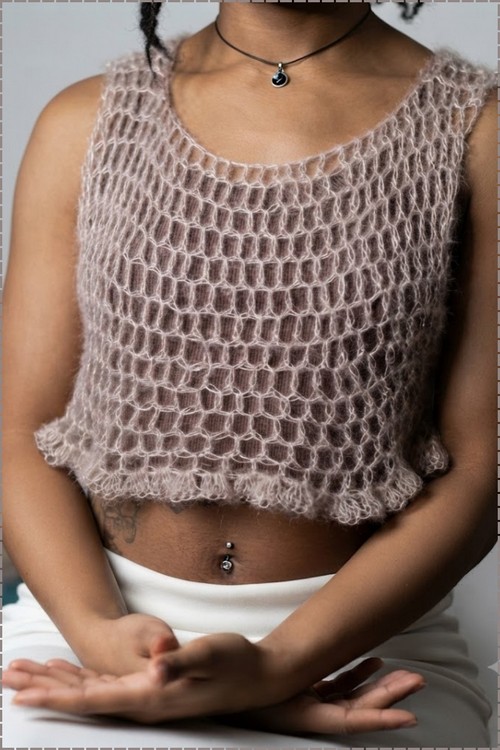
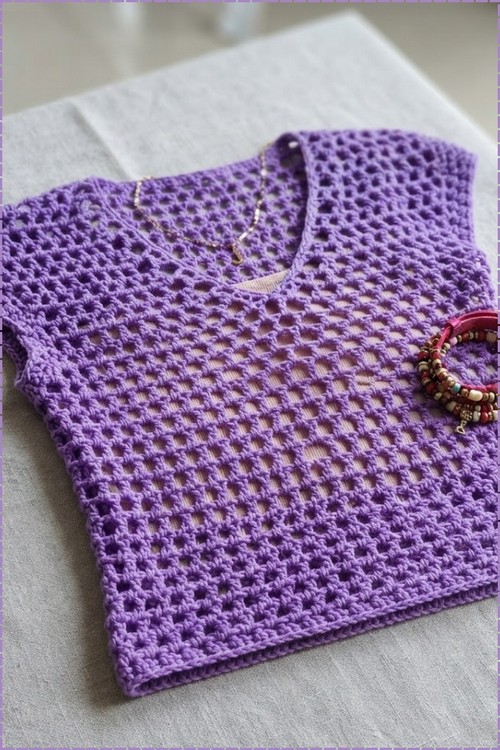
Gold bangles and a thin chain necklace dress up a short sleeve crochet mesh sweater in lavender for warm evenings out with friends. Swim cover up duty suits the cropped mesh top too, since it rolls small enough to tuck into a tote bag beside a towel.
Purple in an open mesh does something a neutral won’t: it makes the grid look like a deliberate design rather than a summer basic. Cropped and short sleeved, so it wants a tank underneath, which is where the layering works in its favour. The V is shallow enough to stay modest but deep enough that nobody mistakes it for a crew neck. Cap sleeves come off the body panel directly, no setting in. Go up a hook size only if you want it looser, because mesh already opens up considerably after washing. There’s a two-tone version of the same construction with a deeper neckline in the teal V neck mesh sweater.
Crochet Mesh Sweater Short Sleeve
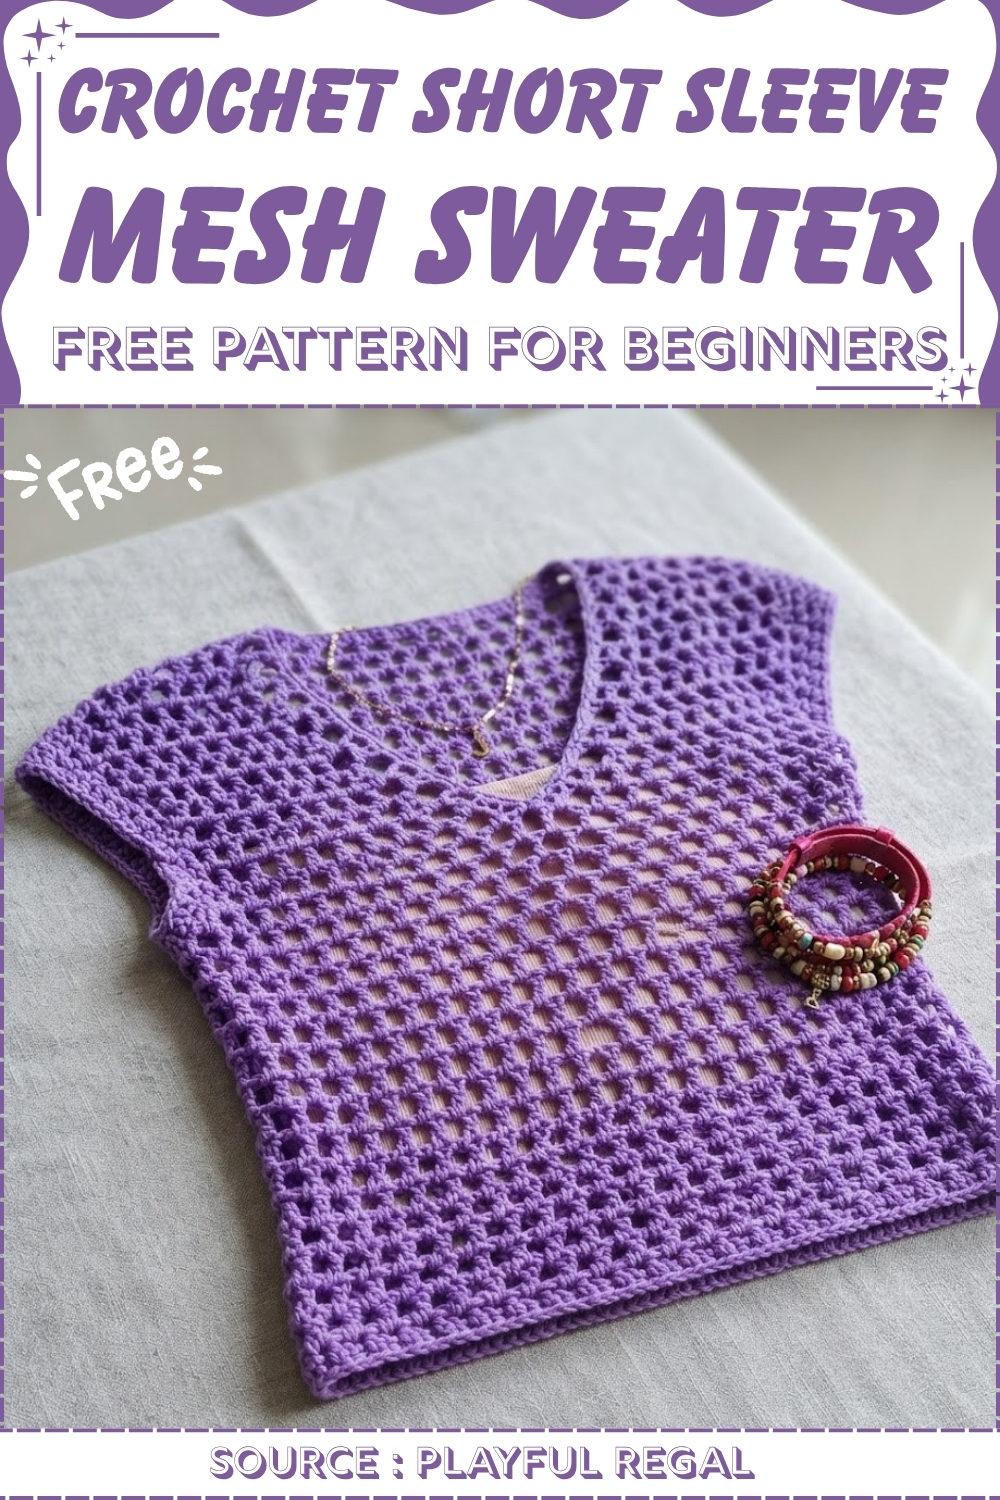
Body is worked in two flat panels with the armhole chain visible in image 4 marking the point where the sleeve width begins. V neck shaping comes from decreasing down the centre front over several rows rather than a cut or separate insert, which gives a cleaner finish than the V insert method. Because the grid is open throughout, this sweater is designed to be worn as a layer rather than standalone a detail worth flagging in the post for readers who may not realise it from the flat lay images.
Quick Facts
Skill Level: Intermediate Construction: Two flat mesh panels (front and back) joined at the shoulders and sides; V-neck shaped with decreases on both sides of center split Main Stitch: dc and ch-2 mesh (rows alternate between two row types) Yarn: Size 3 acrylic — 2 strands held together throughout Hook: 4.25 mm Sizing: Fully measurement-based — built from your bust circumference Sleeves: Optional short sleeve rows added at the armhole after seaming
Customization Ideas
A few decisions to make before you chain your foundation:
- Fit: The foundation chain equals half your bust measurement. The example uses a 33-inch bust → 81 stitches → approximately 17 inches unstretched. Measure your bust, halve it, and chain to that length — making sure the count is both a multiple of 3 and an odd number.
- Body length: Alternate Rows 4 and 5 until the body reaches the top of the bust. The pattern example uses 20 rows for approximately 10 inches — add or remove pairs of rows to adjust.
- Armhole depth: Use the size chart to determine how many split rows to work on each V-neck side. The row count equals the armhole measurement in rows (approximately 1 row per half inch at this gauge).
- Sleeve length: The optional sleeve section is Row 2 repeated to your preferred length. Work 2 rows for a cap, more for a short sleeve, or skip entirely for a sleeveless vest.
- Neckline finish: The V-neck edging uses 2 sc per sp down and up each side — this creates a slightly raised edge. If you want a flatter finish, work 1 sc per sp instead.
Materials & Tools
- Size 3 acrylic yarn, held double throughout
- 4.25 mm crochet hook
- Stitch markers
- Measuring tape
- Tapestry needle (optional, for side seaming)
Abbreviations used in this pattern: ch = chain · dc = double crochet · sc = single crochet · sl st = slip stitch · sp = space · st(s) = stitch(es) · hk = hook · beg = beginning · rep = repeat
Armhole size chart (half circumference): XS = 6.5 inches · S = 7 inches · M = 7.5 inches · L = 8 inches · XL = 8.5 inches (Example: Size S = 14 rows = 7 inches)
Learn the Stitch First
The Pattern
Front Panel
Foundation chain:
- Make a slip knot.
- Chain equal to half your bust measurement. The count must be both a multiple of 3 and an odd number.
- (Example: 33-inch bust → 81 stitches → approximately 17 inches unstretched.)
Row 1:
- Dc in the 3rd ch from the hook. Ch 2, skip the next 2 ch, dc in the next ch. Repeat across until the last ch.
Row 2:
- Ch 3, turn. Dc in the first sp. Ch 2, dc in each sp across until 1 sp remains. Ch 2, dc in the last sp. Dc in the last st.
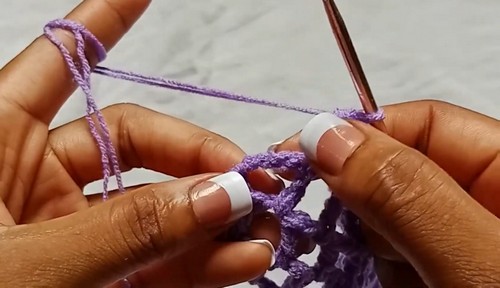
Row 3:
- Ch 5, turn (counts as dc + ch 3). Dc in the first sp. Ch 2, dc in each sp across until the last sp. Ch 2, work 2 dc in the last sp.
Row 4:
- Ch 3, turn. Dc in the first sp. Ch 2, dc in each sp across until 1 sp remains. Ch 2, dc in the last sp. Dc in the last st.
Row 5:
- Ch 5, turn. Dc in the first sp. Ch 2, dc in each sp across until the last sp. Ch 2, work 2 dc in the last sp.
Body repeat:
- Alternate Row 4 and Row 5 until the panel reaches the top of the bust. Keep the total row count even.
- (Example: 20 rows = approximately 10 inches.)
V-Neck Shaping — Left Side:
- Place a stitch marker in the middle space of the last body row.
Split Row 1:
- Ch 5, turn. Dc in the first sp. Ch 2, dc in each sp until 1 sp before the stitch marker. Ch 2, dc the next sp and the marked sp together.
Split Row 2:
- Ch 3, turn. Dc in the first sp. Ch 2, dc in each sp across until 1 sp remains. Ch 2, dc the last 2 sps together. Ch 2, dc in the last st.
Split Row 3:
- Ch 5, turn. Dc in the first sp. Ch 2, dc in each sp until 2 sps remain. Ch 2, dc the last 2 sps together. Ch 2, work 2 dc in the last sp.
- Alternate Split Rows 2 and 3 until the height from the first split row to the last equals half your armhole circumference (use the size chart above). After the last row: ch 1, fasten off.
V-Neck Shaping — Right Side:
- Attach yarn in the beginning ch-3 of the last row before the split.
- Mirror all steps of the left side.
- After the last row: ch 1, fasten off.
Front panel complete.
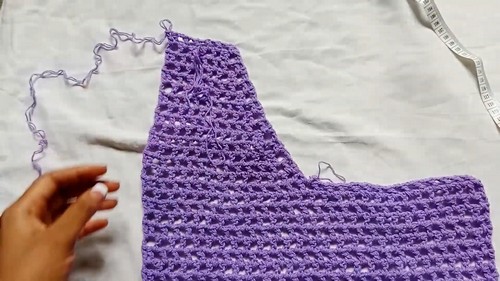
Back Panel
- Work exactly the same as the front panel — same chain count, same row sequence, same stitch pattern — but do not work the V-neck split. Work straight rows to the same total row count as the front.
- Do not fasten off.
Joining the Shoulder Seams
- Place the front and back panels together with right sides facing each other at the shoulder edges.
- Using the live yarn from the back panel, join one shoulder seam. Attach yarn to the other end of the back panel and repeat for the second shoulder.
- Ch 1, fasten off after each shoulder.
Never read a crochet pattern before? No problem! The video tutorial below is perfect for beginners, or give the written pattern below a try!
Neckline Finish
Step 1 — Back neckline:
- Work 1 sc in each sp and st across the back neckline to the last sp. Sl st into the beginning sc. Ch 1, fasten off.
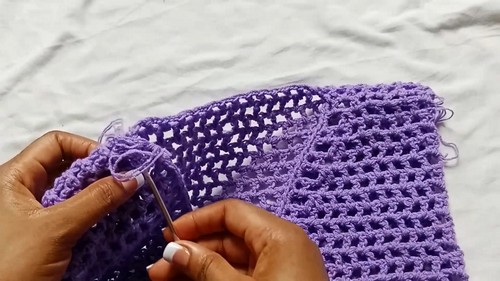
Step 2 — Down one side of the V:
- Insert hook into the loop at the shoulder seam. Ch 1, turn to work downward. Work 2 sc in each dc sp downward until the last sp before the center. Sl st in the middle sp of the last row before the split.
Step 3 — Up the other side of the V:
- Pull up a long loop and turn the top inside out. Continue to work 2 sc in each sp upward until the last sp before the seam. Ch 1, fasten off.
Side Seams
- Turn the top to the wrong side before joining.
- Mark where the armhole starts on both front and back panels — count the same number of rows down from the shoulder seam as your armhole row count (e.g., 14 rows for size S) and mark on both panels.
- Join the side seams below the armhole markers only, leaving the armhole openings unsewn:
- Option A: Work 2 sc in each sp along the side from the bottom up to the sp before the armhole marker. Ch 1, fasten off.
- Option B: Use a tapestry needle to sew both sides together to the same point.
- Repeat for both side seams.
Optional Sleeves / Armhole Edging
- When both side seams are complete, turn the work to the right side.
- Attach yarn at the seam on the side at the armhole opening.
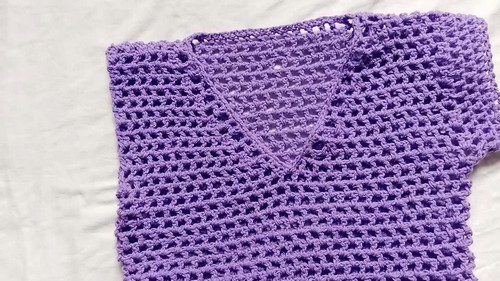
Sleeve Row 1:
- Ch 4. Dc in the next sp. Ch 1, dc in each sp across until the last sp. After the last st: ch 1, sl st into the 3rd ch of the beginning ch-4.
Sleeve Row 2:
- Sl st into the first sp. Ch 4, dc in the next sp. Ch 1, dc in each sp across until the last sp. After the last st: ch 1, sl st into the 3rd ch of the beginning ch-4.
- Repeat Sleeve Row 2 until the sleeve reaches your desired length.
- Fasten off. Repeat for the other armhole.
Tips
- Confirm your chain count is both a multiple of 3 and an odd number before starting Row 1. If it’s a multiple of 3 but even, add or subtract 1 (which takes it off the multiple of 3 — readjust by 3 until both conditions are satisfied). Getting this right at the start saves unraveling rows later.
- Keep track of your row type (Row 4 or Row 5) during the body section. The two rows look similar in the mesh fabric. A simple tally mark on a scrap of paper — odd rows one type, even rows the other — is easier than trying to read the turning chain of the previous row.
- Count your sp count before and after every V-neck split decrease row. Each decrease row removes one sp from the working side. If you lose track mid-row, count sps from the outer edge before turning — you should have one fewer than the row before.
FAQ
1. Why does the chain need to be both a multiple of 3 and an odd number? The mesh pattern repeat uses groups of 3 stitches (dc, ch 2, skip 2), so a multiple of 3 makes the repeat work out evenly across the row. The odd number requirement ensures the row ends symmetrically on both sides. Both conditions must be true simultaneously — check your count before joining.
2. How do I mirror the right V-neck side correctly? The right side is a mirror image — where the left side decreases toward the center, the right side decreases from the center toward the outer edge. Start from the same last pre-split row, attach yarn at the beginning of that row, and follow the split row sequence in reverse direction. The same row types apply; only the decrease position changes.
3. Can I make this as a vest without any sleeve rows? Yes — the sleeve section is explicitly optional. After seaming the sides and finishing the neckline, simply work 1 round of sc around each armhole opening for a clean edge instead of the sleeve rows. The construction is the same up to that point.
4. My two panels came out slightly different widths — can I still seam them? If the difference is a stitch or two, ease the narrower panel to match during seaming. If the difference is larger, check whether one panel’s foundation chain was accidentally off by a multiple-of-3 increment and correct before continuing. A visible width difference in a mesh top will show clearly at the side seam.