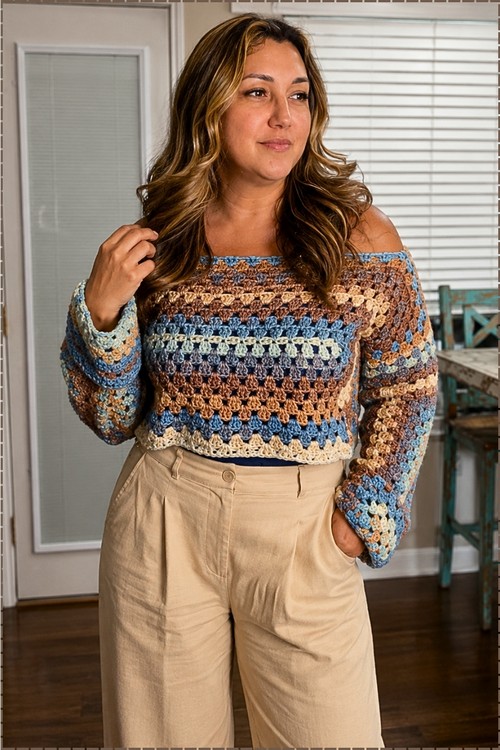
Every body size from petite to plus can wear this easy chunky crochet sweater, with a cropped hem that lands just above high rise pants. On slow Sunday mornings, tan pleated trousers and long, loose sleeves give the free oversize crochet sweater a relaxed coffee date look.
Denim blue, cocoa, sand and cream shift band by band across this sweater without a single yarn change. A straight neckline pulls it off both shoulders and the granny stripe rows stack up quickly enough that the whole thing comes together in a weekend.
Chunky Crochet Sweater
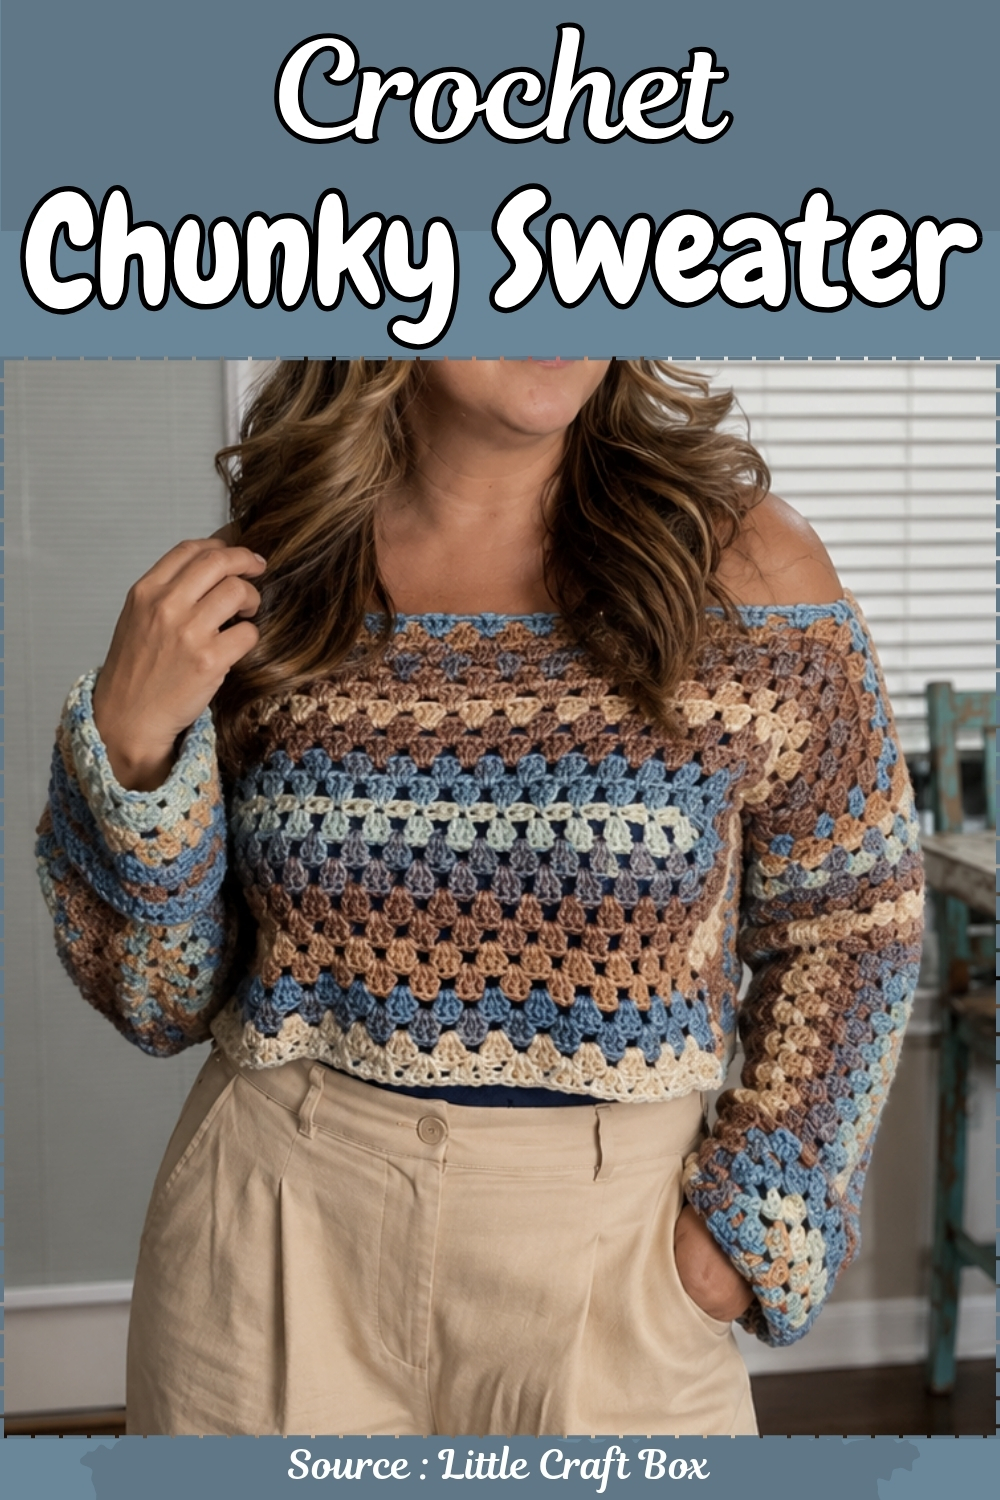
Self striping yarn is carrying the color and the stitch stays the same throughout. Clusters run in horizontal rows across the body and continue down each sleeve, so every color change lands wherever the yarn decides rather than anywhere you have to plan. Panels are worked flat and seamed, with the neckline left wide and unshaped so it sits off the shoulders on its own.
At a Glance
- Difficulty: Beginner to easy intermediate
- Stitches used: Slip stitch, single crochet, double crochet, granny cluster
- Construction: Four identical flat rectangular panels seamed together
- Hook: 6.5 mm
- Time estimate: Two to three weekends depending on yarn weight and working pace
- Sizing: Fully adjustable — width and length are set by your own measurements
Customization Ideas
- Because every panel starts from a foundation chain and is built up in rows, this sweater adjusts to any size before you ever pick up a hook. Make the chain longer for a wider panel. Work more rows for a longer body or longer sleeves. The rectangle construction means there are no armhole curves, no yoke shaping, and nothing to recalculate when you size up or down — just a wider or taller rectangle.
- Colour is equally open. The original uses a long-float cake yarn that shifts gradually across the panel, giving stripe-like colour movement without any yarn changes. A single solid colour reads as a classic textured sweater, while two alternating colours give a bolder graphic look. You could also work each of the four panels in a different colour and seam them together for a colour-blocked result.
- The cluster spacing, which is set by the multiples-of-three foundation, means the granny texture scales naturally with whatever yarn weight you choose. A chunkier yarn on the same hook gives a denser, warmer fabric. A lighter yarn opened up with a larger hook gives something airier for shoulder seasons.
Materials and Tools
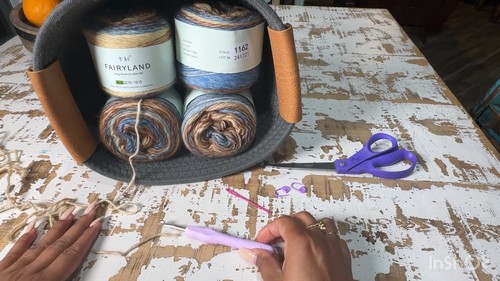
- Medium to chunky yarn of your choice. The original uses Fairy Lane long distance cake balls in colour 1162, plus a small amount of matching yarn kept aside for seaming.
- 6.5 mm crochet hook.
- Tapestry needle for seaming and weaving in ends.
- Stitch markers, at least four.
- Scissors.
Learn the Basics First
The Pattern
Foundation Chain
- Make a slip knot using your preferred method.
- Chain in multiples of 3, then add 2 extra chains to reach your desired panel width.
- The total chain length sets the width of every panel, so measure it against your body before moving on. All four panels use the same count.

Row 1: Single Crochet Base
- Skip the first 2 chains, then work a single crochet into the third chain from the hook.
- Place a stitch marker at the skipped edge to mark the project start.
- Work a single crochet into every remaining chain across the row.
If you’re new to reading crochet patterns, don’t worry, just follow along with the video tutorial below and use the written pattern as a reference!
Row 2: First Granny Clusters and Corners
- Chain 3 and turn your work. The chain 3 counts as the first double crochet of the row.
- Work 2 double crochets into the very first stitch, completing the opening cluster of 3 alongside the turning chain.
- Skip 2 stitches, then work a cluster of 3 double crochets into the third stitch.
- Continue skipping 2 stitches and working a 3 double crochet cluster into every third stitch across the row.
- At the corner space at the end of the row, work 3 double crochets, chain 2, then work another cluster of 3 double crochets into the same space to turn the corner.
- Work clusters along the opposite long side to mirror the bottom clusters.
- Complete the second corner by working 3 double crochets, chaining 2, then closing with a slip stitch into the beginning chain.

Rows 3 to 12: Growing the Rectangle
- Turn your work, slip stitch into the nearest space, and chain 3 to count as the first double crochet of the new row.
- Work clusters of 3 double crochets into every available space between clusters along the sides of the rectangle.
- In each corner space, work 3 double crochets, chain 2, then 3 double crochets to build the corner and increase the rectangle outward.
- Continue in this manner, completing every space across and turning the corners on each row.
- Work until you have completed 12 rows on this panel. [12 rows total per panel]
- Make 3 more identical panels following the same foundation chain and row sequence, for a total of 4 panels: one front, one back, and two sleeves.
Assembly
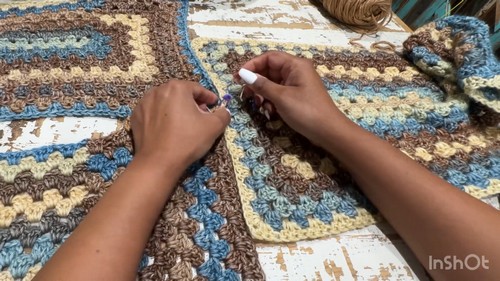
- Lay two body panels together and hold them against your chest to determine how wide the shoulder opening should be. Place stitch markers at both sides to mark the shoulder width.
- Sew or join the shoulders together using the granny stitch method, working from each outer edge inward to the stitch marker on both sides and leaving the centre open as the neckline.
- Attach a sleeve panel at the centre of each shoulder seam, aligning the midpoint of the sleeve top with the shoulder join.
- Seam the sides of the body panels together and continue the seam down the underarm of each sleeve in one continuous line, working from the hem to the wrist on each side.
Tips
- Work the foundation chain loosely. The single crochet row sits directly into it, and a tight chain makes that row stiff and difficult to work into without splitting stitches or losing count.
- Check that all four panels match before you start seaming. Lay them on top of each other. If one is visibly narrower or shorter than the others, it almost always comes from a tension shift partway through rather than a counting error. Block the outlier flat and let it dry before deciding whether to rework it.
- When seaming the sides and sleeves, pin the layers at regular intervals before you sew. The granny texture makes it easy for the layers to drift out of alignment once you are moving quickly, and a few pins every ten centimetres keep the seam straight without slowing you down much.
Yarn Substitution
The cake yarn in the original earns its place because it gives colour movement across a large panel with no yarn changes and no ends to weave in mid-panel. If you substitute, the most important thing is to keep the weight consistent with your hook size so the cluster spacing stays even. A standard medium weight acrylic works well and is widely available. If you want the same gradient effect with a different yarn, hold two strands of different colours together and let them shift as the balls deplete, which gives a softer blend than stripes.
Frequently Asked Questions
- How do I know what length to make my foundation chain? Chain until the length held against your body covers the width you want for that panel, with a little ease. For body panels, that is usually shoulder to shoulder with a few centimetres extra. For sleeve panels, it is however wide you want the sleeve to be at its widest point. Write the number down and use it for all four panels, since they are identical.
- Why does my rectangle look more like a parallelogram? The corners are not being increased correctly. Every corner space needs 3 double crochets, then a chain 2, then another 3 double crochets in the same space. If you are only working a single cluster at the corners, the rectangle will lean and narrow instead of staying square. Rework from the last even row and make sure both corner increases happen on every row.
- Can I make the sleeves a different length to the body panels? Yes, and this is one of the easiest modifications to make. Simply work fewer rows on the sleeve panels for a short or three quarter sleeve, or more rows for a longer one. Since all four panels are otherwise identical in construction, the only variable you are changing is the row count on the two sleeve panels.
- Do the seams show on this sweater? The granny stitch seaming method, which joins clusters to clusters rather than stitch to stitch, blends into the fabric texture noticeably well. If you match your seaming yarn to your main colour the joins become very difficult to spot from the right side. If you use a contrasting colour deliberately, the seams become a design detail rather than something to hide.