Women who love bold colour can wear an aesthetic crochet sweater with high-waisted jeans for coffee dates and campus days. Wide-leg trousers balance a striped crochet sweater design for women, and the long sleeve pullover makes a cheerful gift for a sister or best friend.
Magenta, violet and cobalt shift through this sweater without a single yarn change, and raised bobbles march across it in evenly spaced bands. The color comes entirely from variegated yarn, which is why an aesthetic piece this loud stays simple to actually make.
Aesthetic Crochet Sweater
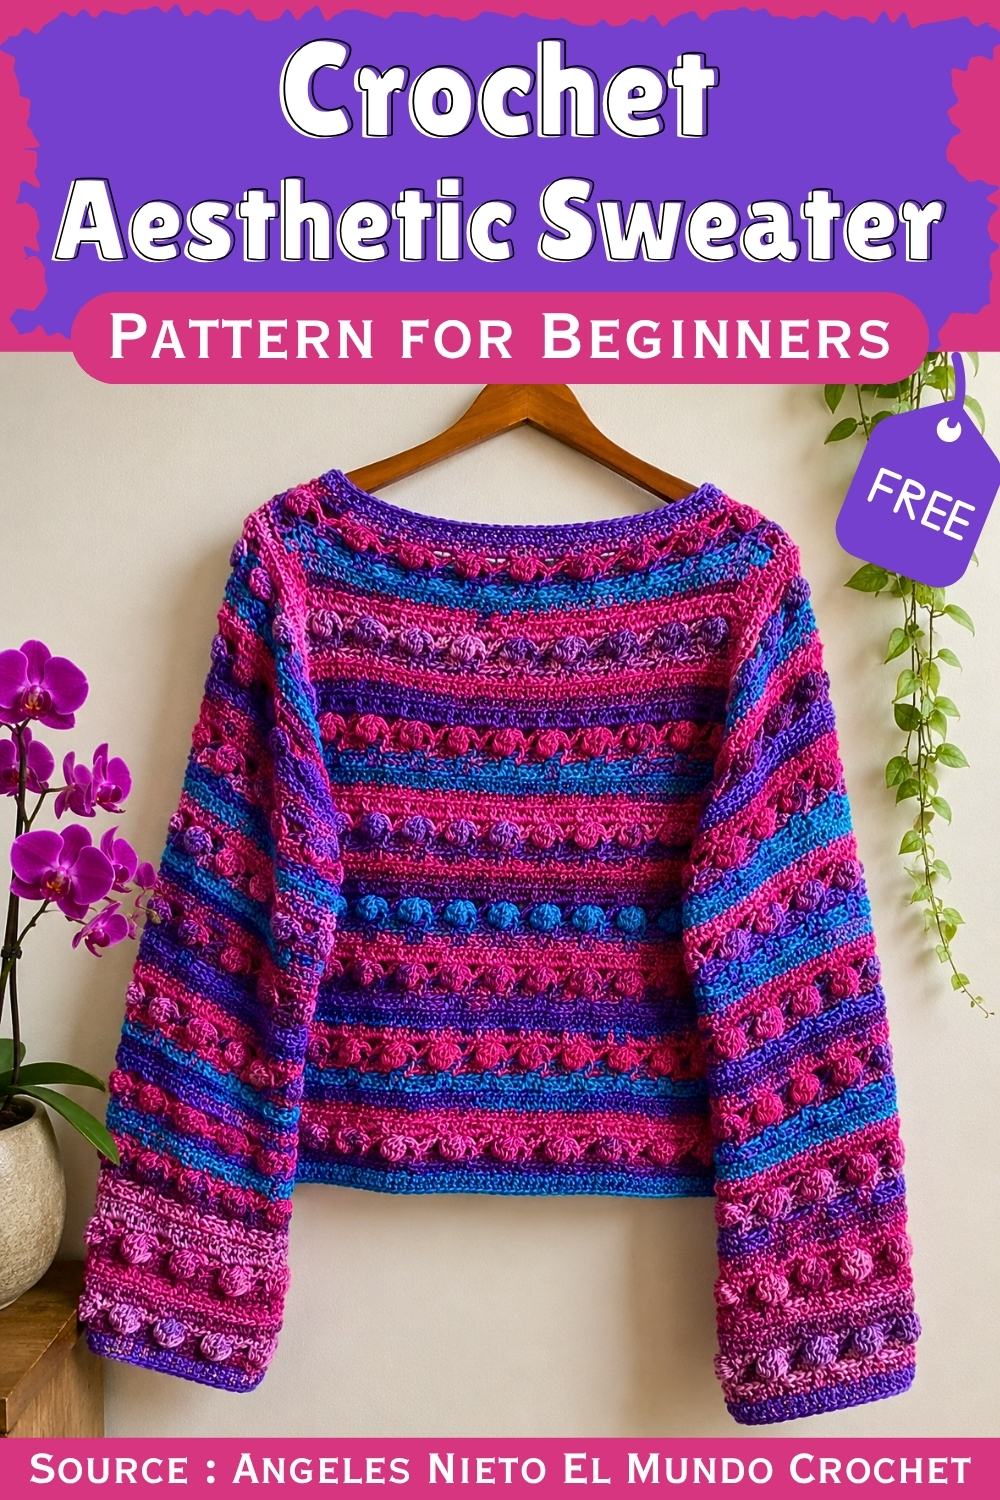
Bobbles carry the texture across the whole garment. Rows of raised clusters alternate with flatter rows so the fabric builds depth without becoming stiff, and the same repeat continues down each sleeve to the wide cuff. Panels are worked flat and seamed at the end, with a boat neckline that needs no shaping beyond leaving the opening wide.
Materials and Tools
- 100% acrylic yarn, roughly 200 g and 459 m per ball
- Plan for 3 balls total for a small size, since the sample used 2 full balls and part of a third
- 4.0 mm crochet hook, even if the yarn label suggests a 5 mm to 6 mm hook
- Tapestry needle for seaming
- Rustproof pins for aligning the pattern rows before sewing
- Stitch markers for tracking row repeats
- Measuring tape
- Sharp scissors
The smaller hook is not a typo. A 4 mm hook against this yarn weight gives a tighter, neater stitch, and it keeps the puff stitches standing proud instead of collapsing sideways. If you go up a hook size the fabric will grow noticeably in every direction, so treat that as a sizing decision rather than a comfort one. Acrylic is a forgiving choice here because it holds the puff texture well and survives repeated wear without pilling into a mess. Wind your balls before starting so you are not fighting tangles halfway through a texture row.
Understand It Before Starting
Difficulty and Time
- Skill level: confident beginner to advanced beginner
- Stitches used: chain, single crochet, double crochet, paired double crochet, five loop puff stitch
- Construction: two flat panels with sleeve extensions, seamed at the end
- Time: most makers finish over a week or two of evening sessions
Nothing in this sweater is technically difficult once you have worked a few rows. The challenge is rhythm rather than skill, because the eight row cycle changes character every row and it is easy to lose your place if you set the project down mid repeat. Keep a note of which row you finished before you walk away. The puff rows take the longest, the levelling rows go quickly, and the plain double crochet rows almost crochet themselves. If you can work a double crochet without looking, you are ready for this one.
Beginner Technique Notes
- The stitch multiple for the body is 6 plus 3 extra chains at the end
- The sleeve chains use a multiple of 6 with no extra stitches
- A five loop puff stitch means yarn over, insert the hook, and pull up a loop five times into the same stitch, then pull through everything together
- Paired double crochets are worked by wrapping the yarn around the base of the previous double crochet before working into the next stitch
- Chain loops between puffs create the open gull wing spaces that give the fabric its drape
- Levelling rows exist to flatten the texture back out so the next row sits evenly
Do not skip the levelling rows or treat them as filler. They are what keeps the fabric from bowing outward after each texture row, and they set up the correct spacing for the next puff sequence. When you work a puff stitch, keep your loops slightly longer than feels natural. Short loops make the puff tight and mean and it will not sit up on the surface the way it should. If your first puff looks lumpy rather than rounded, pull it out and try again with looser loops.
The Pattern
All counts shown in brackets reflect the sample size worked over a starting chain of 75. If you choose a different multiple, your counts will change accordingly.
Sizing and Stitch Multiple
- Chain a multiple of 6, then add 3 extra chains at the end for the body panel
- The sample used 72 plus 3 for the starting chain [75 ch]
- That starting chain measures roughly 43 cm in width
- Work to roughly 30 cm from the bottom edge up to the underarm, which is about 7 rows of puff stitches
- Chain a multiple of 6 with no extra stitches for each sleeve extension
- The sample used 60 chains for a sleeve length of about 35 cm [60 ch]

Phase A: Body Foundation and the Eight Row Repeat
- Starting chain: Make a slip knot and chain your multiple of 6 plus 3 extra chains [75 ch]
- Foundation row: Chain 1 for height
- Foundation row: Work 1 single crochet into every chain across to create a solid base [75 sc]
- Row 1: Chain 3, which counts as the first double crochet
- Row 1: Skip the first base stitch and work 1 double crochet into each stitch across [75 dc]
- Row 2: Chain 3
- Row 2: Work a regular double crochet into the next stitch
- Row 2: Create a paired double crochet cluster by wrapping the yarn around the base of the previous double crochet, inserting the hook into the next stitch, pulling up your loops, then yarn over and pull through 3 loops and again through 2
- Row 2: Repeat the paired sequence across the row
- Row 3: Chain 3, then skip the first stitch
- Row 3: Work a five loop puff stitch into the second stitch by yarning over, inserting the hook, and pulling up a loop 5 times into that same stitch, then pulling through all loops together
- Row 3: Chain 3, skip 2 base stitches, and work 1 single crochet
- Row 3: Chain 3, skip 2 base stitches, and work another five loop puff stitch
- Row 3: Repeat this sequence across the row, ending with a puff stitch followed by a regular double crochet
- Row 4: Chain 1 and turn
- Row 4: Work 3 single crochets over each pattern section, placing 1 over the starting edge, 1 on top of the puff stitch, and 1 under the chain space
- Row 4: Chain 3, skip the loop, then repeat the 3 single crochets and 3 chains across the row
- Row 5: Chain 3
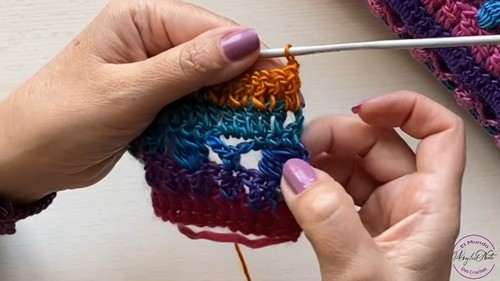
- Row 5: Work 1 double crochet into each single crochet and 3 double crochets directly under each chain 3 space from the previous row
- Row 6: Repeat the paired double crochet sequence exactly as worked in Row 2
- Row 7: Chain 1, turn, and work 2 single crochets at the beginning to shift the zigzag slightly
- Row 7: Chain 3, skip 2 base stitches, and work a five loop puff stitch
- Row 7: Continue the alternating sequence of chain 3, single crochet, chain 3, puff stitch across the row
- Row 8: Chain 5, which counts as 1 double crochet plus 2 chain spaces
- Row 8: Work the 3 single crochets over the puff and chain sections, separating each group with 3 chains
- Row 8: End the row with 2 chains and a double crochet
- Repeat: Work Rows 1 through 8 in order until the panel reaches your desired body length, ending after roughly 7 rows of puff stitch patterning
Don’t let crochet patterns intimidate you! If you’re a beginner, the video tutorial below makes it super easy to follow along!
Phase B: Adding and Working the Sleeves
- Once the body panel reaches armhole length, prepare to add the sleeve extensions
- Chain your sleeve length in a multiple of 6 directly off the side of the main panel [60 ch]
- Turn the work and crochet back across the new sleeve foundation chain using double crochets
- Continue working double crochets across the main body panel
- Carry straight on down the opposite newly chained sleeve extension without breaking the row
- Work the following rows, including the paired stitch rows and the puff pattern rows, continuously across both sleeves and the central body panel
- Keep the same eight row rhythm running through the sleeves as you used on the body
- Work about 14 rows in total across the sleeve section, which is roughly 3 rows of puff stitch patterning.

Phase C: Assembly and Finishing
- Fold the garment so the front and back panels match up evenly
- Turn the sweater inside out so the seams will be hidden on the finished garment
- Use rustproof pins to align the pattern rows, checking that the zigzag puff stitches meet accurately at the seams
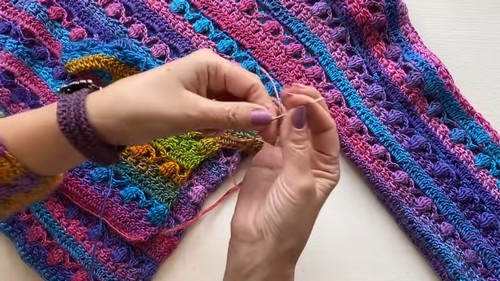
- Thread a tapestry needle and sew the side seams using tight, neat whip stitches
- Continue the same whip stitch seam along the underside of each sleeve
- Leave a central opening at the top for the head and neck, roughly 32 to 33 cm wide or adjusted to your own preference
- Lightly stitch the shoulders closed if you want a tighter, higher collar
- Weave in all remaining ends and block the finished sweater gently to open up the chain spaces
Tips and Troubleshooting
- Count your starting chain twice before you work the foundation row. A single missed chain throws off the multiple of 6 plus 3 and you will not notice until the first puff row refuses to line up.
- Mark the right side of your work with a stitch marker on the foundation row. The fabric looks similar on both faces at first glance, and turning incorrectly after a break will interrupt the zigzag.
- Keep your puff loops long and loose. Tight loops produce flat, hard bumps that disappear into the fabric instead of standing out.
- Work the paired double crochets with even tension. If the wrapped base pulls too tight, the row will visibly narrow compared to the rows above and below it.
- Check your width against the tape measure after the first full eight row repeat rather than after a single row. Texture rows and levelling rows measure differently.
- Write down which row number you finished before setting the project aside. Losing your place mid cycle is the single most common reason people frog this pattern.
- Pin generously before seaming. Matching the puff rows across the seam is what separates a handmade sweater from a homemade one.
- If the fabric feels stiff, block it more firmly. Acrylic responds well to gentle steam and will relax into a much softer drape.
Yarn Substitution
- A DK weight cotton blend works well and gives crisper puff definition, though the finished sweater will feel heavier
- Acrylic and wool blends soften the texture slightly and add warmth without much extra weight
- Avoid heavily textured, boucle, or fuzzy yarns because they hide the puff stitches completely
- Avoid loosely plied yarns that split, since the puff stitch requires five insertions into the same stitch
- Any substitute should be worked at a similar gauge, so test a small swatch of the eight row repeat before committing
Yarn choice matters more than usual here because the entire visual appeal rests on the contrast between raised puffs and open chain spaces. Smooth, tightly plied yarns show that contrast best. If you switch fibers, work at least one full eight row repeat as a swatch and measure the width across the multiple of 6 plus 3. A change in gauge will not ruin the construction, since the shape is rectangular, but it will change your finished measurements. Adjust by adding or removing chains in groups of 6.

Customization Ideas
- Add extra repeats of the eight row cycle before the underarm for a longer, tunic length sweater
- Shorten to a cropped fit by stopping after 4 or 5 puff rows instead of 7
- Chain fewer sleeve stitches in groups of 6 for elbow length or three quarter sleeves
- Work the sleeves in a contrasting color for a color blocked finish
- Add a simple single crochet border around the neckline and cuffs for a more finished edge
- Work the body in one color and change shades at each puff row for a subtle striped texture
- Narrow the neck opening slightly for a closer collar or widen it for an off shoulder look
Frequently Asked Questions
- Can I make this sweater in a larger size? Yes. Add chains to your starting chain in groups of 6 while keeping the 3 extra chains at the end. Every additional 6 chains widens the panel by one full pattern repeat, so you can scale up as much as you need without changing any of the row instructions.
- Why does the pattern use a 4 mm hook when the yarn label says 5 mm or 6 mm? The smaller hook creates a denser, neater fabric that holds the puff stitches upright. A larger hook makes the fabric loose and the texture flattens out. If you prefer a drapier finish you can size up, but expect the sweater to grow in both width and length.
- How do I know when to stop and add the sleeves? Measure from the bottom edge up to where you want the underarm to sit, which was roughly 30 cm on the sample. That worked out to about 7 rows of puff stitch patterning. Finish your current eight row repeat before adding the sleeve chains.
- My puff stitches look uneven. What am I doing wrong? Almost always it is loop length. Pull each of the five loops up to the same height, roughly the height of a double crochet, before closing the puff. Uneven loop heights make some puffs bulge and others sink. Slowing down for the first few rows fixes this quickly.
- Do I need to block this sweater? Blocking is optional but recommended. It opens up the chain spaces, evens out any tension differences between the texture rows and the levelling rows, and softens acrylic noticeably. Gentle steam blocking is enough, and you should avoid pressing directly onto the puff stitches.