Plum petals at the heart of the front square sit right on the chest, and the slightly cropped hem of this chunky crochet sweater meets the jeans waistband. Layered over a white long sleeve tee, the crochet sweater with chunky yarn carries its spring colors straight into fall.
Mint, plum, mustard, teal and soft beige rotate through this top in wide concentric rounds, with one large granny square filling the entire front. Short sleeves and a small split neckline keep it light enough for spring, and anyone who has made a granny square top before will recognize how little shaping is involved.
Crochet Sweater
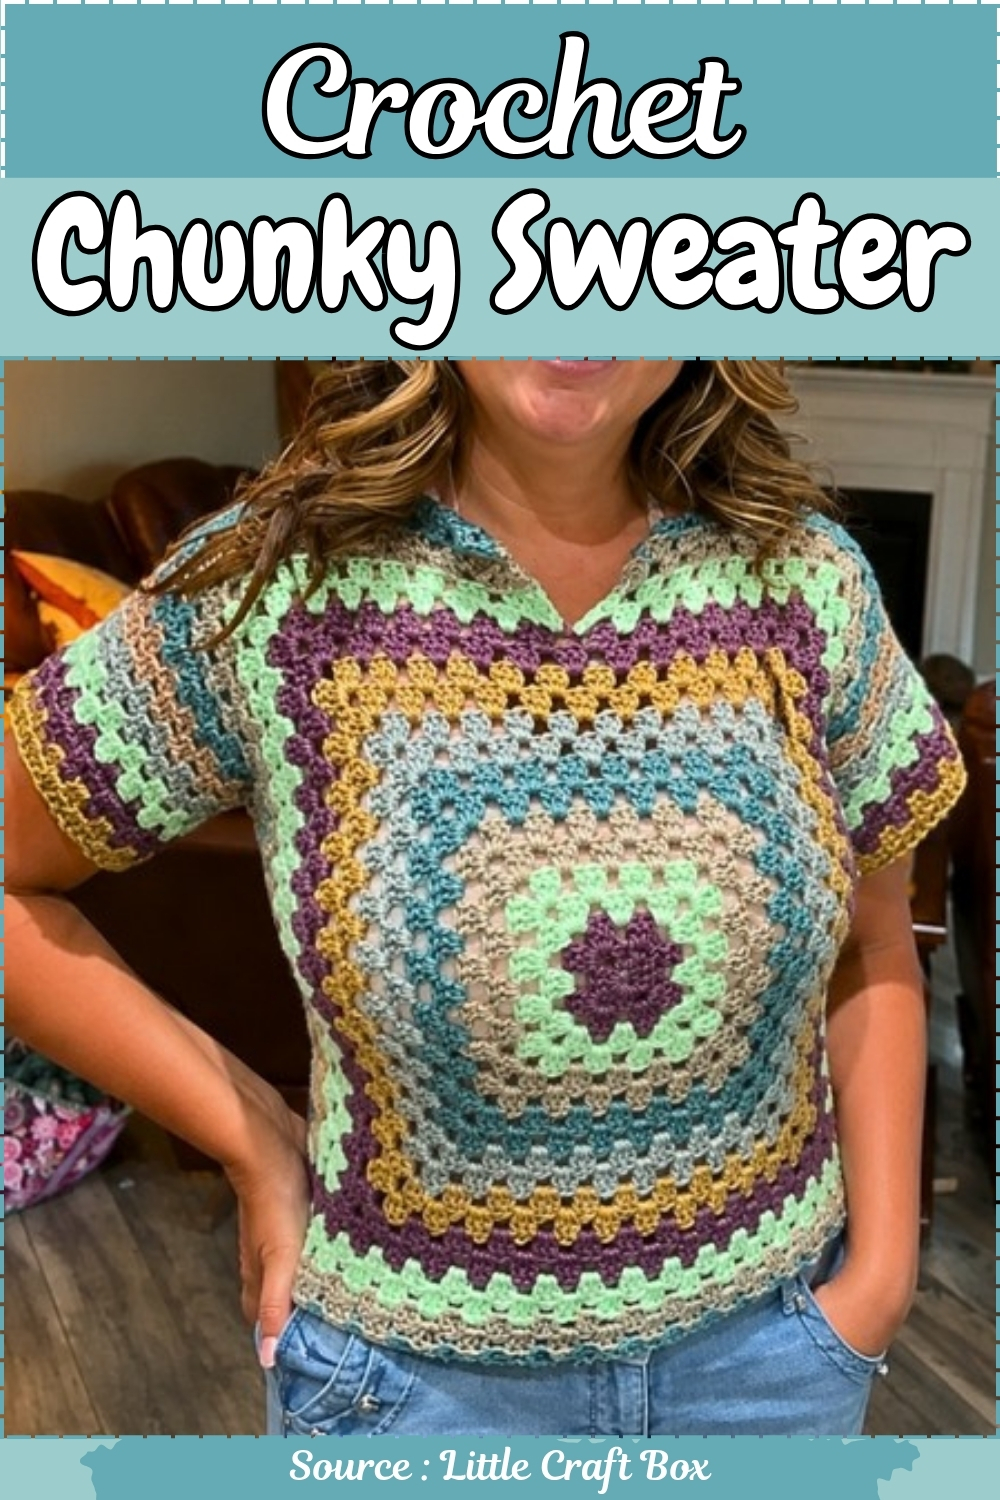
Two big squares are the whole garment. Front and back are each worked outward from a center motif until they reach the width you need, then joined at the shoulders and sides with the openings left for the arms and neck. Color changes land on every round or two, so the palette does all the visual work while the stitch stays identical from the first round to the last.
I love this one because it is genuinely freeing to make. There is no gauge pressure and no size chart to squint at, just a square that grows until it fits, colour changes whenever you feel like it, and a shape that is forgiving enough to suit a wide range of bodies. It is also the kind of project that looks far more considered than it is.
Materials and Tools
- Size 4 medium weight yarn in one colour or as many as you like. Leftover yarn from other projects works perfectly here.
- 6 mm crochet hook.
- Scissors.
- Yarn needle for weaving in ends.
- Stitch markers, at least four, for marking shoulder width and armhole placement during assembly.
Get the Basics Right
Difficulty and Time
This is an approachable intermediate project. The granny square is one of the most practised constructions in crochet, and if you already know it, the sweater is essentially a series of squares grown very large and joined cleverly. The V-neck shaping is worked flat rather than shaped with decreases, which keeps it simple. Where makers tend to slow down is during the assembly stage, because the slip stitch seaming needs a little patience to stay even. Allow a relaxed weekend for the panels and an evening for assembly and finishing.
The Pattern
Starting the Front Panel Centre
- Make a slip knot and chain 3.
- Insert the hook into the first chain, yarn over, and pull through both loops to close the ring with a slip stitch.

Round 1
- Chain 3, which counts as the first double crochet of the round.
- Work 2 more double crochets into the centre ring, completing the first cluster of 3 double crochets.
- Chain 2 to form the first corner space.
- Work a group of 3 double crochets into the ring, then chain 2.
- Repeat this sequence, 3 double crochets into the ring followed by a chain 2, until you have 4 clusters total, each separated by a chain 2 corner space. [4 clusters, 4 corner spaces]
- Slip stitch into the top of the initial chain 3 to close the round.
Never read a crochet pattern before? No problem! The video tutorial below is perfect for beginners, or give the written pattern below a try!
Round 2
- Slip stitch across to the next corner space.
- Chain 3, which counts as the first double crochet, and work 2 double crochets into the same corner space.
- Chain 2, then work 3 more double crochets into that same corner space, completing the corner increase. [3 DC, ch2, 3 DC in each corner]
- Work 3 double crochets into any side space that opens between clusters along each edge.
- Repeat the corner pattern of 3 double crochets, chain 2, 3 double crochets in all four corners.
- Join with a slip stitch to close the round.

Continuing the Front Panel
- To change colour, chain 1, fasten off, and weave in the ends. Attach the new colour in any corner space, chain 3, and continue the granny square pattern.
- Work approximately 2 rounds per colour change for an even stripe rhythm, though any colour arrangement you like is equally valid.
- Continue working rounds, growing the square and completing corners and side clusters in every round, until the panel is large enough to comfortably cover the chest from side to side.
- The front panel in the original reaches 14 rounds worked in alternating colours at this stage.
V-Neck Shaping
- Fold the front panel in half and locate the exact centre of the top edge.
- Count the cluster groups and spaces across the top edge to confirm the centre is symmetrical, then identify the middle corner or space and leave it open as the V-neck start.
- Attach yarn at the centre V-neck opening.
- Chain 3, which counts as the first double crochet, and work 1 more double crochet into that starting space.
- Continue working standard 3 double crochet granny clusters across the row toward the outer edge.
- Finish the edge with 2 double crochets in the final side space, then a single double crochet worked on top of the turning chain.
- Turn the work and begin going back and forth in rows rather than closed rounds, which keeps the V-neck line open as you add height.
- Continue working rows back and forth, changing colour every 2 rows as before, until you complete 6 additional V-neck rows, bringing the front panel to a total of 20 rows.
Back Panel
- Crochet a second panel following the same granny square instructions from Round 1 onward.
- Continue to 20 rows total, keeping the back panel flat without the V-neck opening, or mirror the V-neck shaping if you prefer a matching neckline at the back.
Joining the Shoulder Seams
- Place the front and back panels together with the wrong sides facing each other.
- Use stitch markers to mark out the shoulder width and neckline placement on both panels so they stay aligned while you sew.
- Slip stitch through both loops of both panels simultaneously along each shoulder to close the seams.
Joining the Side Seams
- Leave an opening on each side for the armholes, sized to fit your body. In the original, the armhole opening is approximately 8 cluster spaces wide.
- Slip stitch down both sides from the armhole marker to the bottom hem, seaming the front and back panels together.
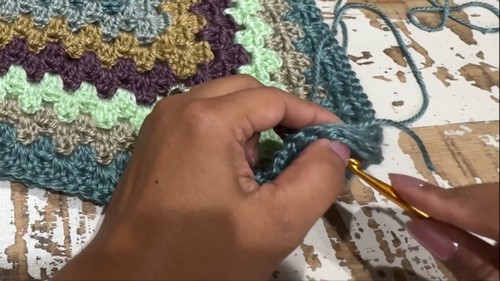
Finishing the Underarms and Sleeves
- Turn the assembled sweater right side out.
- Locate the underarm junction at the bottom of each armhole where gaps tend to open between the seamed panels.
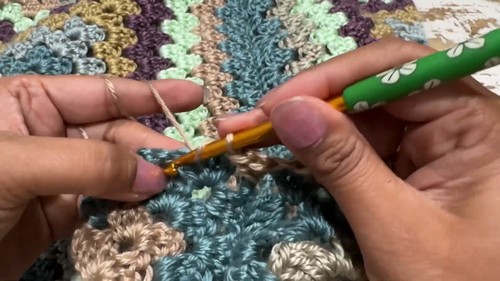
- Attach yarn at one of these junction points and work a set of 3 double crochets bridging the corner gap to close and tidy the underarm.
- Continue working the granny stitch in joined rounds around the full armhole opening.
- For a short sleeve or cap sleeve, work only a few rounds and fasten off.
- For a longer sleeve, continue adding rounds until the sleeve reaches your preferred length.
- Repeat the underarm closure and sleeve rounds on the second armhole.
- Fasten off and weave in all remaining yarn tails.
Tips and Troubleshooting
- Granny squares tend to curl at the edges before blocking, especially in the early rounds. Do not measure the panel against your body while it is curling. Lay it flat, smooth it out by hand, and measure from there. If the panel still looks smaller than you expect, keep going. Medium weight yarn and a 6 mm hook give fabric that relaxes noticeably once it is off the hook and handled a little.
- The V-neck transition from rounds to rows is the most common point of confusion. Once you stop joining rounds and start turning rows, everything stays the same except that you no longer close each row with a slip stitch. Just chain 3, turn, and keep going. The open centre is the neckline. If the edges of the V look untidy, a single round of single crochet worked around the neckline edge after assembly tidies them up instantly.
- Underarm gaps are nearly inevitable with this construction and not a flaw. The 3 double crochet bridge worked into the junction is specifically there to close them. Work it firmly and the finished underarm looks intentional rather than patched.

Yarn Substitution
Almost anything in a size 4 medium weight works here. The project is friendly to mixed fibre content since every ball is small and worn as colour blocks rather than blended. Avoid anything too splitty, since granny stitch involves a lot of hooking into chain spaces and a yarn that splits easily will slow you down considerably. If you want the fabric to drape more softly, a cotton or cotton blend gives beautiful results and shows the colour transitions clearly. For a cosy autumn version, a wool or acrylic wool blend adds warmth without weight.
Customisation Ideas
Colour is the main event. Two colours give a graphic, vintage look. Five or six scrap colours give something maximalist and joyful. A single solid colour lets the granny stitch texture speak on its own. Beyond colour, sleeve length is entirely in your hands since you stop adding rounds whenever the sleeve suits you. The body length is equally flexible. Work the front and back panels longer before shaping for a tunic, or stop them shorter for something that skims the waist.
Frequently Asked Questions
- How do I know when the front panel is large enough? Hold it against your body, smoothed out flat and unstretched, and check that it reaches comfortably from side to side across the widest part of your chest with a little ease. If you can see the edges pulling inward toward your sides when you hold it up, keep going. The V-neck rows add a little extra width to the sides as you work them, so you do not need the square stage to be perfect.
- Can I use a different hook size? Yes, within reason. Going up to a 6.5 mm gives a more open, lacier fabric with better drape, which suits warmer weather well. Going down to 5.5 mm gives something denser and warmer. The main thing to keep in mind is that a different hook size changes how large each round grows, so your panel may reach the right size in fewer or more rounds than the original.
- The armhole opening feels too tight. What can I do? If you notice it during assembly, simply leave more cluster spaces open before you start the side seams. If you notice it after, you can work one or two rounds of granny stitch around the armhole before the sleeve rounds, which widens the opening without altering the body.
- Does the V-neck sit at the right depth for most people? The depth is determined by where you start the flat rows relative to the total panel height. Six additional rows from the centre gives a modest V that is not too revealing. If you prefer a deeper V, add more flat rows. If you prefer something closer to a scoop, start the flat section a little later, closer to the finished panel height, and work fewer rows.