
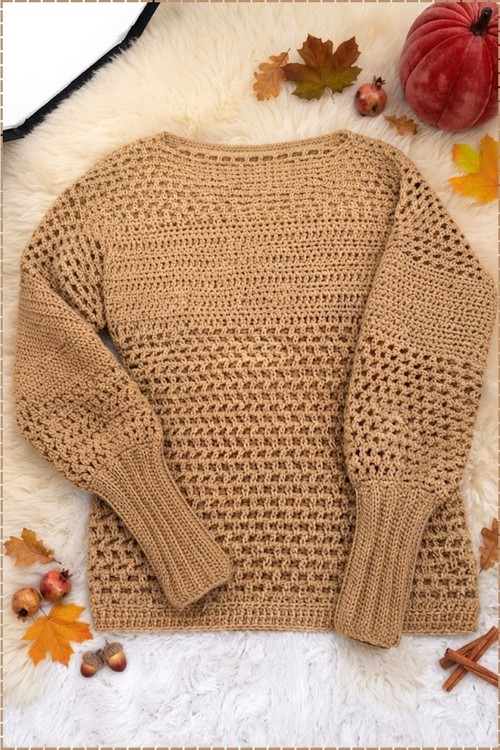
Pumpkin patch visits and bonfire nights suit this cozy crochet sweater, whose hip length camel body sits easily over leggings or jeans. Anyone who wants an easy crochet sweater in one color gets puffy balloon sleeves that suit coffee dates, school runs, or a handmade gift.
Autumn sweaters do not need to be complicated to feel finished. This cozy crochet sweater is a straightforward oversized pullover in warm camel, with a wide boat neckline that sits soft across the shoulders and deep ribbed cuffs that fold back over the wrist.
Cozy Crochet Sweater

Look closely at the fabric and you will see two densities at work. The body alternates solid rows with rows of small even openings, which gives it warmth without much weight, while the sleeves open into a looser lace that keeps the finished piece from feeling bulky. Long ribbed cuffs anchor each sleeve and pull the wide silhouette back in at the wrist.
Materials and Tools
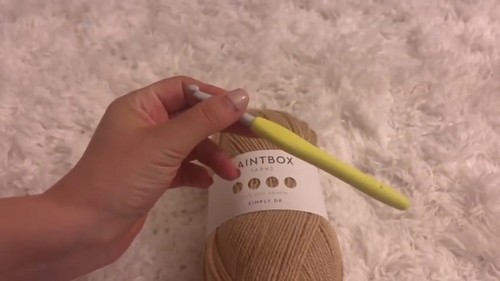
- Paintbox Yarns lightweight weight 3 yarn in butterscotch, approximately 4 skeins at around 300 yards each
- 7 mm crochet hook for the main sweater body and sleeves
- 4.5 mm crochet hook for the wrist ribbing
- Scissors
- Yarn needle for weaving in ends
Understand It Before Starting
The Pattern
Part 1: Front and Back Panels — Make 2
Foundation Chain
- Make a slip knot.
- Chain the appropriate number for your size: 51 chains for small, 57 for medium, 65 for large.
Never read a crochet pattern before? No problem! The video tutorial below is perfect for beginners, or give the written pattern below a try!
Row 1
- Block off the last chain with your thumb and chain 3 more.
- Yarn over, insert your hook into the blocked chain, pull through to get 3 loops on the hook, yarn over, and pull through all 3 loops to make a half double crochet.
- Chain 1.
- Skip the very next chain in the row and place 1 half double crochet in the chain after it.
- Repeat the sequence of chain 1, skip 1 chain, 1 half double crochet across the entire row.

Row 2 and All Open Rows
- Chain 3 and turn your work.
- Place 1 half double crochet directly into the first chain-1 space below.
- Chain 1, skip to the next chain-1 space, and place 1 half double crochet.
- Repeat across the row.
- For the final space in each row, place your half double crochet into the top chain of the turning chain-3 to keep the edge straight.
- Continue this open pattern for 25 rows for small and medium, or 30 rows for large.
Chest Block Section
- Row 1: Chain 2, turn, and place 2 half double crochets into each chain-1 space across the row.
- All following block rows: Chain 2, skip the very first chain connected to the chain-2, and work plain half double crochets across with no spaces.
- Work 10 block rows for small, 15 for medium, or 20 for large.

Upper Panel Open Rows
- Return to the open stitch pattern: chain 3, skip the first chain, work 1 half double crochet, then alternate chain 1, skip 1, half double crochet across.
- Work 10 additional rows in the open pattern.
- Fasten off.
- Repeat all steps to make a second identical panel for the back.
Part 2: Sleeves — Make 2
Wrist Ribbing — Using the 4.5 mm Hook
- Switch to the 4.5 mm hook.
- Make a slip knot and chain 36.
- Row 1: Place 1 half double crochet in the second chain from the hook and continue with half double crochets in every chain to the end of the row.
- Ribbing rows: Chain 2, turn, and work half double crochets in the back loop only across the row.
- Repeat the ribbing row until the cuff fits comfortably around your wrist: 18 rows for small, 20 rows for medium, 22 rows for large.
- Chain 1 and work a row of single crochets evenly spaced along the long edge of the ribbing.
- Fold the ribbing in half and slip stitch or single crochet the short edges together to form a cuff tube.
- Turn the cuff inside out so the seam sits on the inside.
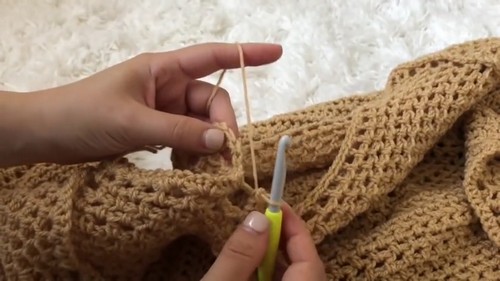
Sleeve Body — Switch Back to the 7 mm Hook
- Switch back to the 7 mm hook.
- Work 51 chains around the outer edge of the cuff as a perimeter base for small. Join with a slip stitch.
- Sleeve rows 1 through 12: Chain 2, skip the first chain, and work the open pattern — 1 half double crochet, chain 1, skip 1 — all the way around in the round. Join each round with a slip stitch.
- Sleeve block section: Chain 2, then work 2 half double crochets into each chain-1 space all the way around. Join with a slip stitch. Work 8 rows of plain half double crochets in the round.
- Upper sleeve open rows: Return to the open pattern — chain 2, 1 half double crochet, chain 1, skip 1 — for 10 additional rounds.
- Fasten off and make a second sleeve following the same steps.
Part 3: Assembly and Neckline
Joining Body and Sleeves
- Lay the front and back panels flat and aligned together.
- Position the sleeves so the wrist seam faces the armpit.
- Attach yarn at the bottom side seam and single crochet up the side and sleeve underside together as far as the armpit, then loop the seam around the sleeve. Repeat on the other side.
Shoulder Seams
- Line up the front and back shoulder edges at the top.
- Single crochet inward approximately 3 to 4 inches from each outer edge to close the shoulders, leaving the central opening for the neck.
Neckline Edging
- Reattach yarn at a corner of the neckline opening.
- Work 1 round of half double crochets evenly spaced around the entire neckline.
- Join with a slip stitch, fasten off, and secure.
- Weave in all remaining ends with the yarn needle and turn the sweater right side out.
A Few Notes Worth Keeping
- The turning chain-3 on the open rows counts as a stitch, and placing your final half double crochet into its top chain on each row is what keeps the side edges from stepping inward. Miss that placement even once and the edge develops a notch that becomes visible at the seam. Check it on every row until it becomes automatic.
- The transition from open rows into the chest block section changes the stitch count because you are working 2 half double crochets into spaces that previously held 1. The fabric becomes denser and the row height shortens slightly. This is expected — it is part of what gives the sweater its textural contrast. Do not try to compensate by adding chains.
- When seaming the sleeves in at assembly, lay the sweater completely flat before picking up the hook. Identifying the armpit point clearly before you begin single crocheting up the side prevents the sleeve from being set too high or too low.
FAQ
- Can I adjust the length of the sweater body? Yes. The open row sections at the bottom of the panel are where length lives. Add rows in multiples that feel comfortable — the pattern does not depend on hitting a specific row count before the chest block begins, so extending the open section adds length cleanly without disrupting anything above it.
- What if my cuff ribbing is too loose around my wrist? Work fewer ribbing rows before seaming the cuff closed. The row count given for each size is a guide, but wrist circumference varies more than body size between people. Try the ribbing around your wrist before joining it and subtract rows if it gaps.
- Does the sweater need to be blocked before assembly? A light blocking before seaming makes the panels easier to align and the stitches more even at the edges, which is where seaming happens. It is not required, but it is genuinely helpful. Pin both panels to the same dimensions while damp and let them dry fully before picking up the hook for assembly.


