Tiered white ruffle skirts pair sweetly with this fitted crochet sweater, whose bubblegum pink foldover collar ties with a tiny front bow. Wear the Valentines crochet sweater to date nights, brunch, or a spring picnic as a cozy layer that still feels sweet and a little flirty.
Soft pink, a collar that folds down across the shoulders, and sleeves that flare wide at the wrist. This romantic crochet sweater leans fully into the off shoulder look, with a slim drawstring at the neckline so the fold stays exactly where you place it.
Romantic Sweater Crochet

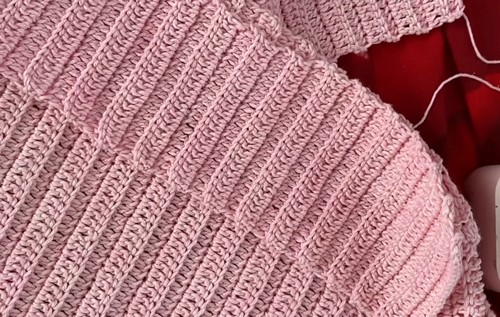
Texture is the whole story here. Raised vertical columns run down the body and continue through each sleeve, giving the fabric a knit-like stretch that hugs through the waist and then releases into the bell cuff. The cropped hem sits right at the natural waist, which is what makes it read as fitted rather than slouchy despite the generous collar.
Materials and Tools
- Worsted weight or DK weight yarn in a soft, drapey fiber such as cotton blend, bamboo blend, or a merino mix
- Crochet hook in the size recommended on your yarn label, plus one size up and one size down for swatching
- Satin or velvet ribbon in a width that suits the neckline and front detailing
- Blunt tapestry needle for seaming and weaving in ends
- Stitch markers for marking armhole edges and panel centers
- Flexible measuring tape
- Scissors
- Rust proof pins and a blocking surface
Choose a yarn with movement. A stiff acrylic will hold the neckline away from your body instead of letting it drape across your shoulders, which is the whole point of this silhouette.
Know the Basics First
Difficulty and Time
This is an advanced beginner project. The stitches themselves are basic, but you are making garment decisions along the way, which means measuring, checking fit, and shaping armholes with your own body in mind. Most makers finish in two to four relaxed sessions once the panels are underway, with the sleeves and finishing taking an evening on their own. If you are new to garments, budget extra time for swatching and trying the panels against yourself. Nothing about this pattern is technically difficult. The care goes into fit rather than complicated stitch work, and that trade is well worth it.
Beginner Technique Notes
- Before you start the panels, spend time on a swatch. Work a square in the stitch you plan to use, wash it the way you will wash the finished sweater, and let it dry flat. Drapey fibers grow, and a sweater that fits beautifully off the hook can end up two sizes larger after a soak. Measure the swatch after drying, not before. It also helps to know how to keep your row edges tidy, since these panels are seamed and uneven edges show. Count your stitches at the end of every few rows and fix problems early.
- Seaming is the other skill worth practicing. A mattress stitch seam or a whip stitch through the outer loops both work here, and either one will look neater than you expect once blocked. Keep your seaming yarn tension relaxed so the join has the same stretch as the fabric around it. When you attach the neckline band, pin it in place first and try the sweater on before you sew anything permanently. That single step prevents most fit disappointments, and it costs you nothing but a few minutes.
The Pattern
Measurements and Sizing
- Take your bust measurement, your waist measurement, and your shoulder to shoulder measurement before beginning.
- Use these measurements to determine the starting chain length for the main body panels.
- Decide how fitted or loose you want the off the shoulder design to sit, and let that decision guide your chain length.

Main Body Panels for the Front and Back
- Chain the length needed to fit across your upper body and chest area, based on the measurements you took.
- Work in rows using basic crochet stitches such as double crochet or half double crochet to build the texture of the sweater body.
- Continue working rows upward to create the height of the panel.
- As you approach the armpit level, work the shaping to carve out space for the sleeves at each side.
- Complete the second panel in the same way so the front and back match.
If you’re a beginner and crochet patterns feel confusing, start with the video tutorial below, it’s the easiest way to learn as you go!
Off the Shoulder Neckline Band
- Construct a continuous band or collar that will sit across your upper arms and shoulders.
- Attach the neckline band securely to the top edges of both the front and back panels.

Sleeves
- Work the sleeves either in the round or as flat panels, whichever you prefer.
- Taper the sleeves gradually as you work down toward the cuffs.
- Attach the finished sleeves to the armhole openings on the sweater body.
Ribbon Details and Finishing
- Crochet or attach ribbon ties and accents along the designated sections of the sweater, such as the front, the neckline, or the sides.
- Secure all ribbon placements neatly so they sit flat against the fabric.
- Weave in all remaining ends and block the finished sweater to shape.
Tips and Troubleshooting
- Swatch after washing, always. Drapey yarns relax, and this design leans on drape, which means growth is likely. Build that into your chain length rather than discovering it later.
- Mark your armhole starting row on both panels with stitch markers so the front and back shaping lines up perfectly at the seams.
- Keep the neckline band snug. An off shoulder neckline that is too loose will slide down all day. It should hold gently across the upper arms without digging in.
- Pin before you sew. Try the pinned sweater on, walk around in it, raise your arms, and only then commit to the seam.
- If the neckline gapes at the back, work the band slightly tighter across that section or add a discreet elastic thread through the inside of the band.
- Should the sleeves feel tight at the top, lengthen the armhole opening on the body panels rather than widening the sleeve cap.
- Pre wash your ribbon if it is a natural fiber, since satin and cotton ribbons can shrink or bleed the first time the sweater is laundered.
- Block firmly but gently. Pat the panels into shape and let them dry fully flat before seaming for the cleanest possible finish.

Yarn Substitution
The right yarn choice matters more here than the stitch you pick. Cotton blends give you cool weight and a beautiful drape that suits the off shoulder shape. Bamboo and viscose blends drape even further and add a soft sheen that pairs well with satin ribbon. Merino or a merino blend brings warmth with enough softness to sit comfortably against bare shoulders. Avoid stiff acrylics and heavily textured novelty yarns, since both will fight the silhouette. If you substitute, match the recommended hook size on your new yarn label rather than the weight name alone, then swatch and adjust.

Customization Ideas
- Lengthen the body panels for a tunic that pairs with leggings, or crop them just below the ribs for a summer version.
- Swap satin ribbon for velvet in autumn tones or grosgrain for a crisper, more tailored look.
- Add a row of eyelets along the front and thread the ribbon through for a lace up detail.
- Make the sleeves long and slightly flared at the cuff for a romantic bell shape.
- Work the neckline band in a contrasting color to frame the shoulders.
- Add ribbon ties at the cuffs to echo the neckline detail.
- Use a subtle self striping yarn so the panels build gentle color movement without extra work.
Frequently Asked Questions
- Will this sweater stay on my shoulders? Yes, provided the neckline band is snug. The band is what holds the whole design in place, so work it firmly enough to grip the upper arms without pinching. If it feels loose during the pinning stage, take it in before sewing.
- Can I make this without knowing my exact size? You can. The panels are measured against your own body rather than a size chart, which is one of the nicest things about this design. Take your bust, waist, and shoulder to shoulder measurements first, then check the panel against yourself as you work.
- What if I have never made a garment before? This is a good first garment. The panels are simple rectangles with light shaping, and the fit is adjustable throughout. Practice your seaming on a swatch first, and take your time at the neckline band, which is the only part where fit really matters.
- Should I work the sleeves flat or in the round? Either works well. Flat sleeves are easier to try against your arm as you go and easier to adjust. Sleeves worked in the round have no seam and give a smoother line. Pick whichever method you find more comfortable.
- How do I wash the finished sweater? Hand wash in cool water and dry flat, especially if you used a cotton or bamboo blend. Never hang a crocheted sweater to dry, since the weight of the wet fabric will stretch the shoulders out of shape. Remove or protect the ribbon if it is delicate.