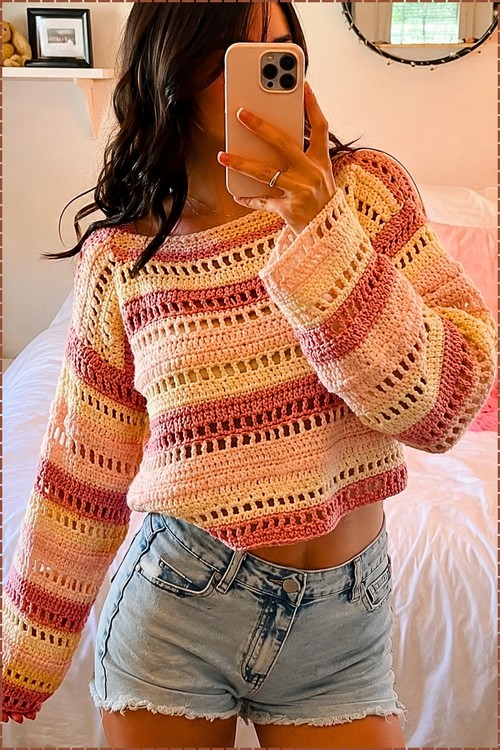
Late summer evenings call for a crochet grunge sweater with slouchy sleeves that slip past the wrists, paired with frayed denim cutoffs. Thrift lovers can build easy grunge outfits around the soft pink and peach stripes, adding a white tank or high waisted jeans in fall.
Faded rose, butter cream and dusty peach stack up in uneven bands across this striped crochet sweater. It has that lived-in thrifted feel the grunge look depends on, helped along by a wide neckline that slides toward one shoulder and a cropped hem that stops right above the waistband.
Crochet Striped Sweater Grunge
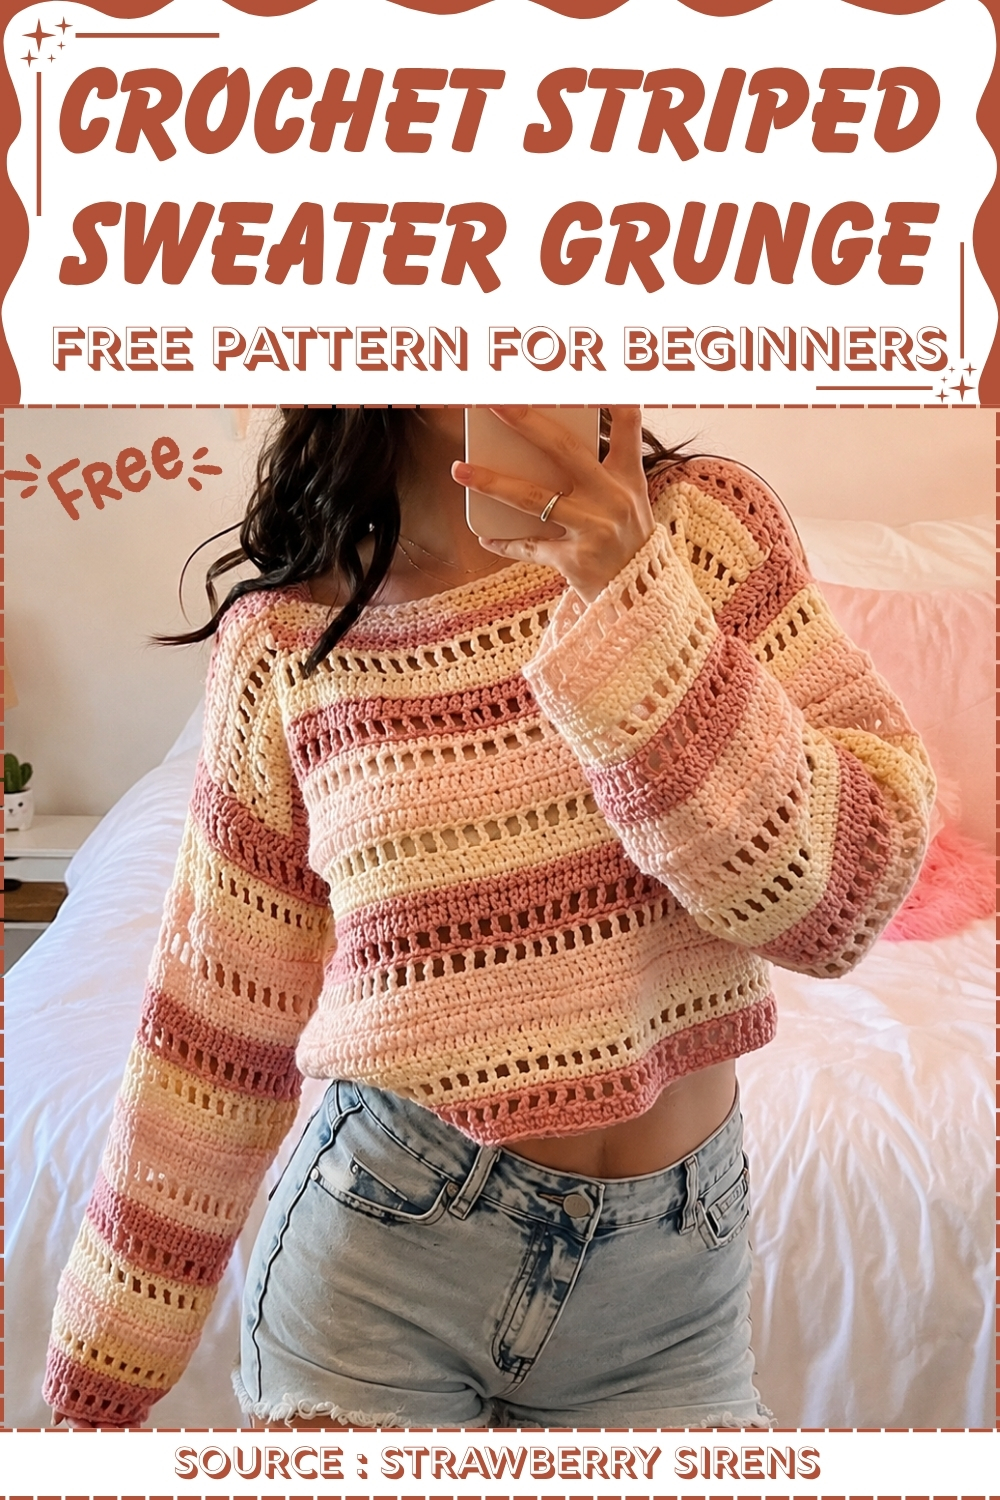
The stripes are doing double duty. Every color change lands on a row of open square holes, so the palette shift and the texture shift happen together and the eye reads it as one repeating band rather than two separate details. Solid rows in between keep the fabric warm enough to wear as an actual sweater, and the whole thing works flat in simple rows with no shaping to track.
What I love most about this one is how the mirrored stitch order between color sections creates that layered, almost vintage texture without any complicated charting. You repeat a simple sequence, flip it for the next color, and the fabric builds itself into something that looks considered and a little bit grunge-cool.
Materials and Tools
- Worsted weight yarn in three colors: a dark pink, an ivory or cream, and a light pink
- Crochet hook in a size that suits your yarn weight and gives you a relaxed, drapey fabric
- Scissors
- Tapestry needle for weaving in ends and optional seaming
- Measuring tape
- A flat surface for blocking if desired
Keep all three yarn balls accessible as you work the panels because you will be switching colors at the end of specific stitch sections. Carrying the unused colors loosely up the side of the panel is tidier than cutting and re-joining at every stripe change, and it keeps your end count manageable when you reach the finishing stage.
Begin with This Stitch
Difficulty and Time
This is a confident beginner to intermediate project. The stitches are foundational — double crochet, treble crochet, single crochet, and a simple puff stitch — but the freehand nature means you are making fit decisions as you go rather than following fixed numbers. That is freeing once you relax into it. Budget two to three sessions for the main panels and another for the sleeves and assembly. The shoulder shaping adds a small amount of decreasing, which is the only technically new element if you are coming from simpler rectangular projects.
Yarn Substitution
The three-color stripe structure is the design, so the yarns need to cooperate with each other in weight and feel. All three should be the same weight so the stitch rows sit level and the color transitions lie flat. A smooth acrylic or acrylic-cotton blend is the easiest choice for freehand work because the stitch definition is clear and the fabric is forgiving. If you want a softer drape for a more relaxed silhouette, a bamboo blend or lightweight cotton works beautifully. Avoid anything too chunky, as the mesh and treble sections need a little airiness to read properly.
Customization Ideas
- Swap the pink palette entirely for earthy neutrals — rust, oat, and cream give this sweater a completely different, autumnal personality.
- Work the puff stitch section in a contrasting texture yarn — a subtle boucle or slub — while keeping the surrounding rows in smooth yarn for contrast.
- Extend the light pink section further for a bolder center stripe, or compress it to make the color transitions more even across the panel height.
- Make the sleeves shorter and slightly flared for a three-quarter bell sleeve.
- Add extra rounds of single crochet at the collar for a wider, more slouchy neckline.
- Use only two colors instead of three for a cleaner, more graphic stripe.
The Pattern
Step 1: Front and Back Panels — Make 2
Foundation — Dark Pink
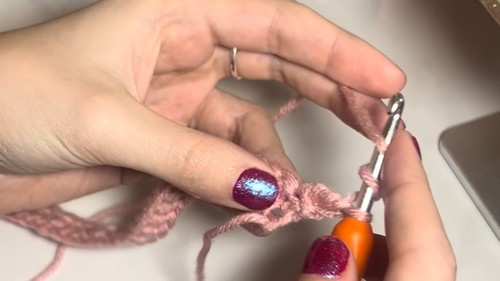
- Make a foundation chain as wide as you want the sweater to be. Wrap the chain around your body to check the fit before committing to the length.
Row 1
- Work double crochets all the way along the foundation chain.
Row 2
- Work treble crochets all the way along, skipping one chain space between each treble crochet to create an open mesh.
Row 3
- Work 2 single crochets into each gap space all the way across.
Still getting the hang of reading crochet patterns? That’s completely okay, the video tutorial below breaks everything down in a simple, beginner-friendly way!
Color Change to Ivory
- On the final loop of the last single crochet in the dark pink section, drop the dark pink yarn and draw through the ivory yarn to make the color change.
Step 2: Ivory Section — Mirrored Pattern
Because this section moves back down the stitch stack, the sequence is reversed from the dark pink section.
- Row 1: Single crochet all the way along.
- Row 2: Treble crochet into every other space.
- Row 3: Work 2 double crochets into each treble gap.
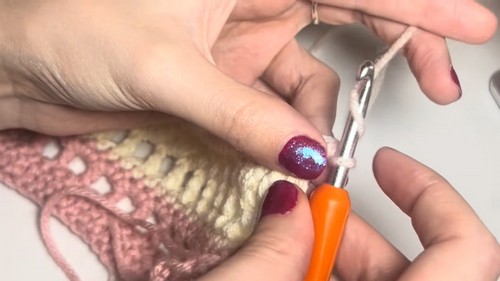
Step 3: Light Pink Section — Extra-Wide
This section is intentionally wider than the others and includes a puff stitch row.
- Row 1: Work a row of double crochets.
- Row 2 — Puff Stitch Row: Yarn over, insert into the first loop and pull through, yarn over, insert again so you have 5 loops on the hook, then pull through all loops together. Repeat this puff stitch across the entire row.
- Row 3: Single crochet into every loop across.
- Row 4: Work a row of double crochets.
- Row 5: Work a row of single crochets.
- Row 6: Work a row of treble crochets, skipping one loop between each stitch.
Step 4: Returning to Dark Pink and Continuing Upward
- Row 1: Work 2 single crochets into every treble crochet gap.
- Row 2: Work a row of treble crochets, followed by 2 double crochets into each gap, then a single crochet row.
- Continue repeating the color sections — dark pink, ivory, light pink — working upward until the panel reaches your desired length before the shoulder and neckline.
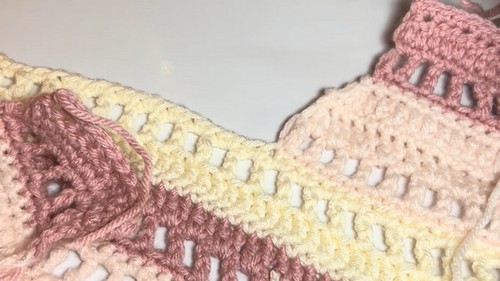
Step 5: Shoulder and Neckline Shaping
- Switch to your next color and single crochet up to the 19th loop, adjusting this number wider or narrower depending on how open you want the neckline to sit.
- Continue the mesh stitch pattern across the shoulder section as established.
- To decrease with double crochet: yarn over, insert into the second-to-last treble gap and pull through two loops, yarn over, insert into the last gap and pull through two loops, then yarn over and pull through all three loops together.
- To decrease with puff stitch or single crochet: insert the hook into the second-to-last stitch and pull up a loop, then insert into the very last stitch and pull up a loop, then pull through all remaining loops at once.
- Continue working alternating stitch rows while decreasing along the neckline edge until the curve feels smooth and gradual.
- Stop decreasing once you reach a stable shoulder strap width.
- Repeat the shoulder shaping for the second side of the same panel.
- Repeat the entire process from Step 1 through Step 5 to create a second identical panel for the back.
Step 6: Assembly and Sleeves
Seaming the Body
- Weave in all loose ends on both panels securely before joining.
- Place the front and back panels together with right sides facing.
- Seam the shoulder sections and side seams. Use a crochet hook join for a visible, textural seam, or a tapestry needle with the back-loop mattress stitch method for a flatter, more invisible finish.

Collar
- Work a few rounds of single crochet around the neckline opening to tighten the edge and adjust the fit as needed.
Sleeves — Make 2
- Make a foundation chain long enough to wrap comfortably around the armhole opening.
- Work the same multi-row stitch sequence used on the body panels — double crochet, treble mesh, single crochet rows, and color stripes — to build a large rectangular sleeve piece.
- Fold the completed sleeve rectangle in half lengthwise and seam the long edge closed.
- Attach the finished sleeve to the armhole opening on each side of the sweater body.
Tips
- The freehand foundation chain is the most important fit decision you make. Wrap it around your body more than once before starting Row 1. A chain that is slightly generous is easier to correct than one that is too tight.
- When switching colors, always make the draw-through on the final pull of the last stitch in the old color, not at the start of the new row. This keeps the transition clean and the color stripe edge tidy.
- Lay both panels side by side at regular intervals while working to check that they are growing at the same pace. Because this is freehand, tension differences between sessions can sometimes create panels of slightly different heights.
- Block both panels before seaming. Even a light misting and pinning will help the mesh sections open out and make the seaming much easier to manage.
- For the shoulder shaping, work slowly and try the panel against your own shoulder before each decrease row. The curve should feel gradual. Rushing the decreases makes the neckline pull awkwardly once the sweater is worn.
FAQ
- Is this pattern suitable if I have never done freehand crochet before? It is a good introduction to freehand garment making because the structure is simple — two identical panels and two rectangular sleeves — and every decision is based on your own measurements rather than a fixed size chart. The main skill to practice is checking your work against your body as you go, which quickly becomes intuitive.
- What if my two panels end up slightly different heights? This happens easily with freehand work, especially if your tension shifts between sessions. Block both panels flat before assembling and pin them to the same measurements while damp. Most minor height differences even out through blocking and become invisible once seamed.
- Can I make this sweater with only two colors instead of three? Absolutely. The pattern works with any number of stripes. Two colors gives a cleaner, more graphic result. Four or more creates something more maximalist and eclectic. The only rule to keep is the mirrored stitch order when you switch colors, which is what creates the layered texture regardless of how many colors you use.
- How do I know when the shoulder strap is wide enough to stop decreasing? Hold the panel up to your shoulder and look at where the strap sits. It should be wide enough to cover your shoulder comfortably without sliding inward toward the neck or outward toward the arm. Most makers find the right width by trying it on rather than measuring, which is one of the small pleasures of freehand construction.