Pair this fairy grunge crochet sweater with black skinny jeans for an easy weekend outfit where three raspberry hearts do all the talking. Short sleeves stop just above the elbow, which keeps a crochet cropped sweater outfit comfortable for spring markets and garden parties.
Bright pink hearts stacked down the center, variegated granny panels either side, and a crisp white border holding it all together. Fairy grunge is exactly this kind of sweet-meets-scrappy mix, and the granny square construction makes it approachable for anyone who has made a basic motif before.
Fairy Grunge Crochet Sweater
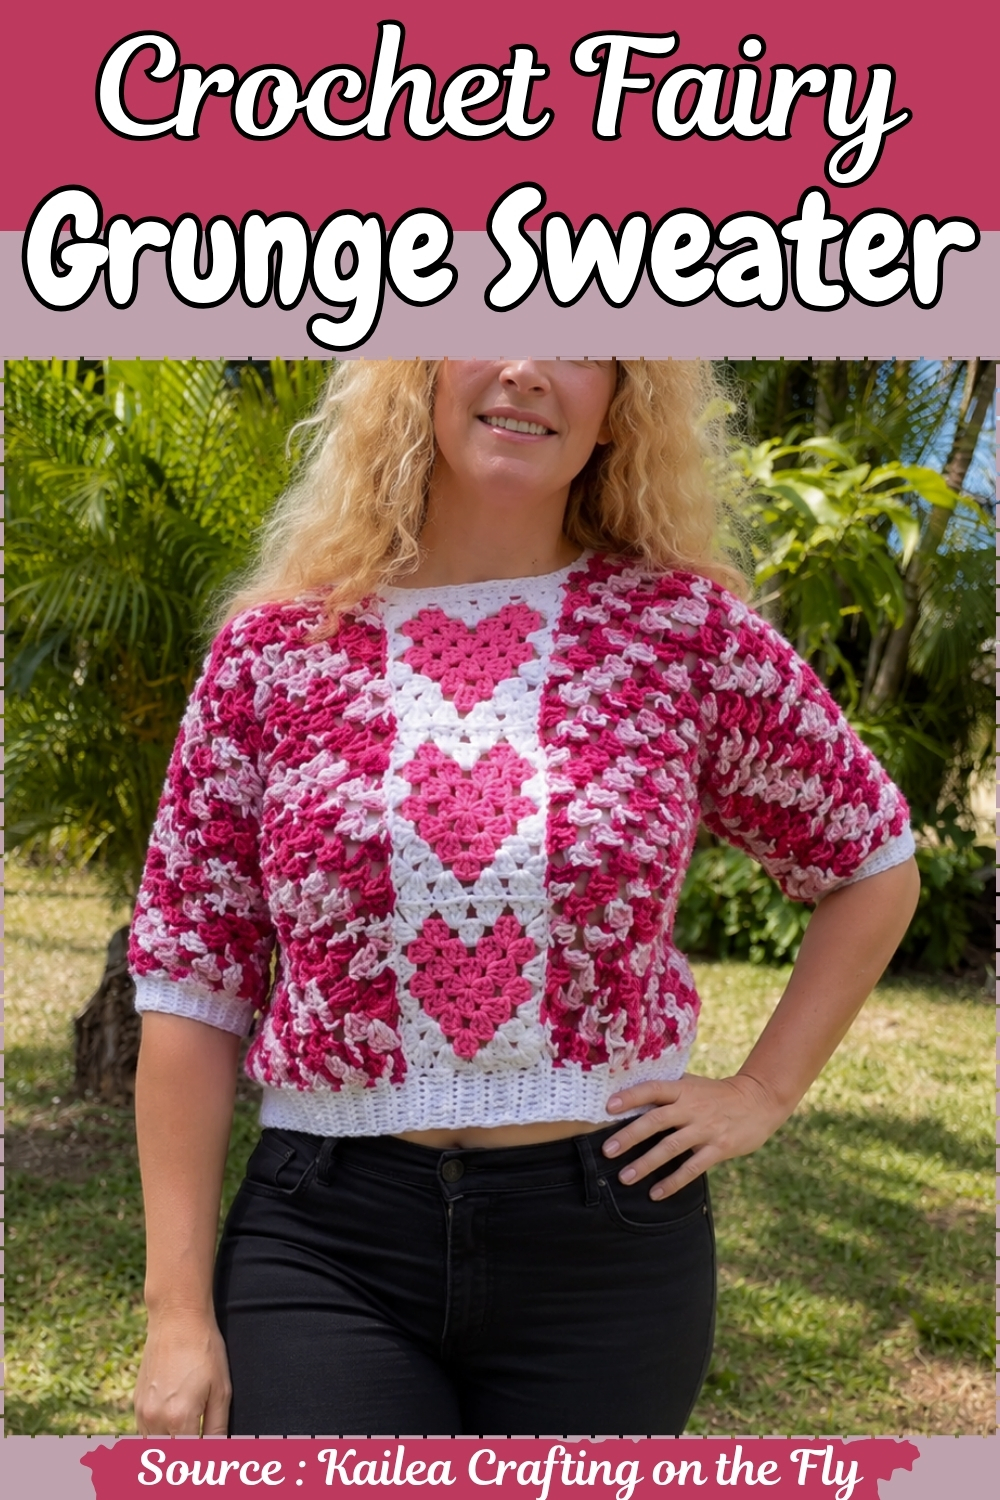
Everything here is built from squares. The heart motifs are worked as individual granny squares with the shape formed in color placement rather than shaping, then joined into a vertical strip that runs down the front. Side panels use the same cluster in a variegated yarn, and white ribbing at the hem and cuffs pulls the cropped shape in so the motif panel stays flat and centered.
Quick Facts
- Difficulty: Intermediate
- Construction: Motif-based, assembled from individual hexagon and heart pieces
- Time: 3 to 5 sessions depending on pace — hexagons are the longest element
- Sizing: Adjustable by adding or removing rounds on the hexagon sleeves and heart panels
- Colors: Pink (main) and white (accent and border)
- Fit: Cropped, demonstrated as a small to medium in the original tutorial
Materials and Tools
- Medium weight, size 4 yarn in pink as the main color
- Medium weight, size 4 yarn in white for color detail, borders, and ribbing
- Size 8 crochet hook for the main motifs
- A smaller hook for the ribbed cuffs and bottom band
- Scissors
- Tapestry needle with a blunt tip for the invisible mattress stitch seaming
- Stitch markers to track hexagon corners and heart assembly layout
Choose a yarn with clean stitch definition so the heart color sections read clearly and the hexagon clusters sit neatly. Smooth acrylic or a cotton-acrylic blend works well at this hook size and is easy to seam with the mattress stitch later.
Practice Before You Begin
Customization Ideas
Before you begin, consider how you want to wear this sweater. A few adjustments make it entirely your own.
- Work fewer hexagon rounds for a tighter sleeve or more rounds for a relaxed, oversized arm opening.
- Swap the pink and white color arrangement — a white body with pink heart detail and a pink border reverses the palette without changing a single stitch.
- Make 4 heart motifs per panel instead of 3 for a longer, hip-grazing hem rather than a cropped silhouette.
- Replace the smooth yarn with a subtle tweed or marl for a more grunge-leaning finish that still lets the heart shapes read through.
- Work the ribbing in a contrasting third color for a pop at the cuffs and hem.
- Use the heart motifs as standalone patches — they are beautiful sewn onto a tote or a denim jacket even outside of this sweater project.
The Pattern
Part 1: Hexagon Sleeves — Make 2
Round 1 — Center
- Start with a slip knot and create a magic loop, or chain 3 and slip stitch to close.
- Chain 3 to count as your first double crochet, then work 2 double crochets into the loop to form your first cluster of 3 double crochets.
- Chain 1.
- Work another cluster of 3 double crochets, then chain 1.
- Repeat until you have 6 clusters of 3 double crochets total, each separated by a chain-1 space.
- Pull the magic loop tight to close the center, then slip stitch to the top of the starting chain 3 to join.
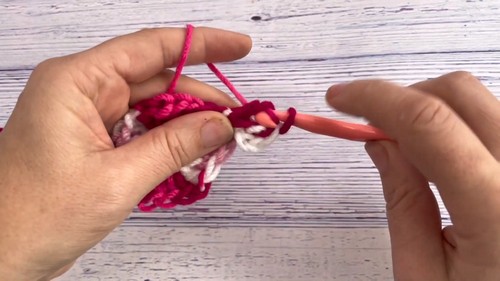
Round 2 — Expanding the Hexagon
- Chain 3, then work 2 double crochets into the same chain-1 space from the previous round to complete the first cluster.
- Move to the next chain-1 space and work a full corner: 3 double crochets, chain 1, 3 double crochets.
- Repeat this corner cluster in each of the remaining 5 chain-1 spaces around the hexagon.
- Slip stitch to the top of the starting chain 3 to join.
Don’t let crochet patterns intimidate you! If you’re a beginner, the video tutorial below makes it super easy to follow along!
Rounds 3 and Beyond — Building Arm Width
- Continue working around the hexagon: work clusters of 3 double crochets into the spaces between existing clusters, and work corner clusters of 3 double crochets, chain 1, 3 double crochets into each of the 6 chain-1 corner spaces.
- Keep adding rounds until the hexagon is wide enough to fold over your arm comfortably. The original tutorial works approximately 9 to 10 rounds to achieve this width.
Connecting the Armhole
- On the final round, fold the hexagon so the two outer edges meet to form the sleeve tube.
- Connect the edges directly along the last row by working slip stitches through the chain-1 corner spaces, continuing your cluster pattern on the active side as you go. This eliminates any need to sew the sleeve closed afterward.
- Repeat the entire process from Round 1 to create a second identical hexagon sleeve.
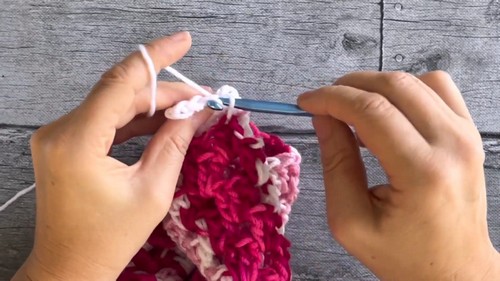
Part 2: Heart Motifs — Make 6 Total
Round 1 — Square Base
- Create a magic loop.
- Chain 3, then work 2 double crochets into the loop.
- Chain 1, then work a cluster of 3 double crochets. Repeat to create 4 clusters in total, each separated by a chain-1 space.
- Pull tight and slip stitch to join.
Round 2 — Expanding the Square
- Chain 3, work 2 double crochets in the chain-1 space.
- Work corner clusters of 3 double crochets, chain 1, 3 double crochets into each of the 4 corner spaces to expand the motif into a square.
- Slip stitch to join.

Round 3 — Shaping the Heart with Color Changes
- Attach white yarn to begin creating the top lobes and center V-shape of the heart.
- Switch back to pink yarn for the sides and bottom tip of the heart as you work around the 4 corners.
- Work clusters and corner clusters in each designated space, following the color transitions to form the distinct heart shape through the round.
Round 4 — Final Border
- Work one complete round in white yarn around the heart square.
- Work clusters of 3 double crochets in the spaces and full corner clusters of 3 double crochets, chain 1, 3 double crochets in each of the 4 corners.
- Slip stitch to join and fasten off, leaving a long tail for seaming.
- Repeat to make 6 heart motifs in total — 3 for the front panel and 3 for the back panel.
Part 3: Assembling the Sweater Body
Connecting the Heart Panels
- Lay out 3 heart motifs in a vertical arrangement for the front panel and 3 for the back panel, leaving a space at the top center for the neck opening.
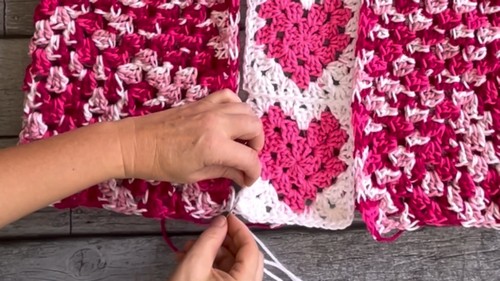
- Use the long white tails and an invisible mattress stitch to seam the heart motifs together side by side and top to bottom.
- Use the same mattress stitch method to attach each hexagon sleeve to the outer edges of the central heart panels on both the front and back.
Part 4: Edgings and Ribbed Cuffs
Neckline Trim
- Attach yarn at the back of the neck opening.
- Work 2 rounds of single crochet evenly around the entire neckline to neaten the edge.
- Slip stitch to join and fasten off.
Bottom Band and Sleeve Ribbing
- Switch to a smaller hook and white yarn.
- Chain a small number of stitches to match your desired cuff or band width, somewhere in the range of 6 to 8 chains.
- Work single crochets back down the chain.
- Anchor the ribbing strip to the edge of the sleeve or bottom hem using a single crochet 2 together decrease followed by a regular single crochet, then turn.
- Work back along the ribbing strip in the back loops only.
- Continue this back-and-forth technique, anchoring one stitch to the garment edge each time, all the way around the opening.
- Slip stitch the final ends of the ribbing together to close the band.

Tips
- Before seaming the heart panels together, lay all 6 motifs flat and check that they are close to the same size. Because the heart is worked from a center magic loop, tension inconsistencies between motifs can affect how neatly the panels sit. Block all motifs to match before you begin assembling.
- The invisible mattress stitch seam is worth the patience it requires. Work slowly through the white border round of each heart motif, catching the same loop position on each side so the seam stays invisible from the front. A blunt tapestry needle and good light make a significant difference here.
- When working the ribbed cuffs on a smaller hook, do not pull the anchoring decreases too tight against the garment edge or the cuff will pucker. Keep the join relaxed enough that the ribbing can stretch slightly when the sleeve is pulled on.
FAQ
- How adjustable is the sizing on this pattern? Very adjustable. The sweater is built from individual motifs rather than a fixed stitch count, so you control the fit by adding or removing rounds on the hexagon sleeves and by changing how many heart motifs you use per panel. Trying the hexagon against your arm before closing it is the most reliable way to check sleeve width.
- Do I need to know how to work a magic loop? It helps, but if you find the magic loop difficult, a simple starting chain of 3 joined with a slip stitch works as a substitute for both the hexagon and heart centers. The magic loop just gives a cleaner, tighter center hole.
- What is the best way to keep the heart color sections neat? Carry the unused color loosely along the wrong side of the work rather than cutting and re-joining at every transition. This reduces the number of ends to weave in and keeps the back of the motif tidy. When you switch colors, always make the final yarn over of the last stitch in the new color so the transition sits cleanly on the right side.
- Can the ribbing be skipped if I prefer a raw edge finish? Yes. A simple single crochet border around the cuffs and hem works perfectly as an alternative and gives a cleaner, more minimal finish. The ribbing adds stretch and a more fitted look at the openings, but it is a design choice rather than a structural requirement.