Autumn weekends suit an old money crochet sweater for men in soft grey, worn under a camel overcoat with dark jeans and brown loafers. Light academia outfits for men rely on quiet knitwear like a striped crew neck pullover, a thoughtful handmade gift for a husband or father.
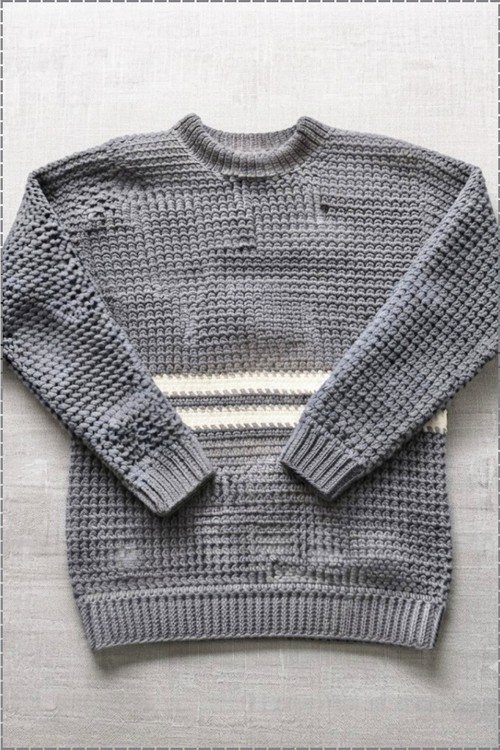
Mid grey with two thin cream stripes across the chest and a deep ribbed band at the neck, cuffs and hem. The texture is what does the work here, a dense repeat that gives the fabric a woven look instead of an obviously crocheted one. It is the kind of plain mens sweater that gets worn on repeat, which is the whole point of the old money look.
Old Money Crochet Sweater
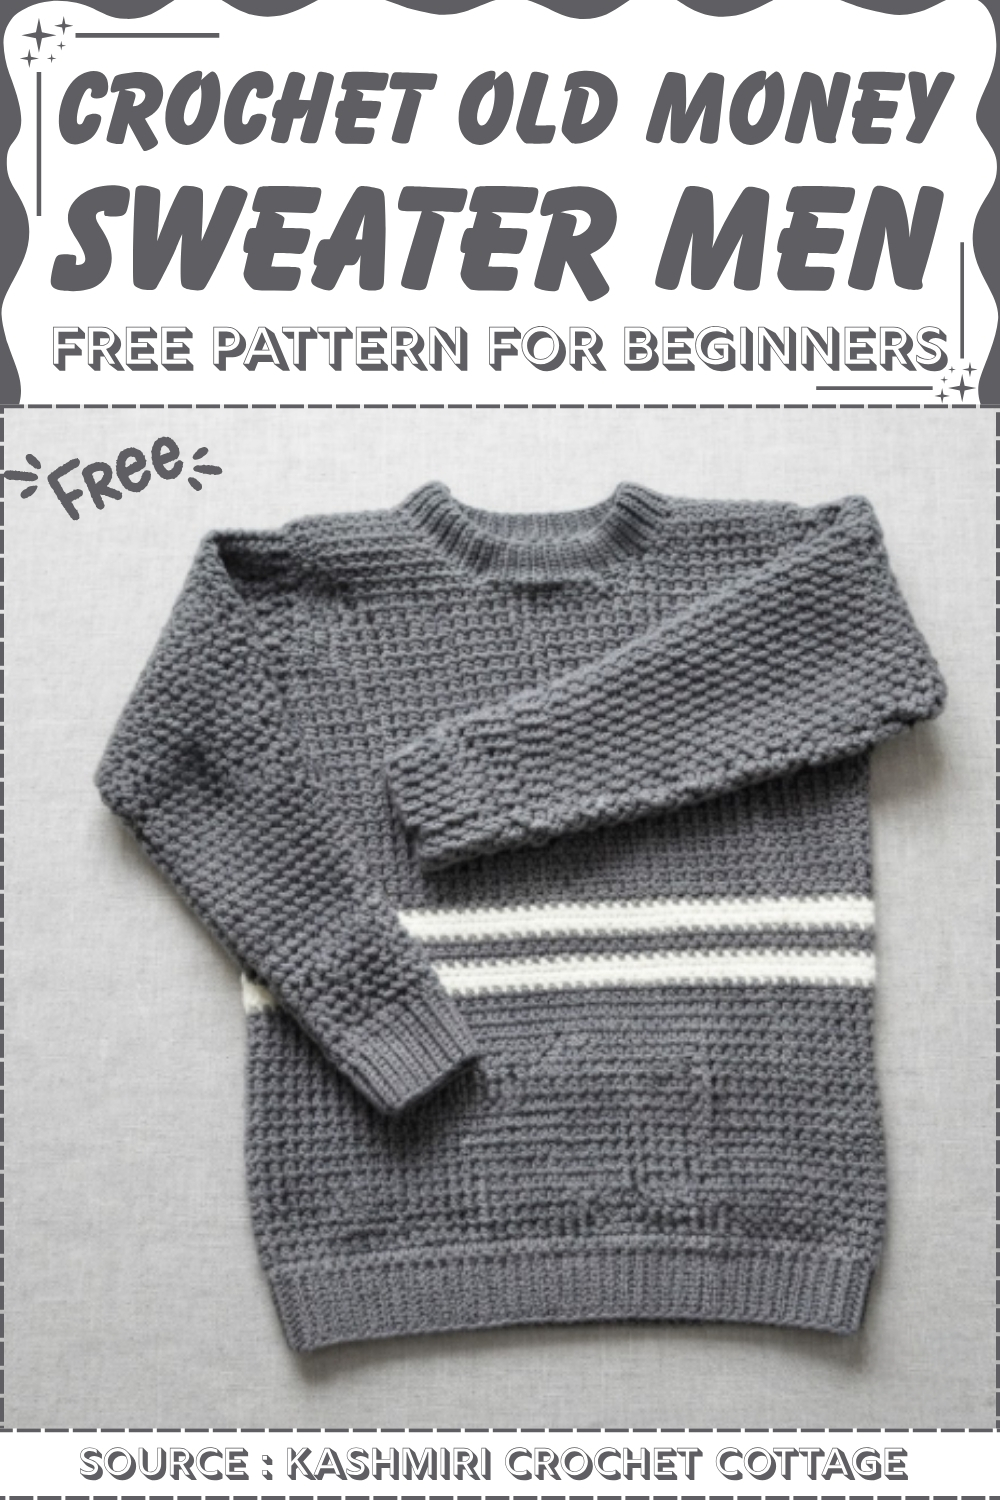
Restraint is the design. One neutral base, two stripes placed low on the chest, and no shaping anywhere except at the shoulder where the sleeve is set in. Body and sleeves are worked flat in the same textured repeat and seamed, then the ribbing is added last at all three edges to give the loose fabric a firm finish. Keeping the stripes to a single pair is what stops it reading as sportswear.
Why This Sweater Works So Well
A modular build gives you control at every stage. You finish each panel on its own, measure it against the wearer, and fix any sizing issue before a single seam goes in. The sc-blo ribbing hugs the waist and wrists the way a shop-bought jumper does, while the textured stitch across the body adds depth without turning busy. Neutral shades like oatmeal, camel, navy, charcoal, and forest green push the look straight into that polished, inherited-wardrobe territory. Pair it with a collared shirt underneath and chinos, and the sweater instantly looks like something passed down from a well-dressed grandfather.
Materials and Tools
- Medium DK weight or fine 3-ply or 4-ply wool or wool-blend yarn, roughly 600 to 800 grams depending on size
- 4.0 mm crochet hook, or the size that matches your tension (most makers land between 3.5 mm and 4.5 mm for this yarn weight)
- Tapestry needle for seaming and weaving in ends
- Measuring tape
- Stitch markers
- Scissors
Learn this stitch first
Difficulty and Time
This pattern sits at an intermediate level. The stitches themselves stay simple, but the project asks you to shape a neckline, increase evenly along a sleeve, and set sleeves into armholes neatly. A confident maker working steady evening sessions usually finishes the panels over a few weeks, then sets aside a relaxed weekend for seaming, collar work, and blocking. Rushing the assembly causes most of the problems I see in finished menswear, so give that stage real time. Sizing runs from Medium to XL, with a flat chest width of about 20 to 24 inches and a body length of about 26 to 28 inches.
Technique Notes Before You Start
- Working into the back loop only. Every stitch has two loops on top. Insert your hook under the loop farther from you only. Repeating this row after row creates the stretchy ridged texture that forms the hem, cuffs, and optional collar.
- Working along a row edge. After finishing the ribbing strip, you turn it sideways and crochet into the ends of the rows. Aim for an even spacing so the body neither ruffles nor pulls in.
- Front post and back post double crochet. For fpdc, wrap your hook around the post of the stitch from the front; for bpdc, go around the post from the back. Alternating them builds a raised rib that looks like knitted ribbing.
- Mirroring a shoulder. When you shape the second side of the front neck, repeat the same decreases and height as the first side, just starting from the opposite edge of the opening.
Old Money Men’s Crochet Sweater Pattern
Pattern Specifications
- Project type: men’s full-sleeve pullover, winter weight
- Skill level: intermediate
- Construction: modular panels with textured body, ribbed hem and cuffs, and seamed or seamless joining
- Hook: 3.5 mm to 4.5 mm depending on yarn, with 4.0 mm as the standard choice
- Sizing: Medium, Large, and XL, with a flat chest width of approx. 20 to 24 inches and a body length of approx. 26 to 28 inches
Abbreviations (US Terms)
- ch: chain
- sl st: slip stitch
- sc: single crochet
- hdc: half double crochet
- dc: double crochet
- fpdc: front post double crochet
- bpdc: back post double crochet
- st(s): stitch(es)
- blo: back loop only
- rep: repeat
- rnd/row: round/row
Back Panel
Bottom Ribbing
- Chain 10 to 12 sts to set the ribbing width, which measures about 2 to 2.5 inches.
- Row 1: Sc in the 2nd ch from the hook and in every ch across, then turn and ch 1 [9–11 sc].
- Row 2: Sc in the blo of every st across, then turn and ch 1 [9–11 sc].
- Repeat Row 2 until the ribbing stretches comfortably to half the chest width, about 50 to 55 rows for Medium or Large, or the row count that matches your waist foundation chain; keep it relaxed rather than tight [9–11 sc].
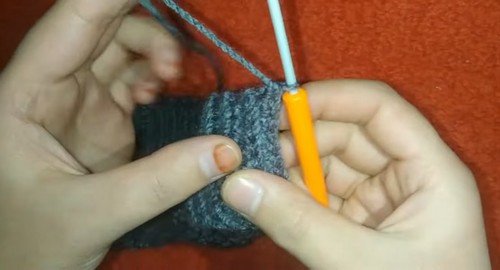
Main Body
- Turn the ribbing so you work along its long edge.
- Row 1 (setup): Spread sc or hdc evenly across the top edge of the ribbing, aiming for an even multiple that suits your stitch pattern, such as a multiple of 2 or 3, then ch 2, which counts as the first dc or turning chain.
- Row 2 onward: Work your chosen body pattern, such as alternating rows of dc or a textured cluster, granule, or alpine stitch.
- Keep working straight rows up from the ribbing until the panel reaches underarm length, about 16 to 18 inches from the base.
Armhole Shaping (Optional)
- For a classic drop shoulder or a gentle armhole curve, sl st across 3 to 4 sts at the start of each of the next 2 rows.
- Work straight for the armhole height until this section measures about 8 to 9 inches.
- Fasten off and weave in the ends of the back panel.
Front Panel
Bottom Ribbing
- Repeat Step 1.1, matching the exact row count and width of the back panel ribbing.
New to crochet and not sure how to read a pattern yet? The video tutorial below will guide you through it step by step, you’ve got this!
Main Body to Neckline
- Work the setup row and body pattern exactly as on the back panel until the piece reaches the shoulder height minus the neckline depth, about 14 to 15 inches from the base.
Neckline Split
- Place stitch markers around the center stitches of the front panel.
- Work across the right chest and shoulder side, leaving the center 12 to 16 sts unworked for the neck opening.
- Decrease 1 st at the inner neck edge on every row for 3 to 4 rows in a row.
- Continue working this shoulder until its height matches the back panel shoulder, then fasten off.
- Join yarn on the left side of the neck opening and mirror the same decreases and height, then fasten off.
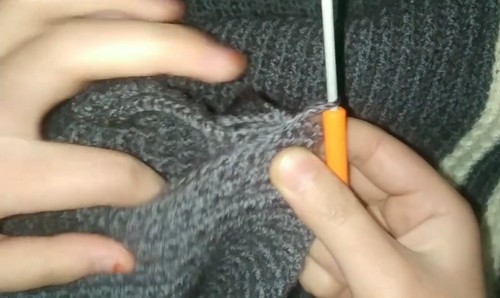
Sleeves (Make 2)
Cuff Ribbing
- Chain 8 to 10 sts for the cuff width.
- Row 1: Sc in the 2nd ch from the hook and in every ch across, then turn and ch 1 [7–9 sts].
- Row 2: Sc in the blo of every st across, then turn and ch 1 [7–9 sts].
- Repeat Row 2 for about 36 to 42 rows until the strip wraps snugly around the wrist [7–9 sts].
- Sl st the short ends together to form a cuff tube, or leave it flat and seam it later.
Sleeve Body and Increases
- Work along the long edge of the cuff, spreading the base stitches evenly [38–44 sts].
- Choose your method: work in rounds for a seamless tube or in flat rows with a seam; for the round method, join with a sl st and ch 2.
- Work the same pattern stitch you used on the body, whether dc, hdc, or a textured stitch.
- Increase round: On every 5th to 6th round, increase 1 st at each end or side for a total of 2 extra sts per increase round, so the sleeve widens gently toward the elbow and underarm.
- Keep increasing until the sleeve reaches the underarm width [60–68 sts].
- Continue until the sleeve measures about 20 to 22 inches from cuff to underarm, or the wearer’s preferred arm length.
- Work 2 to 3 rows straight for the top cap, then fasten off.
- Repeat Steps 3.1 and 3.2 for the second sleeve.
Assembly and Finishing
Shoulder Seams
- Lay the front and back panels together with right sides facing.
- Whipstitch or sc across the top shoulder seams, about 5 to 6 inches in from each outer edge, keeping the center neck opening free.
Attaching the Sleeves
- Line up the midpoint of the sleeve cap with the shoulder seam.
- Pin the sleeve evenly into the armhole and stitch it in place on both the left and right sides.
- Seam the underside of each sleeve from the wrist cuff down to the lower body side seam in one continuous seam if you worked flat, or close it with mattress stitch.
Collar and Neckline Ribbing
- Join yarn at the back or side of the neck opening.
- Work one round of sc evenly around the whole neckline, decreasing slightly at sharp corners or curves to stop the edge from flaring.
- Switch to your ribbing, either alternating fpdc and bpdc or sc-blo for a standing collar, and work 4 to 6 rounds or rows for a neat crew neck.
- Fasten off, cut the yarn, and weave in every loose tail with a tapestry needle.
- Block the finished sweater lightly with steam or wet blocking, following your yarn label, to flatten the seams and sharpen the stitch texture.
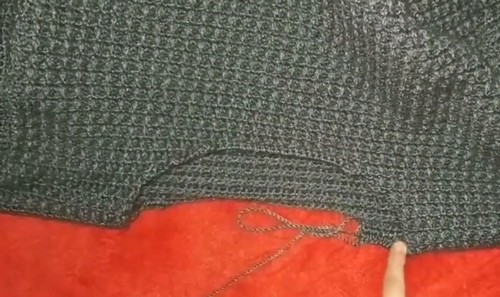
Tips for a Polished, Shop-Quality Finish
- Work a gauge swatch in your chosen body stitch and block it before starting, because textured stitches often shrink or grow once they relax.
- Count your ribbing rows on the back panel and write the number down so the front ribbing matches exactly.
- Measure the wearer’s favorite sweater laid flat and use it as your target for chest width, body length, and sleeve length.
- Place a stitch marker at each side of the sleeve on increase rounds so the increases line up into a tidy underarm line.
- Mark your shoulder seam points with pins before sewing so both shoulders finish at the same width.
- Keep your collar round slightly firm; a loose first sc round lets the crew neck gape and stretch over time.
- Leave long tails when fastening off panels and use them for seaming, which saves you from weaving in extra ends.
Yarn Substitution Guide
Wool and wool blends give this sweater its classic heritage drape and hold the textured stitches crisply after blocking. Merino feels soft against the neck and suits men who find traditional wool scratchy. A wool and acrylic blend handles machine washing better and suits a sweater meant for daily wear. Cotton blends work for a lighter spring version, though they stretch more, so size down the length slightly. Whatever you choose, stay within DK or a fine 3-ply to 4-ply weight and check your gauge, since a heavier yarn changes every measurement in the pattern.
Customization Ideas
- Choose a quiet heritage palette such as camel, cream, charcoal, navy, or bottle green for the true old money look.
- Work the hem, cuffs, and collar in a contrast shade for a subtle varsity touch.
- Add a single contrast stripe across the chest for a classic tennis sweater feel.
- Swap the crew neck for a deeper V by shaping the front neckline lower before splitting.
- Stitch a small suede or leather patch onto each elbow for a professor-style finish.
- Lengthen the cuff ribbing so it folds back for a relaxed, lived-in look.
Frequently Asked Questions
- Can a confident beginner make this old money crochet sweater for men? A maker who already handles sc, dc, and basic seaming can manage it with patience. The neckline split and sleeve setting take the most care, so practice on a swatch first if those steps feel new.
- How do I pick the right size? Measure a sweater the wearer already loves while it lies flat. Match its chest width, body length, and sleeve length to the measurements in the pattern, then adjust the row count of the ribbing and body to suit.
- Should I work the sleeves in rounds or flat rows? Rounds give a seamless tube and a cleaner inner arm, while flat rows let you check the width easily and seam everything together at the end. Both methods follow the same increases.
- Which stitch pattern gives the best old money look? Tight, low-profile textures such as the granule or alpine stitch look closest to fine knitwear. Plain dc rows also work beautifully in a quality wool and a neutral shade.
- How do I wash and care for the finished sweater? Follow the care label of your yarn. For pure wool, hand wash in cool water, press out the water gently, and dry the sweater flat so it keeps its shape.