Your husband, brother or son gets a wave of teal, purple and rust from this free crochet sweater pattern for men, where welt ridges catch each variegated colour change. Set-in sleeves, flat panels and ribbed solid trim keep the long sleeve crochet men’s sweater simple to assemble.
Let the yarn do the talking. A variegated running teal into green into purple, orange and rust needs something to land on, and the welt texture gives it exactly that. The horizontal ridges catch every colour change at a slightly different angle, which is where the wavy, almost landscape look across the body and sleeves comes from. It’s not a stitch you’d choose for a solid, it’d read as plain, but with this yarn it’s the whole point. Sleeves are set in, ribbing at all three edges. The cropped sweater for men uses the same sleeve construction on a shorter body if that’s the length you want.
Crochet Long Sleeve Sweater For Men
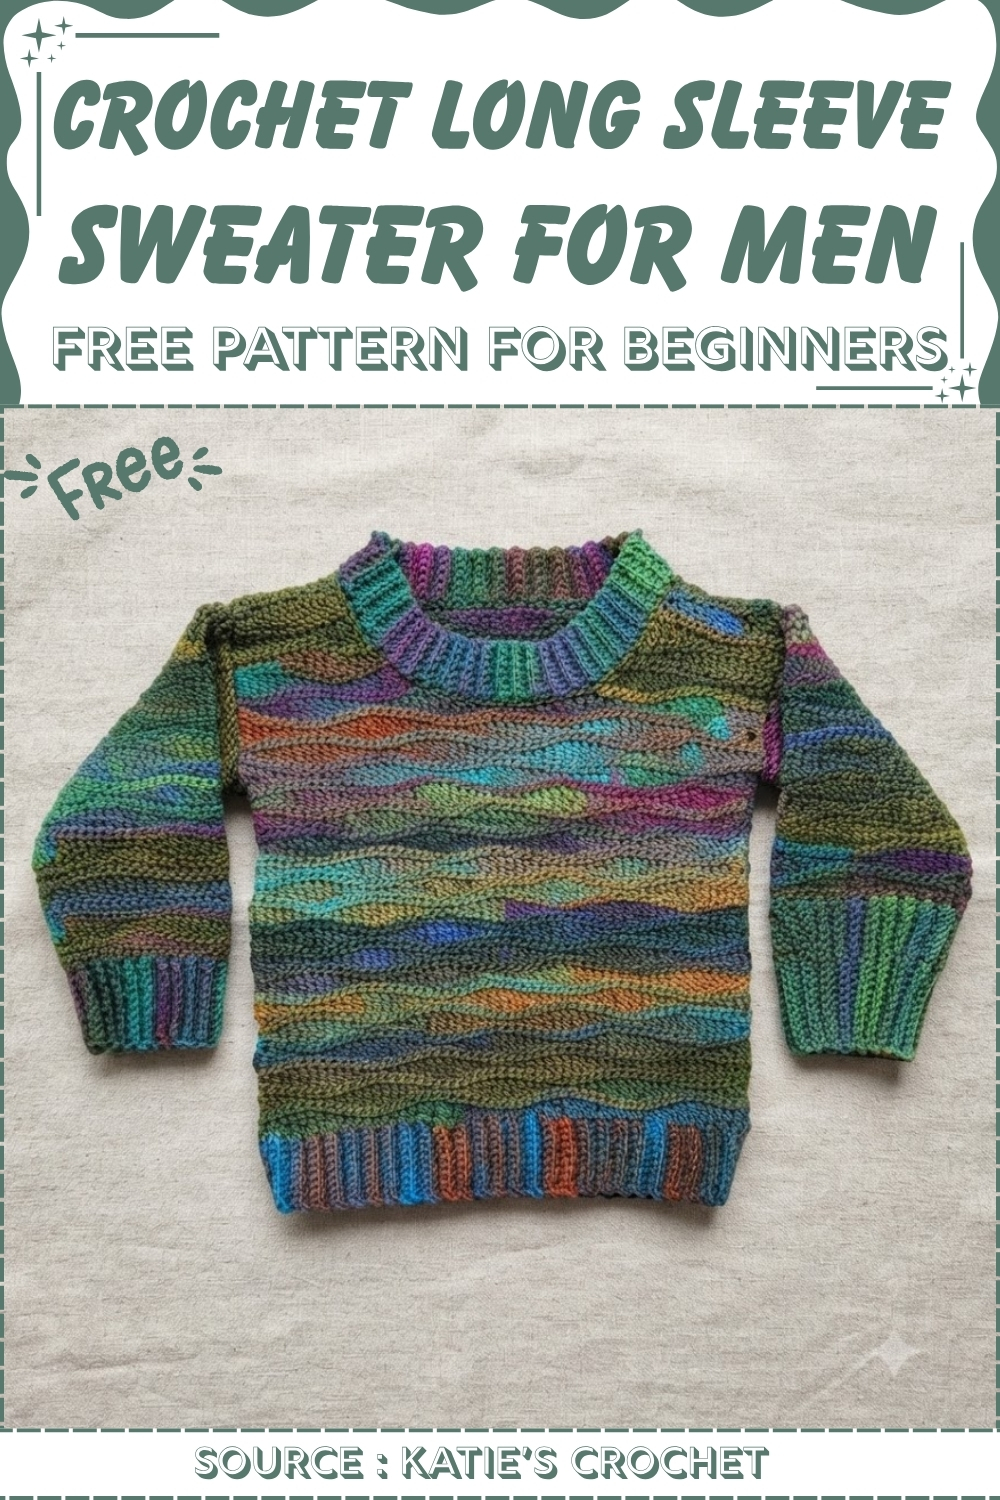
Sweater is built in flat panels joined at the side and shoulder seams, so the variegated colour sequence runs differently on each piece and creates the natural variation in the wave pattern. The collar, hem and cuffs are all worked in a ribbed band using a contrast solid colour pulled from the variegated palette, which grounds the colour without introducing a completely different tone. Process shots in grey yarn in image 4 demonstrate the ribbing technique independently of the main variegated body.
Materials & Tools
- Medium weight acrylic yarn (size 4 / 100% acrylic)
- 4.5 mm crochet hook (main body and sleeves)
- 4.0 mm crochet hook (all ribbing and seaming)
- Stitch markers
- Scissors
- Tapestry needle
Abbreviations used in this pattern: ch = chain · sc = single crochet · hdc = half double crochet · dc = double crochet · tr-dc = triple double crochet (also called treble crochet) · sl st = slip stitch · BLO = back loops only · st(s) = stitch(es) · sp = space · rep = repeat
Stitch multiple for the wavy pattern: Multiples of 14 + 2
Master Before You Start
Difficulty & Time
Beginner-friendly with patience. The label says beginner, and that’s true for the individual stitches — sc, hdc, dc, and tr-dc are all foundational. What asks for attention is the wavy stitch sequence, which cycles through those four stitch heights in a specific order across a 14-stitch repeat. Once that sequence is memorized it becomes fast and satisfying, but the first two pattern rounds take careful counting. Budget a full week of evening sessions for a men’s size sweater.
Beginner Technique Notes
The Pattern
Step 1: Body Panels (Make Two)
Bottom Ribbing (4.0 mm hook):
- Ch 10 (or more for a longer ribbing), plus 1 turning chain — 11 chains total. (Adjust the chain-10 for your preferred ribbing width.)
- Work sc into the back bumps of the foundation chain all the way across.
- Calculate your panel’s stitch count as (14 × your chosen multiples) + 2. If the result is even, subtract 1 to make it odd.
- Ch 1, turn. Work sc in the BLO across every stitch.
- Repeat the BLO sc row back and forth until the ribbing strip reaches your desired body panel width.

Main Body Pattern (Switch to 4.5 mm hook):
[PLACEHOLDER — the exact stitch-by-stitch sequence for the wavy pattern Rounds 1, 3, and 5 must be filled in from the video before publishing. The pattern uses sc, hdc, dc, and tr-dc in a specific grouping across each 14-stitch repeat. The outline below preserves the structure given in the source.]
- Round 1 (Pattern row): Ch 1 (does not count as a stitch). Work the wavy stitch sequence — sc, hdc, dc, and tr-dc in the established groupings — across the row. End with 2 sc.
- Round 2: Ch 1, turn. Skip the ch-1. Sc into every stitch across to the beginning.
- Round 3: Ch 4 (counts as first tr-dc). Skip 1 st, work a tr-dc, then continue the wavy sequence with dc, hdc, and sc.
- Round 4: Repeat Round 2 (sc across).
- Round 5: Ch 1, turn. Work the alternate wavy sequence starting with sc, hdc, dc, and tr-dc.
- Continuing: Repeat Rounds 2 and 5 alternately until the panel reaches your desired length. (The pattern uses 48 rounds total.)
Shoulder decreases:
- Beginning around round 37, place stitch markers to section off the neckline and shoulder areas.
- Work sc rows, decreasing by 2 stitches at the neckline edge on each row.
- Work approximately 6 decrease rows per shoulder side to shape the neckline slope.
- Fasten off and weave in ends.
Repeat the entire step to make the second body panel.

Step 2: Joining the Body Panels
- Lay both panels with wrong sides facing out.
- Using the 4.0 mm hook and sl sts, seam the shoulder and top edge sections together from the wrong side.
- Fasten off and weave in loose ends.
If you’re still learning how to read crochet patterns, no stress! Follow the video tutorial below and use the written pattern below as you get more comfortable!
Step 3: Sleeves (Make Two)
- Using the 4.5 mm hook, ch a multiple of 14 + 2 based on your preferred sleeve width. (Do not subtract 1 here as you do for the body ribbing — you will skip 1 ch at the end of the row instead.)
- Work the wavy stitch pattern rows back and forth, the same as the body panels.
- Repeat the pattern rounds until the sleeve reaches your desired length.
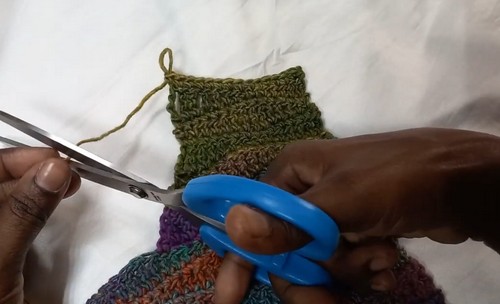
Cuff ribbing (4.0 mm hook):
- Ch 11 (or your preferred cuff width), plus 1 turning chain.
- Work sc into the back bumps of the foundation chain.
- Work BLO sc rows back and forth, sl stitching into the sleeve edge at the end of each row to attach the ribbing as you go.
- Continue until the cuff ribbing wraps the full sleeve opening.
Repeat for the second sleeve.
Step 4: Attaching the Sleeves
- With the sweater body and sleeves both inside out (wrong sides facing), align the center top of each sleeve with the shoulder seam.
- Join each sleeve to the body using sl sts and the 4.0 mm hook.
- Fold and seam the underarms and body sides from the wrong side, working down to the bottom hem.
- Flip the sweater right side out.

Step 5: Neckline Ribbing
- Turn the sweater right side out. Attach yarn at the shoulder seam using the 4.0 mm hook. Ch 1.
- Work a foundation round of sc evenly around the entire neckline opening.
- Sl st to join, then ch your desired ribbing length (e.g., 7 chains) plus 1 turning chain.
- Work BLO sc rows back and forth, sl stitching into the neckline edge stitches to anchor the ribbing as you go all the way around the collar.
- Use a tapestry needle and a long yarn tail to seam the final gap of the neckline ribbing closed neatly.
- Fasten off securely and weave in all remaining ends on the wrong side.
Tips & Troubleshooting

FAQ
1. I’ve never made a sweater before — is this pattern really beginner-friendly? The individual stitches are all standard: sc, hdc, dc, and tr-dc. What’s less familiar to a first-time sweater maker is the stitch multiple, the two-hook system, and the seaming order. None of these are difficult — they just ask for careful reading before you start. Work one body panel and check the measurements before starting the second.
2. What is a triple double crochet and how is it different from a regular dc? A standard dc uses 1 yarn-over before inserting the hook. A triple double crochet uses 3 yarn-overs, making it a much taller stitch. It’s worked the same way — yarn over and pull through 2 loops repeatedly — just with more steps. It creates the peaks in the wavy pattern.
3. Why do I subtract 1 from the stitch count for the body ribbing but not for the sleeves? The body ribbing calculation requires an odd total stitch count so the wavy pattern lines up symmetrically on both edges of the body panel. The sleeve foundation skips one chain at the end of the first row instead, which achieves the same alignment without changing the chain count. Both methods arrive at the same working stitch total.
4. How do I know where the shoulder decrease should start? The source pattern places stitch markers around round 37 out of 48. As a general guide, the decreases begin when the panel is roughly three-quarters of its total height. Hold the panel against the wearer’s torso and check where the shoulder and neckline area begins — that’s where you place your markers.
5. The ribbing is twisting as I attach it to the sleeve — what’s going wrong? This usually means the ribbing strip is twisting between rows before the sl st attaches it. Hold the strip flat and check that the same face is always towards you before each attachment sl st. If the twist is already sewn in, you’ll need to undo back to the start of the twist — unfortunately it doesn’t correct itself further along.