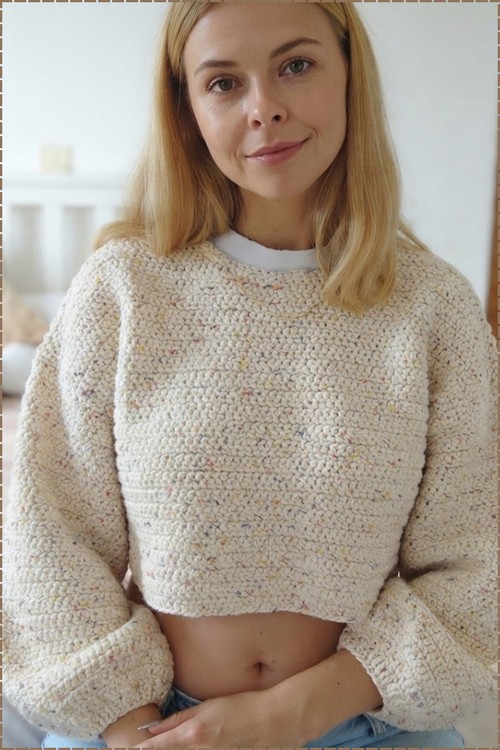
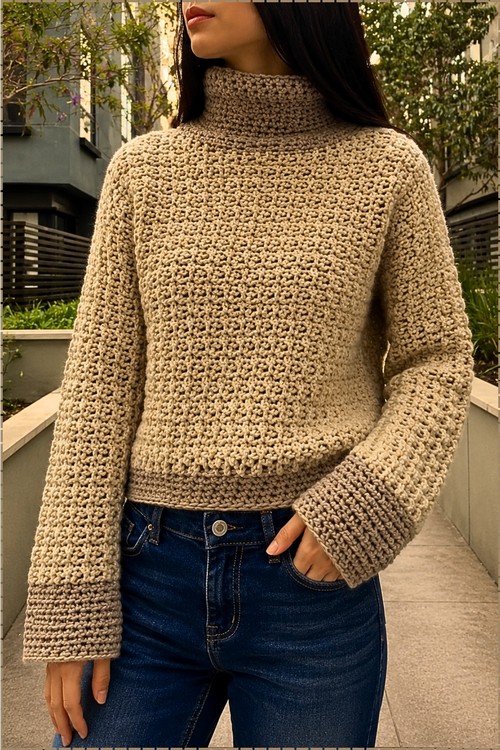
At beach towns and summer markets, a trendy crochet sweater in breathable cotton and linen looks right over a white tank and denim shorts. Holiday packing gets easier with a lightweight crochet sweater design for women that layers over sundresses and swimsuits after sunset.
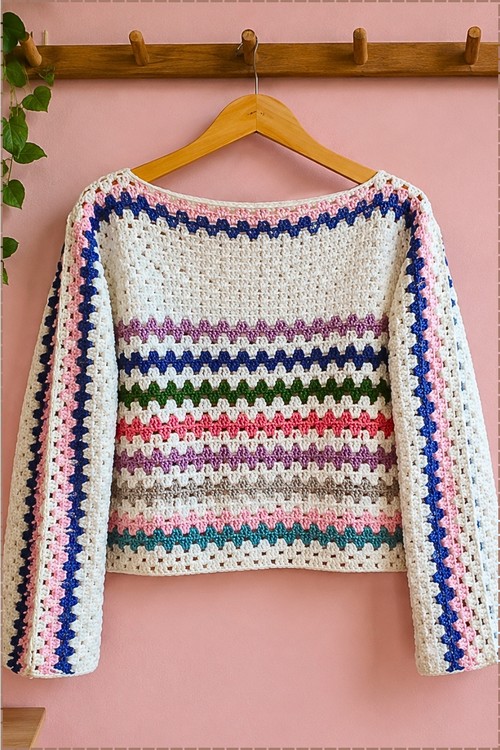
Cream forms the base and thin bands of blue, pink, green and purple break across it at uneven intervals. This trendy crochet sweater keeps the color playful without going full rainbow, and the granny stripe construction means the whole thing is one repeat you already know.
Trendy Crochet Sweater

Direction is what makes the design work. Clusters run horizontally across the body but turn vertical down each sleeve, so the same stitch reads as two different stripe patterns depending on where you look. Wide sleeves flare gently toward the wrist, the neckline stays open and unshaped, and the body stops just below the waist for a slightly cropped finish
Materials and Tools
- Scrap linen yarn, scrap cotton yarn, or any lightweight yarn in multiple colors
- The creator combined linen and 100% cotton in a repeating sequence of colors such as pink, white, and a neutral base
- Crochet hook suited to your chosen yarn weight
- Tapestry needle for weaving in ends
- Scissors
- Stitch markers to track row starts and color change positions
Get Ready with This Stitch
Difficulty and Time
- Skill level: beginner friendly with one intermediate joining technique at the assembly stage
- Stitches used: chain, single crochet, double crochet, elongated double crochet
- Construction: two flat panels, sleeves added off the sides, front joined to back as you go
- Time: varies depending on yarn weight and gauge, but the body works up quickly once the two row rhythm is established
Technique Notes
- The fantasy stitch runs on a multiple of 4 plus 3 extra chains, and that multiple controls every row. Do not adjust it mid panel or the clusters will stop lining up. The elongated double crochet is worked by inserting the hook one row lower than usual and drawing the loop up tall before completing the stitch normally. Keep that loop loose enough to match the height of the surrounding double crochets or the fabric will pull in. If you notice the elongated stitches bunching the fabric, your loop is too tight.
- Color changes happen on the final yarn over of the last stitch in a two row block, not at the beginning of the next row. Carry unused colors up the side of the work rather than cutting and rejoining every time. This keeps the edge tidy and reduces the number of ends to weave in later. The base row uses a 3 single crochets plus 1 chain space rhythm rather than a solid single crochet row, which sets up the cluster pattern that follows without any awkward adjustment on row 1.
- The live join used to attach the front panel to the back is worth practicing on a small swatch. Instead of finishing the chain space at the edge of a front panel row, you insert the hook into the corresponding space on the back panel, connect the two, and continue back across the front as normal. Done row by row, this eliminates a separate seaming step and produces a clean finish on both sides of the fabric.
The Pattern
The sample is worked in a repeating multi-color sequence, changing color every 2 rows throughout.
Stitch Multiple
- Body panel: chain a multiple of 4, then add 3 extra chains at the end
- Sleeve: chain a multiple of 4 only, no extra 3 chains added
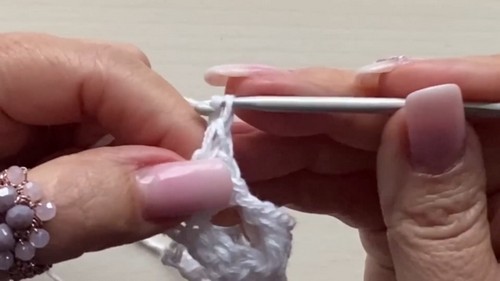
Step 1: Foundation Chain
- Make a slip knot and chain your multiple of 4
- Add 3 extra chains at the very end of that count
Step 2: Base Row
- Chain 3
- Chain 1 so the first single crochet has a secure anchor point
- Work 3 single crochets into the foundation chain
- Chain 1, skip 1 stitch in the base chain
- Repeat the sequence of 3 single crochets and 1 chain space across the row
- Finish the row with 3 single crochets
If you’re still learning how to read crochet patterns, no stress! Follow the video tutorial below and use the written pattern below as you get more comfortable!
Step 3: The Fantasy Stitch Body
Work the following two row sequence, changing color every 2 rows, until the panel reaches your desired underarm height.
Row 1:
- Chain 3 plus 1 extra chain for separation, then turn
- Skip the first 3 base stitches
- Work 3 double crochets into the next chain space
- Chain 1, skip 3 stitches
- Work 3 double crochets into the next chain space
- Repeat the chain 1 and 3 double crochet cluster sequence across the row
- End with 1 double crochet into the last stitch
- Switch to your next color on the final yarn over of this last stitch

Row 2:
- Chain 3, carrying the yarn up cleanly, then turn
- Work the first double crochet normally
- For the second stitch, insert the hook down into the center stitch of the 3 double crochet cluster from the row below, draw up a long loop to stretch it tall, and complete the elongated double crochet
- Work the third double crochet normally
- Chain 1, skip to the next cluster
- Repeat across: 1 normal double crochet, 1 elongated double crochet into the center stitch below, 1 normal double crochet
- End the row with an elongated stitch at the edge
Row 3 onward:
- Chain 3 plus 1 chain space, then turn
- Work 1 normal double crochet, 1 elongated double crochet into the center stitch below, and 1 normal double crochet into each cluster across
- Separate each cluster group with a chain 1 space
- Continue alternating colors every 2 rows until the panel reaches underarm length
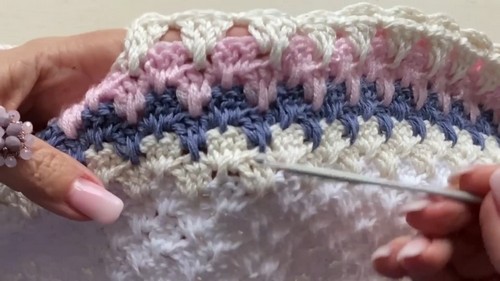
Step 4: Sleeves
- Once the body panel reaches the underarm height, attach yarn at the side edge to begin the sleeve
- Chain a multiple of 4 for the sleeve width, no extra 3 chains needed
- Work the same fantasy stitch pattern across the sleeve chain, continuing the two row color sequence
- Repeat for as many rows as needed to reach your desired arm length
- Work both sleeves to match before moving to assembly
Step 5: Neckline and Assembly
- Leave the neckline opening at the top center of the panel
- The creator worked approximately 11 open spaces for the neck gap and recommends adjusting to your own comfort
- Work the back panel completely flat following the same fantasy stitch and color sequence
- Join the front panel to the back panel as you go: at the edge of each front panel row, instead of completing a standard chain space, insert the hook into the corresponding space on the back panel, join the two panels, and continue working back across the front
- Once both panels are joined, finish the underarm openings and side seams with a round of single crochets or your preferred border stitch
- Weave in all ends

Yarn Substitution
Any smooth lightweight yarn works here provided you maintain a consistent gauge. A DK weight cotton gives a crisper stitch definition and a little more body, while a linen and cotton blend adds natural drape and keeps the fabric cool in warm weather. Avoid textured, bouclé, or fuzzy yarns completely. The elongated stitch draws its visual from the contrast between raised and seated stitches, and any surface texture on the yarn will obscure that entirely. A loosely plied yarn that splits under repeated hook insertions is also a poor choice since the elongated stitch requires going into a specific center stitch from a row below.
Customization Ideas
- Extend the body length below the underarm for a longer, hip grazing fit
- Work more sleeve rows for three quarter or full length sleeves
- Use a single color throughout for a tonal version where the texture does all the work
- Try two colors only rather than a full scrap sequence for a cleaner striped look
- Add a round of crab stitch or reverse single crochet around the neckline and cuffs for a neat edge
FAQ
- Do I need to plan my color sequence in advance? It helps but it is not required. The two row blocks are short enough that you can decide color by color as you go. If you want a specific repeating order, write it down before starting and arrange your yarn in sequence so each color change is ready without searching.
- Can I make both panels the same and skip the live join? Yes. Work both panels completely flat, then seam them together using whip stitch or single crochet on the wrong side. The live join produces a cleaner result with no visible seam ridge, but the flat seam method is easier if you are new to joining panels while working.
- How do I adjust the size? Change the number of chains in your starting chain using multiples of 4. More chains widen the panel, fewer chains narrow it. Adjust the body length by working more or fewer two row repeats before the underarm, and adjust the sleeve width and length the same way.