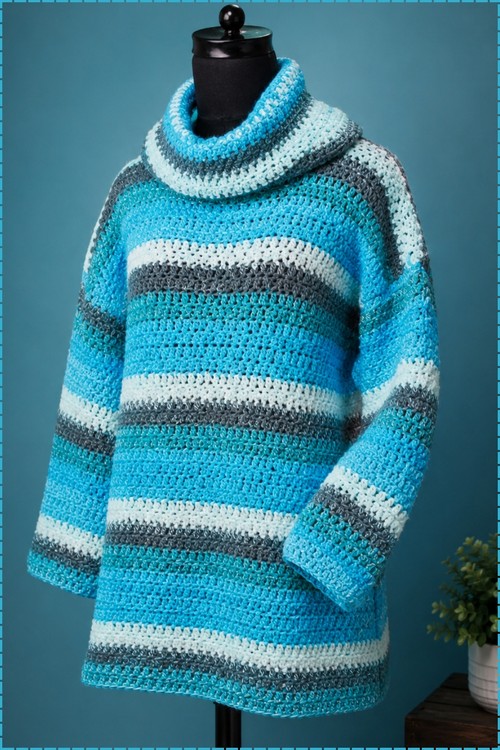
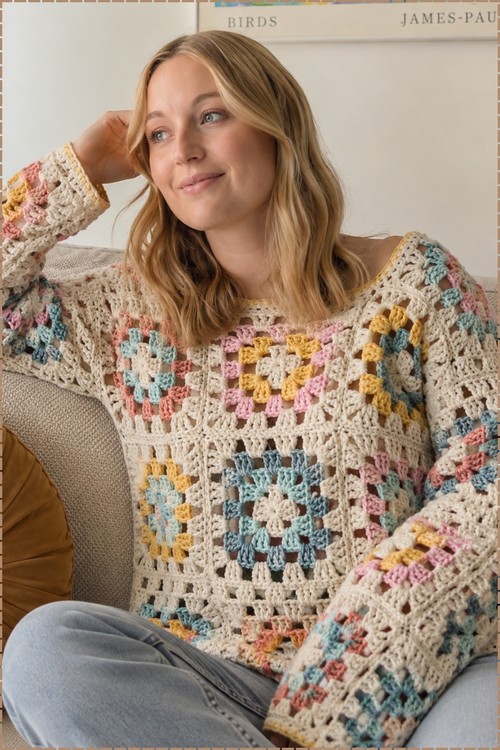
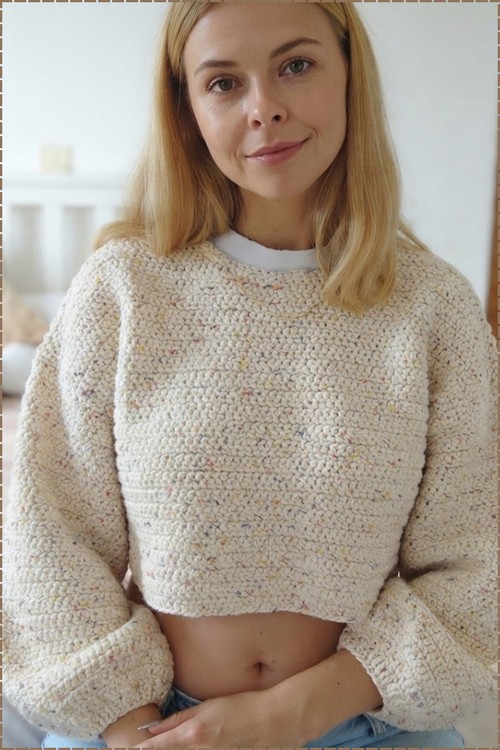
Beginners get an easy crochet sweater pattern worked in straight rows, with a notch at each shoulder corner shaping the neckline instead of decreases. Aran acrylic on a 5.5 mm hook builds the full length body, giving you a long sleeve top in place of a cropped sweater.
Plain cream would look flat here. The confetti flecks catch light differently row to row, which does most of the visual work and lets a simple stitch pattern pass for something more involved. It’s a full length crew neck pullover with balloon sleeves that taper in at the wrist, and the flecks keep the long body from reading as a blank field. Buy all your skeins from the same dye lot, though. Confetti yarn shows a lot when the fleck density shifts partway up. Same flat panel method as the crop version, with a longer body and neckline finishing added.
Long Sleeve Crochet Sweater

The body is built as two flat rectangular panels with a notch cut out at the shoulder corners to define the neckline, rather than shaping the neck through decreases. That notch approach is what keeps this accessible for beginners since you work straight rows the whole time and only adjust the shape at the very end of each panel. The crew neck ribbing is then picked up around the neckline opening and worked in the round to close it.
Materials & Tools
- 4 to 5 balls of Aran-weight acrylic yarn (Sirdar Snuggly or any Aran-weight acrylic works well)
- 5.5 mm crochet hook
- Stitch markers
- Scissors
- Tapestry needle
Key measurements to take before you start:
- Body width (across waist/torso)
- Total body height (shoulder to desired hem)
- Sleeve length (shoulder to wrist)
- Upper arm width (loosely around the upper arm)
Abbreviations used in this pattern: ch = chain · hdc = half double crochet · sc = single crochet · sl st = slip stitch · st(s) = stitch(es) · sp = space · dec = decrease · rep = repeat · FHDC = foundation half double crochet
Learn This Stitch First
Difficulty & Time
Beginner-friendly. The main stitch throughout is hdc — worked back and forth in flat rows. The only technique that may be new is the foundation HDC at the start of each panel, and the V-neck decrease sequence. Both are explained in the technique notes below. A comfortable weekend project for most makers; budget an extra session if this is your first time seaming a garment.
Beginner Technique Notes
- Foundation Half Double Crochet (FHDC): Instead of chaining a foundation row and then working back into it, this method builds the foundation chain and the first row of hdc at the same time. The result is a naturally stretchy bottom edge — no separate ribbing needed. To work one FHDC: ch 2, insert hook into the 2nd ch from hook, pull up a loop (3 loops on hook), yarn over and pull through 1 loop (this creates the chain), yarn over and pull through all 3 loops (this creates the hdc). For each subsequent FHDC, insert your hook into the single chain loop at the base of the last stitch. Repeat until you have your desired width.
- HDC decrease (hdc-dec): To decrease, work an incomplete hdc into each of the next 2 stitches (pulling up a loop in each), so you have 5 loops on the hook, then yarn over and pull through all 5 loops at once. This pulls 2 stitches together into 1 and reduces your stitch count by one.
- Skipping the first stitch: On some decrease rows, the pattern asks you to skip the very first stitch of the row before starting your work. This creates the slanted neckline edge without needing a traditional decrease at the row start — the skipped stitch effectively removes one stitch from that edge.
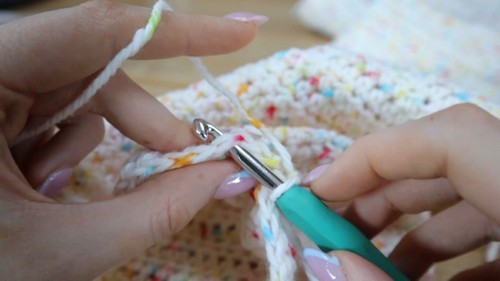
- Slip stitch seam: All seaming in this pattern is done by holding two pieces together and sl stitching through both layers at once. Work from the outside edge inward for shoulder seams, and from the hem upward for side and sleeve seams. Small, even sl sts make the neatest seams.
The Pattern
Measurements and Sizing
Take the following measurements before you start. These drive all your stitch and row counts.
- Body width: Measure across your waist or torso.
- Total body height: Measure from your shoulder to where you want the hem to sit.
- Sleeve length: Measure from the top of your shoulder down to your wrist.
- Upper arm width: Measure loosely around your upper arm.

Front Panel
Foundation and body rows:
- Make a slip knot and work a Foundation HDC chain to your desired body width. (This keeps the bottom hem stretchy without a separate ribbing band.)
- Ch 2 and turn.
- Work regular hdc into every st across the row. At the end of each row, ch 2 and turn.
- Continue repeating rows until the panel reaches your total height minus 2.5 inches. (Tutorial example: 13.5 inches / 39 rows.)
Never read a crochet pattern before? No problem! The video tutorial below is perfect for beginners, or give the written pattern below a try!
V-neck shaping:
- Divide your total stitch count by 2 and place a stitch marker at the center. Place additional markers to indicate your desired shoulder width on each side.
First shoulder side:
- Hdc across until 2 sts remain before the center marker.
- Work a hdc decrease. Ch 2, turn.
- Skip the very first st, then work a hdc decrease across the next 2 sts. Hdc to the end of the row. Ch 2, turn.
- Repeat this decrease sequence (skip first st, decrease at neckline edge) until the shoulder reaches your desired width. (Tutorial example: 6 rows of decreases total.)
- Fasten off and secure yarn.

Second shoulder side:
- Attach yarn to the other side of the neckline opening. Ch 2.
- Repeat the same decrease steps symmetrically to finish the second shoulder.
Back Panel
Foundation and body rows:
- Work the same Foundation HDC chain as the front panel to the same body width.
- Work regular hdc rows until the back panel is 1 inch shorter than your total height. (Tutorial example: 42 rows / 15 inches.)
Shoulder extensions:
- Work across the width of one shoulder only. Ch 2, turn.
- Work a total of 3 rows for this shoulder flap, then fasten off.
- Repeat the 3-row shoulder flap for the opposite shoulder, leaving the center open for the back neckline.
Assembling the Shoulders
- Place the front panel on top of the back panel with right sides aligned.
- Line up the shoulder flaps on each side.
- Insert your hook through both layers at the outer edge. Sl st across the shoulder line to join.
- Ch 1, cut yarn, and pull tight. Repeat for the second shoulder.
Sleeves (Make Two)
- Work a Foundation HDC chain to match your upper arm width.
- Ch 2 and turn.
- Work even rows of regular hdc back and forth until the sleeve reaches your desired length. (Tutorial example: 16 inches / 45 rows.)
- Fasten off. Make a second identical sleeve.
Neckline Edging
- Attach yarn to the back of the neck opening. Ch 1.
- Work 1 round of sc evenly all the way around the collar opening.
- Join with a sl st to the starting chain. Ch 1, fasten off, and secure.
Attaching the Sleeves and Seaming the Body
Attaching sleeves:
- Fold each sleeve rectangle in half lengthwise to find the exact center point. Mark it with a stitch marker.
- Align the sleeve center with the shoulder seam of the joined front/back.
- Sl st the sleeve evenly to the armhole opening on both sides of the shoulder seam.

Side and sleeve seams:
- Turn the sweater inside out.
- Starting from the bottom hem, sl st up the side of the body, around the armpit, and all the way down the underside of the sleeve to the wrist.
Wrist cuff gathering:
- Around the wrist opening, work a sl st into every 3rd stitch all the way around. This gently gathers the cuff inward, creating a soft balloon effect at the wrist.
- Ch 1, fasten off.
Finishing
- Turn the sweater right side out.
- Use your tapestry needle to weave in all remaining yarn ends securely on the wrong side.
Tips & Troubleshooting
- Work your FHDC looser than feels natural. Foundation chains tend to run tight, which makes the bottom edge of the sweater pull inward. Consciously ease your tension on the foundation row — you can always tighten it slightly in the body rows, but a tight foundation is hard to fix once you’re 20 rows in.
- Measure your panels before seaming, not just by row count. Yarn stretch and individual tension mean that 39 rows for one maker can be 14 inches for another and 13 for a third. Lay the panel flat, press lightly with your hand, and measure against a tape measure.
- Place your V-neck markers before you start the decrease rows. Once you’re mid-row it’s harder to judge center by eye than by marker. Set your center marker and shoulder-width markers before you begin the decrease sequence — it takes 30 seconds and prevents lopsided necklines.
- Seam the sleeve to the armhole before closing the side seams. The sleeve attaches to an open, flat piece — much easier than working around a closed tube. Attach both sleeves first, then close the side and underarm seams in one continuous run.
- Check the wrist gather before fastening off. The sl st into every 3rd stitch is adjustable — if you want more gather (a tighter cuff) work into every 2nd stitch; if you want less, work into every 4th. Make the decision before cutting the yarn, not after.
- Weave in ends in two different directions. Thread your tapestry needle with the tail, run it through 4–5 stitches in one direction, then turn and run back 3 stitches. This anchors the end far more securely than a single straight weave.
Yarn Substitution
Aran-weight acrylic is an excellent choice for a first garment — it’s affordable, forgiving, and easy to seam. Sirdar Snuggly is soft and consistent, making it easy to spot stitches. If substituting, choose any Aran or worsted weight yarn that works at a firm but slightly drapey tension on a 5.5 mm hook. A wool or wool-blend Aran gives more warmth and natural spring; a cotton Aran will be heavier and less stretchy but holds its shape well. Avoid anything too hairy or textured (mohair, bouclé) for a first garment — the stitches become hard to see and seaming gets messy.
Customization Ideas
- Adjust the V-neck depth by working more or fewer decrease rows — each additional pair of decrease rows deepens the V.
- Skip the wrist gather for straight, open cuffs instead of the balloon effect.
- Add a ribbed hem by replacing the FHDC foundation with a standard chain and a separate back-loop sc ribbing band at the bottom.
- Make it cropped by reducing the body height rows — stop at hip length or above for a shorter silhouette.
- Make a crew neck instead of a V-neck by skipping the decrease rows entirely on the front panel and working straight across to match the back panel height, then joining shoulders and adding a round of sc around the full neckline.
FAQ
1. What is a Foundation HDC and why does this pattern use it instead of a regular chain? A Foundation HDC builds the starting chain and the first row of hdc at the same time, creating a bottom edge that stretches in the same direction as the rest of the fabric. A traditional chain followed by a row of hdc often produces a stiffer, less stretchy bottom edge that can visually separate from the body. For a sweater meant to be pulled on and worn, the FHDC gives a much more professional finish.
2. How do I know if my tension is right before I start the panels? Make a small gauge swatch — 15–20 sts wide and 10 rows tall — then measure it flat. If your swatch is wider than expected for the stitch count, go down a hook size; if it’s narrower, go up. For this pattern, you’re measuring your body and crocheting to fit, so your gauge determines how many stitches equal your target width. Get that number right on the swatch before starting a full panel.
3. My two panels look slightly different in size after blocking — is that a problem? Small differences in panel height (within half an inch) will ease out in seaming and blocking. If the width is noticeably different, check your stitch count at the top of each panel before assembling. A single missed or added stitch early in a panel can drift across 40 rows into a visible size difference. Recount and adjust before seaming if needed.
4. Can I make the sleeves tapered instead of straight rectangles? Yes. Work the sleeve from the wrist end upward instead of from the upper arm down, starting with a narrower chain and gradually increasing (2 hdc in the same stitch) every few rows along both edges until you reach your upper arm width. This requires more counting but gives a tailored fit if that’s what you’re after.
5. The wrist gather looks uneven — some sections are tighter than others. How do I fix it? This happens when the sl sts into every 3rd stitch aren’t consistently spaced. Before you gather, count your total wrist stitches and divide by 3 to confirm that the count divides evenly. If it doesn’t divide cleanly, adjust slightly — work into every 3rd stitch for most of the round, then sneak in a couple of “every 2nd stitch” intervals to even out the spacing.