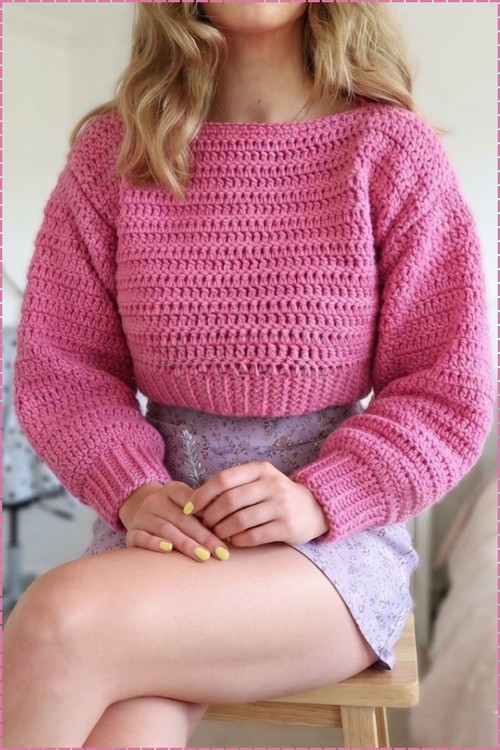
Four to five balls of chunky acrylic make up this long sleeve crop sweater for a UK size 8, worked on a 6 mm hook as simple flat rectangles. A gap left at the shoulder forms the wide boat neck, and the full balloon sleeves gather into a snug ribbed cuff.
Sweet colour, sharp neckline. Pink can tip a sweater into something too soft, and the wide boat neck is what pulls it back, sitting open across the collarbone instead of closing in at the throat. The body stops at the natural waist over a ribbed band, while the sleeves balloon through the arm and then cinch tight at the cuff. Get your cuff ribbing snug or the whole balloon shape collapses down the arm. Panel construction is the same as the cropped sweater tutorial, just with a much fuller sleeve.
Crochet Long Sleeve Crop Sweater
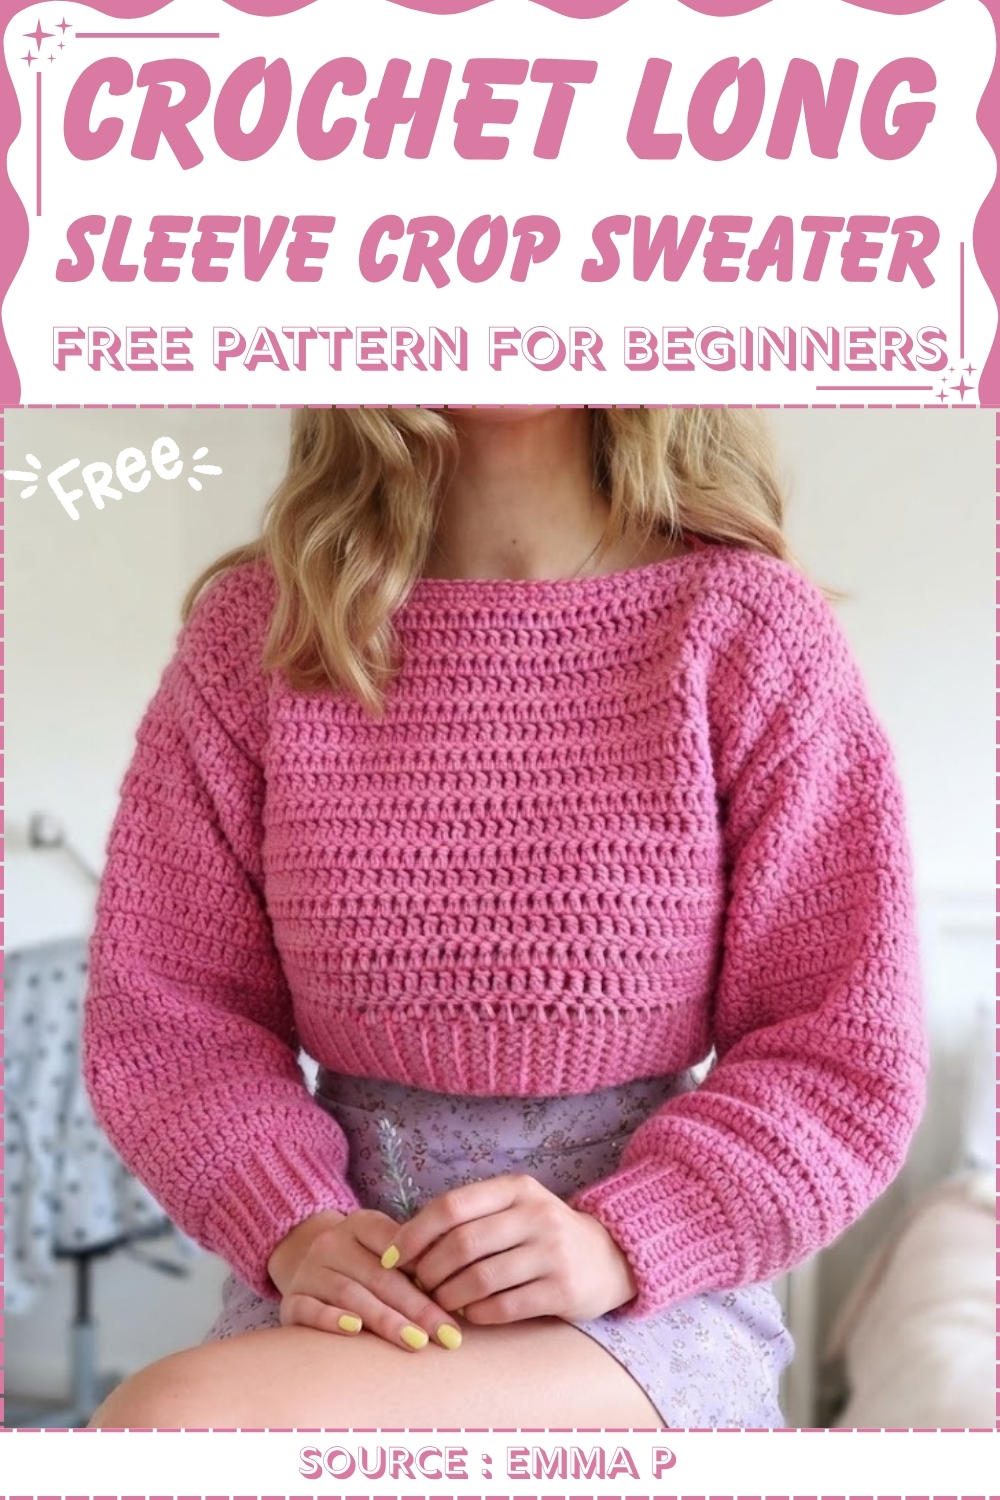
The whole thing is built from flat rectangles rather than shaped pieces, so there is no armhole curve to follow and no neckline decreasing to count. The boat neck comes from simply leaving a gap between the front and back panels at the shoulder, which is why the opening sits so wide. Sleeve volume is worked in at the widest point and then gathered into the ribbed cuff, which is where the balloon shape actually comes from.
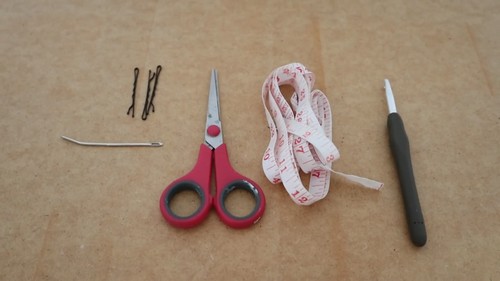
Materials & Tools
- Chunky acrylic yarn — approximately 4 to 5 balls for a UK size 8 (allow extra for larger sizes or longer lengths)
- 6 mm crochet hook
- Tape measure
- Scissors
- Stitch markers
- Tapestry needle
Abbreviations used in this pattern: ch = chain · sc = single crochet · dc = double crochet · sl st = slip stitch · FLO = front loops only · dec = decrease · st(s) = stitch(es) · sp = space · rep = repeat
Stitch Practice Before Starting
The Pattern
Sleeves (Make Two)
Sleeve ribbing:
- Make a slip knot. Ch 9, or chain to approximately 2 inches to match your wrist measurement.
- Row 1: Sc all the way to the end of the chain. Ch 1, turn.
- Following rows: Sc in the FLO across the row. Ch 1, turn at the end of each row. (Working in front loops only on every subsequent row is what creates the stretchy ribbed ridge — don’t skip this or the ribbing will look flat.)
- Repeat until the ribbing fits snugly around your wrist. (Approximately 10 inches for a UK size 8.)
Transition to double crochet:
- Ch 3 (counts as your first dc).
- Dc all the way down the row, working into the side edges of the ribbing rows. (Approximately 44 dc for the original size — adjust slightly for larger sizes.)
- Ch 1, turn.
Edge-turning method:
- At the start of each row, work 1 regular sc in the first hole, then 1 sc in the loop furthest from you for the second stitch, before starting your regular dc. (This keeps the side edges straight and prevents the common problem of fanned-out edges on dc rows.)

Increase rows:
- Increase by working 2 dc in the very first st and 2 dc in the very last st of the row.
- Continue increasing at both ends of every row until the sleeve width matches your upper arm measurement. (Approximately 14.5 inches wide, reached after about 2 increase rows.)
Straight sleeve body:
- Once you reach upper arm width, stop increasing.
- Work straight rows of dc with no increases or decreases until the sleeve reaches your desired total arm length. (Approximately 17 inches total including the ribbing.)
- Fasten off. Make a second identical sleeve.
Just starting out with crochet? The video tutorial below is a great place to begin, or challenge yourself with the written pattern below!
Main Body Panels (Make Two — Front and Back)
Bottom ribbing:
- Make a slip knot. Ch 9, or chain to approximately 2 inches.
- Row 1: Sc to the end of the chain. Ch 1, turn.
- Following rows: Sc in the FLO across. Ch 1, turn. (Same method as the sleeve ribbing.)
- Continue until the ribbing matches your waist or hip measurement. (Approximately 16 inches for the sample size.)
Main body:
- Ch 3 and work a row of straight dc across the top edge of the ribbing.
- Use the same clean edge-turning method (sc + loop-furthest-away sc) at the start of each row. (This is easy to forget after the first few rows — building it into your muscle memory now makes the body rows look much more professional at the sides.)
- Continue straight dc rows until the piece reaches the height just below the neckline. (Approximately 10 inches above the ribbing.)

Neckline shaping — front panel only:
- Fold your work in half and place a stitch marker at the exact center.
- Measure 3.5 inches out from the center marker in each direction and place two more markers — this defines a 7-inch neck opening in the middle.
First shoulder side:
- Attach yarn and work dc toward the neck marker until 2 sts remain before the marker.
- Work a dc decrease over those last 2 sts. Ch 3, turn.
- Skip the very first st and dc all the way to the outer edge.
- Repeat the decrease row and turning pattern for approximately 4 rows total, until the shoulder width measures roughly 4 inches.
- Fasten off.
Second shoulder side:
- Attach yarn at the center neck marker on the other side.
- Work a decrease immediately, then mirror the steps to complete the second shoulder.
Back panel:
- Repeat all the body steps above.
- You can adjust or shorten the neck shaping depth on the back if preferred — a shallower back neck sits higher and gives a cleaner crew neck look from behind.
Assembly and Seaming
Side seams:
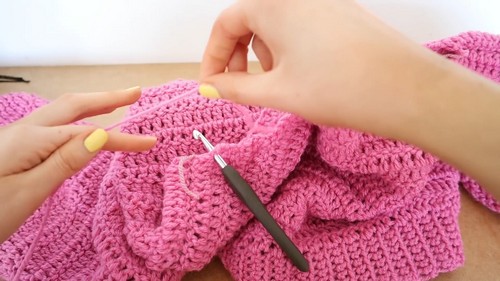
- Lay the front and back body panels together.
- Place stitch markers on each side to indicate where the armhole openings should begin.
- Join yarn at the bottom ribbing and sl st up both sides from the hem to the armhole markers.
Shoulder seams:
- Lay the front and back panels right sides together.
- Sl st across the top of the shoulders on both sides to join them.
Attaching the sleeves:
- Take the top corner of a sleeve and pin it into the armhole opening with a stitch marker, matching corner to corner.
- Join yarn and sl st all the way around the armhole opening to secure the sleeve.
- Once you complete the circle, continue straight down and sl st the sleeve seam shut from the armpit down to the cuff.
- Repeat for the second sleeve.
- Turn the sweater right side out.
Step 4: Neckline Edging
- Attach yarn at the back of the neckline.
- Ch 1, then work 1 round of sc evenly around the entire neck opening.
- Sl st into the second sc to join. Ch 1 and work a second round of sc around the collar.
- Fasten off and weave in all loose ends.
Technique Notes
- FLO ribbing only looks right when you consistently work into the front loop on every ribbing row after the first. The front loop is the one closest to you as the work faces you. If you accidentally slip into both loops on a row, that row will look flat instead of ridged — it shows clearly in chunky yarn. Check your hook placement before each stitch for the first few rows until it becomes automatic.
- The edge-turning method — sc into the first hole, then sc into the loop furthest from you — solves one of the most common problems with dc garments: fanned, wavy side edges. It’s two stitches, takes seconds, and makes a visible difference across 10 inches of body rows. Don’t skip it.
- The dc decrease at the V-neck works by starting a dc in the first stitch (pulling up a loop, yarn over, pull through 2), then immediately starting another dc in the next stitch without finishing the first. You’ll have 3 loops on the hook — yarn over and pull through all 3 to close. This draws the 2 stitches together into 1.
- Sleeve attachment is simpler than it sounds when you follow corner-to-corner placement. The top corner of the sleeve rectangle aligns with the shoulder seam. Once that single pin is in place, the sl st seam distributes the sleeve evenly across the armhole opening as you work around.
FAQ
- 1. How do I know where to place my armhole markers on the body panels? The armhole opening needs to match the total width of the sleeve top (upper arm width). Measure the top edge of your finished sleeve, then mark the same distance down each side of the joined body panels before seaming. The seam closes below that mark; everything above it stays open for the sleeve.
- 2. Can I make this longer instead of cropped? Yes — simply work more dc rows on the body panels before the neckline shaping. The construction doesn’t change at all; you’re just adding rows until the panel reaches your preferred length. Keep the stitch count the same throughout.
- 3. My ribbing looks twisted — the ridges are going in an unexpected direction. What went wrong? This usually means you accidentally worked into the back loop instead of the front loop on one or more rows. The FLO creates a horizontal ridge on the surface; if your ribbing has vertical ridges instead, check your loop placement. Unfortunately this requires unraveling to the error row — it doesn’t correct itself further along.