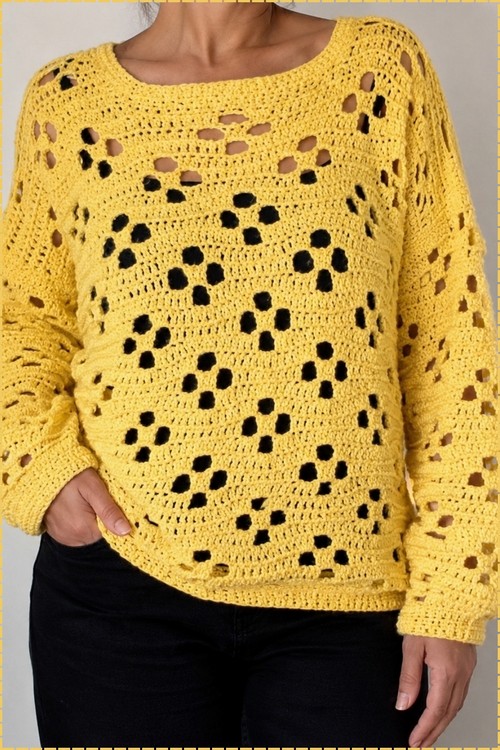
Six rows build every flower in this crochet pullover sweater. Chain gaps open first, petals grow into them, and a solid double crochet row resets the field, a rhythm that runs from the back bump foundation up to the scoop neck in about 750 meters of DK yarn.
Yellow and open lace together make this sweater feel like it belongs in late spring rather than deep winter, even though the long sleeves and scoop neck give it full coverage. The body is worked in a repeating floral eyelet motif that creates an almost spotted pattern against whatever you wear underneath, while the hem and cuffs stay solid to anchor the openwork. It has the same easy layering appeal as an open weave top but with the warmth and sleeve length of a full sweater.
Crochet Scoop Neck Sweater
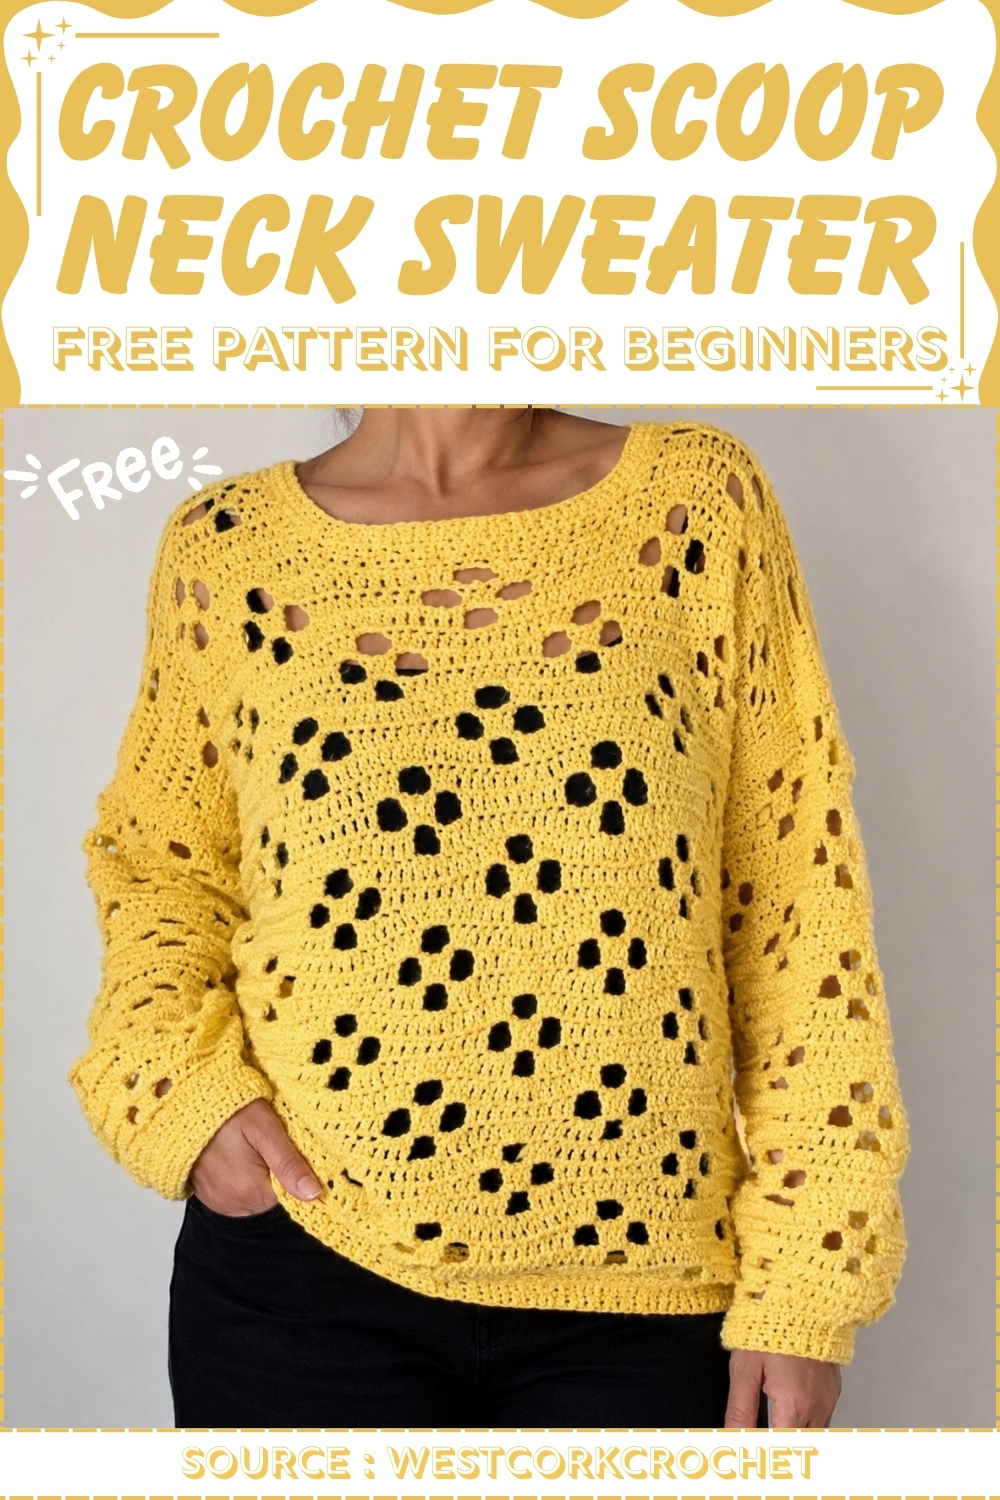
The motif repeat is consistent across both body and sleeves so once the pattern clicks in the first few rows it stays predictable all the way to the hem. A scoop neckline forms naturally from the shaping at the top of the front panel without any complicated decreasing. Working in a single bold color means all the visual interest comes from the texture of the stitches themselves.
Materials and Tools
- Approximately 750 meters of DK medium weight yarn
- A 5.0 mm crochet hook
- Tape measure
- Stitch markers
- Yarn needle
Core Stitch to Learn
Difficulty and Time
This is an intermediate-to-advanced project. The six-row flower repeat requires tracking which row you’re on and understanding how each row sets up the next — but it rewards that attention with one of the most beautiful crochet fabric patterns a DK sweater can produce. The sizing system is measurement-based (no fixed stitch count) and the sleeves, ribbing, and neckline each have their own construction stages. Budget several focused sessions.
Beginner Technique Notes
Here’s a closer look at the techniques and structure before you begin:
- Back bump foundation row: The base row of each panel is worked into the bumps on the underside of the starting chain. This gives the bottom edge the same look as the rest of the panel — important since both edges are visible.
- The 6-row flower repeat: The pattern works in sets of 6 rows. Row 1 establishes the chain-3 gaps. Row 2 grows petals into those gaps. Row 3 closes the petals. Row 4 resets to a solid field of double crochets, offset from Row 1’s pattern. Row 5 starts the next offset petal. Row 6 closes the second petal. Then Row 1 begins again, and the flowers interlace through the fabric as you build height.
- Multiple of 18 minus 1: Your foundation chain count must follow this formula. The stitch count of 53 (for example) is the result of 3 × 18 minus 1, giving 3 full pattern repeats. Calculate your own chain from your shoulder measurement using this formula.
- Scoop neck shaping: The front panel is worked 6 rows shorter than the back, creating the deeper front scoop without any decreasing — the shorter panel height is the shaping.
- Shoulder slope: Before seaming, a few decrease rows shape the shoulder stitches downward toward a target count (28 stitches in the example) for a clean, sloped shoulder seam.
- Sideway ribbing: The cuffs and bands are worked as separate strips that attach to the sweater edge row-by-row, rather than picked up directly. This gives more control over stretch and length.
The Pattern
1. Gauge and Sizing
- Body width: Measure from the outer edge of one shoulder to the other and add 20 cm (10 cm overhang on each side).
- Stitch multiple: Your starting chain count must be a multiple of 18 minus 1.
- Panel width: The back and front panels must each cover at least half of the measurement around the widest part of your upper body.
2. Back Panel Construction
Base border row
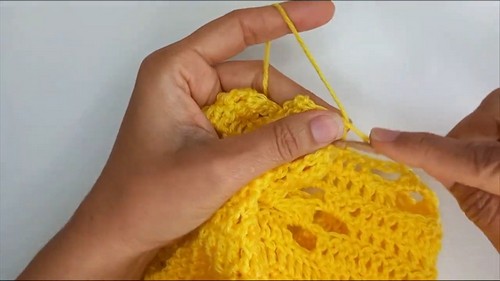
- Chain your required multiple of 18 minus 1 (for example, 53 chains for the sample size).
- Work 1 double crochet into every back bump of the chain. (This is a border row, not part of the main 6-row repeat.)
The 6-row main pattern repeat
- Row 1: Work 7 double crochets. Chain 3, skip 3 stitches. Work 15 double crochets. Repeat chain 3, skip 3, 15 double crochets across. At the end, chain 3, skip 3, and finish with 7 double crochets.
- Row 2: Work 4 double crochets. Chain 3, work 3 double crochets into the chain space (forming the first part of the petal). Chain 3, skip 3, then work 9 double crochets. Repeat chain 3, 3 double crochets in space, chain 3, skip 3, 9 double crochets across. Finish with chain 3, 3 double crochets in the space, chain 3, skip 3, and 4 double crochets.
- Row 3: Work 4 double crochets, then 3 double crochets into the chain space (7 total). Chain 3, work 3 double crochets into the next chain space. Work double crochets up to the next chain space, put 3 double crochets in the space, chain 3, then 3 double crochets in the other side of the space. Continue across and end with the last 4 double crochets (7 total).
- Row 4: Work 16 double crochets (including those in the chain space). Chain 3, skip 3. Work 15 double crochets. Repeat chain 3, skip 3, 15 double crochets across, ending with 16 double crochets.
- Row 5: Work 13 double crochets (ending 3 short of the gap). Chain 3, 3 double crochets in the gap, chain 3, skip 3. Work 9 double crochets between flowers. Repeat the petal sequence across, ending with 13 double crochets.
- Row 6: Work 16 double crochets (including 3 in the chain space). Chain 3, 3 double crochets in the next chain space. Work 15 double crochets total across the gaps, repeating chain 3, 3 double crochets in space as needed to the end of the row.
Back panel neckline (scoop neck shaping)
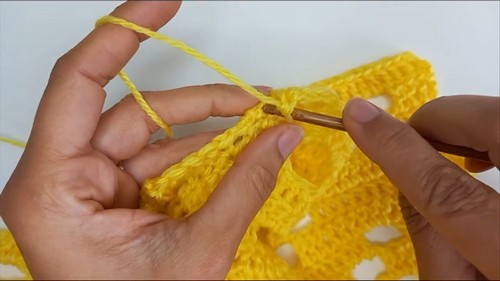
- Continue the 6-row repeat until you are 3 rows short of your full height. (31 rows total in the sample.)
- Place markers to reserve the middle third of stitches for the neck opening.
- Shoulder slope rows: Work up to 2 stitches before the marker and work those 2 stitches together as a decrease (double crochet two together). Turn, decrease the first 2 stitches together on the return row, and finish the row pattern.
- Final row: Work a solid row of double crochets across (no flower holes), working decreases at the edges to reach your target shoulder stitch count. (28 stitches in the sample.)
- Neckline clean-up: Work single crochets down the slope (2 single crochets into the side of each double crochet) and around the edges as desired.
3. Front Panel Construction
- Work identically to the back panel, but stop 6 rows short of the full back height to create a deeper scoop at the front.
- Shoulder seaming: Line up the front and back shoulders with right sides facing inward. Single crochet (or sew) across the 28 shoulder stitches.
4. Sleeves (Worked in the Round)
- Seaming: With the sweater inside out, seam each side from the bottom hem up to the armhole markers.
- Round 1: Join yarn at the underarm with a standing double crochet and work a round of double crochets evenly around the armhole opening. Ensure the total is a multiple of 18 stitches. (36 stitches per side in the sample, 72 total.)
- Rounds 2–6 (flower pattern): Work the 6-row flower repeat in the round, slipping a stitch extra when the pattern hits the seam to realign the flower gaps.
- Length: Continue the repeat until the sleeve reaches your desired length, finishing with a solid double crochet round.
Sleeve cuff ribbing
- Reduction row: Work a round of single crochets by decreasing every 2 stitches together to reduce the cuff stitches by half.
- Ribbing: Chain 6. Work 5 single crochets down the chain. Slip stitch into the next 2 stitches of the cuff edge to anchor. Turn and slip stitch back up the 5 stitches loosely, then chain 1 and single crochet back down. Repeat this slip-stitch and single-crochet ribbing method all the way around the cuff, then invisible-seam the ends together.
5. Neckline and Base Band Ribbing
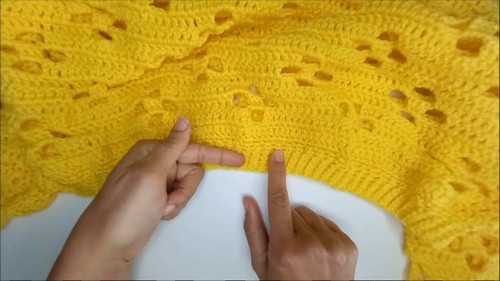
- Neckline ribbing: Work single crochets around the entire neckline. Then attach ribbing by chaining 4, working 3 single crochets in rows, and slip-stitching once into the collar edge on each return to avoid puckering.
- Base band ribbing: Work similar ribbing around the bottom hem, but slip-stitch twice into the base edge each time to pull the bottom in snugly.
Tips and Troubleshooting
- Write out which row you’re on for the first full repeat. The six-row pattern looks similar across rows — marking your progress (Row 1, Row 2…) at the start of each row until the rhythm is memorized prevents costly miscounts.
- Confirm your chain multiple before starting. The formula of multiple-of-18-minus-1 must be satisfied exactly. If your calculated chain doesn’t fit the formula, adjust by 1 or 2 stitches — this is easier to do before the foundation row than after.
- Work the sleeve pickup round in a multiple of 18. The flower repeat won’t align cleanly in the round unless the sleeve stitch count is divisible by 18 from the start. Count and adjust the pickup round before proceeding.
- Keep the slip-stitch ribbing genuinely loose. The cuff and band ribbing uses slip stitches to secure each row — tight slip stitches here will make the bands stiff and difficult to turn on each row.
- Swatch the 6-row repeat before sizing. The pattern repeat is 18 stitches wide but the visual size depends entirely on your tension and hook. A 2-repeat swatch (chain 35) shows you the flower spacing and lets you calculate exactly how many repeats your shoulder measurement needs.
Yarn Substitution
The pattern uses DK weight, which is the right call for a summer sweater — light enough to drape through the open flower gaps but substantial enough to hold the petal shapes. A smooth, plied DK in cotton, cotton-blend, or viscose will give the best stitch definition in the flower motifs. Fluffy or textured yarns obscure the chain spaces that create the petal effect. Linen or linen-blend DK is particularly beautiful here — the slight crispness makes the flowers pop more sharply than acrylic.
Customization Ideas
- Adjust the scoop depth. The front panel is 6 rows shorter than the back — work fewer rows for a shallower scoop, more rows for a deeper plunge.
- Change the sleeve length. More or fewer six-row repeats before the cuff adjusts the sleeve to your arm length.
- Skip the ribbing. A simple single crochet border at the hem, neckline, and cuffs gives a cleaner, more minimal finish.
- Widen the shoulders. Adding one more chain repeat (18 more chains) on the foundation gives a fuller shoulder span.
Frequently Asked Questions
1. Why is the stitch count a multiple of 18 minus 1? The flower repeat spans 18 stitches from center to center, and the minus-1 adjusts for the way the row starts and ends so both edges mirror each other symmetrically. Without the minus 1, the first and last sections of each row won’t match.
2. Why is the front panel 6 rows shorter than the back? The shorter front panel creates the deeper scoop neckline without any decreasing. The back reaches the full height while the front stops 6 rows short, so when seamed at the shoulders, the front naturally sits lower at the neck. It’s one of the most elegant shaping techniques in flat-panel construction.
3. How does the flower pattern interlace across rows rather than just stacking? The pattern uses a six-row cycle where the chain gaps in Rows 1 and 4 are offset by half a repeat. Row 1 puts gaps in one position; Row 4 puts them in the position between. The petals that grow into each gap are consequently alternating in position row by row, which creates the overlapping, continuous floral texture.
4. What does “slip stitch once versus twice” mean for the different ribbing sections? When you anchor the ribbing strip to the sweater edge, the number of slip stitches per anchor determines how tightly the band draws in. One slip stitch per row of ribbing (as at the neckline) keeps the edge relaxed. Two slip stitches per row (as at the hem) pulls the base band in more snugly, creating a waist effect. Changing this number is how you control how much each band cinches.
5. Can I make the sleeves in flat rows instead of in the round? Yes — work the sleeve panels flat, seam the long edges into tubes, and attach them to the armhole openings. The flower pattern works the same whether flat or in round; the only difference is that in the round you work one-direction rather than turning, which may require adjusting the row reading direction.