Over a crisp long sleeve shirt, this crochet sweater vest gives a plain outfit a warm pop of burgundy and pink. Each 4 inch square needs only four rounds, so you can finish the full set of motifs quickly before joining the panels and adding the ribbing.
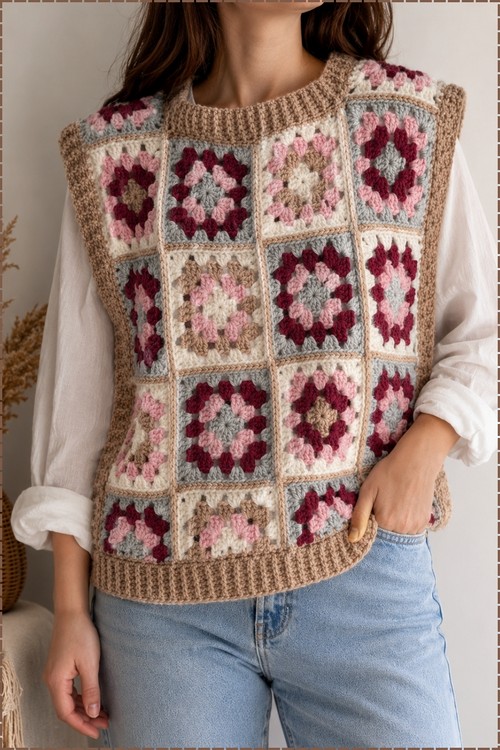
Twelve granny squares in burgundy, pink, gray, and tan arranged in a three by four grid make up the entire body of this vest, which means the hardest part is picking your color rotation and then repeating it. A tan ribbed neckline and hem border pull all the individual motifs together into something that reads as a finished garment rather than a sampler. Layered over a white long sleeve top the way it appears in the photos, it works as a granny square top with sleeves does, except here the sleeves come from whatever you wear underneath.
Square Neck Crochet Sweater
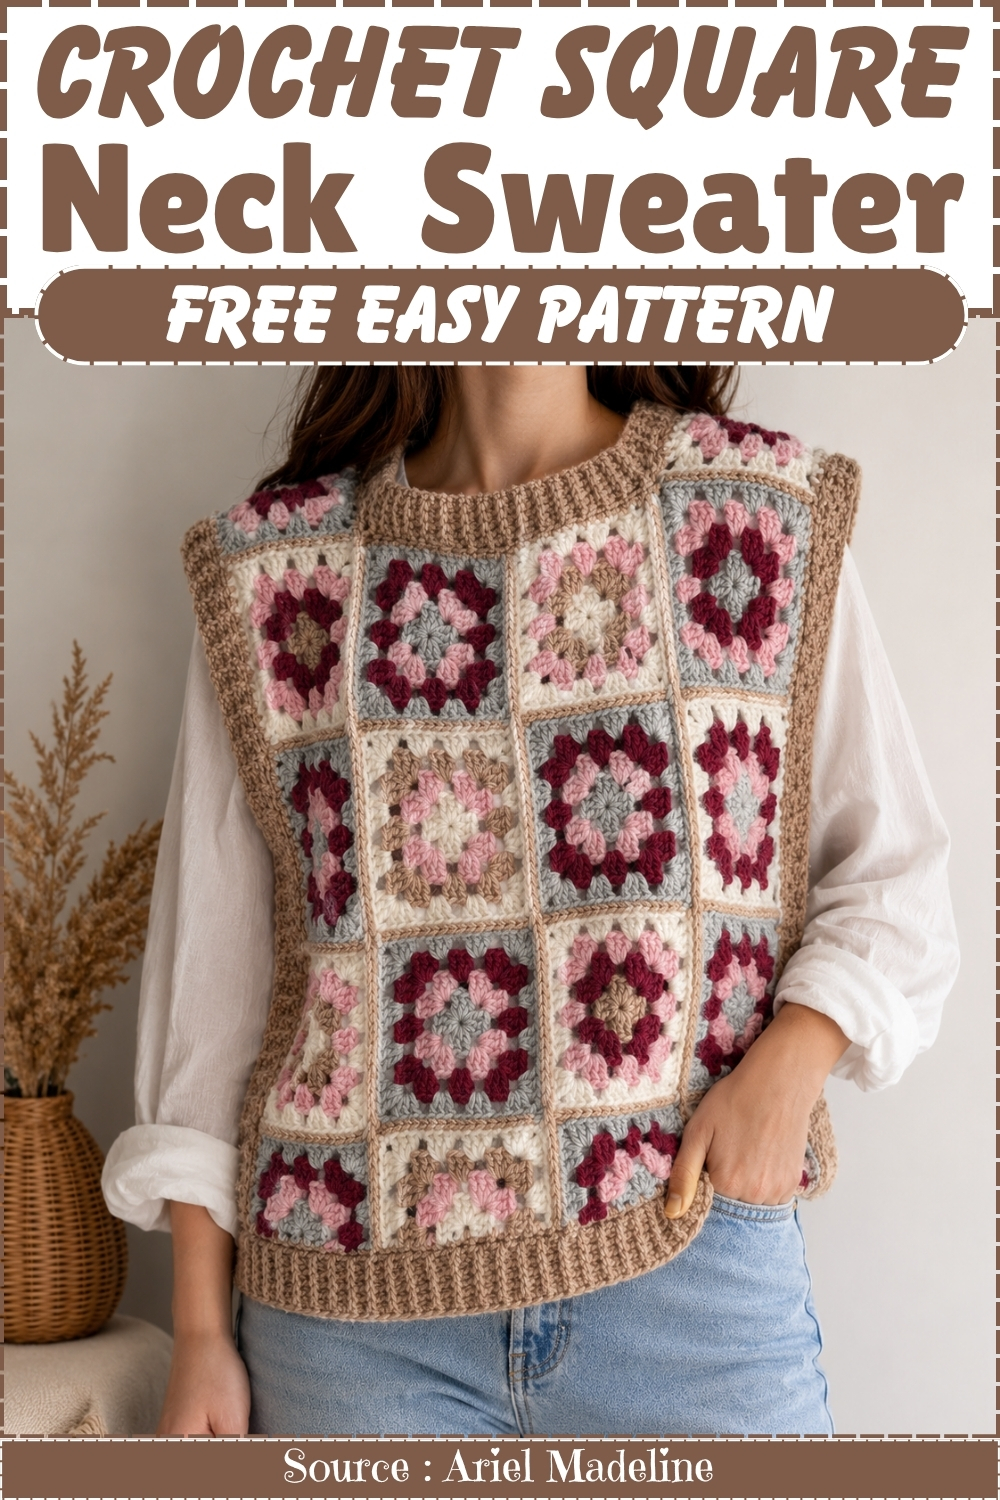
Each square is worked from the center outward and then the panels are joined before the ribbed borders go on last. The square neckline forms from the grid itself so no extra shaping is needed at the neck edge. Color placement across the twelve motifs can be randomized for a scrappy look or kept consistent for the more orderly finish shown in the photos.
Materials and Tools
- Various colors of stash yarn (3 to 4 colors per granny square)
- A size H-8 hook (or a hook matched to your chosen yarn weight)
- Scissors
- Yarn needle
Go-To Stitch to Know
Stitches and Construction (with tips as you go)
- The granny square: Each 4-inch square is worked in 4 rounds. The first round establishes the center ring; subsequent rounds add 3-double-crochet clusters at corners and sides. Each round introduces a new color if using a multi-color scheme. Tip: weave in your ends after completing each individual square rather than saving them all for the end — 38 squares accumulate a lot of tails.
- The single crochet seam: Squares are joined with wrong sides facing each other, working single crochets through both corner chains and stitch-by-stitch along the edge. Seam vertical strips first, then join the strips into panels. Tip: joining into strips before assembling panels keeps the joins tidy and consistent in direction.
- Armhole single crochet round: Before adding the ribbing, work single crochets around the armhole with a skip-1 every few stitches to cinch the raw granny square edges in slightly. Tip: this preparation round is what lets the ribbing sit flat rather than ruffling.
- BLO single crochet ribbing: All three ribbing bands (armhole, neckline, and hem) are worked as separate strips in back-loop-only single crochet, anchored to the vest edge by slip stitching at the end of each row. The width of the chain sets the band height — 3 stitches for the armhole, 5 for the neckline, 7 for the hem. The hem slips twice per anchor row to pull the bottom in slightly more snugly than the other bands. Tip: keep your slip stitches loose on the anchoring step — tight slip stitches will bunch the band.
The Pattern
Step 1: Making the Granny Squares
Make approximately 38 squares (about 4 × 4 inches each) across 5 different color combinations.
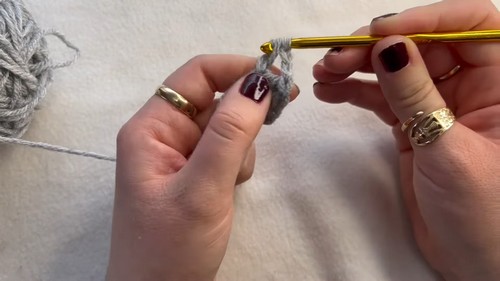
Foundation ring
- Make a slip knot.
- Chain 3.
- Slip stitch into the first chain to form a circular ring.
Round 1
- Chain 4 (counts as a double crochet plus the corner chain space).
- Work 3 double crochets into the center of the ring.
- Chain 2 for a corner.
- Repeat (3 double crochets, chain 2) two more times.
- For the final side, work 2 double crochets into the center ring — the starting chain-4 counts as the first double crochet.
- Slip stitch into the 2nd chain to close the round. Cut and secure the yarn.
Round 2 (color change)
- Attach your next color yarn to a corner space (starting in a different corner helps keep the square even).
- Chain 4, then work 3 double crochets into that same corner space.
- Chain 1, then work (3 double crochets, chain 2, 3 double crochets) in each subsequent corner space around.
- Finish the final corner with 2 double crochets and slip stitch into the 2nd chain. Fasten off.
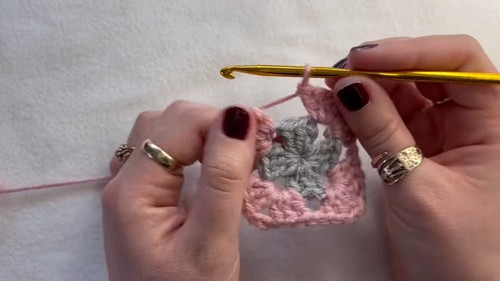
Rounds 3 and 4
- Continue following the traditional granny square pattern. Each round increases the number of 3-double-crochet clusters per side: Round 3 has 3 clusters per side; Round 4 has 4 clusters per side.
- Weave in ends as you complete each square to save time later.
Step 2: Vest Layout and Assembly
Layout
- Lay out squares for the front and back panels in a 4-by-4 grid each.
- Connect the front and back panels at the shoulders using 1 square per shoulder, and join the side seams using 2 squares per side.
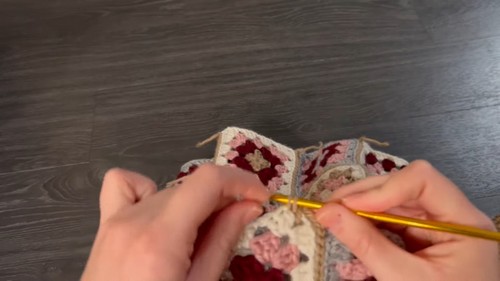
Seaming method (single crochet seam)
- Place two granny squares with wrong sides together.
- Insert your hook through the corner chains of both squares, yarn over, and pull through.
- Work single crochets through both squares stitch-by-stitch until you reach the opposite corner.
- Seam all squares into vertical strips first, then seam the strips together to form each vest panel.
Step 3: Armhole Preparation
- Attach your working yarn around the armhole opening.
- Work single crochets into the next 3 stitches (across the 3-double-crochet clusters), then skip 1 stitch to cinch and reduce the armhole gap slightly.
- Repeat all the way around and slip stitch to close the round.
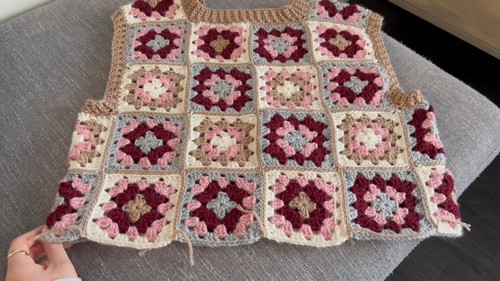
Step 4: Adding the Ribbing
Armhole ribbing (3 stitches wide)
- Chain 4, turn, skip the first chain, and single crochet in the back loop only of the next 3 chains.
- Slip stitch into the armhole base (skipping one stitch for a decrease).
- Turn, single crochet in the back loop of the 3 stitches going back up, chain 1, turn.
- Repeat this ribbed band all the way around the armhole.
Neckline ribbing
- Follow the exact same ribbing technique, but make the band 5 stitches long instead of 3 for a taller collar.
Bottom hem ribbing
- Follow the same ribbing technique, making the band 7 stitches long for the bottom hem. You can work any stray yarn ends into the stitches as you go.
Customization Ideas
- Adjust the size. More squares per row make wider panels; more rows make longer panels. Adding one extra square per row on the front and back increases the vest by approximately one square’s worth of width.
- Change the color scheme. Using a single yarn throughout gives a tonal, sophisticated look; using maximum contrast colors per square gives the most graphic, colorful effect.
- Adjust the ribbing width. Chaining more stitches for any of the three ribbing bands makes a deeper, more substantial border.
- Add length at the hem. Attaching an extra row of granny squares to the bottom of the panels before the ribbing extends the vest.
Frequently Asked Questions
1. Why are vertical strips seamed before joining the panels? Seaming in one direction first keeps all joins consistent and prevents the squares from shifting position mid-assembly. Joining strip by strip also lets you check the layout as you work rather than discovering an error after everything is assembled.
2. Why is the armhole edged with single crochet before the ribbing is added? Granny squares have irregular edges with gaps between clusters. The single-crochet round with occasional skip-stitches smooths these into a uniform surface that the ribbing can attach to cleanly. Without it, the ribbing would ripple and gap where the square seams meet.
3. Why do the three ribbing bands have different stitch widths? The armhole band is narrowest (3 stitches) because it only needs to neaten the edge and reduce the opening slightly. The neckline band is wider (5 stitches) because it sits against the skin and frames the face. The hem band is widest (7 stitches) and anchors with two slip stitches per row rather than one, which pulls it in more snugly to give the vest a cleaner, more structured bottom edge.