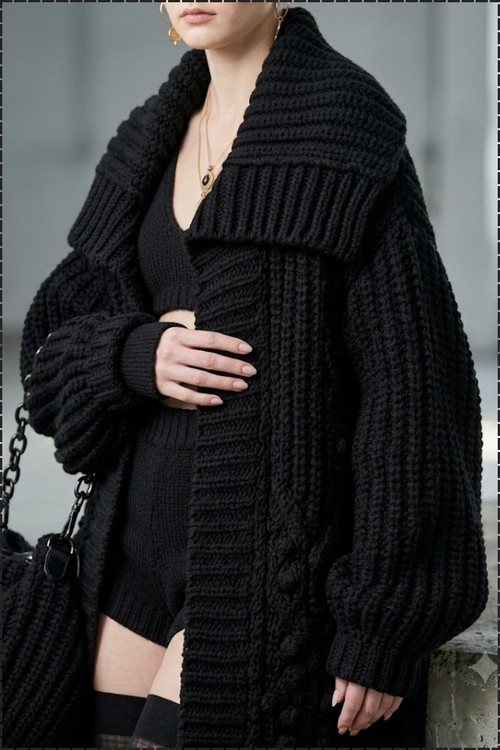
Brunch dates suit crochet button vests worn closed as a top or open over a sundress. Wooden or pearl buttons swap in for gold on the free crochet sweater vest button up pattern, which runs from S to 3XL.
Three gold buttons on a magenta vest is a combination that does not need much else around it, and this pattern leans into that by keeping the construction straightforward. The front bands are built as part of the body rather than added on separately, so the button placement comes out even without any extra finishing rows. Crocheters who want more coverage can pair this with the crochet sweater vest V neck for a back to back project in the same weight yarn.
Crochet Button Up Sweater Vest

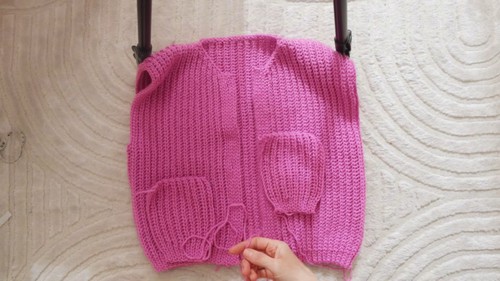
The two patch pockets sit at hip level and are worked flat then sewn on, which means you can adjust their position before committing. The body is built in two panels joined at the sides, so there is no working in the round and no shaping at the underarm beyond a simple bind off. Ribbed texture at the front bands and lower hem keeps those edges from rolling without needing a separate border step.
Materials
- Medium to chunky 100% acrylic yarn (50 grams / 100 meters per ball — the original uses Hobby Amigo)
- A 6 mm hook for the main body
- An optional 4 mm hook for a tighter armhole border
- Tapestry needle
- 3 large buttons
- Scissors
Understand the Stitch First
Two stitches run throughout:
- Closed half double crochet: Yarn over, insert hook, pull up a loop, yarn over, and pull through only the first two loops on your hook. (Not all three.) This closes the stitch neatly and creates the dense ribbed fabric.
- Back loop only (BLO): All main body stitches after Row 1 go into the back loop only of the stitch below — the loop farther from you. This is what creates the vertical ribbing.
The Pattern
1. The Back Panel
Worked sideways from one underarm across to the other.
- Foundation: Chain 39 (38 base stitches plus 1 turning chain).
- Row 1 (bottom to top): Skip the 1st chain from hook. Work 4 slip stitches in the next 4 chains (bottom ribbing). Work 34 closed half double crochet across the remaining chains. (38 stitches total.)
- Row 2 (top to bottom): Chain 1 and turn. Skip chain. Work 34 closed half double crochet in the back loop only. Switch to back loop only for the last 4 stitches and work 4 slip stitches.
- Row 3 (underarm extension / increase): Chain 1 and turn. Work 4 slip stitches in the back loop only, then 34 closed half double crochet in the back loop only. At the end of the row, chain an extra 33 chains (32 for the shoulder extension plus 1 turning chain).

- Row 4 (shoulder panel main row): Skip the 1st chain. Work 32 closed half double crochet along the new chains. Continue across the previous body section with 34 closed half double crochet in the back loop only. Finish with 4 slip stitches in the back loop only at the very bottom. (70 stitches total: 66 closed half double crochet plus 4 slip stitches.)
- Rows 5–62 (main back width): Repeat the 70-stitch sequence back and forth — 4 slip stitches in the back loop only at the bottom, 66 closed half double crochet in the back loop only across the rest — until you have 31 total shoulder ribbing ridges. (1 ribbing ridge = 2 rows.)
- Rows 63–64 (opposite underarm decrease): To mirror the beginning, work only the bottom portion: 4 slip stitches in the back loop only and 34 closed half double crochet in the back loop only. Leave the remaining 32 shoulder stitches unworked. Turn and work back down (34 closed half double crochet in the back loop only, then 4 slip stitches in the back loop only). Cut yarn.
Don’t let crochet patterns intimidate you! If you’re a beginner, the video tutorial below makes it super easy to follow along!
2. The Front Panels (Make 2)
The two front panels start exactly like the back panel but introduce step-down decreases to form the V-neck.
- Rows 1–4: Follow the exact setup as the back panel — the underarm short rows and the shoulder extension into the full 70-stitch row.
- Main shoulder rows: Work the 70-stitch rows back and forth until you have completed 10 full shoulder ribbing ridges (20 rows total).
- V-neck slanted decreases: Create the neckline slant over the next 5 ribbing ridges (10 rows). On each upward row traveling toward the neckline, leave the last 2 stitches unworked. Turn and work back down normally. Repeat this step-down decrease across the next 5 ribbing ridges.
- Leave the yarn attached on the front panels for finishing the borders.

3. Assembly
- Lay the back panel flat and place both front panels on top, aligning the bottom ribbings.
- Shoulder seams: Match the 10 shoulder ribbing ridges of the front panels to the outer 10 ribbing ridges of the back panel. Sew the shoulders together using an invisible circular whip stitch.
- Side seams: Sew the side seams closed up to the underarm extensions, leaving open spaces for the armholes.
4. The Neck and Button Border
Using the yarn left attached to the front panel:
- Clean up the V-neck edge: Work a row of slip stitches up the inside edge of the front panel. When you hit the “steps” from the neckline decreases, insert your hook into the top corner of a step and then the bottom corner of the same step, yarn under, and pull through to flatten the jagged profile. Work 2 slip stitches per ribbing ridge along the back neck collar.
- Create the buttonholes: On the opposite return pass (traveling down the front border), map button placement based on a 60-stitch edge. Work 3 slip stitches at the bottom, chain 3 skipping 3 stitches below for the first hole, work 22 slip stitches, chain 3 for the second hole, work 23 slip stitches, chain 3 for the third hole, then finish the remaining stitches.
- Complete the border trim: Turn and crochet back down, placing slip stitches into the back loop only of your previous stitches and regular slip stitches into the chain spaces. Work a total of 6 border rows (3 complete ribbing ridges). Sew buttons onto the opposite front panel to align with the buttonholes.
Optional armhole finish: Using the 4 mm hook, work one clean round of tight slip stitches around the raw armhole edges to keep the openings structurally sound.

5. The Pockets (Make 2)
- Foundation: Chain 26 using the 6 mm hook.
- Row 1: Work 4 slip stitches (bottom ribbing), 20 closed half double crochet across the center, and 1 slip stitch at the top edge.
- Row 2: Chain 1 and turn. Work 1 slip stitch in the back loop only, 20 closed half double crochet in the back loop only, and 4 slip stitches in the back loop only.
- Rows 3–18: Repeat this sequence until you have 9 total ribbing ridges.
- Attachment: Skip 2 main body ribbing ridges inward from the vest’s front border. Align the 4 slip stitches of the pocket with the bottom hem ribbing of the vest. Use a tapestry needle to stitch around the three closed sides of the pocket.

A Few Tips
- The closed HDC is the whole fabric. Work slowly through the first 4–5 rows to lock in the muscle memory — it only needs: yarn over, insert, pull up loop, yarn over, pull through 2 loops (stop there). Most errors happen at the end by accidentally pulling through all loops.
- Count your ribbing ridges, not your rows. Since 1 ridge = 2 rows, tracking ridges (31 for the back, 10 for the shoulder, 5 for the V-neck decrease) is cleaner and harder to lose count on.
- Use the step-flattening technique on the V-neck precisely. Inserting into both the top and bottom corner of each step before pulling through is what turns the jagged decrease edge into a smooth diagonal line.
Frequently Asked Questions
1. Why is the back panel 62 rows but the front panels only go to 20 rows for the shoulder before the V-neck starts? The back panel runs the full width of the garment from one underarm to the other — that’s the full 62 rows. Each front panel covers only half the back width (to the center front), so they reach 20 shoulder rows before the V-neck begins to angle toward that center. The two fronts together equal the full back width.
2. Why does the V-neck use “step-down” decreases rather than one stitch at a time? Leaving 2 stitches unworked on every second row creates larger, more defined steps — which the border pass then smooths into a diagonal line. A single-stitch-per-row decrease would make a very gradual angle that reads more as a crew neck than a V.
3. Can I skip the pockets? Yes — the pockets are fully optional. The vest construction is complete at Step 4. If you add them, placement at 2 ribbing ridges inward from the front border keeps them symmetrical and out of the way of the button band.