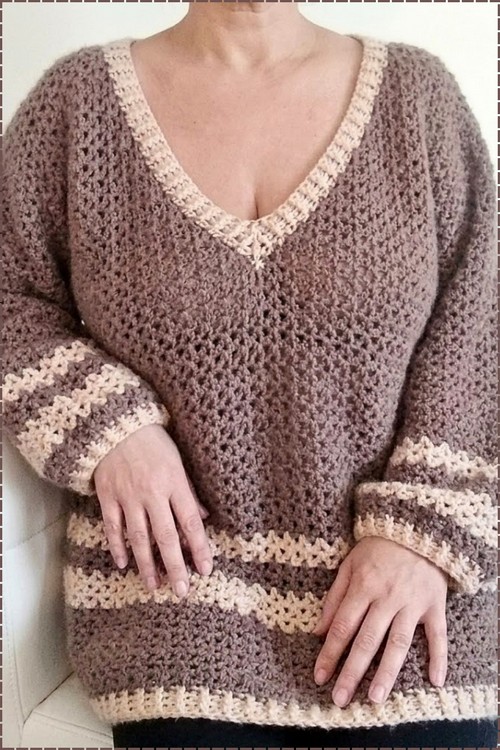
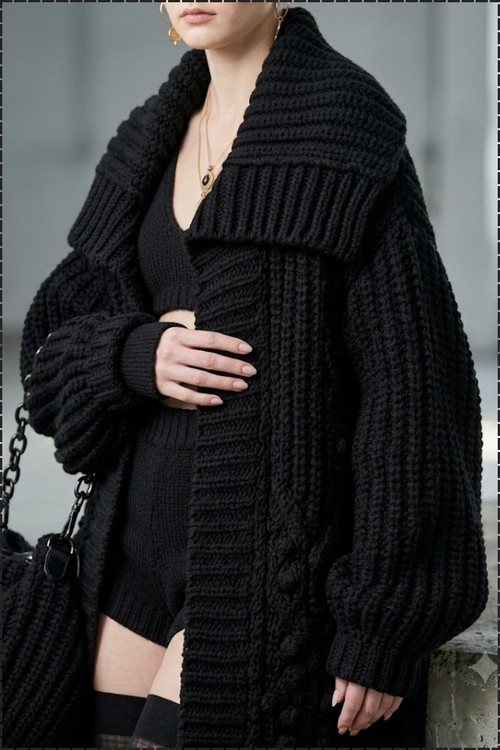
Your yellow crochet sweater vest layers over tees and turtlenecks from September to March. Beginners can follow the free sweater vest pattern crochet steps, and any solid colour you already own swaps in for the mustard.
Mustard yellow is one of those colours that photographs warm and wears even warmer, and this crew neck vest earns its place as a layering piece through simple proportions rather than any decorative detail. The body is worked in two flat panels joined at the shoulders and sides, which means there is no shaping to track while you work. Anyone who made the V neck version in grey will find this one follows the same flat panel logic but with a rounded neckline instead.
Crochet Sweater Vest

Ribbing on this vest is worked sideways and attached as a separate strip, which is what gives the hem and armhole edges those clean vertical columns. That construction also means you can block the ribbing flat before joining it, so the finished edges lie without any rolling or puckering. The crew neck sits close enough to frame a shirt collar underneath without crowding it.
Quick Facts
- Skill level: Intermediate
- Construction: Worked sideways from underarm to underarm, with shaped armholes, shoulders, and necklines
- Main stitch: Back-loop-only slip stitch (gives the fabric vertical ribbing that reads as knit)
- Size: Small (chain 27 for the base underarm-to-waist length)
- Yarn: Medium or aran weight, approximately 330 grams for a size small
- Hook: 6.0 mm
- Estimated time: Several focused sessions — the construction is methodical and the sideways shaping requires row-by-row attention
Customization Ideas (Before You Begin)
- Adjust the length. The starting chain of 27 sets the underarm-to-waist length for a size small. Chain more for a longer body, fewer for a cropped fit.
- Change the neckline depth. The back neck uses 4 decrease rows (shallow) and the front uses 8 (deeper scoop). Add or remove rows to adjust how open each neckline sits.
- Make the neck trim taller. Chain more than 5 at the start of the neck trim for a mock-neck or funnel neck instead of a standard crew.
- Adjust the shoulder chain. The 36-chain shoulder extension sets the shoulder width for a size small — adjust this count to fit a larger or smaller shoulder span.
- Change the armhole trim shape. The V-shaped armhole trim is designed to sit smoothly into the curved armpit — you can work a flat trim instead if the V construction feels too advanced.
Materials and Tools
- Medium or aran weight yarn (approximately 330 grams for a size small)
- A 6.0 mm crochet hook
- Stitch markers
- Darning needle
Key technique note: The entire body uses back-loop-only slip stitch (BLOSLST). Keep your tension as loose and even as possible throughout — especially on increase and decrease rows, where tight slip stitches make the fabric buckle.
Master Before You Start
The Pattern
The vest is built from two shaped flat panels (back and front) worked sideways from underarm to underarm, plus four separate ribbed trim strips (waist, neck, and two armholes) sewn on at assembly.
Part 1: The Back Panel
Foundation chain and base underarm section
- Create a slip knot and chain 27 for a size small. (This chain sets the length from your underarm to your waist, excluding the bottom trim. Adjust length as desired.)
- Row 1: Insert hook into the 2nd chain from your hook. Work 1 slip stitch into each chain down the row.
- Row 2: Chain 1 and turn. Work 1 back-loop-only slip stitch into each stitch across.
- Rows 3–6: Repeat Row 2 to create a straight, uniform underarm section.
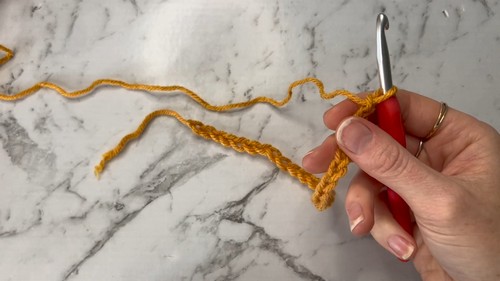
Underarm shoulder extension — increasing to frame the armpit
- Row 7 (increase row): Chain 1 and turn. Work 2 back-loop-only slip stitches into the very first stitch (keep these loose). Work 1 back-loop-only slip stitch into each remaining stitch across.
- Row 8: Chain 1 and turn. Work 1 back-loop-only slip stitch across until the very last stitch (the previous row’s increase). Work 2 back-loop-only slip stitches into that last stitch.
- Rows 9–16: Continue alternating these rows, placing one increase on the armpit side of every row for a total of 10 increase rows.
Reading crochet patterns can be tricky when you’re just starting out, feel free to follow the video tutorial below instead!
Shoulder width expansion
- At the end of your last increase row, chain 36 (or your size equivalent) to build up to your shoulder line.
- Next row: Skip the first chain from the hook. Work standard slip stitches down the new chain, then transition smoothly into back-loop-only slip stitches across the main body stitches to the bottom.
- Work 6 rows across this full length with no increases or decreases to define the shoulder width.
Back neckline shaping
- Neckline decrease row: Working from the top shoulder down, chain 1 and turn. Work a slip stitch decrease over the first two back loops: insert hook into the first back loop, pull up a loop, insert hook into the second back loop, pull up a loop, and draw that first loop through all loops on the hook.
- Continue this decrease at the neckline edge of every row for 4 rows total.
- Center back neckline: Work 6 rows straight with no increases or decreases.
- Neckline rise: Work 4 rows of increases at the neckline edge to bring the piece back up to the shoulder line height.
Second shoulder and underarm mirror
- Second shoulder: Work 6 straight rows with no adjustments to match the first shoulder.
- Underarm drop: Work 10 rows of decreases along the inside edge to angle back down to the armpit.
- Final base section: Work 6 straight rows to mirror the starting underarm section. Break yarn, leaving a long tail for seaming.

Part 2: The Front Panel
The front panel follows the exact same construction as the back panel, with one difference at the neckline:
- Follow the back panel steps for the underarm and shoulder sections exactly.
- Front neckline shaping: Instead of 4 rows, work 8 rows of decreases at the neck edge to create a deeper scoop.
- Center front neckline: Work 6 straight rows with no changes.
- Neckline rise and second half: Work 8 rows of increases at the neck edge, followed by 6 straight shoulder rows, 10 underarm decrease rows, and 6 final base rows. Leave a double-length yarn tail at the end.
Part 3: Ribbed Trims
All trims use back-loop-only single crochet to create stretchy ribbing.
Waist trim
- Chain 8 for all sizes.
- Row 1: Single crochet into the 2nd chain from the hook and each chain across. (7 single crochets total.)
- Row 2: Chain 1 and turn. Work 1 back-loop-only single crochet into each stitch across.
- Repeat Row 2 until the trim matches the total circumference of your combined front and back panels at the bottom. Leave a long tail for sewing.

Neck trim
- Chain 5 (or more if you want a taller mock-neck).
- Row 1: Single crochet into the 2nd chain from the hook and each chain across. (4 single crochets.)
- Row 2: Chain 1 and turn. Work 1 back-loop-only single crochet across.
- Repeat until the trim matches your neckline circumference, then leave a long tail.
Armhole trims (make 2)
These trims use a V-shaping technique to fit smoothly inside the curved armpit:
- Chain 2. Single crochet into the 2nd chain from the hook. (1 single crochet.)
- Chain 1 and turn. Work 2 back-loop-only single crochets into that single stitch (an increase).
- Chain 1 and turn. Work 2 back-loop-only single crochets into the first stitch, then 1 back-loop-only single crochet into the next. (3 stitches total.)
- Continue increasing at the beginning of rows until the fabric spans 5 stitches wide.
- Work straight back-loop-only single crochet rows until the trim reaches your desired armhole circumference length.
- Mirror the starting edge by working single crochet decreases row by row until you return to 1 stitch. Fasten off.
Part 4: Assembly and Sewing
Seaming the panels
- Place the front and back panels together with the right sides facing inward. Using a darning needle, sew upward along both side seams (waist to armpit) and across the narrow shoulder tabs with a mattress or whip stitch. Turn right-side out.
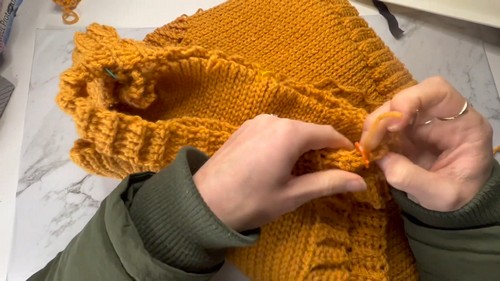
Attaching the armhole trims
- Pin the armhole trim around the opening, aligning the straight edges with the garment edge and placing the angled V-point at the bottom center of the armpit. Sew the trim securely around the opening, then stitch the two V-ends together cleanly under the arm.
Attaching the waist trim
- Use stitch markers to divide both the lower vest opening and the waist trim into quarters to ensure even stretching. Whip-stitch the trim to the bottom raw edge of the vest panels, then seam the two ends of the trim together at the side.
Attaching the neck trim
- Sew the short ends of the neck trim together first to form a closed tube. Pin it evenly around the neckline opening — it will feel slightly tighter than the opening, which helps it cinch the neck cleanly — and sew it in place.
- Weave in all loose ends inside the finished vest.

Tips and Troubleshooting
- Loosen your slip stitches deliberately. Back-loop-only slip stitches are the tightest stitch in crochet. If your fabric buckles or won’t lie flat, the fix is almost always to consciously relax your tension — work each stitch with a slightly longer pull-through than feels natural.
- Use the quarter-marking method for the waist trim. Dividing both the trim and the vest edge into quarters before sewing keeps the trim from bunching on one side or pulling on the other. This step takes 2 minutes and saves a lot of unpicking.
- Seam the neck trim into a tube before pinning. Closing the neck trim ends first (before attaching it to the vest) gives you a neater join and makes it much easier to pin the trim evenly around the opening without one end flopping loose.
Frequently Asked Questions
- 1. Why is this vest worked sideways rather than from the bottom up? Sideways construction runs the back-loop-only slip stitches vertically on the finished garment, which is what creates the knit-like ribbing effect. If it were worked bottom-up, the ribbing would run horizontally. The sideways direction is essential to the look.
- 2. My fabric looks twisted or has a seam-like ridge running down it — what happened? This is the most common slip stitch quirk: the back-loop creates a slight lean in the fabric, and if your tension varies row to row, that lean shows. The fix is to keep your tension as even as possible across the entire panel, and to turn consistently in the same direction at the end of each row.
- 3. Why is the armhole trim V-shaped instead of a simple straight strip? The armhole opening has a curved base where the body panels meet at the underarm. A straight trim strip would gap or pucker at that curve. The V-shape is worked to match the curve — widening out from a point and then narrowing back, so it sits smooth and flat inside the opening.
- 4. The neck trim feels smaller than the neck opening — is that right? Yes, intentionally. The trim is slightly shorter than the raw neckline circumference, which is what draws the neckline in when you pin and sew it. If it matched exactly, the neck would sit open and loose. The slight negative ease is what gives the neckline a fitted, finished shape.