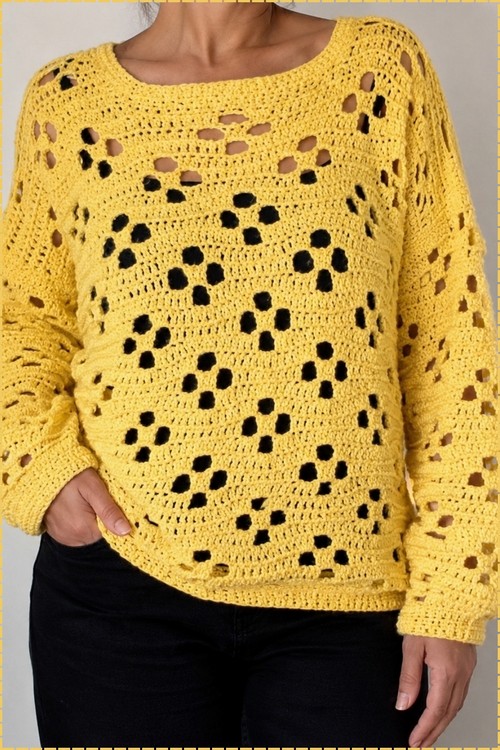
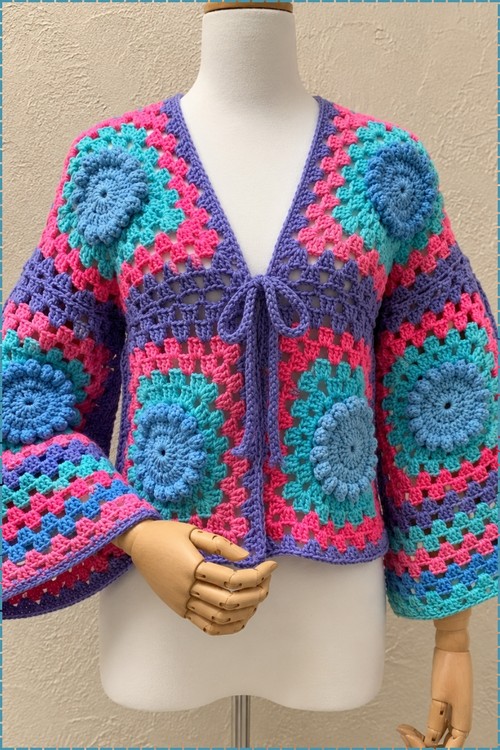
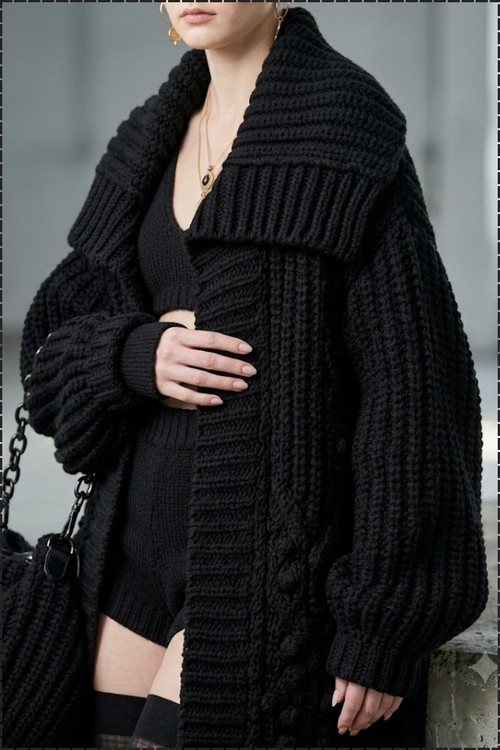
City winters meet crochet sweater coats this dramatic, and every pavement starts to feel like a runway. The oversized collar sits high enough to block the wind, and one long crochet cardigan for women layers over dresses, jumpers and wide leg trousers alike.
Folding wide across the shoulders, an oversized collar tops this free crochet sweater coat pattern for women, a long black coat worked in deep ribbed texture. Full sleeves balloon out before gathering into tall ribbed cuffs, and a column of raised bobbles runs down the front band. The open front hangs well past the hips. Choose a yarn with good drape, since this much black ribbing adds real weight at the shoulders.
Crochet Sweater Coat
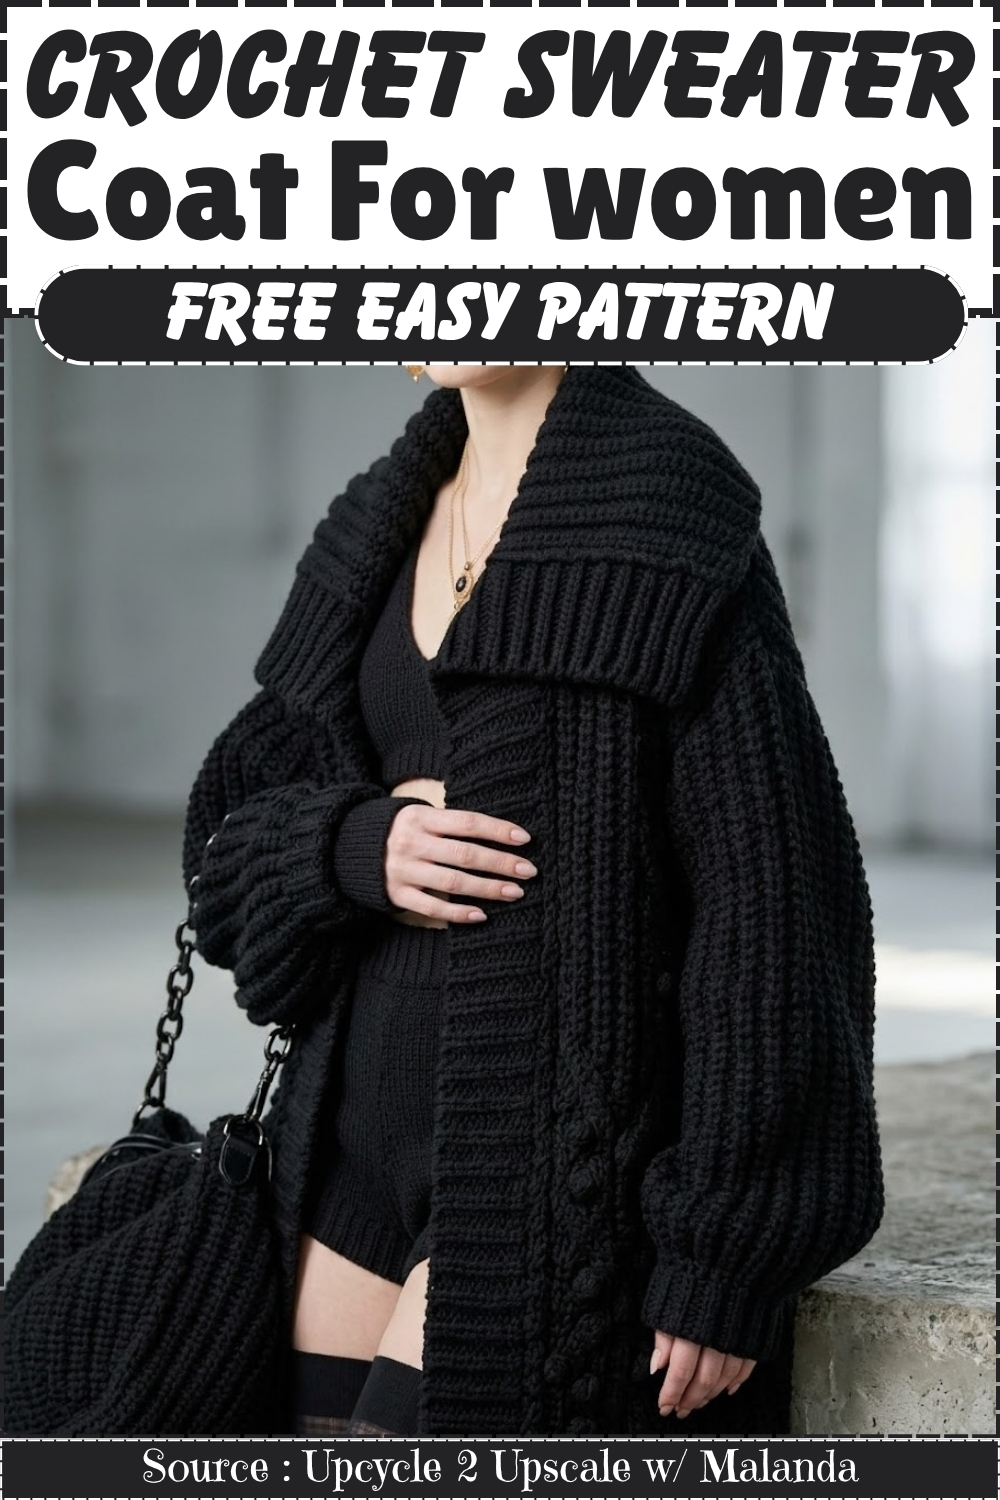
A sweater coat is the kind of project that looks runway ready in the finished photos and turns out to be almost entirely ribbing once you start working it. The shawl collar, body, and sleeves all use the same dense vertical texture, which means the stitch pattern stays consistent from cast on to bind off and the construction never changes gear. This front post and back post tutorial covers the exact technique doing all of that structural work here.
The volume comes from the sleeve construction rather than any complex shaping, with the upper arm ballooning out before tapering back to a fitted cuff. A cable panel runs down the center front between the ribbed body sections, which is the one detail that distinguishes this from a straightforward ribbed cardigan and accounts for most of the Dolce and Gabbana reference in the original tutorial title. Worked in bulky black yarn the whole piece is faster to make than its size suggests.
Materials and Tools
- 100% wool yarn in bulk — the creator used Yarn Bee Snow Story, which produces a thick, heavy coat fabric
- A 6.0 mm (J) hook for the majority of the coat
- A 5.0 mm (H) hook for tighter areas if the yarn thickness varies
- Stitch markers or pins
- Measuring tape
- Yarn needle
Important Stitch to Learn
Note on yarn: Wool is worth it here. A 100% wool yarn gives this coat real weight and warmth — the thick, heavy fabric is the whole character of the garment. An acrylic in the same weight will work but produces a noticeably lighter result.
Difficulty and Time
This is a beginner-friendly project stretched across a large-scale garment. Every piece is made in the same stitch, and there’s no complicated shaping — it’s all flat rectangles, pinned together, and seamed. The cuffs are the one section that requires a different technique (a skip-and-gather decrease followed by post-stitch ribbing), and those are explained in full below. Plan for a multi-week make — the back panel alone is 50 inches long, and working up bulk wool adds satisfying weight fast.
Beginner Technique Notes
Here’s everything you need to know before you start, explained from the ground up.
- Half double crochet (HDC): Yarn over, insert hook into the stitch, yarn over and pull up a loop (3 loops on hook), yarn over and pull through all 3 loops. This is slightly taller than a single crochet and slightly shorter than a double crochet.
- Back loop only (BLO): Every stitch has two loops at the top forming a V. The back loop is the one farther from you. Working into only the back loop leaves the front loop as a raised ridge on the surface of the fabric — and it’s those ridges, repeated across hundreds of rows, that create the ribbed texture. This is the only reason the fabric looks like a knit rib — the back loop is the whole secret.
- Chain 2 to start each row: The chain-2 at the beginning of every half double crochet row lifts the yarn to the correct height for the next row of stitches. It does not count as a stitch — your first half double crochet goes into the very first stitch of the row below. Tip: this is the most common beginner error with half double crochet — working into the chain-2 as if it’s a stitch. It isn’t. Start in the real stitch beside it.
- The back width formula: Your back panel should be wide enough to cover your shoulders comfortably with some ease. Measure shoulder-to-shoulder on a coat you like and add 5 inches. That’s your target width, and you add rows of half-double-crochet-BLO until you reach it.
- The front panel formula: Each front panel is roughly half the back panel’s width, minus space for the neck. The formula: take your back width, subtract 6 inches for the neck gap, then divide by 2. That’s the width of each front panel.
- The dynamic cuff decrease (the trickiest part): The sleeve is 20 inches wide — far too wide for a wrist. To decrease dramatically in one pass, you skip every raised ridge stitch and only place stitches into the flat valley spaces between them. This pulls the circumference in sharply. The row that follows closes the resulting gaps by placing one stitch into the flat space and one into the top loops of the ridge you previously skipped. Tip: work this row slowly and deliberately. The fabric will look gathered and slightly strange before the post-stitch ribbing rows smooth it out — trust the process.
- Front and back post double crochet: Post stitches work around the vertical body of a stitch (the post) rather than into the top loops. A front post double crochet wraps from front to back to front; a back post double crochet wraps from back to front to back. Alternating them creates the stretchy, elastic ribbing used for the cuffs. Tip: keep front post over front post and back post over back post on every ribbing row so the columns stay aligned.
- The perpendicular collar construction: Instead of picking up stitches around the neckline and working inward, the collar is built as a separate perpendicular strip. You chain outward from the neck corner (10 inches), crochet back down, and anchor the row to the neck edge with 3 slip stitches each time you return. Repeating this back-and-forth builds the collar width gradually across the entire neckline. Tip: keep your slip stitch anchors consistent — 3 per pass — so the collar attaches evenly without puckering or pulling.
- The 4-inch trim strip: The front border trim is also built perpendicularly, the same way as the collar. You chain out 4 inches from the front edge and crochet back and forth, slip-stitching into the coat body on every downward pass. The resulting attached strip gives the coat a structured, tailored front border.
The Pattern
The creator’s finished coat measurements: back panel 50 inches long by 25 inches wide, each front panel 50 inches long by approximately 9.5 inches wide, sleeves 25 inches long by 20 inches wide (flat).
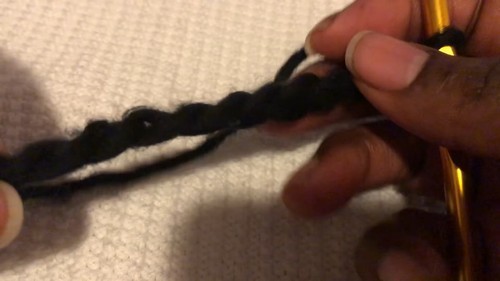
1. The Back Panel
- Foundation chain: Chain a length equal to your desired coat length (the creator uses 50 inches for a floor-length coat).
- Row 1: Chain 2. Work half double crochets all the way down the chain, starting in the 3rd loop from the hook.
- Row 2 and all following rows: Chain 2, turn, and work half double crochets in the back loop only across the entire row.
- When to stop: Repeat Row 2 until the panel reaches your target back width (shoulder-to-shoulder measurement plus 5 inches).
2. The Two Front Panels (Make 2)
- Foundation chain: Chain the exact same length as the back panel.
- Row 1: Work half double crochets down the chain, same as the back panel.
- Subsequent rows: Chain 2, turn, and work half double crochets in the back loop only.
- When to stop: Repeat until the panel reaches your calculated front width (back width minus 6 inches, divided by 2). Fasten off. Repeat to make the second front panel.
3. The Sleeves (Make 2)
- Foundation chain: Measure from the middle of your upper arm down to your wrist. Chain a length matching that measurement (the creator’s is 15 inches).
- Row 1: Work half double crochets down the chain.
- Subsequent rows: Chain 2, turn, and work half double crochets in the back loop only.
- When to stop: Continue until the sleeve width reaches 20 inches (or wider for a more generous fit).
Just starting out with crochet? The video tutorial below is a great place to begin, or challenge yourself with the written pattern below!
4. Assembly and Seaming
- Shoulders: Lay the back panel flat. Place both front panels on top of it. Pin a 6-inch gap in the exact center of the back panel for the neck opening (3 inches on either side of the center). Single crochet the front and back panels together at the shoulders up to the neck pins.
- Sides and armholes: Measure your desired armhole depth down from the shoulder seam and pin it (the creator uses 11.5 inches). Single crochet the side panels together from that pin down to the bottom hem, leaving the armhole space open.
- Sleeves: Fold each sleeve rectangle in half so the ribbed texture runs vertically up and down the arm. Single crochet the underarm seam closed. Turn the sleeve inside out and single crochet it into the armhole opening of the coat.
5. The Cuffs
The sleeve ends are 20 inches wide — the cuffs drastically reduce this to a fitted wrist using a 3-step process.
Decrease row
- Attach yarn to the sleeve opening. Chain 2.
- To dynamically decrease the diameter, skip every raised ridge stitch and place stitches only into the flat valley spaces in between. Work all the way around. This gathers the wide sleeve edge in significantly.

Gap-closing row
- Work a row of double crochets all the way around.
- To close the gaps created by the gathering, place one stitch into the flat space and the next stitch directly into the top loops of the raised ridge that was previously skipped. Alternate these two placements around the full circumference.
Post-stitch ribbing
- Chain 3. Work alternating front post double crochet and back post double crochet around the posts of the previous row.
- Repeat this alternating post ribbing for 10 total rows to build a thick, foldable cuff. Tie off.
6. The Large Folded Collar
- Attach yarn to one of the front corners of the neck opening.
- Chain out 10 inches perpendicular to the neckline (this sets the depth of the collar).
- Double crochet back down the 10-inch chain toward the neck. When you reach the neckline, secure the row to the coat body using 3 slip stitches along the raw neck edge.
- Turn your work and crochet back up the collar in the back loops only. Repeat this up-and-down process, slip-stitching into the neckline on every downward pass, until the collar covers the entire neck opening.
- Add 5 extra rows of back-loop-only double crochets across the top and bottom collar edges to widen the lapels.
7. The Outer Trim and Pockets
Front border trim
- Attach yarn to the bottom floor corner of a front panel. Chain out 4 inches. Crochet up and down in back-loop-only double crochet along the entire vertical front edge, slip-stitching into the coat body and collar on every downward pass. Repeat on the other front panel to create a uniform 4-inch border on both sides.
Pockets (Make 2)
- Chain 36. Work Row 1 in standard double crochet, then work 21 rows of back-loop-only double crochet to create a ribbed square.
- Use a yarn needle to sew both pockets onto the front panels at your preferred hand height.

Tips and Troubleshooting
- Mark your center neck point with a pin before seaming the shoulders. The 6-inch neck gap needs to be centered on the back panel — pinning 3 inches on each side of the actual center before you single crochet saves you from an off-center neckline.
- Work the dynamic cuff decrease loosely. The skip-ridge, stitch-in-valley technique gathers significant fabric at once. If your tension is too tight, the gathered stitches will be impossible to work into in the gap-closing row.
- Keep the collar slip stitches to exactly 3 per pass. More than 3 causes the collar to bunch; fewer causes it to gap. Consistency on this detail is what gives the folded collar its clean, flat appearance.
Customization Ideas
- Adjust the coat length. The foundation chain sets the length — chain shorter for a midi coat, longer for a sweeping floor-length version.
- Change the front width for more or less overlap. The front panel width formula gives a standard single-breasted front; making the panels slightly wider creates a deeper wrap-style overlap.
- Make the cuffs shorter. 10 post-stitch ribbing rows is quite a substantial cuff — stopping at 5 or 6 rows gives a shorter, simpler wrist band.
- Make the collar smaller. Chain fewer than 10 inches for the collar depth if you prefer a narrow lapel rather than an oversized fold-over collar.
- Skip the trim strips. The 4-inch front border trim is a styling choice — the coat is structurally complete without it.
Frequently Asked Questions
1. Is this pattern really suitable for a beginner? Yes, with patience. The only stitch used in the main body is half double crochet in the back loop only — you’ll repeat this action thousands of times across the panels, which means you become very good at it very quickly. The cuffs are the one section that steps up in complexity, but they’re explained step by step and happen right at the end when your skills are most confident.
2. Why does the chain-2 at the start of each row not count as a stitch? In half double crochet, a chain-2 turning chain is used for height only — it doesn’t represent a stitch the way a chain-3 does in double crochet. If you treat it as a stitch and work into it at the end of the next row, you’ll add an unintended stitch to every row and the panels will gradually widen. Always start your first half double crochet in the very first real stitch of the row below.
3. Why do I skip the ridge stitches on the decrease row for the cuffs? The raised ridges on the sleeve edge are the exposed front loops left over from working back-loop-only throughout the sleeve. Skipping these ridges and only working into the flat valley spaces between them reduces the total stitch count dramatically in one pass — which is the only way to go from a 20-inch opening to a wrist-sized one without spending dozens of decrease rows. The gap-closing row that follows evens out the result.
4. What is the difference between front post and back post double crochet in the cuff ribbing? Both stitches work around the vertical post of a stitch rather than into the top loops. The difference is the direction: a front post double crochet enters from the front, wraps behind the post, and exits from the front again. A back post double crochet does the opposite. Alternating them creates the elastic, three-dimensional rib texture that makes the cuff grippy and stretchy.
5. Why is wool recommended over acrylic for this coat? Wool has natural memory and weight that acrylic lacks. In a long heavy coat, that weight is what makes the fabric drape beautifully rather than floating. Wool also compresses slightly when worn, which fills out the ribbed texture. An acrylic in the same weight is workable but produces a noticeably lighter, less structured result — if warmth and drape are important to you, wool is worth the investment here.