Swimsuit season welcomes yellow crochet sweater tops as quick cover-ups for beach lunches and poolside drinks. Lightweight yarn keeps the long mesh airy in the heat, and a bright tank underneath shows through every opening.
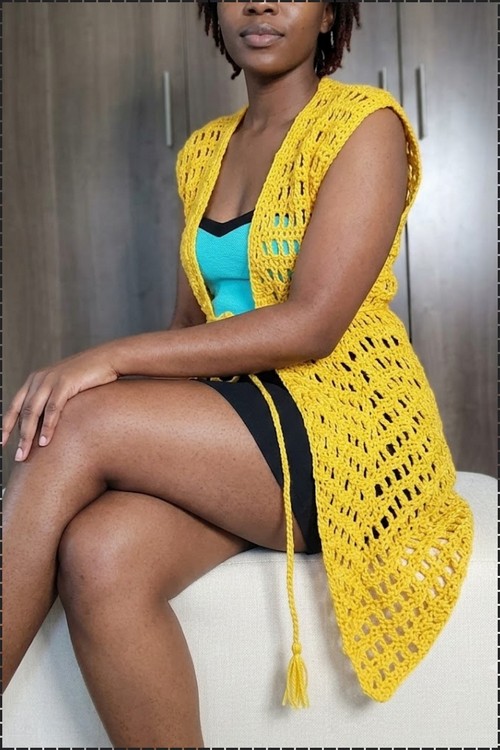
Behind the wearer, the hem drops lower than at the front in this free high low crochet sweater pattern, a sleeveless yellow vest that hangs open like a kimono. Rows of rectangular openings run through the whole body, so a bright top underneath shows through. Wide bands frame the armholes and neckline, and a single tie with a yarn tassel hangs at the waist. Block the finished piece flat, since mesh fabric curls and the uneven hem needs a clean line.
Crochet High Low Sweater
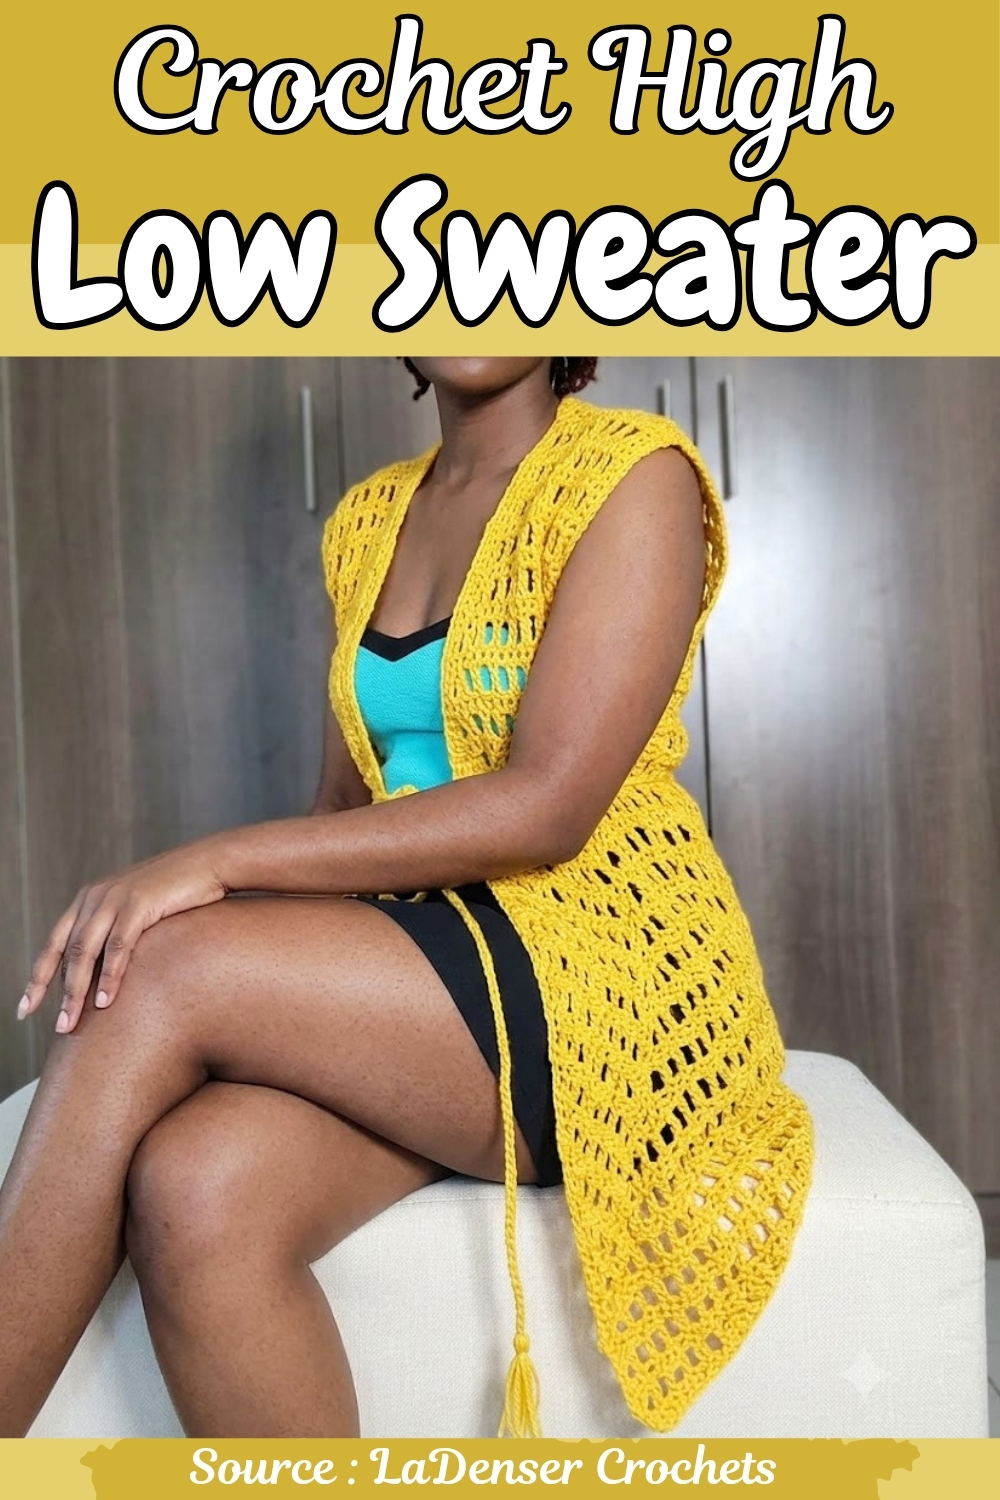
High low shaping means the front panels drop into pointed tasseled hems while the back sits shorter, creating the kind of draped silhouette that works equally well thrown over a swimsuit or a summer outfit. The yellow mesh fabric is open enough to function as a cover up but structured enough to stand alone as a vest layer. Anyone who has made the mesh wrap top will find the same v stitch logic running through this one at a longer scale.
The piece is sleeveless and open front throughout, so there are no armhole seams or button bands to manage at the end. Tassels at the front hem points finish the look without adding any technical steps beyond a basic wrap and tie. That combination of simple construction and strong visual impact makes this a useful pattern to have in rotation for beach and warm weather layering.
Materials and Tools
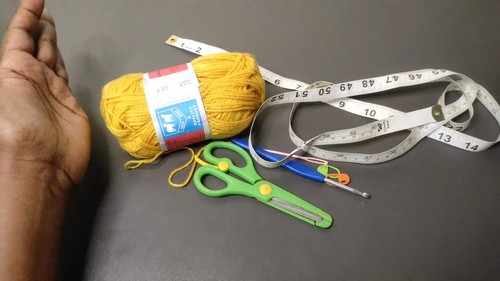
- Medium-weight yarn (acrylic or cotton — both work well in this open mesh stitch)
- A 4.0 mm hook
- Measuring tape
- Tapestry needle
- At least 2 stitch markers
- Scissors
Must-Know Stitch
Difficulty and Time
This is a solid intermediate project. The back panel is a straightforward alternating pattern (one single crochet row followed by four rows of double crochet mesh) that’s easy to settle into. The front panels add the real interest — simultaneous increases on one edge and decreases on the other, maintained through the same pattern cycle. The shaping takes focus but rewards patience with a genuinely beautiful diagonal line. Budget several relaxed sessions: the back panel is meditative, the front panels need attention, and the assembly and edging are satisfying finishes.
Beginner Technique Notes
A few things worth reviewing before you start:
- The stitch multiple: The starting chain must be a multiple of 4 plus 2. This keeps the double crochet mesh pattern distributing evenly across every row. The example used in the tutorial is 80 plus 2 chains (82 total) — but the right chain for you depends on your intended vest length.
- Chain 3 as the first double crochet: On every mesh row, the chain-3 at the start counts as the first double crochet of the row. This means you skip the stitch directly below it and begin your second double crochet in the next stitch. Counting the chain-3 as a stitch on mesh rows (and working into the top of it on the following row) is what keeps your edge counts accurate.
- Chain 1 does not count as a stitch: On the single crochet rows, the chain-1 turning chain is for height only — your first single crochet goes directly into the first stitch of the row below.
- The front panel diagonal: One edge of each front panel increases by one double crochet at the start of each row (creating extra width on the longer side). The opposite edge decreases by combining the last two stitches (creating the shorter side). Run a stitch marker along the increasing edge so you can always identify which edge gets the extra stitch.
- Mirror the front panels: The two front panels should be mirror images — if the increase edge is on the left on the first panel, it should be on the right on the second. Pay attention to the orientation before you start each panel.
The Pattern
Part 1: The Back Panel
- Starting chain: Chain in multiples of 4 plus 2 to reach your desired length. (The tutorial uses 82 chains for a vest length of approximately 18.5 inches shoulder-width when complete.)
- Row 1 (single crochet): Chain 1 (does not count as a stitch). Work 1 single crochet into each chain across. (82 single crochets for the example size.)
- Row 2 (double crochet mesh): Chain 3 (counts as the first double crochet). Skip the first stitch. Double crochet in the next stitch. Chain 2. Skip 2 stitches. Double crochet in the next 2 stitches. Repeat this sequence — chain 2, skip 2, double crochet in 2 — all the way to the end.
- Rows 3 and 4: Chain 3 and turn. Work double crochets into the double crochet stitches from the previous row and chain 2 into each chain-2 space.
- Rows 5 to 7 (continuing the repeat): Return to a single crochet row, followed by 4 rows of double crochet mesh. Continue repeating this full 5-row block (1 single crochet + 4 mesh rows) until the back panel reaches your desired shoulder width. (The tutorial works 7 complete repeats for 18.5 inches.)
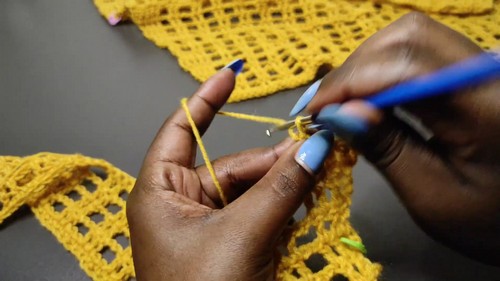
Part 2: The Front Panels (Make 2)
- Foundation: Begin with the same starting chain as the back panel. Work the first two rows identically to the back panel.
- Shaping — the diagonal: Unlike the flat back panel, the front panels use simultaneous increases and decreases on opposite edges to create the slant.
- Place a stitch marker on the edge that will be increased (the longer, lower front hem side).
- Increase rows: Chain 3, then work an extra double crochet into the very first stitch before continuing the pattern across. This adds one stitch to the increasing edge each time.
- Decrease rows: At the end of the row, combine the final two stitches into a single stitch. This removes one stitch from the opposite edge.
- Maintaining the pattern cycle: Continue following the 5-row block rhythm (single crochet rows combined with mesh rows) while consistently applying the side shaping. Keep the stitch marker at the increase edge and move it up after each row.
- When to stop: Continue until the front panels match the number of repeats and overall length of the back panel.
Reading crochet patterns can be tricky when you’re just starting out, feel free to follow the video tutorial below instead!
Part 3: Assembly and Seaming
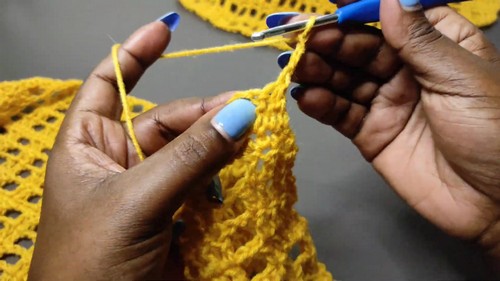
- Shoulder seams: Lay the back panel flat with the right side facing up. Position the front panels on top with the slanted edges oriented correctly (shorter edge toward the center neckline, longer hem downward). Use single crochet stitches to join the shoulder seams together.
- Sleeve openings: Measure approximately 7 to 8 inches down from the shoulder seam on each side and place a stitch marker. Seam the sides from the bottom hem upward to the stitch markers to create the armhole openings.
- Edging: Turn the kimono right-side out. Work a clean single crochet edging along the collar and shoulder openings to finish the raw edges.
Part 4: The Waist Tie (Optional)
- Strap: Create a separate chain of 200 to 250 chains using a two-strand yarn method.
- Weaving: Thread the strap through the open mesh gaps at the waistline (approximately 4 rows below the armpit) to cinch and style the kimono vest as desired.
Tips and Troubleshooting
- Mark the increase edge on the front panels immediately and move the marker up with every row. The diagonal only works correctly if increases and decreases happen consistently on the same respective edges. Losing track mid-panel produces an uneven slant rather than a clean line.
- Count your stitches at the end of every front panel row. The total stitch count on the front panels changes each row (increases by one on one end, decreases by one on the other), but the row width stays roughly constant. If your total drifts significantly in either direction, you’ve likely added or missed a shaping stitch somewhere.
- Work the chain-3 as the first double crochet — always. On every mesh row, the chain-3 counts as a stitch. Working an additional double crochet into the first stitch beside it adds an extra stitch to the edge of every mesh row and gradually widens the panels. Confirm after Row 2 that your stitch count matches your foundation.
- Make the front panels mirror images before you seam. Lay both front panels flat next to each other and confirm the increase edges are on opposite sides before joining. Seaming two panels with increases on the same side produces a mismatched diagonal.
- Cut the waist tie strand more generously than you think you need. Threading a 200-chain strap through the mesh and tying it with a bow uses more length than it looks from flat — giving yourself 25 to 30 chains of extra length means you can adjust the bow size without running short.
Yarn Substitution
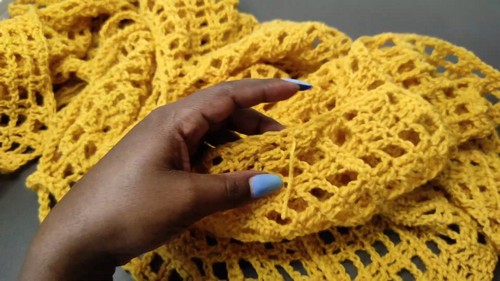
Medium-weight (Category 4) yarn is the right call for this open mesh pattern — heavier yarn closes up the chain-2 spaces and loses the breezy kimono quality, while lighter yarn can make the drape feel too insubstantial for a vest that needs some body. Within medium weight, cotton gives a crisper, more structured mesh (great for spring and summer); acrylic is lighter and softer and more forgiving to work with; a cotton-acrylic blend sits nicely between the two. Whatever you choose, swatch the mesh section and hold it up to the light — you want the chain spaces to be visibly open, not packed tightly.
Customization Ideas
- Adjust the length. The starting chain sets the vest length from shoulder to hem. More chains give a longer, more dramatic hem; fewer give a cropped kimono that sits at the hip.
- Change the shoulder width. The number of 5-row repeats sets how wide the back panel grows — more repeats produce a looser, more dropped-shoulder look; stopping earlier gives a more fitted shoulder.
- Widen the armhole. Marking 7 to 8 inches down from the shoulder gives a standard armhole. Measuring more gives a wider, more dramatic sleeve opening for a true flowy kimono look.
- Skip the waist tie. The vest is completely finished and wearable without the optional strap — wearing it open and flowing is a different but equally beautiful silhouette.
- Try a solid or variegated yarn. The open mesh shows the yarn’s character beautifully — a tonal or self-striping yarn creates an almost stained-glass effect through the chain spaces.
Frequently Asked Questions
1. What does “multiple of 4 plus 2” mean for the starting chain? It means your total chain count should be divisible by 4 with a remainder of 2 — so 82 (80 plus 2), or 62, or 102 would all work. The double crochet mesh pattern is built in groups of 4 stitches, and the plus-2 ensures the first and last stitches outside the repeat fill the edges cleanly. If you want a different length, count in fours and add 2 at the end.
2. Why do the front panels need to be mirror images of each other? The diagonal slant runs in the same direction on both front panels when laid flat — one panel has the longer hem on the left and the other has it on the right. When folded and assembled, these mirror images meet at the center front with the long hems hanging at the sides and the shorter edges forming the V-neck collar. If both panels have increases on the same side, both front hem points fall on the same side rather than forming a balanced V.
3. What happens if I skip the single crochet row in the 5-row pattern block? The single crochet row serves as a visual and structural reset between the mesh sections — it flattens the fabric slightly, creates the horizontal stripe you can see in the finished pattern, and gives each mesh section a clear starting base of solid stitches to work into. Skipping it would mean working a mesh row into a previous mesh row, which changes the alignment of the chain spaces and blurs the pattern rhythm.
4. How do I make sure the armholes are the same size on both sides? Measure 7 to 8 inches down from the shoulder seam on each side before you seam — not after. Placing stitch markers before you begin seaming means you can align both markers and confirm they’re at the same height while the piece is flat. Measuring after partially seaming one side introduces more room for error.
5. How does the two-strand method work for the waist tie? Rather than making the chain with a single strand, you hold two strands of yarn together and chain as normal. The resulting chain is thicker and more substantial, which prevents it from disappearing inside the mesh gaps when woven through the vest. It also makes the tied bow look more intentional and visible at the waist.