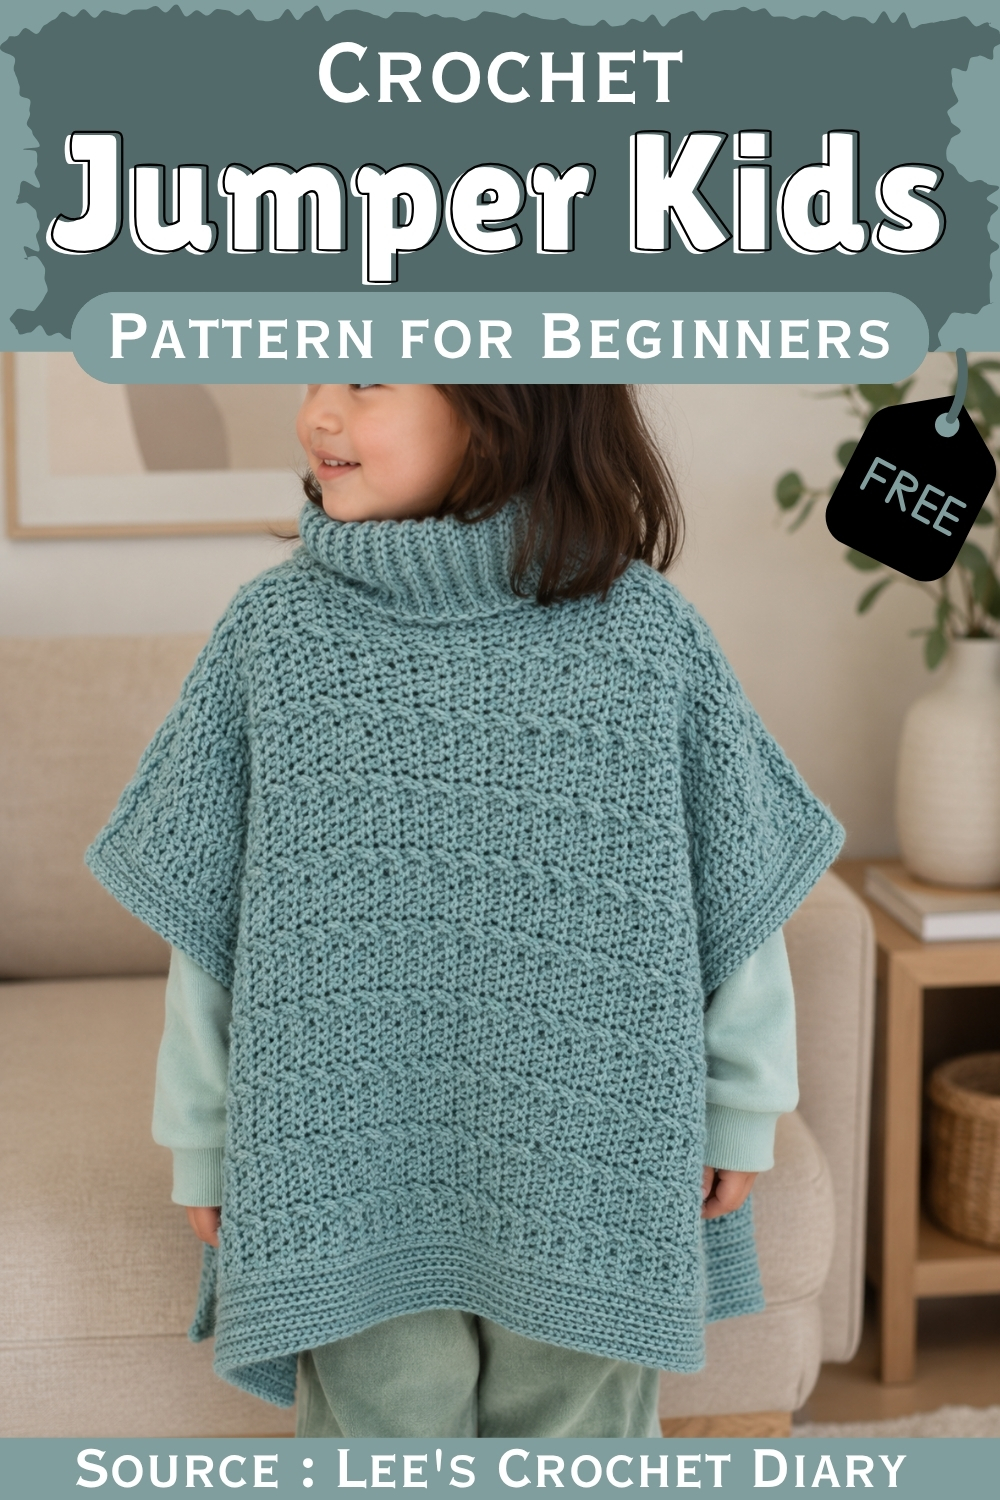
Wriggly toddlers slip crochet kids jumpers on in seconds, with no sleeves to fight at the door. The loose poncho shape leaves growing room, so one jumper for kids can last more than one winter over any long sleeve top.
Folding over into a tall ribbed collar, this free crochet jumper pattern for kids, sized for ages 2 to 4, makes a dusty teal poncho that drapes over the shoulders. Diagonal bands of raised texture run across the body, and a ribbed band trims the hem and short side slits. Arms move freely underneath, so a long sleeve top keeps them warm. Test that the neck stretches easily over the child’s head, since the collar has no opening.
Crochet Jumper For Kids
A flat cable-stitch poncho with button bands at both ends worked in one continuous piece from trim to trim, with neckline shaping built into the middle section. The cable pattern alternates a plain single crochet row with a front-post treble crochet cable row throughout, and the result looks far more technical than it is once you understand the repeat. Sized for ages 2 to 4. Good for confident beginners ready for their first textured stitch and makers who want a wearable gift that looks handmade in the best sense.
Materials and Tools
- Approximately 450 grams of 10-ply yarn (the original uses Hobbii Portobello)
- A 5 mm crochet hook
- Stitch markers
- Scissors
- Tape measure

How the Pattern Works
Before the row-by-row instructions, two things are worth understanding:
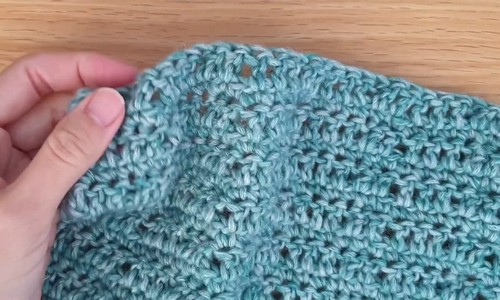
- The cable stitch sequence: Odd rows are always plain single crochet rows. Even rows are the cable rows, worked as double crochets with a front post treble crochet worked back into skipped stitches. The front post treble crochet always goes into the skipped stitches from 2 steps back, creating the cross that forms the cable. Every cable section must end with 2 double crochets before the turning chain. Tip: if your cable rows look uneven, check that you’re returning to the correct skipped stitches — the FPTR should always reach back two stitches.
- The trim edges: The back-loop-only single crochet rows of the top and bottom trims use regular single crochets (both loops) in the very first and last stitches of each row. This keeps the edges firm and clean rather than rolling. Tip: put a stitch marker in the first and last stitch of your trim rows until this becomes habit.
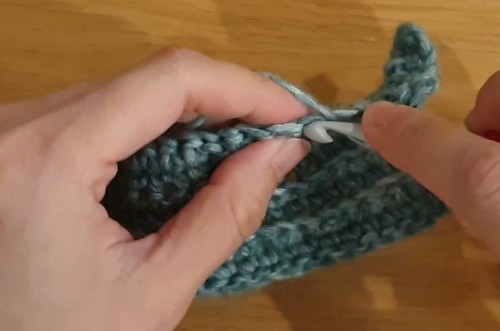
- Buttonholes: On the designated buttonhole rows (Rows 5 and 69), buttonholes are made by replacing a back-loop-only single crochet section with chain 1, skip 1. On the following row, you simply crochet into the chain space as if it were a normal stitch.
The Pattern
The poncho is worked as one long flat piece: bottom trim with buttonholes, main body panel, neckline shaping, main body panel again, top trim with buttonholes, and a final slip stitch edge. The pattern notes below use plain language throughout.
Section 1 — Bottom Trim (Rows 1–7)
- Row 1: Make a slip knot. Chain 62.
- Row 2: Turn, skip 1, single crochet across 61 stitches. Chain 1.
- Row 3: Turn, skip 1, work 61 stitches in back loop only single crochet (using regular single crochet in the first and last stitch). Chain 1.
- Row 4: Turn, skip 1, work 61 back-loop-only single crochets (regular single crochet in first and last). Chain 1.
- Row 5 (buttonholes): Turn, skip 1, back-loop-only single crochet 6, chain 1 skip 1, back-loop-only single crochet 8, chain 1 skip 1, back-loop-only single crochet 8, chain 1 skip 1, back-loop-only single crochet across the rest of the row (3 buttonholes made). Chain 1.
- Row 6: Turn, skip 1, work 61 back-loop-only single crochets (regular single crochet in first and last). Chain 1.
- Row 7: Turn, skip 1, work 61 back-loop-only single crochets (regular single crochet in first and last). Chain 1. (Bottom trim complete.)
Section 2 — Main Body Panel 1 (Rows 8–28)
- Row 8: Turn, skip 1, single crochet 61. Chain 1.
- Row 9: Turn, skip 1, single crochet 61. Chain 3.
- Row 10 (cable row): Turn, skip 3, double crochet 2. Skip 2, work 1 front post treble crochet back into the skipped stitches, double crochet 2, skip 1 (the stitch where the front post treble crochet was worked), double crochet 3. Repeat the cable section from the skip-2 point across. Row must end with 2 double crochets. Chain 1.
- Row 11: Turn, skip 1, single crochet 61. Chain 3.
- Row 12 (cable row): Repeat Row 10 exactly. Chain 1.
- Repeat Rows 11 and 12 until Row 28.
Section 3 — Neckline Shaping (Rows 29–40)
- Row 29: Turn, skip 1. (Note: the original creator did not record the opening action for this row.) Single crochet 57. Chain 3.
- Row 30 (cable row): Turn, skip 3, double crochet 4. Skip 2, work 1 front post treble crochet back into the skipped stitches, double crochet 2, skip 1, double crochet 3. Repeat the cable from the skip-2 point across. End with 2 double crochets. Chain 1.
- Row 31: Turn, skip 1, single crochet 56. Chain 3.
- Row 32 (cable row): Turn, skip 3, double crochet 2. Skip 2, front post treble crochet into skipped stitches, double crochet 2, skip 1, double crochet 3. Repeat. End with 2 double crochets. Chain 1.
- Row 33: Turn, skip 1, single crochet 56. Chain 3.
- Row 34 (cable row): Turn, skip 3, double crochet 2. Skip 2, front post treble crochet into skipped stitches, double crochet 2, skip 1, double crochet 3. Repeat. End with 2 double crochets.
- Repeat Rows 33 and 34 until Row 40.
Section 4 — Neckline Continues (Rows 41–44)
- Row 41: Turn, skip 1, single crochet 56. Chain 4.
- Row 42 (cable row): Turn, skip 3, double crochet 3. Skip 2, front post treble crochet into skipped stitches, double crochet 2, skip 1, double crochet 3. Repeat. End with 2 double crochets. Chain 1.
- Row 43: Turn, skip 1, single crochet 57. Chain 7.
- Row 44 (cable row): Turn, skip 3, double crochet 7. Skip 2, front post treble crochet into skipped stitches, double crochet 2, skip 1, double crochet 3. Repeat. End with 2 double crochets. Chain 1. (Neckline shaping complete.)
Section 5 — Main Body Panel 2 (Rows 45–64)
- Row 45: Turn, skip 1, single crochet 61. Chain 3.
- Row 46 (cable row): Turn, skip 3, double crochet 2. Skip 2, front post treble crochet into skipped stitches, double crochet 2, skip 1, double crochet 3. Repeat. End with 2 double crochets. Chain 1.
- Repeat Rows 45 and 46 until Row 64.
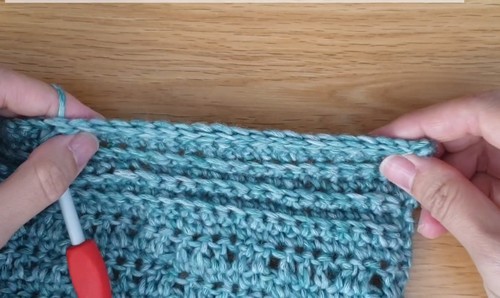
Section 6 — Top Trim (Rows 65–72)
- Row 65: Turn, skip 1, single crochet 61. Chain 1. (Top trim begins.)
- Row 66: Turn, skip 1, single crochet 61. Chain 1.
- Row 67: Turn, skip 1, work 61 back-loop-only single crochets (regular single crochet in first and last). Chain 1.
- Row 68: Continue the back-loop-only single crochet pattern.
- Row 69 (buttonholes): Turn, skip 1, back-loop-only single crochet 6, chain 1 skip 1, back-loop-only single crochet 8, chain 1 skip 1, back-loop-only single crochet 8, chain 1 skip 1, back-loop-only single crochet across the rest of the row (3 buttonholes made). Chain 1.
- Row 70: Turn, skip 1, work 61 back-loop-only single crochets (regular single crochet in first and last). Chain 1.
- Row 71: Turn, skip 1, work 61 back-loop-only single crochets (regular single crochet in first and last). Chain 1.
- Row 72: Turn, skip 1, work 61 slip stitches across — not too tight. (Top trim complete.) Fasten off or leave with a stitch marker.

Yarn Substitution
The pattern uses a 10-ply (bulky) yarn, which is what gives the cable texture its chunky, defined look. Stay within 10-ply or a thick aran-to-bulky weight for best results on the 5 mm hook — the cable cross needs a yarn with enough body to sit up and show. A softer woolly yarn makes the cables slightly more rounded and tactile; a smooth acrylic keeps them crisp and defined. If you go much lighter in weight, the cables will look flattened and the poncho will come out smaller than intended.
Frequently Asked Questions
1. What does “front post treble crochet back into the skipped stitches” mean? On cable rows, you skip 2 stitches forward, work the next stitch, and then go back to those 2 skipped stitches and work the front post treble crochet around them. The “front post” part means your hook goes around the vertical post of the stitch (from front to back to front), not into the top loops. This backwards reach is what forms the cable cross.
2. How do I make the buttonholes close neatly? On the buttonhole row (Row 5 and Row 69), you replace a stitch with chain 1, skip 1. On the very next row, simply work 1 back-loop-only single crochet directly into that chain-1 space — this closes the hole with a firm edge that buttons pass through cleanly.
3. Can I make this bigger or smaller for a different age? The 61-stitch width is set for ages 2 to 4. To scale up or down, adjust the starting chain (Row 1) while keeping the cable repeat divisible so it ends correctly with 2 double crochets. The number of body rows before and after the neckline shaping can also be adjusted for length.
Suggested Alt Text for Photos
- Finished kids cable stitch crochet poncho in a chunky 10-ply yarn, laid flat showing the cable pattern and button bands.
- Close-up of the front post treble crochet cable stitch crossing over double crochets on the main body section.
- The bottom trim showing the back-loop-only single crochet rows and the three buttonholes on Row 5.
- The neckline shaping section showing the reduced stitch count and adjusted cable opening.
- A child wearing the finished poncho showing the overall drape and the button closure at the neck.