A boxy fit is the quiet secret behind sweaters that look expensive and this free crochet sweater pattern nails it. The straight, structured shape skims the body instead of clinging, giving you clean lines that pair perfectly with high-waisted jeans, wide-leg trousers, or a slip skirt. This modern crochet sweater pattern keeps the construction simple (boxy shapes are wonderfully beginner-friendly, since there’s minimal shaping to fuss with) while the finished piece looks anything but basic. Minimal effort, maximum wear—your free pattern is waiting.
A granny stitch sweater in two colors looks complex on the hanger but comes together faster than most people expect, especially when the construction is broken into flat panels you seam at the end. For a similarly relaxed silhouette with a different stitch texture, the free crochet boxy top with granny stitch is a great warm-up before you commit to full sweater yardage.
Boxy Crochet Sweater
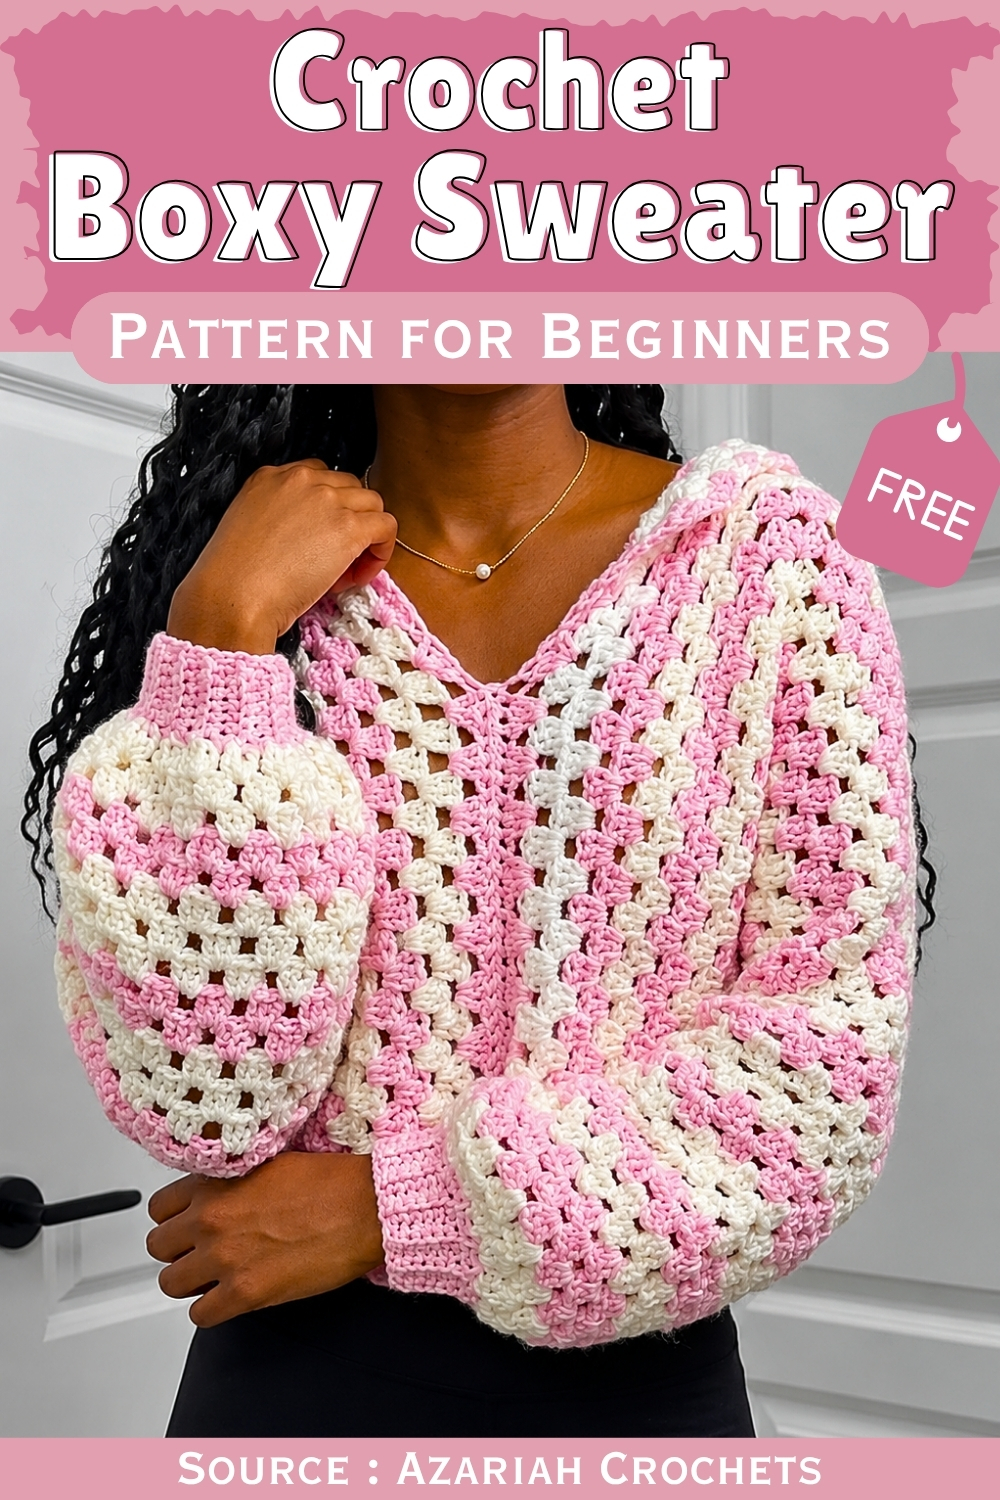
The pink and white colorway here leans soft and vintage, but this same construction works just as well in neutrals or a single bold color. If you want something with sleeves but a lighter, more open drape, the free cropped crochet sweater for beginners covers a different approach worth having open alongside this pattern.
Materials and Tools
- Weight 4 (medium / worsted) acrylic yarn, such as “I Love This Yarn!” by Hobby Lobby. Use 2 skeins of each color if you’re making a two-toned sweater.
- A 5.75 mm hook for the main body and sleeves (it works the stitches up quickly for a soft, chunky effect)
- A 5.0 mm hook for the cuff ribbing
- Tapestry needle
- Scissors
The Stitches and Techniques (with tips as you go)
This sweater leans on a few granny-style techniques. Here’s what you’ll use, plus the small things that make the whole thing behave.
- Magic ring: Every hexagon starts here. Tip: don’t fully cinch the ring until you’ve finished Round 1 and can confirm you have all 6 clusters — then pull the tail to close it neatly.
- The granny hexagon: You’re building a six-sided granny, working 3-double-crochet clusters in every gap. The trick is telling corners from sides: corners get a full cluster of 3 double crochet, chain 1, 3 double crochet in the same space, while plain side gaps get a simple 3 double crochet. Tip: as the hexagon grows, the number of side gaps between corners increases each round — just keep the corners as corners and fill everything between them with plain clusters, and the shape stays true.
- Single crochet seaming: The sleeves and body are joined by single crocheting matching stitches together. Tip: work these seams with the piece turned wrong-side out so the join sits hidden on the inside.
- Single crochet decrease (sc2tog): Used all around the wrist to pull the wide sleeve into a fitted cuff.
- Back-loop-only ribbing: The cuff ribbing is worked sideways in short rows, into the back loops only, to create stretch. Tip: work the very last stitch of each ribbing row under both loops for a more stable edge.
- A handy working tip: When you extend the sleeves, feed your whole ball of yarn through the sleeve opening so you can keep crocheting in rounds without cutting and rejoining.
The Pattern
You’ll make two large hexagons, fold and seam each into an L-shape to form a shoulder and sleeve, extend the sleeves, add ribbed cuffs, build up the front and back edges, and finally join the two halves. A steam block at the end brings it all together.
Step 1: Make the Hexagon Panels (Make 2)
Each hexagon folds into an “L” shape to create the sleeves, front, and back of the sweater.
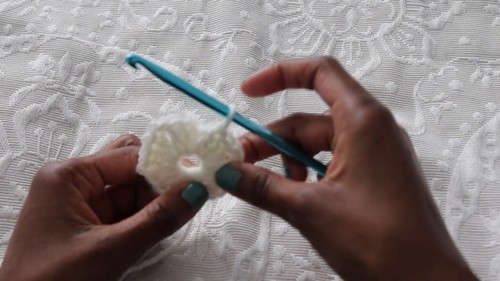
- Round 1: Start with a magic ring. Chain 3 (this counts as your first double crochet). Work 2 double crochets into the ring. Chain 1, then work 3 double crochets into the ring. Repeat until you have 6 clusters of 3 double crochets separated by chain-1 spaces. Pull the tail to tighten the ring and slip stitch into the top of the initial chain-3.
- Round 2: Chain 3. Work 2 double crochets into the space directly beneath the chain. Move to the next chain-1 space (this is a corner) and work a full corner cluster of 3 double crochet, chain 1, 3 double crochet, all in that same space. Repeat this corner cluster in every remaining space around. When you reach your starting half-corner, finish it by working 3 double crochet, chain 1, then slip stitch to the top of your initial chain-3.
- Round 3: (Change colors here if you’d like a two-tone look.) Chain 3. Work 2 double crochets in the corner space below. In normal side gaps (non-corners), work 3 double crochet. In corner gaps, work a corner cluster of 3 double crochet, chain 1, 3 double crochet. Repeat this logic all the way around, finishing the starting corner at the end.
- Rounds 4–14: Repeat the Round 3 logic. As the hexagon grows, the number of side gaps (worked as 3 double crochet only) will increase between the corners. Complete 14 rounds total, or until the folded panel comfortably wraps around your arm as a sleeve.
Step 2: Fold and Seam the Sleeve
- Fold your hexagon into an “L” shape so it forms the top of the shoulder and the sleeve.
- Turn the panel wrong-side out so the seam stays hidden.
- Keeping your yarn attached, single crochet the matching stitches together, starting from the outer wrist corner and working all the way along the top edge to the neck and shoulder corner.
Still getting the hang of reading crochet patterns? That’s completely okay, the video tutorial below breaks everything down in a simple, beginner-friendly way!
Step 3: Extend the Sleeve Length
- Turn the panel right-side out. (Feed your ball of yarn through the sleeve opening so you can keep working without cutting it.)
- Sleeve Rounds 1–13: Chain 3, work 2 double crochets in the same space, then work 3 double crochets in every gap around the cuff opening. Slip stitch to close each round. Work a total of 13 rounds to lengthen the sleeve.
Step 4: Add the Decreased Sleeve Cuff
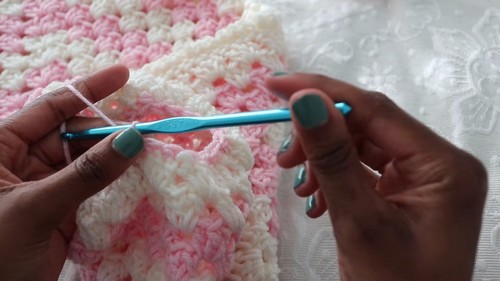
- Decrease round: Switch to the 5.0 mm hook and your contrast color. Work a single crochet decrease around every stitch to sharply reduce the wrist diameter. Slip stitch to close.
- Cuff ribbing: Chain 6. Starting in the 2nd chain from the hook, single crochet down the chain (5 single crochet total). Slip stitch into the next 2 stitches along the sleeve’s decrease round. Turn your work, skip the slip stitches, and work 5 single crochet in the back loops only back up the ribbing (work the last stitch under both loops for stability). Chain 1, turn, and single crochet in the back loops only back down. Repeat this process all the way around the wrist, then use a tapestry needle to sew the two ends of the ribbing together.
Step 5: Add Back and Front Length Extensions
Before joining the two halves, add rows to the back and front flap edges so the sweater fits loosely rather than feeling tight or distorted.
- Attach yarn to the bottom corner gap of your panel. Chain 3, work 2 double crochets in the same gap, then work 3 double crochets in every side gap all the way up to the shoulder seam.
- At the top, chain 3, turn your work, and crochet back down, working 3 double crochets in every gap.
- Repeat this back-and-forth row process for 5 rows total.
- Do the exact same thing on the matching flat edge of your second hexagon panel.
Step 6: Join Both Panels Together
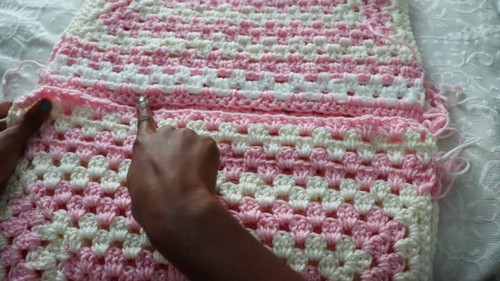
- Lay both completed halves flat, line them up, and flip them inside out.
- Front seam: Join your yarn at the bottom front and single crochet the matching stitches together, moving upward. Stop roughly 13 stitches before the top to leave an open V-neck opening for your head, then tie off and cut the yarn.
- Back seam: Start at the bottom back and single crochet both panels completely together, all the way to the top neck edge without leaving a gap.
Step 7: Finishing
- Turn the sweater right-side out.
- Weave in all remaining loose yarn tails with your tapestry needle.
- If the body feels too cropped, attach yarn to the bottom hem and crochet 3-double-crochet clusters continuously around the bottom opening until it reaches your desired length.
- Steam-block your finished garment to relax any stiffness and help it drape beautifully.
Yarn Substitution
The pattern uses an easy-to-find worsted (Weight 4) acrylic, which keeps this sweater affordable and gives it that soft, slightly chunky body on the 5.75 mm hook. Any smooth worsted yarn will work on the same hooks, so feel free to use a favorite. A wool or wool-blend adds warmth and lovely drape, while acrylic stays lightweight and easy to wash. If you go two-toned, just make sure both colors are the same weight so your hexagons grow at the same rate. Whatever you choose, a steam block at the end makes the biggest difference to the final drape.
Customization Ideas
- Go one color or two. Solid hexagons give a classic look; changing color mid-hexagon creates a bold concentric effect.
- Adjust the sleeve length. Add or remove sleeve rounds before the cuff to suit your arm length.
- Lengthen the body. Use the optional bottom-hem clusters to take the sweater from cropped to hip-length.
- Change the neckline depth. Stopping the front seam sooner or later adjusts how deep the V-neck sits.
- Play with cuff contrast. A contrast cuff and hem tie the whole two-tone look together.

Frequently Asked Questions
1. Do I need to know special stitches to make this? Not really — if you can work a basic granny square (3-double-crochet clusters into gaps), you already have the main skill. The magic ring, single crochet decrease, and simple ribbing are all easy to pick up as you go.
2. How do two hexagons turn into a whole sweater? Each hexagon folds into an “L” shape, which becomes one shoulder and sleeve plus half of the front and back. Once both are folded, seamed, and extended, you join them together to form the body. It feels like magic the first time.
3. My hexagon is starting to curl or ruffle. What happened? This usually comes from the corners. If it cups, you may be missing a corner cluster; if it ruffles, you may have added an extra one. Keep exactly 6 corners per round and fill everything between them with plain 3-double-crochet clusters, and it will lie flat — a steam block also helps at the end.