Any basic crochet top in your drawer can become a crochet puff sleeve sweater, because the sleeves work up separately and attach at the end. Stretchy foundationless cuffs slide over your hands, and a V stitch body builds the gathered sleeves in a weekend.
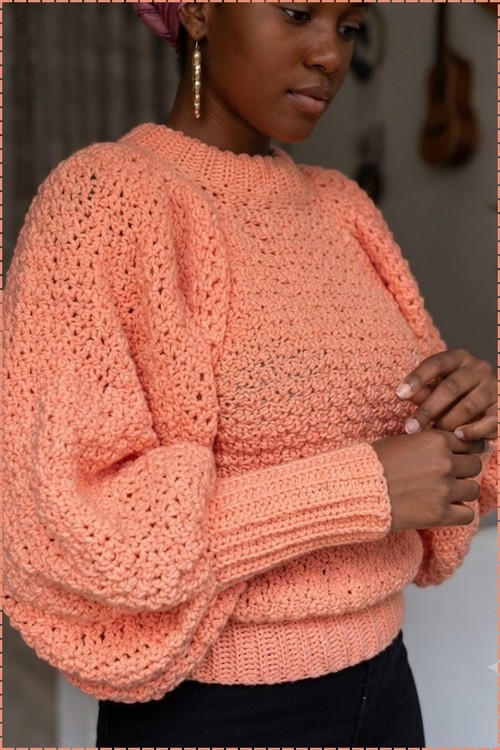
Peach yarn and puffed sleeves make this crochet sweater one of those pieces that photographs as well as it wears, and the wide ribbed cuffs are what give the volume its shape rather than letting it droop. The body works up in smooth even rows that go quickly once you find your rhythm, and if you enjoy sweaters with distinctive sleeve details the bishop sleeve sweater is a good next project to bookmark.
Crochet Puff Sleeve Sweater
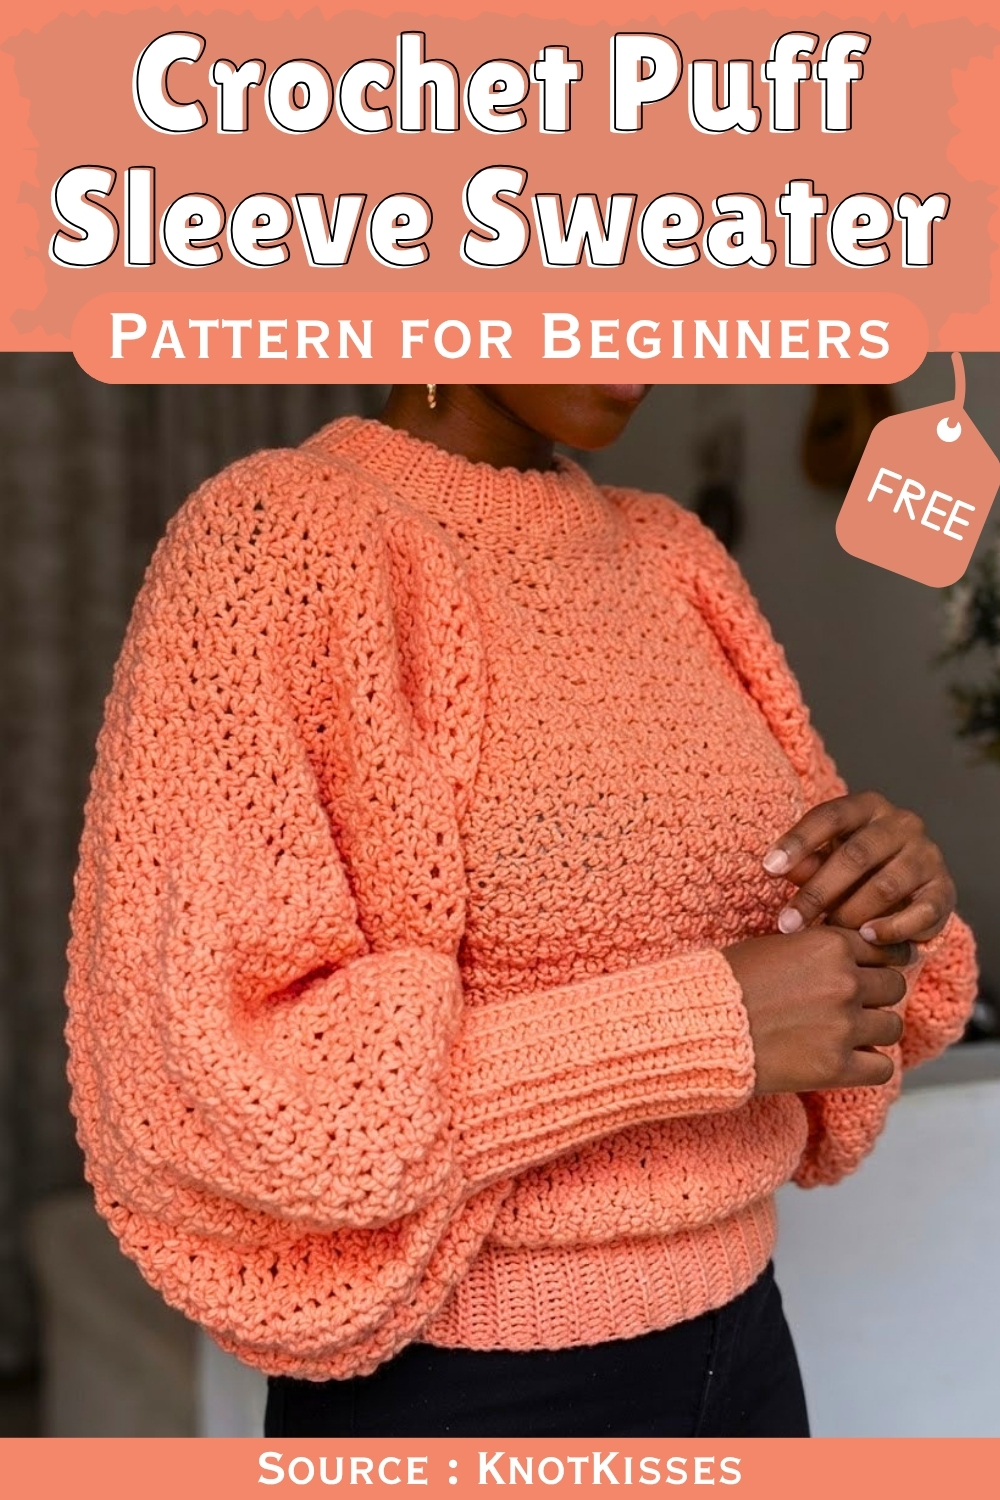
Worsted weight yarn in a single solid color lets the sleeve construction do all the talking here. The ribbed hem and cuffs are worked in the same yarn as the body so everything reads as one cohesive piece rather than a patchwork of separate elements.
Materials & Tools
- Medium weight yarn
- 4.5 mm crochet hook
- Tapestry needle
- Scissors
- Measuring tape
- Stitch markers
- A previously made basic crochet top (any construction — the sleeves attach at the end)
Abbreviations used in this pattern: ch = chain · sc = single crochet · dc = double crochet · sl st = slip stitch · BLO = back loops only · st(s) = stitch(es) · sp = space · rep = repeat
Go-To Stitch to Know
Difficulty & Time
Intermediate. The foundationless sc start and V-stitch sleeve body are the two techniques that might be new to you — both are explained clearly in the pattern and in the technique notes below. If you can work dc and basic sc rows, you’ll manage this comfortably. The sleeve body is repetitive in a satisfying way, and the attachment is straightforward once the quarters are marked. Budget a full weekend for both sleeves if you’re working at a relaxed pace.
Beginner Technique Notes
- Foundationless single crochet: This is a way of starting a piece without a traditional foundation chain. Instead of chaining a row and then working back into it, you build your foundation and first row of stitches at the same time, by inserting your hook into the V of the previous stitch’s base. It takes a few tries to feel natural but creates a very neat, stretchy starting edge — perfect for a cuff that needs to slip over your hand.
- Back loops only (BLO): When working BLO, insert your hook under only the back of the two loops sitting at the top of each stitch. This leaves the front loop visible as a ridge on the fabric, which stacks up row by row to create the classic ribbed texture.
- V-stitch: A V-stitch is simply 1 dc, ch 1, 1 dc — all worked into the same stitch or space. It creates an open, lacy structure that gives the puff sleeve its airy, voluminous look. In later rounds, each V-stitch is worked into the ch-1 sp of the V-stitch below it.
- Double V-stitch cluster (Round 1 only): The first round uses a slightly expanded version: dc, ch 1, dc in one stitch to start, then a shell of dc, ch 1, dc, ch 1, dc in the next. This sets up the V-stitch grid for every subsequent round.
The Pattern
Step 1: Making the Cuff
Foundationless single crochets:
- Begin with a slip knot and insert your 4.5 mm hook.
- Ch 2 (yarn over and pull through the slip knot twice).
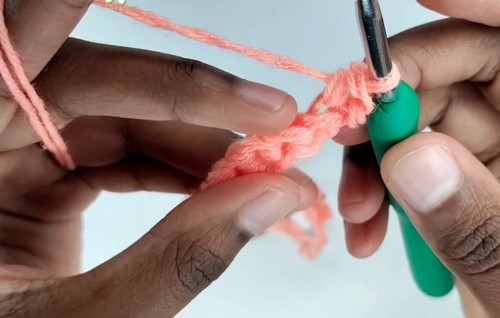
- Insert your hook into the first chain, pull up a loop (2 loops on hook), yarn over and pull through the first loop only, then yarn over and pull through the remaining 2 loops — this is your first foundationless sc. Place a stitch marker in this first st.
- Continue creating foundationless sc by inserting your hook into the V of the base chain just worked. Repeat until you have a total of 25 foundationless sc. (This measures approximately 6 inches for a long cuff.)
Ribbed rows:
- Ch 1 and flip your work. (The ch-1 is the turning chain only — it does not count as a stitch.)
- Work BLO sc into each st across the row.
- Ch 1, flip, and repeat the BLO sc row.
- Continue repeating this row until the cuff fits snugly around your wrist. (The pattern uses about 26 rows, resulting in approximately 13 ridges and a finished cuff of roughly 6 inches by 6 inches.)
If you’re a beginner and crochet patterns feel confusing, start with the video tutorial below, it’s the easiest way to learn as you go!
Joining the cuff:
- Lay the cuff flat with wrong sides together.
- Ch 1, then sl st through the back loops only of both matching edges to seam the cuff into a circle.
- Flip the cuff inside out so the right side faces outward. Try it on to confirm a snug, comfortable fit.
Step 2: Foundation Round for the Puff Sleeve
- Ch 1 and work 1 sc into the nearest visible stitch along the cuff edge. Place a stitch marker in this first st.
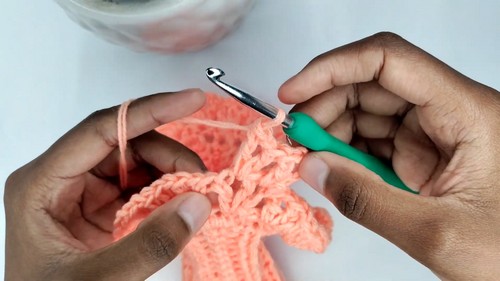
- Because the puff sleeve needs more stitches than the cuff has rows, increase by placing 3 sc between each ridge all the way around.
- You should end up with a total of 40 sc.
- Sl st into the first st to close the round.
Step 3: Crocheting the Puff Sleeve Body (V-Stitch Pattern)
Round 1:
- Ch 4 (counts as the first dc + ch-1 sp).
- Work 1 dc, ch 1, and 1 dc in the same st — this forms a double V-stitch cluster.
- Skip the next st.
- In the next st, work a shell: dc, ch 1, dc, ch 1, dc.
- Repeat this pattern around.
- Sl st into the 3rd ch of the beginning ch-4 to close the round.
Rounds 2 and onwards:
- Sl st into the first V-stitch sp, then ch 4.
- Work standard V-stitches (1 dc, ch 1, 1 dc) directly into each V-stitch sp from the previous round.
- Repeat this round until the sleeve reaches your desired length. (The pattern completes 34 rounds total, measuring approximately 24 inches.)
Step 4: Cleaning Up the Sleeve Edge
- In the first V-stitch sp, work 1 sc. Place a stitch marker.
- In the second V-stitch sp, work 2 sc.
- Alternate this pattern around: odd-numbered V-stitch sps get 1 sc, even-numbered V-stitch sps get 2 sc.
- You should end up with 60 sc total.
- Sl st to close the round, ch 1, and cut the yarn, leaving a long tail for sewing.
Step 5: Attaching the Sleeve to the Top
Divide into quarters:
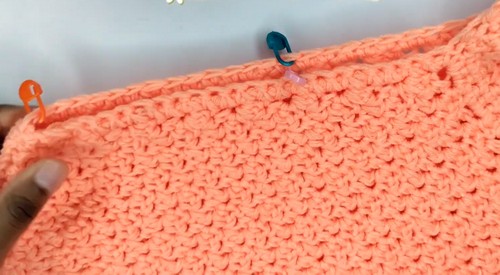
- Divide both the sleeve opening (60 sts) and the arm opening on your main top into 4 equal sections.
- Place stitch markers at each quarter point — the sleeve markers will sit 15 sts apart.
Align:
- Turn your main top inside out so the wrong side faces outward.
- Place the puff sleeve inside the arm opening, wrong sides together, matching your quarter stitch markers.
Whip stitch seam:
- Thread your tapestry needle with the long yarn tail.
- Whip stitch the sleeve and body edges together, moving steadily from one quarter marker to the next all the way around.
Finishing:
- Weave in all remaining yarn ends.
- Repeat the entire process for the second sleeve.

Tips & Troubleshooting
- Use the stitch marker on your first foundationless sc. The starting point is easy to lose track of in this technique — the marker saves you from miscounting and having to pull back later.
- Check the cuff fit before seaming it. Try the ribbed band around your wrist before you sl st the edges together. It’s much easier to add or remove rows at this stage than after you’ve joined it into a circle.
- Keep your V-stitches even by working into the ch-1 sp, not the dc. In Rounds 2 and onwards, place each V-stitch into the ch-1 space of the previous round’s V-stitch, not on top of the dc legs. This keeps the columns straight and the fabric airy.
- Don’t skip the quarter markers when attaching the sleeve. They distribute the sleeve evenly around the armhole and prevent the puff from bunching at one side. Take a moment to count and mark carefully before you pick up the needle.
- Work the whip stitch from the inside for the cleanest result. Because both pieces are wrong sides together when you sew, your seam allowance ends up hidden inside the garment. A small, even whip stitch stays invisible on the outside.
- Adjust sleeve length by adding or removing rounds in the V-stitch body. Each round adds a consistent amount of length — stop earlier for a shorter puff sleeve or keep going beyond 34 rounds for something more dramatic.
Yarn Substitution
Medium weight yarn (size 4) is the recommended weight here and it’s a good choice — it gives the V-stitch sleeve enough drape to move without being so light that the structure collapses. Any fiber works well: cotton will give you a cooler, crisper sleeve; acrylic is budget-friendly and widely available; a cotton-acrylic blend sits somewhere in between. If you want to match a specific top you’ve already made, use the same yarn and hook you used for the body so the drape and texture read as a matched set. Avoid chunky or bulky yarn — it makes the V-stitch sleeve too heavy and the puff loses its shape.
Customization Ideas
- Shorter puff: Stop at 15–20 rounds of V-stitch for a cap or short puff sleeve instead of a full-length one.
- Tighter cuff: Work the ribbed cuff to fewer rows for a narrower band, or use a slightly smaller hook for a firmer grip at the wrist.
- Color contrast: Make the cuff in a contrasting color and switch to your main color at the foundation round — the ribbed cuff becomes a design feature.
- Attach to different necklines: This sleeve works equally well on crew-neck tops, V-neck tops, and cardigans. The quarter-marker attachment method adapts to any armhole shape.
FAQ
1. Do I have to use a previously made top, or can I make the whole sweater from scratch? The pattern as written assumes you’re attaching the sleeves to a finished top. However, nothing stops you from making a basic top from scratch and then following this pattern for the sleeves — just make sure your armhole opening is roughly the right size to accommodate 60 sleeve stitches.
2. My foundationless sc feels really tight and hard to work into — is that normal at first? Yes, it’s one of those techniques that feels awkward for the first 5 or 6 stitches and then suddenly clicks. Make sure you’re inserting your hook into the V of the base chain and not into a tighter spot. If it’s really resistant, try starting with a slightly larger hook and then switching back once you’re past the first few stitches.
3. How do I know how many rounds of V-stitch I need for my arm length? Measure from your shoulder seam to where you’d like the cuff to sit, then divide by the height of one V-stitch round. Crochet a few rounds and measure the height per round in your yarn and tension — then multiply to get your total. The pattern’s 34 rounds gives approximately 24 inches, which you can use as a starting reference.
4. The sleeve looks much wider than my armhole — is that right? Yes. The puff effect comes specifically from easing a wider sleeve into a smaller armhole opening. The quarter-marker method manages that difference evenly around the seam so the extra width becomes volume rather than puckering.
5. Can I make a shorter cuff instead of the 6-inch version? Absolutely. Work fewer foundationless sc at the start for a shorter cuff length, or work fewer BLO rows for a narrower band. The cuff dimensions in the pattern (6 inches by 6 inches) are a guide, not a fixed requirement — fit it to your wrist and preference.