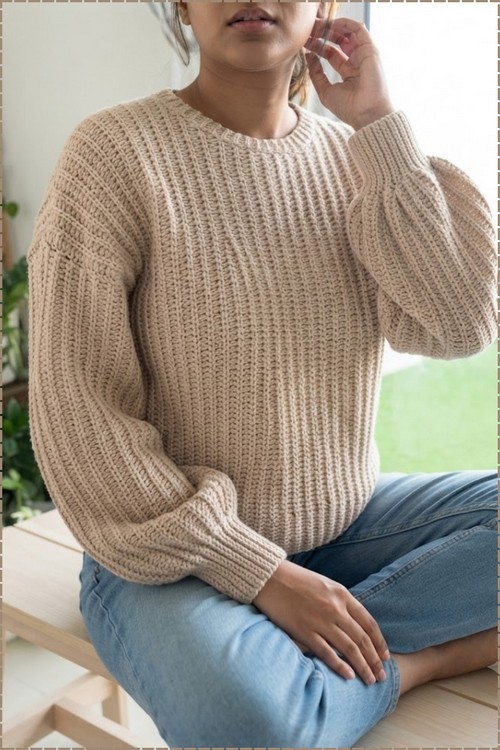
Pull on this grunge crochet sweater for a goth night out and let silver chains swing in looping tiers from each shoulder to the waist. Black jeans keep a punk crochet sweater hung with Y2K chains looking styled rather than costume-like, from campus days to late concert nights.
A solid black body, sleeves worked in wide open mesh, and layers of pearl strands and safety pins draped over the front. This grunge crochet sweater actually earns the label, and the oversized fit keeps the whole thing loose enough to wear over a tee without the hardware feeling constricting.
Grunge Crochet Sweater

Two fabrics meet in one garment. The body is worked dense and slightly textured so it holds shape under the weight of the chains, while the sleeves switch to a large open grid that lets skin show through from shoulder to cuff. Ribbed cuffs and a ribbed neckband close both ends, and the pearls and chains are added afterward as removable hardware rather than crocheted in.
Materials and Tools
- Weight 0 lace yarn held in 3 to 4 strands together throughout the main body, which brings it up to a workable weight while keeping the fabric light and open
- A 3.75 mm crochet hook for the main sweater body
- A 2.5 mm or smaller crochet hook for the neckline ribbing and cuffs
- Pearls in your preferred size, strung on stretchy beading cord or bracelet string
- Crimp beads for securing the pearl strands
- Jump rings in a metal finish of your choice
- Safety pins, keychain rings, and other small metal loop components
- Jewelry pliers for crushing crimp beads and opening jump rings
- Tapestry needle
- Scissors
The multi-strand lace approach is what gives this sweater its specific gossamer quality. Holding 3 to 4 strands together lets you control the weight without losing the delicate, thread-like appearance of the mesh. If you substitute a single strand of a heavier yarn, the sweater will work structurally but the open mesh sections will look different and the distressed holes will not have the same fragile quality.
Know This Stitch First
Difficulty and Time
This is an intermediate project on the crochet side, with an additional crafting stage for the embellishments that requires basic jewelry-making skills. The mesh stitch itself is simple — double crochet, chain 1, skip 1 — but the shaping decisions, the distressing, and the hardware attachment all require you to work with a degree of improvisation rather than following exact numbers. Budget two to three sessions for the panels and sleeves, and a separate session for the ribbing. The embellishment stage is as long or short as you want the final piece to be. A version with light hardware takes an afternoon; a version with extensive pearl stranding takes longer.
Beginner Technique Notes
- Mesh stitch in this pattern is a relaxed, open structure: double crochet, chain 1, skip the next stitch, double crochet. Worked across a row, this creates an even grid of small holes that gives the sweater its characteristic see-through quality. The spacing of the holes also makes the fabric easy to cut and distress without unraveling, which is important for the back panel detailing.
- Back loop only ribbing means inserting your hook into only the back of each stitch rather than through both loops. This creates a stretchy, ridged fabric that compresses tightly when worked on a smaller hook. It is used for the neckline collar, the armhole cuffs, and the wrist cuffs, and is applied in short perpendicular rows that are slip-stitched to the garment edge as you go. The size difference between the main hook and the ribbing hook is what creates the contrast in density between the open mesh body and the tight, compact ribbing.
- Distressing crochet is safer than it sounds. Because each crochet stitch locks the loops above and below it, cutting into the fabric creates a frayed opening rather than causing the piece to unravel. The risk area is always the active loop at the very end of your yarn — as long as that is secured, cut sections in the middle of the fabric hold their shape. Work small cuts with sharp scissors and check after each one before cutting further.
The Pattern
Step 1: Back Panel
- Start with a base row of double crochets across the full width of your back panel.
- Transition into the mesh pattern: double crochet, chain 1, skip a stitch, double crochet, repeating across to create evenly spaced holes throughout the fabric.
- Shape the panel by decreasing at the start of rows to form a gently curved shape rather than a straight-edged rectangle.
- Work back and forth in the mesh pattern, adding an increase on the final lower row to curve the bottom edge.
- Once the back panel is the right height, create intentional holes or cut sections in the upper back area to achieve the distressed look. Trim carefully and check each cut before making the next.
- Shape the back neckline by decreasing stitches across a couple of rows at the top center of the panel.

Step 2: Front Panel
- Work the front panel using the same construction as the back: start with a base row of double crochets, then move into the mesh pattern.
- Shape the front neckline gradually over approximately five rows by decreasing stitches on each side toward the center.
- Keep the front panel relatively short, as it is designed to be worn tucked in.
Just starting out with crochet? The video tutorial below is a great place to begin, or challenge yourself with the written pattern below!
Step 3: Neckline and Distressing
- Seam the shoulder sections of the front and back panels together to connect the two pieces.
- Test distressing on a scrap of the mesh fabric first. Once confident, carefully cut into the back panel fabric in the upper sections to create frayed openings. Trim slowly and check the stability of each cut before continuing.

Step 4: Ribbing and Armholes
- Switch to the smaller 2.5 mm hook for all ribbing sections.
- Work the neckline ribbing in short rows using single crochets into the back loops only, slip-stitching each completed row to the collar edge of the sweater as you go to attach it simultaneously.
- Form the armholes by sewing or slip-stitching the side seams up to the appropriate underarm length on each side.
- Add matching ribbed cuffs around each armhole opening using the same single crochet back-loop-only ribbing method worked in short attached rows.
Step 5: Sleeves
- Join yarn around the armhole opening and work in the mesh stitch pattern — double crochet, chain 1, skip 1 — working in rounds rather than flat rows.
- Gradually decrease stitches as you work toward the wrist to taper the sleeve to a narrower cuff.
- Finish the wrist opening with tight ribbing worked in single crochets into the back loops only, using the smaller hook.
- If desired, add extra distressed thread details across the sleeve fabric using a needle and thread after the ribbing is complete.

Step 6: Straps and Metal Hardware
- Construct custom straps using the multi-strand yarn and the small hook.
- Attach keychain rings or other metal loop components to the garment using short connecting straps and secure them with stitches through the mesh.
Step 7: Beaded Pearl and Chain Accents
- Cut lengths of stretchy beading cord to match the placement and proportion of your reference.
- Thread crimp beads and jump rings onto the cord, form loops at the ends, then crush the crimp beads with pliers to secure everything in place.
- Attach the finished pearl strings, safety pin chains, and any remaining metal elements across the sweater to complete the final embellished look.

Tips and Troubleshooting
- Hold your lace strands together from the very beginning of the project, not just partway through. Inconsistency in strand count between sections creates noticeable density differences in the finished panels.
- Work a swatch of the mesh stitch on the 3.75 mm hook before starting the back panel. Mesh gauge varies significantly between makers, and checking your swatch saves you from discovering a fit problem mid-panel.
- Test your distressing cuts on leftover yarn before touching the actual sweater. Make small, deliberate cuts and allow the fabric to rest for a few minutes before deciding whether to cut further — the appearance settles once you stop pulling on it.
- Attach the ribbing to the neckline and armholes with a consistent number of slip stitches per ribbing row. Uneven attachment creates a wavy, gathered collar rather than a smooth flat band. Count and match your attachment points before you begin.
- Crush crimp beads firmly with the flat jaw of jewelry pliers rather than the round jaw. A properly crushed crimp bead holds the beading cord securely even when the sweater is worn and the cord is under slight tension.
- Use safety pins as a design element deliberately — spacing them evenly or clustering them in a specific zone looks intentional and editorial. Random placement reads as accidental.
- If the sweater feels too open or sheer for your comfort, a slip dress or bodysuit underneath is the expected styling choice for this aesthetic and solves the coverage question without altering the garment itself.
- When seaming the shoulders, use a length of the same multi-strand yarn and keep the seam relaxed. A tight shoulder seam restricts movement and distorts the mesh pattern on both panels.
Yarn Substitution
The multi-strand lace approach in this pattern is not easily swapped out without changing the character of the finished piece. The reason 3 to 4 strands of weight 0 lace yarn are held together — rather than simply using a single strand of fingering or DK — is that the resulting fabric has a translucency and a light, floating quality that a standard single-strand yarn does not replicate. If you substitute, stay within lace or thread weight and hold multiple strands together to reach your target hook size gauge. A bamboo or silk-blend lace yarn held in the same way gives a slight sheen that works beautifully with the pearl embellishments. Avoid anything with a halo or texture — the mesh needs clear stitch definition and visible gaps to work visually.

Customization Ideas
- Skip the pearl and chain embellishments entirely for a clean, minimal version that is more wearable as an everyday layering piece.
- Add more or fewer distressed cuts depending on how extreme or subtle you want the grunge aesthetic.
- Work the front and back panels in different colors for a two-tone effect that plays with the layered, open mesh.
- Replace the keychain ring hardware with vintage brooches pinned directly through the mesh.
- Extend the sleeve length or shorten it to a cap sleeve depending on your preference.
- Add a row of pearl beads crocheted directly into the neckline ribbing by threading them onto the yarn before working the ribbing rows.
FAQ
- Is this sweater very difficult if I have only made simple flat projects before? The mesh stitch itself is beginner-accessible, but the combination of multi-strand yarn, two hook sizes, shaping decisions, distressing, and hardware attachment makes the overall project intermediate. If you have made a flat panel garment before and are comfortable with basic shaping, you are ready for this. If you are newer to garments, work the crochet portion first and skip the embellishments until you are happy with the fit.
- Will the distressed cuts make the sweater fall apart? No, and this is one of the most reassuring things about distressing crochet. Each stitch locks the loops on either side of it, so a cut in the middle of the fabric creates a stable frayed opening rather than an unraveling edge. The only vulnerable point is the active loop at the end of your yarn tail — as long as that is woven in securely before you cut anywhere near it, the rest of the fabric is safe.
- How do I keep the multiple yarn strands from tangling while I work? Work from the center of each ball where possible, or set each ball in a separate small container beside you so they unwind independently. Lay the strands flat on a table before each row and straighten them out before crocheting. The tangle risk is highest at the beginning of each row when you turn your work — take a moment to separate the strands before pulling through the turning chain.
- Can I make this without the pearl and chain embellishments? Absolutely. The crochet sweater is a complete, wearable garment on its own. The mesh structure with distressed cuts and ribbed details is already a strong design without any additional hardware. The embellishments are an optional extra styling layer, not a structural requirement. Many makers will find the plain version more wearable for everyday use.
- What is the best way to secure the crimp beads if I do not have jewelry pliers? Jewelry pliers are the most reliable tool for this, but in their absence you can try securing crimp beads by pressing firmly with the back of a teaspoon or the flat jaw of a pair of standard craft pliers. The key is applying even, firm pressure across the full body of the crimp bead rather than just one edge. Test on a spare crimp bead before working on the actual strands.