Early autumn calls for a crochet mesh sweater in grunge stripes that skims the hip and leaves the bare neckline free for a gold chain. High waisted light denim balances an oversized mesh crochet top, keeping the grunge aesthetic relaxed for gigs, thrift runs and coffee dates.
Candy red and pale pink run in vertical stripes down this crochet mesh sweater, which is sheer enough to wear over a cami and loose enough to slide off one shoulder on its own. Long flared sleeves and a wide swingy body give it the slouch that a mesh top usually loses when it is worked too tight.
Crochet Mesh Sweater Grunge

Openwork is the entire fabric here, not an accent. Rows of spaced stitches separated by chains create the airy grid, and switching colors on alternating groups of columns turns a plain mesh into a stripe without any colorwork technique. Tutorial photos show it worked in a single cream yarn, which is a useful reminder that the stripes are a color choice rather than a structural one.
Materials and Tools
- Approximately 200 grams of yarn in total, which works out to roughly 800 meters. If you want stripes, use 100 grams of each of two colors
- A 6.0 mm or 6.5 mm crochet hook, whichever gives you a fabric you like the look and feel of
- Tapestry needle for weaving in ends and sewing seams
- Tape measure
- Scissors
Both yarn weight and hook size matter here because the open mesh effect depends on a relaxed gauge. If your fabric feels stiff or dense, go up a hook size before starting your panels.
Start with This Stitch
Difficulty and Time
This is a beginner-friendly garment project. The stitch used throughout — the foundation triple crochet — sounds technical but is simply a way of building your foundation and your rows at the same time. Once you get the rhythm of it, the fabric grows quickly. Allow one or two sessions per panel, and a third session for the sleeves and seaming. The neckline shaping involves a small amount of decreasing and increasing, but it is mirrored and even, so it is very manageable once you understand how the symmetry works.
Beginner Technique Notes
- Foundation Triple Crochet is the building block of this entire sweater. Unlike a standard foundation chain followed by a separate first row, a foundation triple crochet creates both the base stitch and the chain in one motion. Here is how it works: start with a slip knot and chain 4. Yarn over twice, insert your hook into the first chain, pull up a loop, then pull through one loop, then through two loops, then through two loops, then through two loops. That completes your first foundation triple crochet. Repeat this to keep extending your foundation row. The finished fabric has a lovely open, airy quality that makes it ideal for mesh designs.
- Increasing in this pattern means working more than one triple crochet into the same end stitch at the edge of your row. This pushes the edge outward and creates the diagonal slope you need at the underarm and sleeve. Do it gently — one or two extra stitches at a time — so the increase is gradual rather than a sudden jump.
- Decreasing means stopping a few stitches before the end of the row, skipping a stitch, and triple crocheting into the one after it to pull the edge inward. This is how the neckline curve and the second underarm slope are created. Work your decreases in even pairs — the same number going down each side — so both edges match when the panel is finished.
- Seaming is done with your tapestry needle and a length of matching yarn, inside out, using a whip stitch or mattress stitch. Keep your tension relaxed through every seam, especially at the shoulders. A tight seam pulls the mesh out of shape and changes how the sweater sits on the body.
The Pattern
Step 1: Front and Back Body Panels — Make 2 Identical Panels
Foundation and Body
- Start with a slip knot, then chain 4.
- Yarn over twice, insert your hook into the first chain, pull up a loop, pull through one loop, then pull through two loops, then through two loops, then through two loops. This is your first foundation triple crochet.
- Continue working foundation triple crochets, building from the bottom of the sweater upward until the foundation row reaches the height of your underarm or armpit.

Underarm Shaping — First Side
- Work a stacked triple crochet or your preferred turning method at the start of the row.
- Work increase rows at the armpit edge over several rows by working multiple triple crochets into the end stitch, building the diagonal slope up toward the shoulder.
- If you are changing colors, switch colors every 2 rows for an even stripe.
Shoulder and Neckline — Choose Your Version
- For an off-the-shoulder version: keep the armhole opening slightly smaller, work straight rows for approximately 10 centimeters across the top of the shoulder, and keep the neckline wide.
- For a regular or higher neckline: work more foundation rows or additional triple crochet rows higher up toward your neck before beginning the shaping.
Reading crochet patterns can be tricky when you’re just starting out, feel free to follow the video tutorial below instead!
Neckline Decreases
- Stop a couple of stitches short of the end of the row, skip a stitch, and triple crochet into the next stitch to create a smooth inward slope toward the neckline.
- Work an even number of decrease rows on this side for symmetry.
- Work a flat section of straight rows across the front or back center neckline.
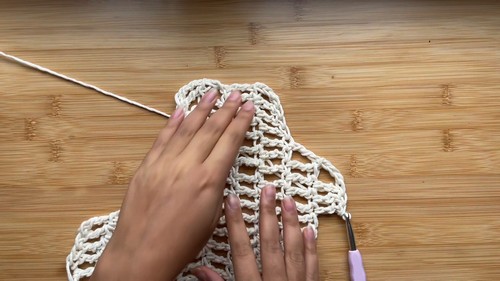
Neckline Increases
- Mirror your decrease rows exactly by working increase stitches at the neckline edge on the other side, building the slope back up symmetrically.
Second Underarm Shaping
- Complete the second shoulder and underarm slope with matching decrease rows so the panel is fully symmetrical from top to bottom.
- Fasten off and repeat all steps from the foundation to create a second identical panel.
Step 2: Seaming the Body
- Turn both panels inside out and lay them together with wrong sides facing outward.
- Using a tapestry needle and a matching length of yarn, sew up both side seams from the bottom hem up to the underarm on each side.
- Sew the shoulder seams together, keeping your tension relaxed throughout.
- Secure all seams and weave in the ends.
Step 3: Sleeves — Make 2
Foundation and Length
- Measure from your wrist up to your armpit.
- Work a foundation triple crochet chain that spans the full length from wrist to armpit.
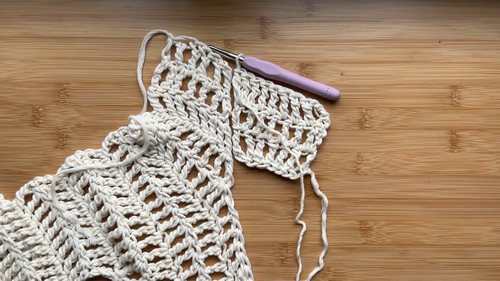
Sleeve Shaping
- Work increase rows on both sides of the sleeve as you move upward, building the diagonal shape of the arm.
- Continue increasing until the sleeve reaches its maximum width, which should match your armhole opening.
- Work an even number of straight rows at the widest point.
- Mirror your increase rows with decrease rows working back down the other side.
Seaming the Sleeve
- Leave a long yarn tail before fastening off.
- Fold the sleeve piece in half lengthwise and sew the sleeve seam from the wrist up to the underarm.

Step 4: Attaching the Sleeves
- Turn the sweater body inside out.
- Place each finished sleeve right side out inside the armhole opening so the raw edges align at the armpit.
- Using a tapestry needle, whip stitch or mattress stitch all the way around the armhole opening to secure the sleeve.
- Repeat for the second sleeve.
- Turn the finished sweater right side out and weave in any remaining loose ends.
Tips and Troubleshooting
- If your foundation triple crochet row feels uneven in your first few stitches, that is completely normal. The rhythm takes a few repeats to click. Work a short practice swatch of 10 to 15 stitches before starting the actual panel so you get comfortable with the motion before it counts.
- Hold both panels together after finishing each major section — after the underarm increases, after the neckline, after the second underarm — to confirm they are growing at the same pace. Catching a discrepancy early is always easier than trying to adjust after both panels are complete.
- When seaming the sleeves into the armhole, pin them in place with stitch markers before you sew. This distributes the fabric evenly around the opening and prevents bunching or puckering at the seam.
- If you are making stripes, changing color every 2 rows is the most reliable approach for keeping the stripe edges clean and even across both panels.
- Block both panels flat before seaming, especially if you are working with a fiber that relaxes after washing. Even a light misting and gentle pin-out will open the mesh and make the seaming much easier to work through.

Yarn Substitution
Yarn choice genuinely changes the character of this sweater. A smooth cotton or cotton-blend yarn gives you the crispest mesh definition and the most structured silhouette. A bamboo or viscose blend drapes more softly and gives the sweater a flowing, more relaxed quality. Acrylic works well if you want easy care and a springy, light fabric. What to avoid: anything fluffy, textured, or with a halo, because the open mesh structure relies on being able to see through the gaps, and a fuzzy yarn fills them in and loses the entire effect. Stick to smooth, plied fibers at a light to medium weight.
FAQ
- Do I need to know how to do foundation stitches before I start? No prior experience is needed. Foundation triple crochet sounds complicated but is simply a chain and a stitch worked at the same time. The beginner technique notes above walk you through it step by step. Work a practice swatch of 10 to 15 stitches before you begin the actual panel and you will feel confident very quickly.
- How do I know when my foundation row is the right length? Hold the foundation row against your body from the bottom hem up to where your armpit sits. That is your target. The panel is worked vertically, so the length of your foundation row becomes the height of the sweater body, not the width. Measuring against yourself is more reliable than counting stitches for this kind of freeform garment.
- What if one panel comes out slightly bigger than the other? Block both panels flat before seaming and pin them to the same dimensions while damp. Minor size differences almost always even out through blocking, and a slight difference in width or length becomes invisible once the seams are worked and the sweater is worn.
- Is the off-the-shoulder version harder to make than the regular version? Not at all. The difference is in how many rows you work across the shoulder section and how wide you leave the neckline. The off-the-shoulder version actually involves slightly less shaping at the top of the panel because the neckline stays wide and open rather than being worked up toward the neck. If anything, it is a little simpler.
- Can I make this sweater longer or shorter than the original? Yes, and it is easy to do. The length of your foundation triple crochet row controls the height of the sweater body. Start your foundation row from the hem and stop when it reaches wherever you want the underarm to be. The same logic applies to sleeve length — measure your own arm and adjust the starting foundation row accordingly.
- Every stitch you work on this sweater is teaching you something that transfers directly to every garment you make after it. Take your time, trust your measurements, and enjoy the process.