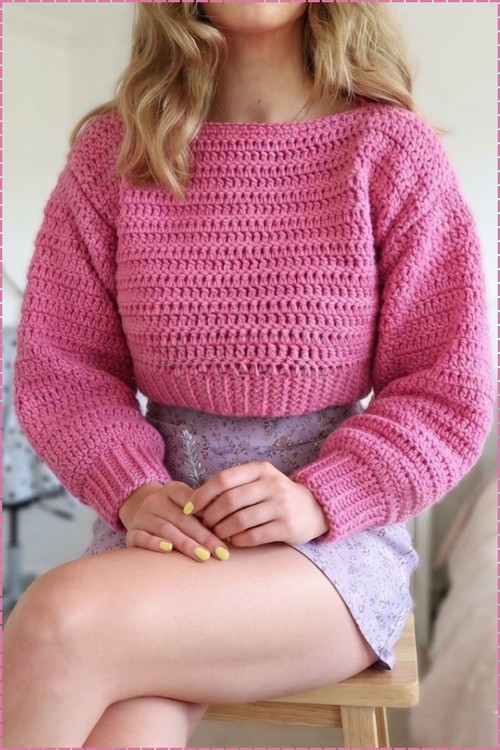
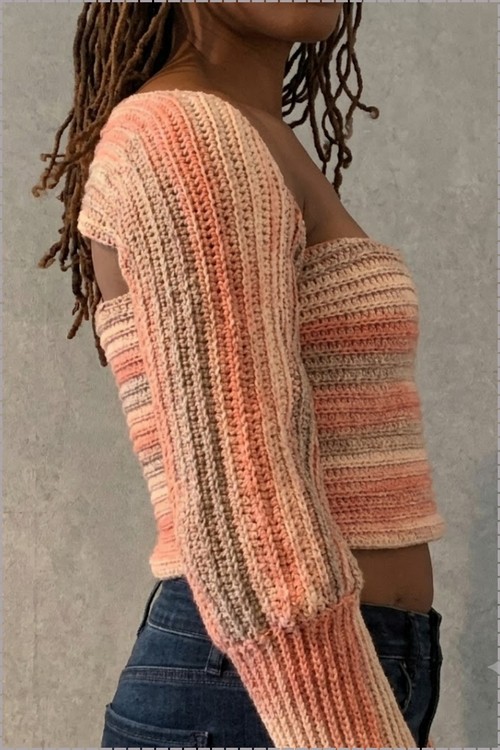
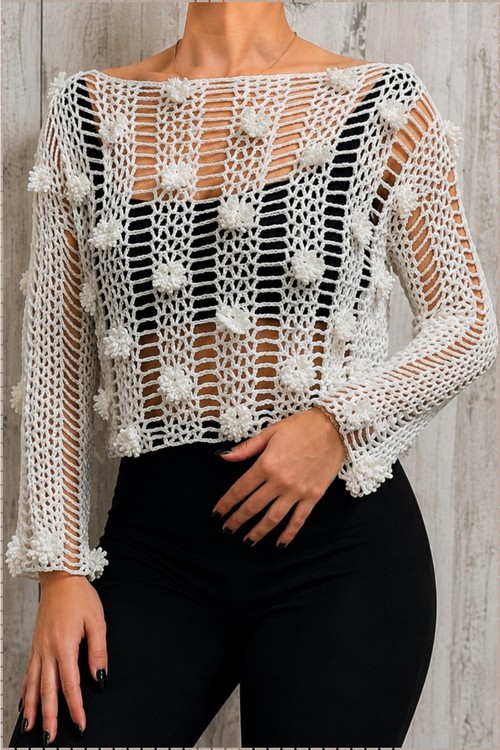
Cream rosettes dot the sheer openwork of this crochet coquette sweater, and a dark bandeau underneath makes every flower stand out. At garden parties and spring brunches, a handmade cropped sweater with a wide boat neckline looks polished over black high waisted trousers.
This is a V-stitch top with 3D picot rosettes worked directly into the mesh grid at regular intervals, alternating position between rows so the flowers stagger across the front panel. The back is plain V-stitch, the sleeves are worked in the round from the armhole, and the cuffs get their own flower border before a final anchoring round closes them. If you want a garment that photographs well and rewards patience, this is the project. The chain multiple structure keeps the math consistent throughout, and once you build one rosette you repeat the same motion every time.
Crochet Off Shoulder Sweater Coquette

Materials and Tools
- Tencel Capri yarn by Loops and Threads, which is a weight 3 light worsted or DK fiber with a smooth, slightly silky finish
- 3.0 mm crochet hook — one size down from the label recommendation, used deliberately for firmer stitch definition and cleaner rosette shaping
- Scissors
- Tapestry needle for weaving in ends
The 3.0 mm hook choice matters here. A larger hook makes the V-stitch mesh looser, which causes the rosettes to sit less cleanly and the chain-5 bridges to sag. If you substitute yarn, match the DK or light worsted weight and swatch with a 3.0 mm hook before committing. The resulting fabric should feel structured but not stiff.
Difficulty and Time
This is an intermediate project. The V-stitch rows are repetitive and meditative once the pattern clicks, but the 3D rosette construction requires attention the first few times — you are building picot loops around stitch posts and then pulling the working loop through to pop the flower into shape. That closing step is the only technically unusual moment in the whole pattern. Budget one session to get comfortable with the rosette before starting the actual front panel. Sleeves add significant time given the round count, so plan for several dedicated sessions across the full project.
The Pattern
Part 1: Front Panel
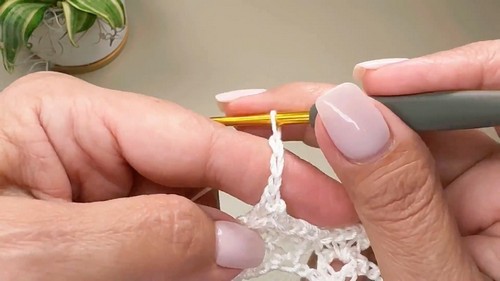
Foundation Chain and Setup Row
- Make a slip knot and chain a multiple of 14 stitches to reach your desired width. For a size small, chain 112, which accommodates 4 motif sections.
- Yarn over, skip the first 4 chains, and insert your hook into the 5th chain from the hook. Work 1 V-stitch by working 1 double crochet, chain 2, and 1 double crochet all into the same stitch.
- Yarn over, skip 3 chains, and into the 4th chain work your second V-stitch — 1 double crochet, chain 2, 1 double crochet.
- Yarn over, skip 3 chains, and into the 4th chain work your third V-stitch. You now have a set of 3 V-stitches making up one motif block.
- Bridge to the next block: chain 5, skip 5 chains, and into the 6th chain work the first V-stitch of the next motif block.
- Repeat the sequence of 3 V-stitches followed by a chain-5 bridge across the full row, ending with 1 double crochet into the very last chain space to keep the edges tidy.
Row 2 — V-Stitch Row
- Chain 4 and turn your work. The chain 4 counts as 1 double crochet plus a 2-chain space.
- Work V-over-V across the 3 V-stitches: 1 double crochet, chain 2, 1 double crochet worked inside the chain-2 space of each V-stitch from the previous row.
- Chain 5 across the chain-5 bridge space from the previous row.
- Repeat across the full row and finish with 1 double crochet in the top of the turning chain.
Row 3 — First Flower Motif Row
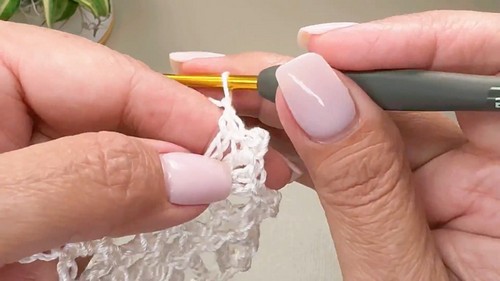
Flowers are placed in the middle V-stitch of each motif block on designated rows, and their position alternates between blocks on each subsequent flower row.
- Chain 4, turn, and work the first regular V-stitch over the first V-stitch of the motif block.
- Move to the middle V-stitch of the block. Work 1 double crochet into the top of the first double crochet of that V-stitch.
- Work 2 double crochets into the center chain-2 space of the V-stitch.
- Build the rosette with 9 textured picot loops: work 1 double crochet, chain 3, then slip stitch or single crochet around the post of that double crochet to form a picot. Repeat this picot construction until you have 9 picot-topped stitches total forming the rosette.
- Finish the flower base with 1 double crochet in the chain-2 space and 1 double crochet in the remaining double crochet of the V-stitch.
- Close the flower into its 3D rosette shape: drop the working loop, insert your hook from front to back through the base of the first double crochet of the flower, pick up the dropped loop, pull it through to the front, and secure it with 1 chain. This step pops the flower forward into a rounded rosette.
- Work the final V-stitch of the motif block, chain 5, and continue the pattern across the row.
Subsequent Rows — Building the Body Height
- Follow an alternating sequence throughout: every flower row is followed by 3 plain V-stitch rows with chain-5 bridges, then another flower row.
- On each new flower row, offset the flower placement so that rosettes appear above the plain V-columns from the previous flower generation, creating a staggered grid across the front panel.
- Continue repeating this sequence of flower rows and plain V-stitch rows until the front panel reaches your desired length. For a short top in size small, work to approximately 36 cm of height.
Part 2: Back Panel
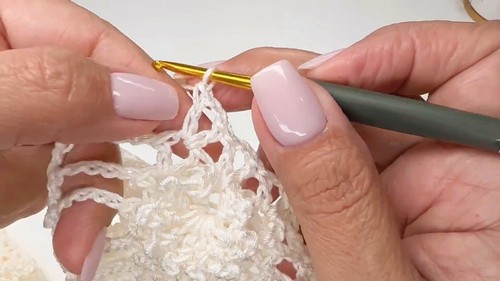
- Crochet the back panel to exactly the same dimensions and stitch count as the front panel.
- Work all rows in plain V-stitch with chain-5 bridges throughout — no rosettes are placed on the back panel.
Part 3: Joining the Panels
- Place the front and back panels together with right sides facing inward so the rosettes are on the inside during seaming.
- Shoulder seams: slip-stitch the outer shoulder edges together for approximately 10 cm on each side, leaving a central neck opening of approximately 28 cm for size small. Fasten off.
- Side seams: align the side edges and slip-stitch from the bottom upward on each side, leaving the armhole openings unsewn. Fasten off and weave in all ends on the wrong side.
Part 4: Sleeves — Make 2
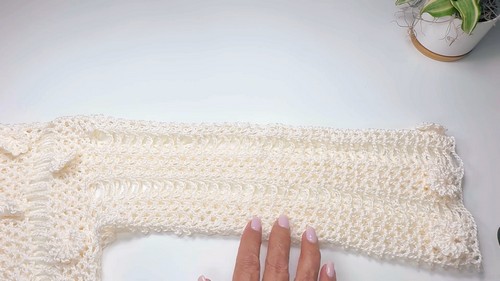
Sleeve Foundation and Rounds
- Turn the assembled top right side out and attach yarn at the underarm join of the armhole.
- Chain 3 to count as 1 double crochet, chain 2, and work 1 double crochet in the same space to form the first V-stitch of the round.
- Work around the armhole opening using the same V-stitch and chain-5 spacing sequence used on the body panels.
- Join with a slip stitch in the 3rd chain of the beginning chain.
- Continue working joined rounds of V-stitches and chain-5 spaces for the full sleeve length. Work 32 rounds total before beginning the cuff details.
Sleeve Cuff Flower Border
- On round 33, incorporate a row of rosettes centered over selected V-stitch columns around the cuff, using the same flower construction method used on the body panel — 9 picot-topped stitches, flower base completion, and the dropped-loop closing step.
- Work 1 final round of V-stitches, placing a V-stitch directly into the center of each completed rosette, to anchor the cuff edge.
- Repeat the entire sleeve process for the second sleeve.
Part 5: Neckline Finishing
- Attach yarn at the shoulder seam of the neckline.
- Chain 1 and work 1 round of single crochet around the entire collar opening.
- Work 4 single crochets across each chain-5 space.
- Work 2 single crochets inside each V-stitch chain-2 space and 1 single crochet between V-stitches.
- Join with a slip stitch to the first single crochet, fasten off cleanly, and weave in all remaining yarn tails.
Technique Notes
- The rosette closing step is the one place where makers consistently hesitate. The motion feels counterintuitive — you drop the active loop deliberately, which always feels risky — but crochet does not unravel from the middle of the fabric, only from the live end. The dropped loop is immediately recaptured on the hook and pulled through, so the stitch is secure within a second. Practice on a swatch before working the actual front panel and the motion becomes automatic by the third or fourth flower. Do not skip the closing chain after pulling through; it is what locks the rosette in its raised position.
- The alternating flower placement across rows is what creates the all-over floral pattern rather than a grid of columns. On each new flower row, count your motif blocks carefully before placing the first rosette and confirm you are offsetting from the previous flower generation. Placing a stitch marker in the chain-2 space of each intended flower position before you begin that row removes the counting pressure while you work.
- Sleeve seaming into the armhole is easiest when the body is turned right side out first and the armhole edge is clearly visible all the way around. Attach yarn at the underarm rather than at the shoulder so your join falls at the least visible point on the sleeve.
Yarn Substitution
Tencel Capri has a specific drape and surface quality — smooth, slightly cool to the touch, with a gentle sheen — that suits the coquette aesthetic of this sweater very well. If you substitute, stay within DK or light worsted weight and look for fibers with similar properties: bamboo blends, viscose blends, or cotton-modal mixes all give comparable drape. Avoid anything with a halo or texture, as the rosette picot loops need clean individual definition to read as flower petals rather than a textured blob. Pure cotton is workable but gives a stiffer result. Match the hook size to your swatch rather than the yarn label.
FAQ
- Does the chain multiple have to be exactly 14? Yes, the entire stitch pattern — the 3 V-stitches per motif block plus the chain-5 bridge — is built on a repeat of 14. Adding or removing width means adding or removing complete multiples of 14. If you go up one full motif repeat from size small, add 14 to your starting chain total.
- Can the back panel have flowers too? Structurally, yes — the back panel is worked identically to the front except for the rosettes, so you can add flowers following the same alternating sequence if you want a fully floral garment. The original design keeps the back plain so the top is reversible and so the floral texture does not press against the body uncomfortably when worn.
- What if my rosettes are not popping forward into a rounded shape? The most common reason is that the closing step — pulling the dropped loop through to the front at the base of the first flower double crochet — is being worked too loosely. Pull the loop snugly when you bring it through, then chain 1 to lock it before continuing. A rosette that lies flat rather than rounding up is usually underpulled at that final step.