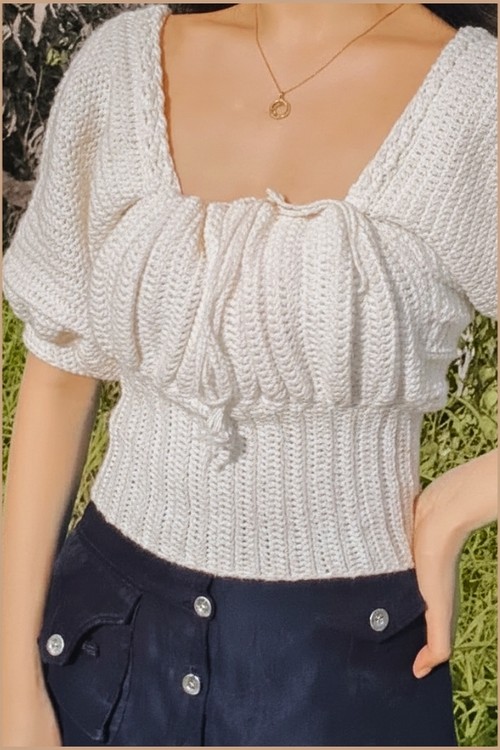
This cut-out crop top is one of those beginner-friendly builds that looks far more complex than it is, a mesh yoke flows into cap sleeves, and a structured ribbed panel at the front creates the open waist detail that makes the whole silhouette pop. If you love negative space in your crochet, you might also want to bookmark this heart cut-out top for your next make.
Free Cut-Out Crop Top Crochet Pattern

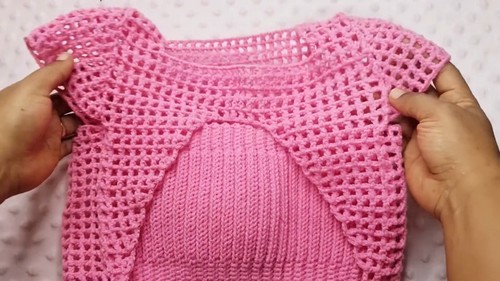
The two-texture contrast, open mesh across the shoulders and cap sleeves against the dense ribbed centre, is what makes this top stand out on the hook and off it. Work through the mesh section first, then switch to the ribbing for the front panel, and the cutout takes shape almost automatically. Once you finish this one, the cut-out shoulder top is a natural next make.
Why I love this one: the ribbing-up construction means the fit is built into the process — you’re never guessing whether it’ll work, because you’re trying it on the whole way through.
Materials & Tools
- Milky Cotton yarn or a similar weight yarn
- 3.5 mm or 4.0 mm crochet hook (depending on your tension)
- Scissors
- Measuring tape
- Stitch markers
Crochet Stitches Explained
Difficulty & Time
Skill level: Confident beginner to intermediate. The stitches are simple, but the construction is shaped to the body, so you’ll be measuring and adjusting as you go. Estimated time: An afternoon to a weekend, depending on size and how often you stop to check the fit.
The Pattern

Ribbing Bottom Band
- Make a slip knot and chain your desired ribbing height — usually 6 to 7 chains. Single crochet in the second chain from the hook and in each chain across.
- Chain 1, turn, and single crochet in the back loops only of each stitch. Repeat these rows until the ribbing fits comfortably around your waist or underbust.
- Join the short ends together using slip stitches to form a circle.
Body and Front Cut-Out Section
- Single crochet evenly around the top edge of the ribbing. Switch to double crochet and continue working in the round to build height.
- When you reach the front section, stop working in the round to form the cut-out opening. Work back and forth in rows to shape the front opening, using slip stitches to move your yarn to the correct starting position as you shape.
Bust and Upper Shaping
- Continue working rows of double crochet to build the chest area. Increase by placing two double crochets into one stitch at your shaping points.
- Once the cut-out reaches the height you want, separate the front into left and right sections. Work each side individually to form the neckline shape.

Straps and Finishing
- Attach yarn to the top corners and chain your desired strap length. Work single crochet or double crochet back along the chain for sturdy straps.
- Match the back panel height to the front before joining at the shoulders. Single crochet or slip stitch evenly around the armholes and neckline for a clean finish.
- Still getting the hang of reading crochet patterns? That’s completely okay, the video tutorial below breaks everything down in a simple, beginner-friendly way!
Fit Notes
- Measure against the body as you crochet for the best results.
- Adjust the ribbing length, cut-out depth, and strap length to suit your style.
- Weave in all ends securely before wearing.

Tips & Troubleshooting
- Back-loop-only ribbing is the secret to good stretch. Working into the back loops only creates those vertical ridges that let the band hug your body. If your ribbing feels stiff or won’t stretch, double-check you’re catching only the back loop on each stitch.
- Mark your front section before you split for the cut-out. Place stitch markers at both edges of where the front opening will sit before you stop working in the round. It’s much easier to keep the opening centered and symmetrical when you’ve marked the boundaries in advance.
- Keep a small gauge sample of your double crochet rows. Because the height of the body is built row by row to your own measurements, knowing roughly how tall each row works up helps you estimate how many rows you’ll need before separating for the neckline.
- Try it on often. This pattern rewards frequent fittings. The cut-out depth and strap placement are far easier to get right when you check against your body rather than committing to a guess.

Yarn Substitution Notes
Milky Cotton is a soft, slightly sheeny cotton-blend that’s popular for garments like this — it has good stitch definition and a gentle drape. If you’re substituting, look for these qualities:
- Cotton or cotton-blend DK/sport weight is the closest match and the most comfortable choice for a summer top against skin.
- Bamboo blends drape beautifully and add a cool, silky hand if you want something a little more fluid.
- Avoid pure acrylic for this one if you can — it’s warmer against the skin and lacks the breathability that makes a summer crop top comfortable. If acrylic is what you have, a lighter cotton-acrylic blend is a better compromise.
Whatever you pick, choose a smooth yarn with clear stitch definition so the ribbing and double crochet texture read cleanly.
Customization Ideas
Cut-out depth: This is the signature detail, and it’s entirely yours to set. A shallow opening reads more subtle and everyday; a deeper one is bolder. Decide based on the height where you split the front.
Strap style: The straps can be thin and delicate or wide and supportive depending on whether you work single or double crochet, and how many rows you add. Make them long enough to tie at the neck, or shorter to sit as fixed shoulder straps.
Band height: A taller ribbed band gives more underbust coverage and structure; a shorter one keeps it cropped and minimal.
Color blocking: A contrast ribbing band against a different body color is a simple way to add interest without changing the construction at all.
FAQ
Do I need to know my exact size before starting? No — that’s the beauty of this construction. You build the ribbing to fit your waist or underbust, then measure against your body as you work upward. As long as you have a measuring tape and try it on as you go, the fit takes care of itself.
How do I keep the front cut-out centered? Mark the edges of the front section with stitch markers before you stop working in the round. Working back and forth between those markers keeps the opening symmetrical and centered on the front.
Can I make the straps adjustable or tie-able? Yes. Chain the straps longer than you think you’ll need and they become ties you can knot at the neck or shoulders. For a fixed strap, simply join them at the matched back panel height when finishing.
What if my ribbing won’t stretch enough to go over my body? Make sure you’re crocheting into the back loops only, which is what creates the stretch. If it’s still tight, add a few more rows of ribbing before joining into a circle — the band should sit snugly but pull on comfortably.