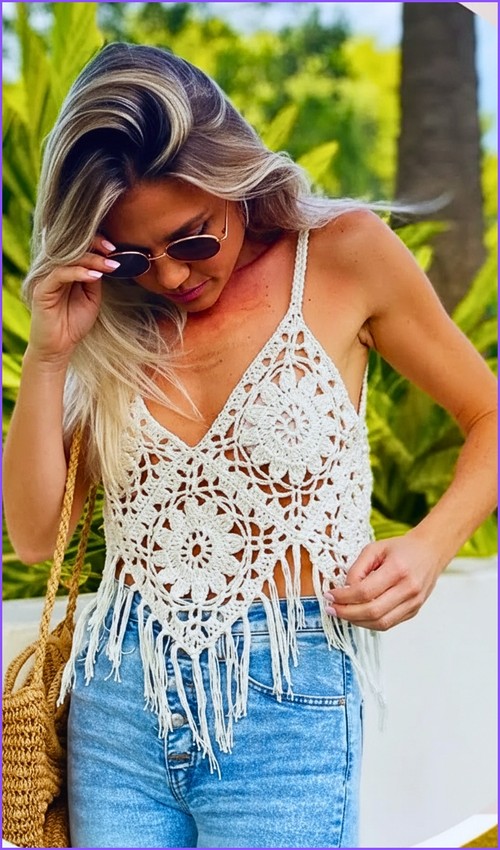
A single heart-shaped cut-out edged in contrast pink turns a plain white crop top into something with real personality the kind of detail that reads festival-ready without much extra work. For a colour-block take on the cut-out idea, the cut-out halter top uses a keyhole opening between three-colour cups.
Cut-Out Heart Crochet Top

The body is worked as a simple sleeveless shell, with the heart shaped by placing the opening mid-panel and outlining it afterward. If you like the clean single-crochet fabric and want a version without the cut-out, the tie-front top offers the same dense finish in a tied silhouette.
Difficulty & Time
- Skill level: Advanced beginner — comfortable with double crochet, increasing, and basic seaming
- Time: A relaxed weekend project for most makers
- What makes it approachable: It’s built from two identical cups and worked in familiar stitches, so once you’ve made the first cup, the second is pure muscle memory
Materials & Tools
- Medium weight yarn — cotton or acrylic both work beautifully (cotton gives crisp stitch definition and breathability; acrylic adds a little stretch and softness)
- 3.5 mm or 4 mm crochet hook — go down a hook size if you crochet loosely and want tighter, more opaque coverage
- Scissors
- Tapestry needle for seaming and weaving in ends
Master These Stitches First
Beginner Technique Notes
A few stitches do most of the heavy lifting here. If any of these feel new, a quick practice swatch will set you up for success:
- Double crochet (dc): Your workhorse stitch for the whole top. Yarn over, insert into the stitch, pull up a loop, then work off two loops at a time.
- Working into both sides of a foundation chain: The cups are shaped by crocheting across one side of your starting chain, turning at the end, and coming back along the other side. This is what gives each cup its rounded, triangular form.
- Increasing at the center top: The “2 dc, chain 1, 2 dc” worked into the same point creates a clean increase with a little built-in pivot, letting the cup fan outward as it grows.
- Shell stitch: A cluster of stitches grouped into one base stitch, fanned out like a seashell, for a pretty scalloped edge.
The Pattern
Creating the Cups
- Begin with a slip knot and chain enough stitches to measure from the bottom of your bust up to the nipple — this length sets the height of your cup, so use your tape measure rather than guessing.
- Work double crochet stitches across the chain.

- At the end of the chain, work 3 double crochet stitches into the same stitch to turn your work around the point.
- Continue with double crochet stitches along the opposite side of the foundation chain.
- At the center top of each row, work 2 double crochet, chain 1, 2 double crochet to increase and shape the cup.
- Repeat the rows until the cup reaches your desired coverage.
- Make two identical cups.
- Never read a crochet pattern before? No problem! The video tutorial below is perfect for beginners, or give the written pattern below a try!
Joining the Cups & Forming the Band
- Lay both cups side by side with right sides facing up, positioning them to form that heart shape.
- Join the cups at the center bottom using slip stitches or single crochet for about one inch.
- Attach yarn to the outer edge of one cup and chain to your desired back strap length.
- Work double crochet stitches back along the chain.
- Continue working double crochet across the bottom of both cups to build the band.
- Chain the same number of stitches on the opposite side for the second back strap.

Adding the Ruffles
- Attach yarn along the bottom edge of the band.
- Work triple crochet stitches into each stitch, placing multiple stitches into each space to create a full, flouncy ruffled effect.
- Attach yarn to the outer edge of each cup.
- Work a shell edging: place 5 double crochet stitches into one stitch, skip one stitch, then slip stitch into the next.
- Repeat the shell pattern all the way around both cups.
Straps & Finishing
- Attach yarn to the top point of each cup.
- Chain approximately 100 to 120 stitches for the neck straps.
- Work slip stitches or single crochet back down the chain to make the straps strong and stable.
- Add extra chains to the ends of the back band if you’d like longer tie straps.
- Weave in all loose ends securely with your tapestry needle.

Tips & Troubleshooting
- Swatch before you measure. Work a small double crochet sample first so you know your stitch and row height. It makes the “measure to the nipple” instruction far easier to translate into a cup that actually fits.
- Make your two cups truly identical. Count your rows on the first cup and write the number down, then match it exactly on the second. Cups that differ by even a row or two will throw off the symmetry of the heart.
- Keep straps tight and even. Working slip stitches or single crochet back down each chain isn’t optional — it stops the neck and back ties from stretching out and going limp over time.
- Mind your tension on the cups. Loose double crochet leaves gaps; if you want more coverage, drop to the 3.5 mm hook or hold the yarn a touch firmer.
- Pin before you seam. When joining the cups at center bottom, pin them in place and check the heart shape in a mirror before committing your stitches.
- Block at the end. A gentle steam or wet block relaxes the stitches, opens up the ruffle, and helps the shell edging lie flat and crisp.
Yarn Substitution
- Cotton is the classic pick for a top like this — breathable, structured, and great in warm weather. It holds the cup shape well and shows off the shell edging.
- Acrylic is more forgiving and budget-friendly, with a softer drape and a little give, which some makers find comfier against the skin.
- Cotton-acrylic blends split the difference nicely, offering structure with extra softness.
- Whichever you choose, stay within medium weight so the cup proportions and strap lengths in this pattern still work as written.

Customization Ideas
- Adjust the coverage by adding or stopping cup rows sooner — fuller for more support, shorter for a daintier bralette look.
- Skip the ruffle for a sleeker, more minimal band, or double it up for extra drama.
- Play with color: work the cups in one shade and the shell edging in a contrast color to make the heart pop.
- Lengthen the back band into long wrap ties that can crisscross and tie at the front.
- Layer it over a fitted tee or slip dress to take the look from beach to street.
FAQ
1. How do I know how many chains to start with? Use your tape measure rather than a fixed number. Chain enough to span from the bottom of your bust up to the nipple — that length determines your cup height, and it’ll differ from maker to maker.
2. Cotton or acrylic — which should I use? Both work. Cotton gives crisp, breathable, structured cups that are lovely for summer, while acrylic is softer, stretchier, and gentler on the budget. If you’re unsure, a cotton-acrylic blend is a safe middle ground.
3. My two cups came out different sizes. What went wrong? Almost always a row-count mismatch. Track the exact number of rows on your first cup and replicate it on the second. Tension drift between sessions can also cause it, so try to make both cups in similar sittings.
4. Why work slip stitches back down the strap chains? A plain chain stretches and warps under tension. Working back along it with slip stitch or single crochet reinforces the strap so it holds its shape and supports the top properly.
5. Can I make this more supportive or add more coverage? Yes — simply keep adding cup rows until you reach the coverage you want, and consider a tighter tension or smaller hook for a denser, more opaque fabric. You can also line the cups with fabric if you’d like extra structure.
Two cups, a few rows of double crochet, and you’ve got a top that looks like it came straight off a boutique rack — happy making!