
Three colours, a centre cut-out, and knotted halter ties make this crop top one of the more playful colour-block makes in the halter category. For another tie-front halter with a similar bralette build, the tie-front top shares the same cup-panel construction in a simpler palette.
Crochet Cut-Out Halter Top

Each cup is worked separately and joined at the waistband, keeping the colour changes clean and easy to manage. If you enjoy the colour-block approach and want to try it in a tube-top format, the asymmetrical tube top applies similar blocking in a different silhouette.
Materials & Tools
- Yarn: Weight 2 or 3 cotton yarn, approximately 100g — cotton is the right call here for breathability and stitch definition
- Hook: 3.0 mm or 3.5 mm crochet hook
- Other: Scissors, yarn needle, measuring tape
Stitch Used from Start to Finish
Difficulty & Time
Advanced beginner, and a fast one. If you can work double crochet and follow a simple increase, the cups come together quickly and the rest is straightforward shaping and ties. Plan for an evening or two.
Technique Notes
A few pointers built into the stitches you’ll be using, so you can work cleanly from the start:
- Double crochet is your main stitch throughout. The cups, bodice, and edging all rely on it, so a quick warm-up swatch is worth it if you’re rusty.
- The cups are worked around both sides of the foundation chain. You’ll crochet across one side, form the point, then come back along the other side — that’s what shapes each cup. Tip: when you reach the chain-15 starting length, measure it against your own body (base of breast to nipple) before committing, since that length sets your cup height.
- The “2 dc, ch 1, 2 dc” at the peak is your increase point. Working it into the same stitch (and later into the chain-1 space) fans the cup outward each row. Tip: keep your tension even on these increases — pulling them tight will distort the point and flatten the cup.
- Making two matching cups matters most. Tip: count your rows on the first cup and replicate exactly on the second; even one row of difference shows once they’re joined.
- Mesh edging is just dc, chain 1, skip 1. It’s forgiving and decorative. Tip: work it evenly and don’t skip more than instructed, or the holes get sloppy.
- Reinforce nothing about the straps is automatic — long chains stretch. Tip: if you want sturdier ties, work a row of slip stitch back along each chain strap before fastening off.
The Pattern
Bra Cups (Make 2)
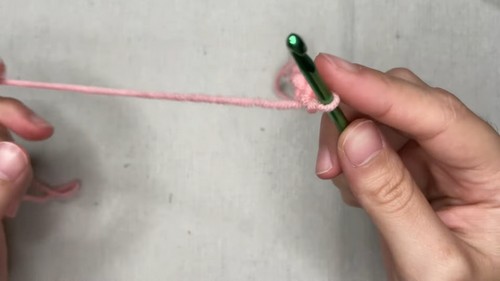
- Start with a slip knot and chain 15, or chain enough to measure from the base of your breast to the nipple.
- Double crochet in the third chain from the hook and in each chain across.
- In the last chain, work 2 double crochet, chain 1, 2 double crochet to form the top point.
- Continue with double crochet down the opposite side of the foundation chain.
- Chain 2 and turn.
- Double crochet in each stitch until you reach the chain-1 space at the peak.
- In the chain-1 space, work 2 double crochet, chain 1, 2 double crochet.
- Double crochet in each stitch down the other side.
- Repeat the increase rows until the cup fully covers the breast — typically 8 to 9 rows for a small size.
- Just starting out with crochet? The video tutorial below is a great place to begin, or challenge yourself with the written pattern below!
Joining the Cups & Creating the Peekaboo Gap
- Complete both cups, and do not cut the yarn after finishing the second cup.
- Chain 2 and double crochet evenly across the bottom edge of the first cup.
- Chain 2 to 4 stitches, depending on your desired center gap width.
- Double crochet evenly across the bottom edge of the second cup.

Bodice Bottom Section
- Chain 2 and turn.
- Double crochet across the entire width, including both cups and the center chain space.
- Chain 2 and turn at the end of each row.
- Decrease one stitch at each row end for a tapered fit, if desired.
- Continue working rows until the bodice reaches 4 to 6 inches or your preferred length.
Edging & Mesh Details
- Attach yarn at any edge of the top.
- Work double crochet, chain 1, skip 1 stitch around the edges to create a mesh effect.
- Continue evenly around the cups, sides, or bottom edge as desired.

Straps & Finishing
- Attach yarn to the chain-1 space at the top of each cup.
- Chain 80 to 100 stitches for each neck strap.
- Attach yarn to each bottom corner of the bodice.
- Chain 100 to 120 stitches for the back tie straps.
- Fasten off and weave in all loose ends with your yarn needle.

Customization Ideas
- Widen or narrow the center gap by adjusting the chain-2-to-4 at the join — more chains for a bolder cut-out, fewer for a subtle one.
- Lengthen the bodice past 4 to 6 inches for more midriff coverage, or keep it short for a true crop.
- Skip the mesh edging for a solid, clean finish, or run it around everything for an airy, lacy look.
- Play with the tapered decreases for a snugger, more fitted shape, or leave them out for a relaxed fit.
FAQ
1. How do I size the cups for me? Don’t rely on chain 15 if it doesn’t match your body. Chain enough to measure from the base of your breast to the nipple, then keep adding increase rows until the cup fully covers — the 8 to 9 rows noted is just a small-size starting point.
2. Will the long chain straps stretch out? A plain chain can stretch under tension over time. If you want them to hold, work a row of slip stitch back along each neck and back-tie chain before fastening off for extra stability.
3. What yarn works best? Stick with the weight 2 or 3 cotton called for. Cotton gives crisp stitch definition, breathes well in heat, and holds the cup shape, which matters for a structured top like this.


