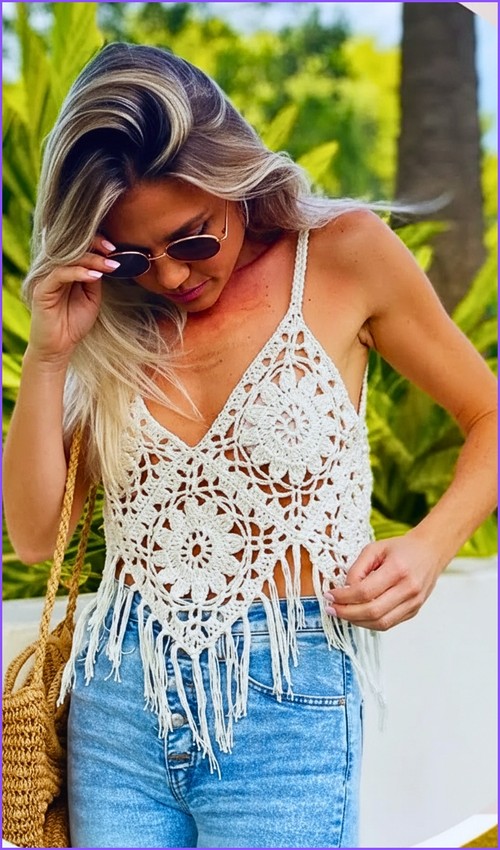
The strap is what makes this top, a braided length worked in three ombre shades that runs diagonally from shoulder to side tie, turning a simple white rectangle into something that reads much more considered. The body itself is as straightforward as crochet tops get, which means most of the creative energy goes into the color choices for that braid. It’s a different approach to the one-shoulder silhouette than the red one-shoulder ribbed crop top covered elsewhere on the site.
Asymmetrical Crochet Tube Top

The main panel is worked flat in rows and seamed at the sides to form the tube shape, no shaping required, just consistent tension across the width. The diagonal strap is made separately as a braided chain and attached once the body is complete, so you can plan your color gradient before committing. For another clean, minimal tube style, the ribbed tube top takes a similar flat-rectangle approach with a different stitch texture.
Pattern Overview & Notes
Skill Level: Intermediate (or ambitious beginner!)
Construction: This top is made by crocheting two identical pieces (a front and a back panel) from the waist up. The asymmetrical slope is created using a clever, staggered stitch height method rather than traditional decreases. The sides are left open and laced together with thick, durable cords for an adjustable fit.
Terminology: US Crochet Terms
Materials & Tools
Main Yarn: Category 3 (Light/DK weight) yarn. A blend of approximately 51% cotton and 49% bamboo rayon is highly recommended for optimal drape and breathability.
Decorative/Cord Yarn: Category 4 (Medium/Worsted weight) 100% cotton yarn (used for the side laces and decorative leaf embellishments).
Crochet Hook: 3.5 mm (or size needed to obtain gauge).
Notions: Tapestry needle, stitch markers, and scissors.
Optional: A small piece of fabric for lining the front panel.

Quick Stitch Guide
Sizing & Measurements
This pattern is easily customizable to your exact body measurements!
Width Calculation: Measure your total bust circumference in centimeters. Divide this number by 2, then subtract 5 cm. This is your target panel width.
Example (Size Small): 90 cm bust $\div$ 2 = 45 cm. Next, 45 cm – 5 cm = 40 cm target width.
Main Body Height: Approximately 24 cm (21 rows for Size Small), reaching from your waistline to just above the bust line.
Slope Height: Approximately 20 cm (17 rows for Size Small), reaching from the top of the bust to the shoulder line.
Step-by-Step Pattern Instructions
Step 1: The Base & Foundation
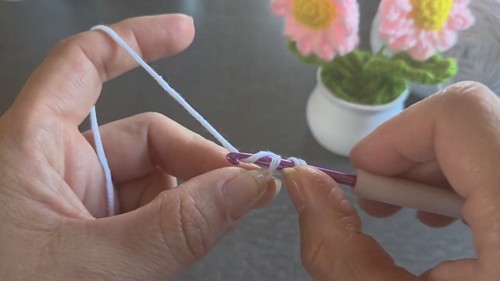
Foundation: Chain a length of stitches until your piece reaches your calculated target width (e.g., 40 cm for a size Small). Make sure to measure your chain flat without stretching it.
Row 1: Chain 1 extra (does not count as a stitch), turn your work, and half double crochet (hdc) across the entire row, working exclusively into the back loops of your foundation chain.
- Never read a crochet pattern before? No problem! The video tutorial below is perfect for beginners, or give the written pattern below a try!
Step 2: Building the Main Body Rectangle
Row 2: Chain 1 (does not count as a stitch), turn. Double crochet (dc) through both loops across the entire row.
Subsequent Rows: Repeat Row 2 to build a solid rectangular panel of double crochets. Continue repeating this row until the panel measures from your waistline to just above your bust line (21 rows / ~24 cm for Size Small).
Step 3: Creating the Asymmetrical One-Shoulder Slope
The slope is worked on one designated side of the panel only, while the armhole side is kept completely straight.
Slope Row 1: Chain 1 and turn. Slip stitch (sl st) into the first stitch, single crochet (sc) into the second stitch, half double crochet (hdc) into the third and fourth stitches, and double crochet (dc) into the fifth stitch. Place a stitch marker into this fifth stitch. Double crochet (dc) regularly in every remaining stitch across to the opposite end of the row.
Slope Row 2: Chain 1 and turn. Double crochet (dc) straight back across the row until you are exactly 4 stitches before your stitch marker. In those final 4 stitches, taper your stitch height down as follows: hdc in the next stitch, sc in the following stitch, and sl st directly into the marked stitch. Remove your marker.
Slope Row 3: Turn your work. Slip stitch (sl st) into the first stitch to shift your starting position over. Single crochet (sc) into the next stitch, hdc into the third stitch, and hdc into the fourth stitch. Double crochet (dc) into the fifth stitch and place your stitch marker into this new dc. Finish the remainder of the row with regular double crochets (dc) to the straight edge.
Subsequent Slope Rows: Repeat the sequence established in Slope Rows 2 and 3. Keep the armhole side completely straight while continuing the slope on the neckline side until the panel reaches from the top of your bust up to your shoulder line (17 rows / ~20 cm for Size Small). Fasten off.

Pro-Tip: Smooth Slopes with Staggered Stitches
Traditional decreases (like dc2tog) can sometimes leave a jagged, “stair-step” edge on garment necklines. This creates a beautifully fluid, sharp diagonal line that looks incredibly professional and is much easier to edge later!
Step 4: Cleaning Up and Assembly
Neckline Edging: Join your main yarn at the neckline. Chain 1 and work a neat row of single crochets (sc) all along the shoulder seam and down the raw, jagged edges of your diagonal neckline to smooth it out. Fasten off and weave in all ends.
Back Panel: Repeat Steps 1 through 3 to create a second panel that is exactly identical to the first.
Seaming the Shoulder: Place the front and back panels together with the wrong sides facing out. Using a tapestry needle and the long tail of yarn left on one of the shoulders, sew the shoulder stitches together securely using a mattress stitch or whipstitch.
Step 5: Crocheting the Lacing Cords

You will make two separate cords—one for each open side of the top.
Using your Category 4 cotton yarn, hold two strands together and place a slip knot on your hook.
Keep one strand draped over your index finger (working strand) and the other strand held down securely in your hand (anchor strand).
Loop the bottom anchor strand over the front of the hook from front to back. Then, yarn over with the top working strand and pull it through both loops on your hook.
Repeat this motion continuously to create a thick, durable cord. Make each cord roughly 130 cm long (for Size Small). Tie off the ends securely.
Step 6: Final Details & Custom Embellishments
Lacing the Sides: Lay your top completely flat. Start at the top underarm area (where the diagonal slope begins) and lace the cord through the edge stitches of both panels. Criss-cross the cord downward like shoelaces, skipping roughly 3 rows of stitches between each crossover point. Tie beautifully at the bottom.
Neckline Embellishment: Using your Category 4 yarn, crochet several small decorative leaf motifs. Using a tapestry needle, sew them along the entire border of the polished diagonal neckline, overlapping them slightly to create a romantic, vine-like texture.
Tech Editor’s Comfort Note
Because double crochet stitches can inherently have tiny gaps and be slightly sheer, you can easily cut and hand-sew a basic nude or matching fabric rectangle onto the inside lining of the front panel. This adds structural stability and allows you to wear your new asymmetrical tube top comfortably without a bra!