One black star on a pale grey fishnet body makes the crochet star sweater an easy Y2K statement for concert nights and thrifted weekend looks. Black wide-leg trousers and a dark cami let the star mesh crochet top read sharp, with flared cuffs falling past the wrists.
I still remember the first time I pulled a mesh top over a plain tee and realized how much attitude a few chains and double crochets could carry. This Y2K crochet star sweater is built on that same idea: an airy fishnet body, long spiral sleeves, and one bold color-work star sitting right in the middle of the chest.
Crochet Star Sweater
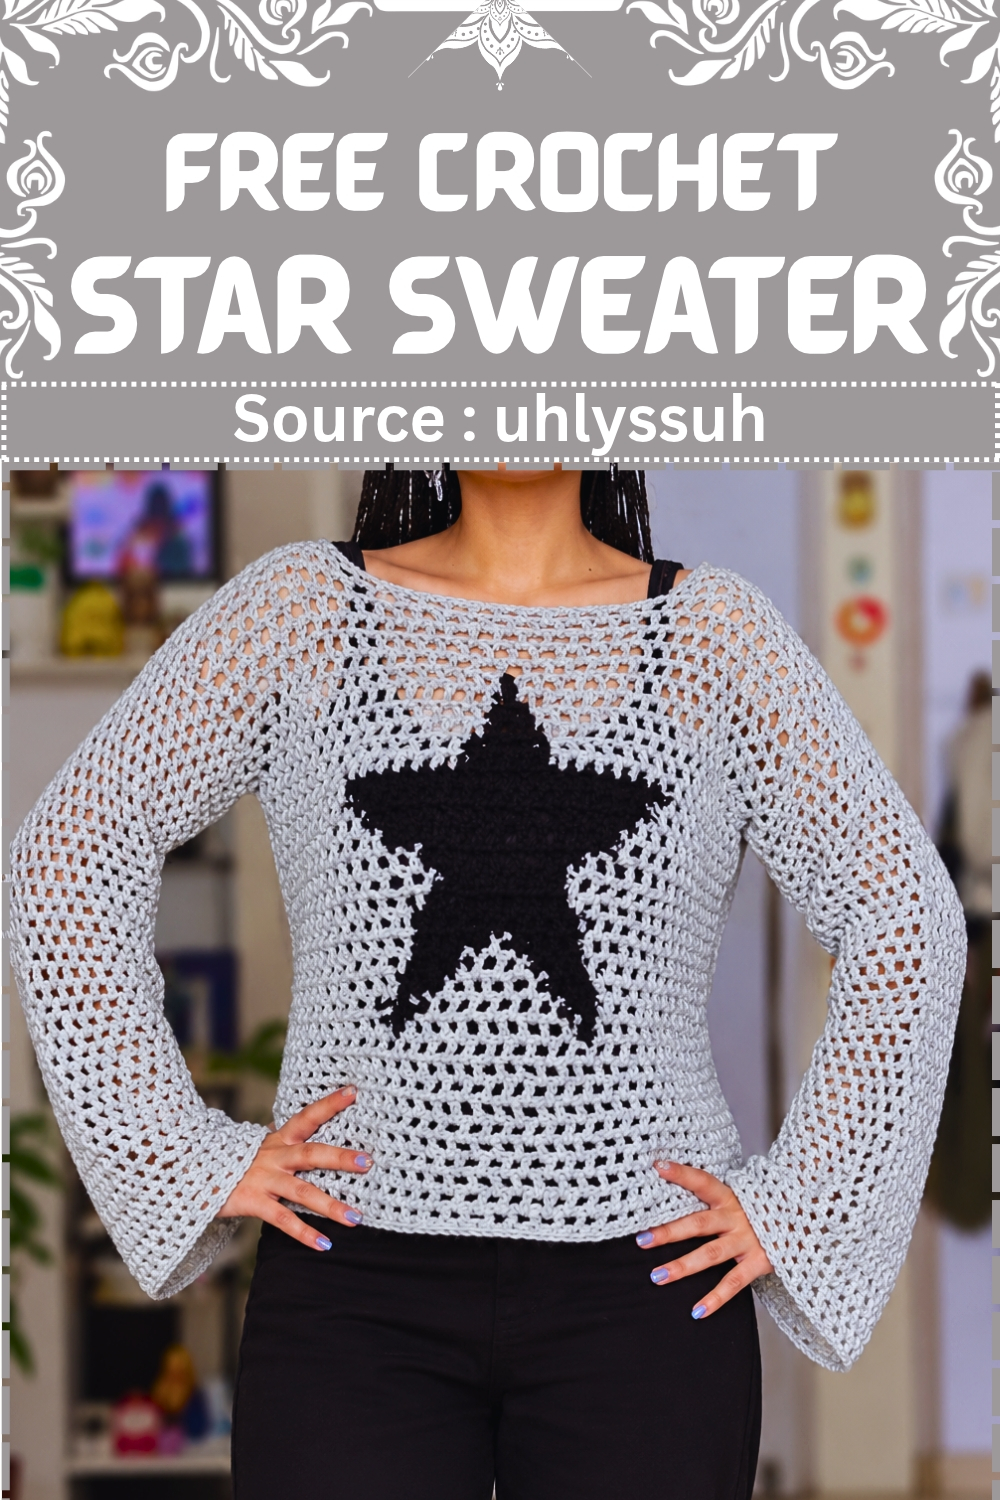
Every piece is worked in a simple mesh stitch, so the rhythm becomes relaxing fast, and the star is where you get to slow down and enjoy the shaping. It layers beautifully over tanks, slip dresses, and baby tees for that early 2000s look.
Difficulty and Time
The mesh body is easy enough for an advanced beginner, but the star section asks for steady counting, frequent color changes, and a little patience with ends. That puts the whole project at an intermediate level. Plan on a few relaxed evenings for the front and back panels, then another session or two for the seams and sleeves. Because the top is made to measure, your own time will depend on your size, your yarn weight, and how long you want the sleeves. The good news is that the mesh grows quickly, so progress feels visible from the very first rows.
Materials and Tools
- Main color yarn in worsted weight or the yarn of your choice (grey works beautifully)
- Star color yarn in the same weight as your main color (black gives a sharp contrast)
- Crochet hook in the size recommended for your yarn
- At least 4 stitch markers
- Scissors
- Tapestry needle for weaving in ends
Stitches and Technique Notes
This pattern uses US crochet terms. If you are newer to mesh or color-work, read through these notes before you start, because two small details make a big difference to how clean your star looks.
- Ch: chain
- Dc: double crochet
- Sc: single crochet
- Sl st: slip stitch
- Mesh stitch: Dc, ch 2, skip 2, then Dc in the next stitch or space
- Loop: the open chain space created by each mesh stitch
- For all regular mesh rows, work your Dc into the large open loop of the row below, not into the top of the Dc itself
- For star color stitches only, work the Dc into the actual stitch (the top V) so the edges of the star look crisp
- When you place two or more star stitches side by side, add a Ch 1 between them so the row does not tighten up or shrink in height
- To change colors, cut the yarn you are leaving and tie it to the new color, then weave those ends in as you go
Y2K Crochet Star Sweater Pattern
Front Panel Base
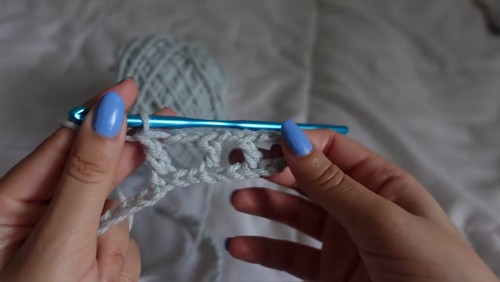
Foundation Chain
- With the main color, chain 96.
- If you are resizing for a different body, keep your chain count a multiple of 3 so the mesh spaces line up.
Mesh Rows
- Row 1: Chain 5 more (these act as your first turning chain and top spacing), skip the first 7 chains from the hook, and Dc into the 8th chain to form your first loop.
- Row 1 continued: Ch 2, skip 2 chains, Dc into the next chain, and repeat across the whole foundation chain, then count to confirm your loops. (33 loops)
- Rows 2 to 10: Ch 5 and turn, Dc into the first large loop, then ch 2 and Dc into the next loop, repeating the mesh stitch all the way across each row until you have 10 rows completed. (33 loops)
Mapping the Star Zone
- Place a stitch marker in the middle loop of the panel, which is the 17th loop, leaving 16 loops on each side.
- Count 8 loops to the left of the middle marker and place a stitch marker.
- Count 8 loops to the right of the middle marker and place another stitch marker.
- Treat the area between the two outer markers as your 17-loop-wide graph zone; the star stays entirely inside it.
Star Color-Work

Star Stitch Rules
- Work every star color Dc into the actual stitch (the top V), not into the loop.
- Ch 1 between neighboring star stitches to keep the row from tightening.
- Cut and tie the yarns at every color switch.
- Weave in ends as you go so they never pile up.
Opening Star Rows
- Row 11: Work regular mesh in the main color up to the first marker.
- Work 3 more mesh loops in the main color inside the graph zone.
- Switch to the star color and Dc 1 into the actual stitch.
- Switch back to the main color and work 9 mesh loops.
- Switch to the star color and Dc 1 into the actual stitch.
- Switch back to the main color, work 3 loops to the marker, then continue regular mesh to the end of the row.
- Row 12: Work regular mesh in the main color to the marker, then 3 loops inside the zone.
- Switch to the star color and work 2 stitches (Dc in the stitch, Ch 1, Dc in the next stitch).
- Switch to the main color and work 7 mesh loops.
- Switch to the star color and work 2 stitches (Dc, Ch 1, Dc).
- Switch to the main color and finish the row.
- Row 13: Work regular mesh in the main color to the marker, then 3 loops inside the zone.
- Switch to the star color and work 3 stitches (Dc, Ch 1, Dc, Ch 1, Dc).
- Switch to the main color and work 5 mesh loops.
- Switch to the star color and work 3 stitches.
- Switch to the main color and finish the row.

Completing the Star
- Rows 14 to 29: Continue building the star row by row by following the star graph from uhlyssuh’s original mesh star top tutorial, using the same color-switch and star stitch rules inside the graph zone, until the star is complete at 29 rows from the bottom of the panel.
Upper Front and Shoulder Straps
Top Base
- Rows 30 to 34: Work 5 more rows of regular mesh using only the main color, bringing the front panel to 34 rows tall. (33 loops)
Shoulder Straps
- Right strap: Along the right side of the top edge, work 12 mesh loops across, then turn and continue until the strap is 4 rows tall. (12 loops)
- Tie off the right strap.
- Left strap: Attach yarn on the left side of the top edge, work 12 mesh loops across, and build up until the strap is 4 rows tall. (12 loops)
- Tie off the left strap.
Back Panel
- Work the back exactly like the front, without the star.
- Foundation: With the main color, chain 96, then chain 5 more and begin the mesh as in the front panel.
- Rows 1 to 34: Work 34 continuous rows of regular mesh in the main color. (33 loops)
- Add a 12-loop-wide, 4-row-tall shoulder strap to the top right corner. (12 loops)
- Add a matching 12-loop-wide, 4-row-tall shoulder strap to the top left corner. (12 loops)
Assembly

Shoulder Seams
- Place the front and back panels together, inside out.
- Sl st the top edges of the front and back shoulder straps together.
Armholes and Side Seams
- Decide how deep you want your armholes (the sample used about 8 inches from the shoulder seam down) and place a stitch marker at that point on both sides.
- Starting at the bottom hem, sl st the front and back panels together up each side.
- Stop when you reach the armhole marker, then Ch 1 and pull tight to secure.
- Turn the top right side out.
Sleeves
Joining the Sleeve
- Find the armpit where the side seam ends and attach the main color there.
- Round 1: Ch 5, Dc into the loop right next to it, then ch 2 and Dc into the next loop, repeating the mesh stitch all the way around the armhole opening. (about 28 loops)
- Sc into the first loop to connect the round.
Building the Length
- Ch 5 and begin the next round.
- Work continuously in a spiral with the mesh stitch, going around and around until the sleeve reaches your desired length (the sample used 39 rounds, about 19 inches).
Leveling the Cuff
- After your final round, Sc into the first loop of the next round to level the edge and avoid a stair step at the wrist.
- Tie off.
- Repeat the full sleeve on the second armhole.
Finishing
- Check that every color-work end from the star section is firmly woven into the stitches.
- Snip all remaining tails close to the fabric.
Tips for a Clean Finish
- Count your loops at the end of the first row and again after a few mesh rows. A single missed space shifts the center of the panel, and the star will sit off center.
- Keep the four stitch markers in place until the star is finished. Moving them up every few rows saves a lot of recounting.
- Hold your tension a little looser when you switch colors. Knots and tight first stitches can pucker the mesh around the star.
- Weave in ends at the end of every star row instead of saving them for later. The mesh is open, so loose tails show easily.
- Try the panels against your body before you seam the sides. It is much easier to adjust armhole depth with a marker than after the slip stitch is done.
- Use a stitch marker at the start of each sleeve round so you always know where the spiral begins, especially when counting toward your chosen length.
- Give the finished top a gentle wet block and lay it flat to dry. Mesh opens up beautifully once it relaxes, and the star becomes sharper.
Yarn Substitution
Worsted weight gives this top a cozy, sweater-like drape with a defined star, but you can absolutely work it in other weights. A cotton or cotton blend keeps the mesh crisp and holds its shape well in warm weather, while a soft acrylic gives more stretch and a slouchier fit. A lighter yarn creates a delicate, see-through layer that is lovely over slip dresses. Whatever you choose, keep both colors in the same weight and fiber so the star stitches match the mesh around them. Since the chain is worked to measure, swatch a few rows first and adjust the multiple of 3 to fit you.
Customization Ideas
- Swap the classic black star for metallic, neon, or pastel yarn for a different Y2K mood.
- Chart a heart, moon, or flame inside the same graph zone instead of the star.
- Add a second star to the back panel so the top looks finished from both sides.
- Stop the sleeves at the elbow for a lighter summer layer, or keep going past the wrist for thumbhole length.
- Work fewer rows below the star for a cropped fit, keeping the star centered on the chest.
- Use a fuzzy or sparkly yarn for the star only to make the motif pop against a plain main color.
Frequently Asked Questions
Is this Y2K star sweater beginner friendly?
The mesh body is very approachable once you are comfortable with chains and double crochet. The star section is where beginners may need extra patience, because it involves counting inside the graph zone and frequent color changes. Taking it one row at a time and weaving ends as you go makes it manageable.
How do I adjust the size?
Measure across your body and chain to that width, keeping the chain count a multiple of 3 so the mesh works out evenly. Make more or fewer rows to change the length, and use the armhole marker to set a depth that feels comfortable for you.
Why do the star stitches go into the stitch instead of the loop?
Working the star color Dc into the top V of the stitch below keeps the edges of the motif crisp and defined. If those stitches went into the loops like the mesh, the star would look softer and less clearly shaped.
Why are the sleeves worked in a spiral?
Working continuously around the armhole avoids a visible seam line running down the sleeve. The single crochet at the end levels the final round, so the cuff sits evenly without a stair step.
Will the top be see-through?
Yes, the mesh is open by design, which is part of the Y2K charm. Most makers wear it layered over a tank, bralette, or fitted tee. A lighter yarn makes it more sheer, while worsted weight gives slightly more coverage.