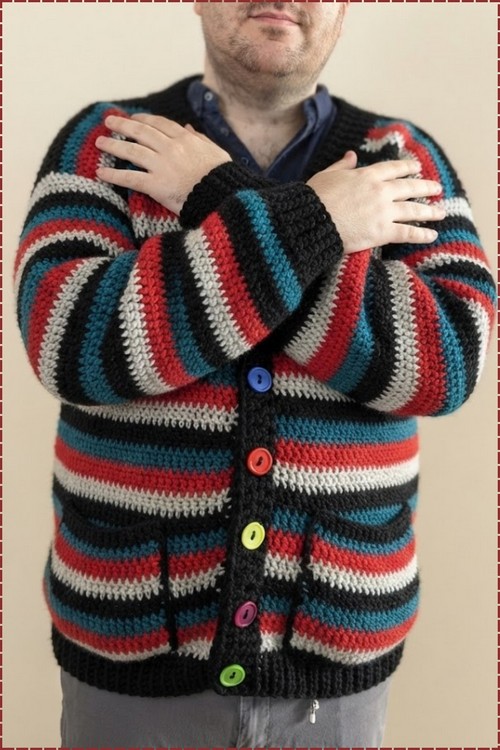
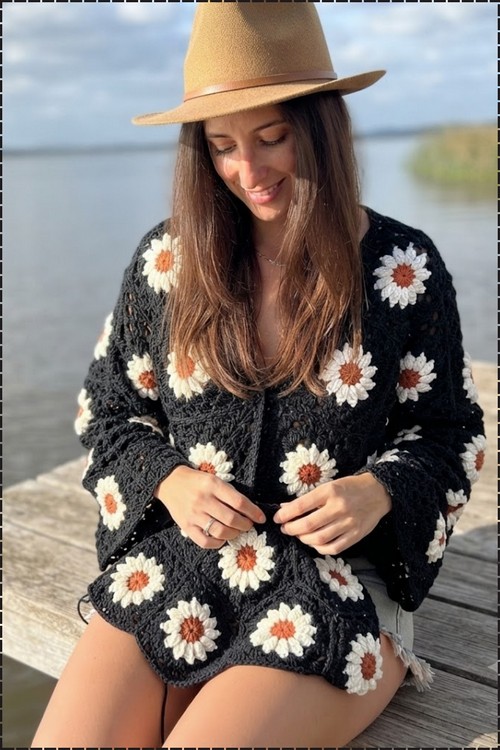
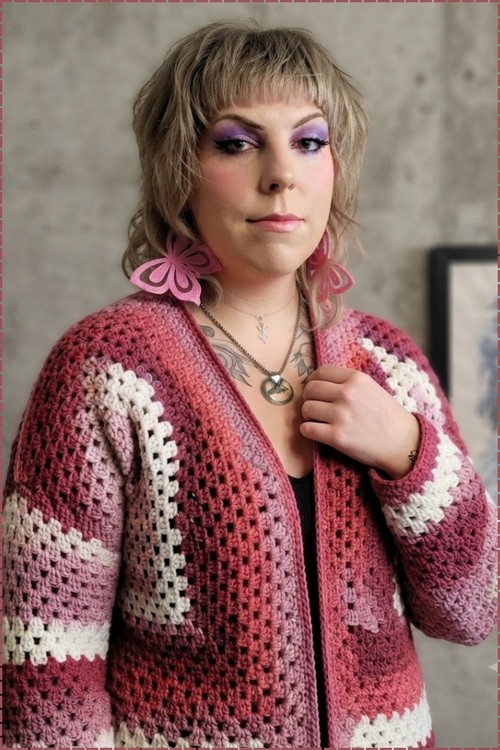
Raspberry and cream stripes wrap each sleeve of the hexagon cardigan, and crochet sweater cuffs keep the colour blocks neat at the wrist. Statement earrings and a black camisole suit the pink granny cardigan, and crochet cuffs freshen a plain ribbed sweater as a makeover.
Granny stitch cardigans tend to get all the attention for their texture, but the finishing details are what make them look truly polished, and this tutorial from Kate focuses entirely on getting those cuffs right. The color block sleeve construction here pairs beautifully with something like the boxy sweater if you want a full granny pullover to practice on first.
Crochet Cuffs On Sweater

The cuffs and neckband are picked up directly from the finished granny body and worked in a simple ribbing that snugs the edges without changing yarn. Open front cardigans like this one benefit especially from that clean band finish since the lapels stay visible throughout wear.
Materials
- The same yarn you used for your cardigan (or a matching weight in a coordinating color)
- The hook you used for your cardigan body
- A hook one size smaller than your cardigan hook (for the cuff rows)
- Stitch marker
- Scissors
- Yarn needle for weaving in ends
Know Your Stitch Before Starting
Difficulty and Time
Difficulty: Easy — if you can work single crochets in a round, you can do this. Estimated time per cuff: 30–60 minutes depending on cuff length and yarn weight.
Beginner Technique Notes
- Single crochet (SC): Insert your hook into the stitch, yarn over, pull up a loop (2 loops on hook), yarn over and pull through both loops. One single crochet made.
- Back loop only (BLO): When you look at the top of a stitch, you see a small “V” shape made of two loops. The back loop is the loop farthest away from you. Working into the back loop only — leaving the front loop unworked — creates a horizontal ridge on the fabric. Alternating back-loop and both-loop rows is what produces the ribbing effect in these cuffs.
- Single crochet decrease (SC2tog): Insert your hook into the next stitch, yarn over, pull up a loop. Without finishing the stitch, insert your hook into the following stitch, yarn over, pull up another loop (3 loops on hook). Yarn over and pull through all 3 loops at once. Two stitches become one. This is how the cuff narrows toward the wrist.
- Stitch marker: A stitch marker clips into the last stitch of a round so you always know where one round ends and the next begins. When working in continuous rounds without a joining slip stitch, a stitch marker is essential — without it, it is easy to lose your place and accidentally add or drop stitches.
- Working into clusters on the sleeve edge: The base row of single crochets is worked directly into the existing stitches around the sleeve opening. For hexagon cardigans built from clusters, the general rule is to work 2 single crochets into each cluster and 1 single crochet into each space between clusters. This distributes stitches evenly around the opening without pulling or puckering.
The Pattern
Row 1 — Base Round
- Work single crochets evenly around the entire sleeve opening.
- Into each cluster, work 2 single crochets. Into each space between clusters, work 1 single crochet.
- Place a stitch marker at the end of this round to track your starting point.
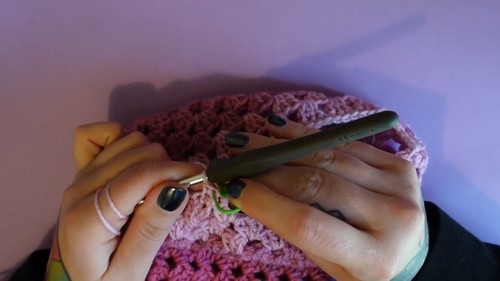
Row 2 — Even Round with Smaller Hook
- Switch to a hook one size smaller than the one you used for the cardigan body.
- Single crochet evenly around, working 1 single crochet into each stitch.
Never read a crochet pattern before? No problem! The video tutorial below is perfect for beginners, or give the written pattern below a try!
Row 3 — First Decrease Round
- Work 2 single crochets, then 1 decrease over the next 2 stitches.
- Repeat this sequence — 2 single crochets, 1 decrease — all the way around the round.

Row 4 — Back Loop Only Round
- Single crochet into the back loop only of every stitch around the full round.
Row 5 — Second Decrease Round
- Work 1 single crochet into each of the next 4 stitches, then work 1 decrease over the following 2 stitches.
- Repeat this sequence — 4 single crochets, 1 decrease — all the way around.
- At this point, try the cuff on your wrist to check the fit. The opening should feel snug but not tight. If it needs more cinching, you can work an additional decrease round using the same rhythm before moving on.

Row 6 — Both Loops Round
- Single crochet into both loops of every stitch around. This round works against the back-loop-only rows to create the start of the ribbing texture.
Building the Cuff Length
Once the cuff is narrowed to your preferred wrist size, build the length of the cuff by repeating the following 3-round sequence:
- Work 2 rounds of single crochet in the back loops only.
- Work 1 round of single crochet in both loops.
Repeat this 3-round sequence until the cuff is as long as you want it.
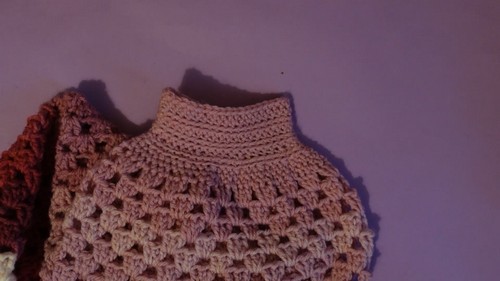
Final 2 Rows — Finishing Edge
- Work 2 final rounds of single crochet in both loops only (no back-loop-only rows for these last two rounds).
- At the very end of the last round, slip stitch into the final stitch, fasten off, and weave in your ends.
- Repeat the entire cuff process on the second sleeve.
Tips
- Use your stitch marker on every round without fail. Single crochet rounds worked continuously (without a joining slip stitch at the end of each round) are easy to spiral out of control if you lose track of where you started. Moving the marker up at the end of every round takes two seconds and saves a lot of frustration.
- Try the cuff on your actual wrist between the decrease rounds, not just when the pattern tells you to. Everyone’s wrist size is different. If after Row 5 the opening still feels too loose, add one more decrease round in the same rhythm (4 single crochets, 1 decrease) before moving to the cuff length section.
- Keep your tension even when switching hooks. Going from a larger to a smaller hook can sometimes cause a visible line in the fabric if your tension tightens up noticeably. Work the first few stitches of Row 2 at a relaxed, conscious pace until the smaller hook feels natural.
Yarn Substitution
Use the same yarn you worked the cardigan in, or a yarn of the same weight in a coordinating color if you want contrasting cuffs. The cuff is worked at a tighter tension than the body, so a slightly different dye lot of the same yarn is unlikely to be noticeable once the decreases pull the cuff in. Avoid substituting a very different fiber — if the cardigan is in wool, a cotton cuff will behave differently under tension and may not sit as neatly against the sleeve edge.
FAQ
- Do I need to count my stitches carefully before starting? You do not need an exact count, but it helps to have a rough sense of how many stitches you pick up in Round 1. The decrease pattern in Rows 3 and 5 works in groups, so if your round total is divisible by 3 (for Row 3) and by 5 or 6 (for Row 5), the math will come out neatly. If not, that is fine — work one or two extra plain single crochets at the end of the round to tidy up.
- What if the cuff feels too loose after all the decrease rows? Try it on your wrist before you start the cuff length section. If it still feels loose, add one more decrease round before moving to the 3-row repeating sequence. The pattern is designed to be adjusted to fit your actual wrist, not a fixed measurement.
- Why does the pattern switch hook sizes? The smaller hook on Round 2 begins tightening the fabric before the decreases start, which gives the base of the cuff a neater, more controlled look. It also helps prevent the cuff from flaring out at the wrist edge.
- What does “back loop only” actually look like when I do it? Look at the top of any stitch from above. You will see a small V-shape — two loops side by side. The back loop is the one sitting behind the V, farthest from you. Slip your hook under only that back loop and work your stitch normally. The front loop stays unworked and creates a horizontal ridge that gives the cuff its ribbing texture.
- Can I add these cuffs to any cardigan, not just a hexagon one? Yes — the technique works on any cardigan sleeve with an open edge. The only adjustment is how you pick up stitches in Round 1. For a hexagon cardigan the cluster-and-space method is specified; for a different construction, just pick up single crochets evenly and consistently around the opening and the rest of the pattern works the same way.