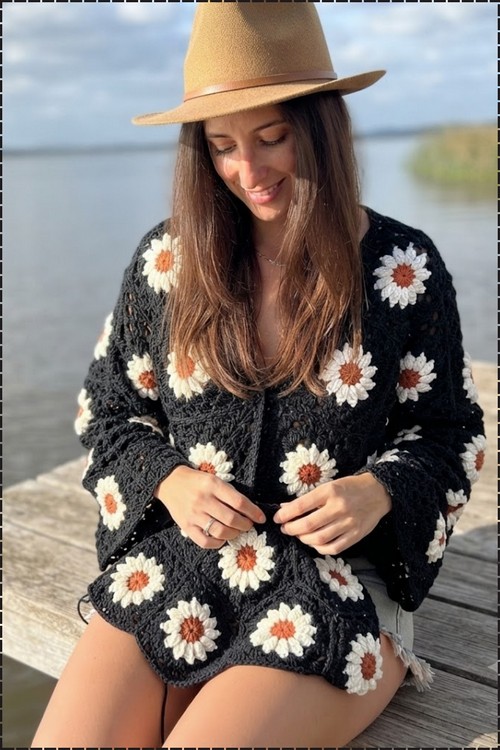
Late summer afternoons by the lake call for a retro daisy granny square cardigan worn loose with a tan wide brim hat. Cottagecore dressers can grab the flower granny square cardigan as a beach cover up, a festival layer or a handmade gift for a daisy loving friend.
Daisies bloom across every square of this retro sweater, white petals around rust centers on a black ground that makes them stand out from across a room. The front opens into a deep V with a single closure at the bust, the sleeves flare wide past the elbow and the body falls to mid thigh. Assembly follows the same logic as any patchwork top, just with more motifs and a longer body.
Crochet Retro Daisy Granny Square Sweater
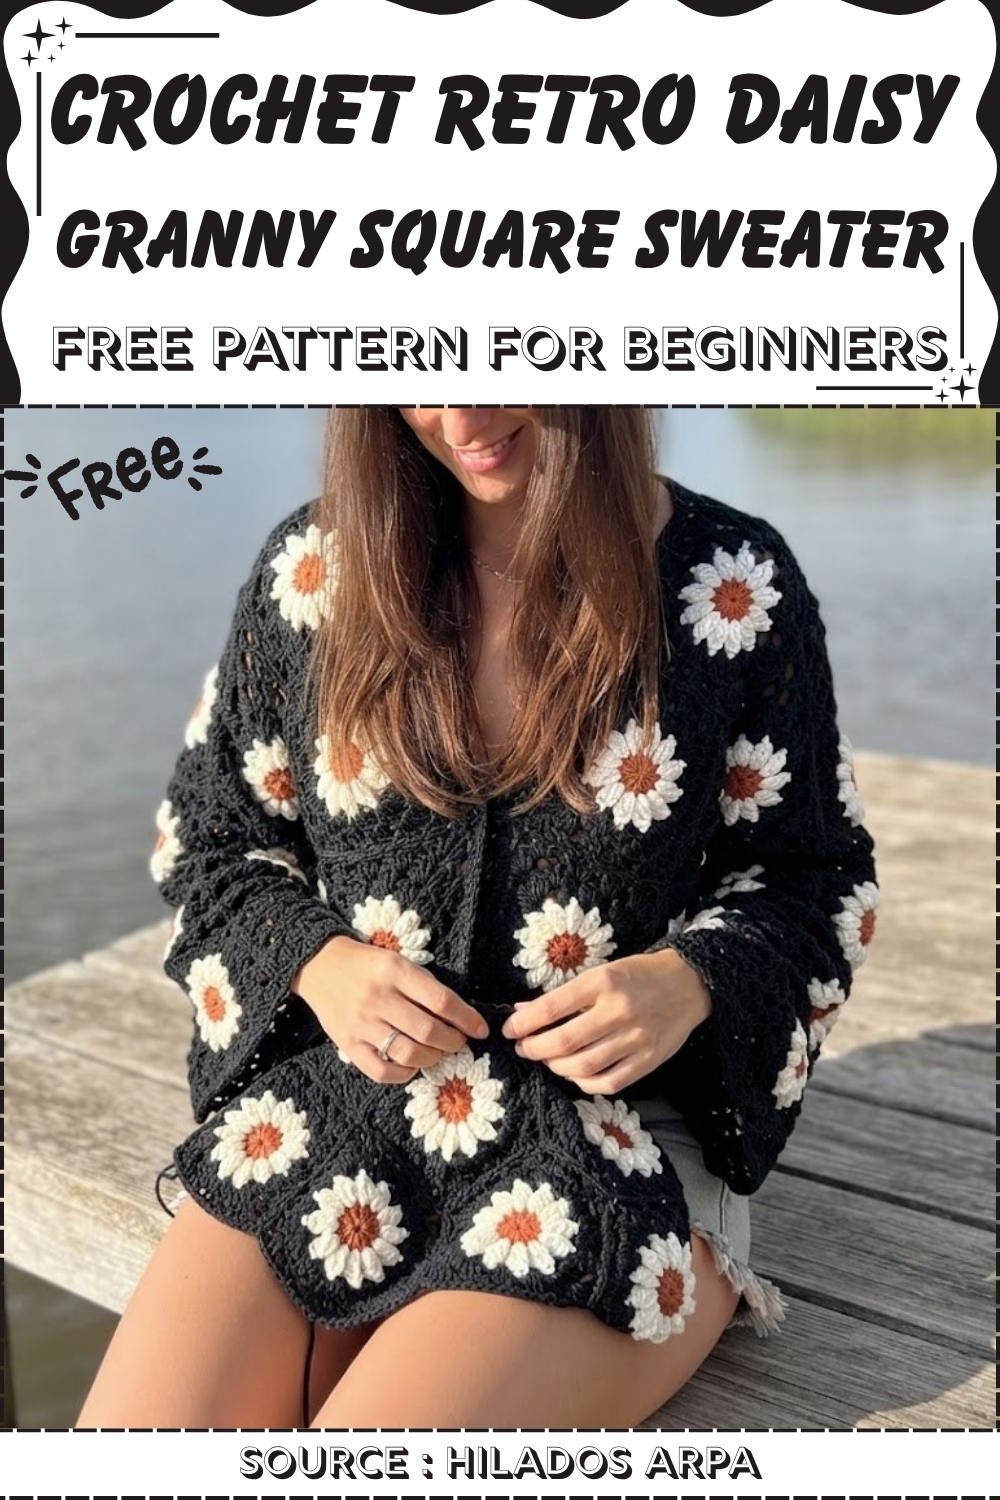
Petals come first in every motif. A small rust center is worked in the round, white puffed clusters form the daisy around it, and black granny rounds then square the flower off so every motif finishes at the same size. Those motifs join into a front, a back and two sleeves, with the open front left unjoined down the middle so it wears as a cardigan.
Materials and Tools
The yarn choice keeps this cardigan crisp. Combed cotton gives the popcorn petals clear definition and makes the black background read as a sharp frame around each daisy. You need three colors, and the black does most of the work, since it squares off every motif, joins the pieces, and edges the whole garment. Buy that color generously. The finished cardigan has a 60 cm (23.5″) back width, a 40 cm (15.7″) length, and 40 cm (15.7″) sleeves. Each square measures 20 x 20 cm (approx. 8 x 8 inches), and you can resize the whole cardigan by adding or removing black rounds.
- Worsted (size 4) or DK weight combed cotton yarn, such as Cotonet 86
- Color A: coral, for the flower centers
- Color B: ivory or cream, for the petals
- Color C: black, for the background, joining, and edging
- 4.5 mm crochet hook
- Yarn needle for weaving in ends
- Scissors
- Stitch markers or small tags for numbering finished squares
Learn Before You Begin
Technique Notes
Expect an advanced beginner project. The square uses simple stitches, and the skills that need care are the popcorn stitch, joining as you go, and reading the assembly map correctly. Most of your time goes into making 18 squares, which is calm, repetitive work. Assembly is quicker but needs full concentration, because a square joined to the wrong edge means unpicking a whole round. The notes below explain each technique and the practical habits that make it go smoothly. Read them once before you start, then refer back to the assembly section with your numbered squares laid out in front of you.
- Work in batches. Make all 18 coral centers first, then all 18 ivory petal rounds, then the black rounds. You change colors far less often, and your tension stays consistent across every square.
- Popcorn stitch. Work 3 treble crochets into the same stitch, drop the active loop, insert your hook from front to back through the top of the first treble, pick up the dropped loop, and pull it through. Pull firmly so the petal puffs forward. A loose pull gives flat, shapeless petals.
- Leave long petal tails. The ivory round ends with a long tail. Weave it under the black stitches of the next rounds so it cannot show through the cotton.
- Half double crochet on the sides. Round 3 uses hdc on the sides and dc at the corners. The shorter stitch keeps the sides flat while the corners turn sharply. If your squares cup, check that you used hdc and not dc on those sides.
- Starting each black round. Use the same start every time, either a ch 3 or a chainless starting dc. Mixing the two gives a visible jog at the start of some squares.
- Join as you go. On the final round, replace the ch 1 between clusters with a slip stitch into the neighboring square, and replace the ch 2 at corners with a slip stitch into its corner space. Keep those slip stitches the same tension as your chains, or the join puckers.
- Number your squares. Tag each finished square with its number before assembly. Laying them out in the T shape first, with the front squares beside it, makes the folding steps much easier to follow.
Daisy Granny Square Cardigan Pattern
The pattern is worked in four stages. First you make the daisy square itself, then join the squares as you work their final round. Next you follow the assembly map, which builds a large T for the back and back sleeves before folding the front squares over to close the sides and sleeves. The shell edging around the cuffs and the full body finishes the piece. The pattern uses US crochet terms throughout, and every round instruction below is a single bullet, so you can tick them off as you go. Work Square 1 completely on its own, since every other square joins to it.
Stitch Abbreviations (US Terms)
- ch: chain
- sl st: slip stitch
- sc: single crochet
- hdc: half double crochet
- dc: double crochet
- tr: treble crochet
Making the Daisy Squares
- Make all the squares in batches: every coral center first, then every ivory petal round, then the black rounds. [18 squares]
Coral Center
- Round 1: With Color A, make a slip knot and ch 3.
- Sl st into the first chain to form a ring, or start with a magic ring instead.
- Ch 3, which counts as the first dc.
- Work 11 dc into the center of the ring.
- Sl st into the top of the beginning ch 3 to join. [12 dc]
- Fasten off and cut the yarn.

Ivory Popcorn Petals
- Round 2: With Color B, place a slip knot on your hook and join the yarn by working directly into the top of any dc from Round 1.
- Work 3 tr into that first stitch.
- Remove your hook from the active loop, insert it from front to back into the first tr, grab the active loop, and pull it through to close the popcorn.
- Ch 3 to secure the popcorn and create a space.
- Work a 3-tr popcorn followed by ch 3 in every remaining stitch around.
- Sl st into the top of the first popcorn to join. [12 popcorns and 12 ch-3 spaces]
- Fasten off, leaving a long tail to weave in later.
Squaring the Circle
- Round 3: With Color C, place a slip knot on your hook and join the yarn in any ch-3 space between the petals.
- Work the first corner in that space: ch 3 (counts as the first dc) or a chainless starting dc, then 2 dc, ch 2, and 3 dc.
- Ch 1, then work 3 hdc in the next ch-3 space.
- Ch 1, then work 3 hdc in the next ch-3 space.
- Ch 1, then work a corner of (3 dc, ch 2, 3 dc) in the next ch-3 space.
- Repeat the last three steps around until every ch-3 space is worked and you have 4 corners.
- Sl st to the top of the first stitch to join. [4 corners]
Building the Square
- Rounds 4 and 5: Continuing with Color C, sl st across the stitches until you reach the corner ch-2 space.
- Work a corner of (3 dc, ch 2, 3 dc) in the corner space.
- Ch 1, then work 3 dc in the next ch-1 space.
- Repeat (ch 1, 3 dc in the next space) across the side until you reach the next corner.
- Work the next corner of (3 dc, ch 2, 3 dc).
- Continue in this way all the way around.
- Sl st to the first stitch to join.

Final Round
- Round 6, Square 1: Repeat Round 4 one more time, then fasten off.
- Round 6, Squares 2 to 18: Do not finish this round on its own; work it as the joining round, using the join as you go method below.
Joining as You Go
- Every square from Square 2 onward joins to its neighbors during Round 6, so no sewing is needed.
- To join a side: in place of the ch 1 between 3-dc clusters, insert your hook into the matching ch-1 space of the neighboring square and work a sl st.
- Work your next 3-dc cluster back into your current square.
- To join a corner: work the first 3 dc of the corner in your current square.
- In place of the ch 2, work 1 sl st into the corner space of the neighboring square.
- Work the remaining 3 dc back into your current square to complete the corner.
- Where several squares already meet at a corner, sl st directly into the center junction point of those joined corners.
If you’re a beginner and crochet patterns feel confusing, start with the video tutorial below, it’s the easiest way to learn as you go!
Assembly Map
- Build a large T shape first for the back and the back of the sleeves, then fold the front squares over to form the cardigan.
Back and Back of Sleeves
- Join Squares 1 to 6 into a rectangle 3 squares wide and 2 squares tall for the body back.
- Join Square 7 to the left side of Square 4.
- Join Square 8 to the left side of Square 7.
- Join Square 9 to the right side of Square 6.
- Join Square 10 to the right side of Square 9; the pieces now lie flat in a large T shape. [10 squares]

Front Left Body and Sleeve
- Join Square 11 to the top of Square 6 at the shoulder.
- Join Square 12 below Square 11.
- Fold Square 12 down so it rests on top of the back panel.
- Join the side of Square 12 to the side of Square 3 to form the body side seam.
- Join Square 13 to Square 11 at the shoulder and to Square 9.
- Fold Square 13 so it attaches to both the top and bottom edges of Square 9, forming a tubular sleeve.
- Join Square 14 to Square 13, folding it to attach to both the top and bottom edges of Square 10. [4 squares]
Front Right Body and Sleeve
- Join Square 15 to the top of Square 4 at the shoulder.
- Join Square 16 below Square 15.
- Fold Square 16 down and join its side to Square 1 to form the right side seam.
- Join Square 17 to Square 15 at the shoulder.
- Fold Square 17 to join it to the top and bottom edges of Square 7, forming the sleeve tube.
- Join Square 18 to Square 17, attaching it to the top and bottom edges of Square 8. [4 squares]
Borders and Edging
- Once all 18 squares are joined, do not cut your yarn; go straight on to the edging.
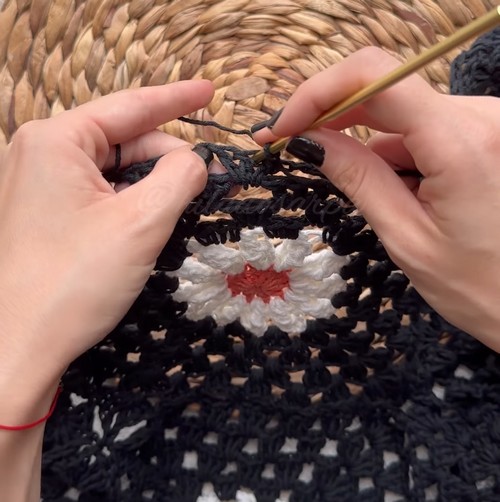
Sleeve Cuffs
- Join black yarn in the middle dc of any 3-dc cluster at the end of the sleeve and work 1 sc.
- Work a shell of 4 dc in the next space between clusters.
- Sc in the middle dc of the next 3-dc cluster.
- Repeat (4 dc in the next space, sc in the middle dc of the next cluster) all the way around the cuff.
- At each seam between two squares, work a sc over the join and continue.
- Sl st to the first sc to join and fasten off.
- Edge the second cuff the same way.
Body and Neckline Edging
- Join black yarn at the center back of the neckline in the middle dc of any 3-dc cluster and work 1 sc.
- Work a shell of 3 dc in the next space; the smaller shells keep the body edge from flaring, while the 4-dc cuff shells give the sleeves a slight flare.
- Sc in the middle dc of the next cluster.
- Repeat around the entire perimeter of the cardigan, including up the front lapels, around the neck, and across the bottom hem.
- At each of the two bottom front corners of the lapels, work 6 dc into the corner space for a rounded finish.
- Sl st into the first sc to join.
- Fasten off and weave in all your ends.
Yarn Substitution
Combed cotton is the reason the daisies look so clean. It has almost no halo, so each popcorn petal stands out against the black and the shell edging keeps a crisp scalloped line. If you substitute, keep a smooth, tightly plied yarn and avoid anything fluffy, brushed, or heavily variegated, since those blur the flower shapes. A cotton acrylic blend is the easiest swap, with similar definition and a little more stretch and warmth. Whatever you choose, make one full square first and measure it. Your squares should come out at 20 x 20 cm, or the finished measurements will shift.
- Cotton acrylic blends give the closest look with a softer, lighter feel.
- Smooth acrylic works well for a warmer, more budget friendly version.
- Avoid mohair, chenille, and brushed yarns, which hide the popcorn texture.
- If your test square is smaller, add a black round; if it is larger, remove one.
Customization Ideas
Because every square is identical, small changes repeat across the whole cardigan, and each one has a big effect. The black background gives a bold vintage look, but swapping it for cream, sage, or mustard turns the same pattern sweet and soft. You can also change the size of the garment without touching the assembly map, simply by adjusting the black rounds on every square. Pick your changes before you start the batch process, since you want all 18 squares to match. A quick test square in your new colors shows you how the finished cardigan will look.
- Swap the black background for a softer neutral or a bright retro color.
- Change the petal or center color on alternate squares for a patchwork effect.
- Add black rounds to every square for a roomier fit, or remove them for a smaller one.
- Work the cuff edging with 3-dc shells to match the body if you prefer a straight sleeve.
FAQ
How do I make this cardigan bigger or smaller?
Add or remove black rounds on every square. Each change alters the size of all 18 squares, so the back width, length, and sleeves all scale together.
Do I really not need to sew anything?
Correct. Every square from Square 2 onward joins to its neighbors on its final round, including the folded side seams and sleeve tubes. You only weave in ends at the end.
Can I use regular acrylic instead of cotton?
Yes, as long as it is smooth and tightly plied. Make a test square and check that it measures 20 x 20 cm before committing to all 18.