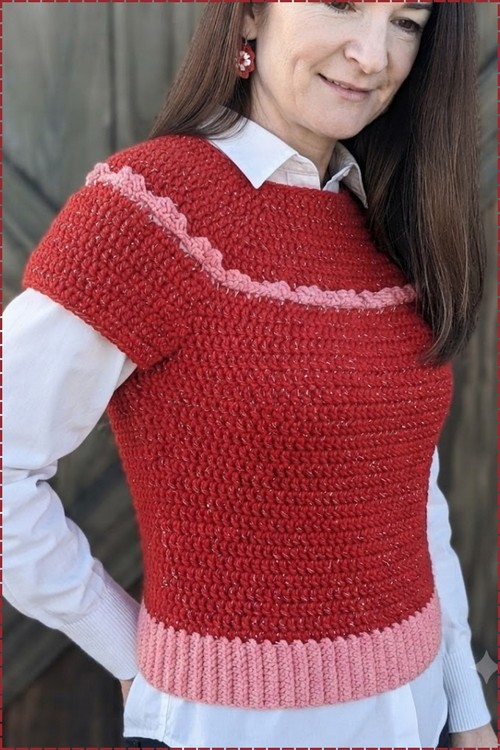
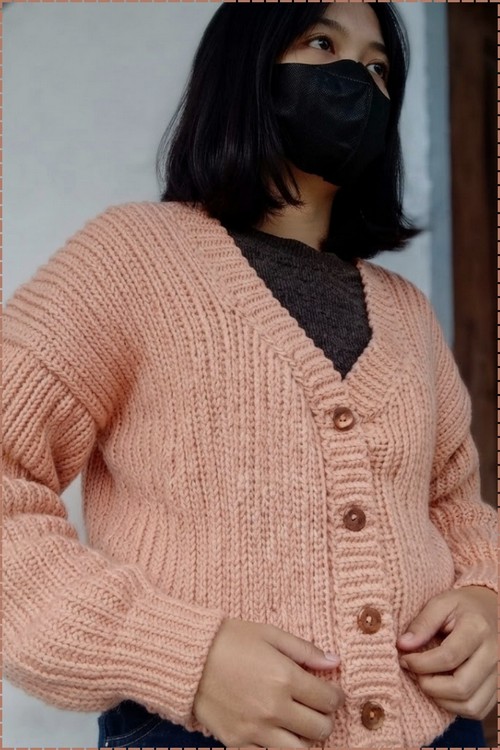
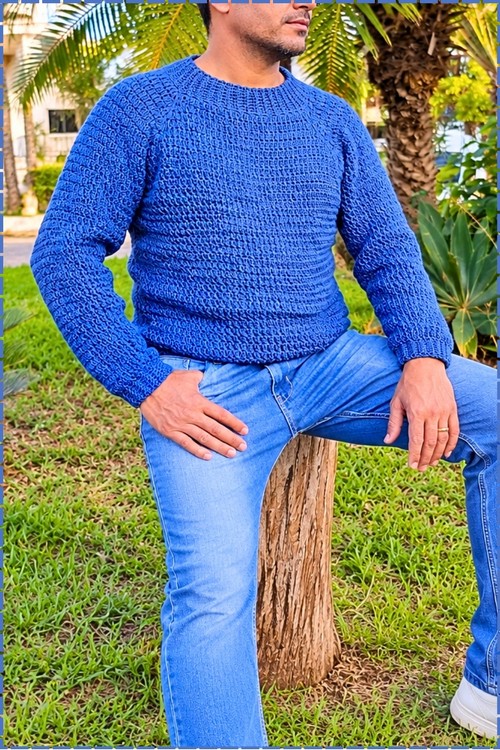
Husbands, brothers and dads get a crochet raglan sweater worked top down in calm celeste blue, with corner fans marking each raglan line. Around seven balls of pill resistant acrylic cover a size Large to Extra Large, and ribbed cuffs finish the long sleeves.
Every man I have ever crocheted for wants the same three things from a sweater. It has to look like something he could have picked up in a good shop, it has to sit properly across the shoulders, and it has to survive real life. This raglan crochet sweater for men delivers all three. You work it from the neckline down in one continuous piece, so you can try it on as you go and stop the yoke the moment the armholes feel right. A textured stitch gives it a knitted look without heavy bulk, and the ribbed finishing makes it feel truly polished.
Raglan Crochet Sweater for Men

The sample is worked in a calm celeste blue using a pill resistant acrylic, which keeps the surface smooth through plenty of wears and washes. You begin with one round of chains, divide it into a front, a back, and two sleeves, then grow all four sections together with neat corner fans that form the raglan lines. Once the yoke reaches armpit depth, the body joins into a tube and the sleeves wait their turn. A size Large to Extra Large took around seven balls of yarn and two hook sizes. It suits a confident beginner ready for a first garment just as well as a seasoned maker.
This pattern is based on the top down men’s sweater by Vanessa Artes Crochê, rewritten here with fuller notes and finishing guidance.
Materials and Tools
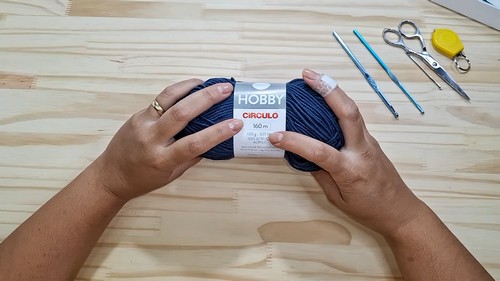
- Yarn: Círculo Hobby, a 100% acrylic anti pilling yarn (Tex 625)
- Color used: Celeste Blue (Azul Celeste, shade 560)
- Yarn amount: approximately 7 balls for a size Large/Extra Large
- 5.0 mm crochet hook for the yoke, body, and sleeves
- 4.0 mm crochet hook for the hem, collar, and cuff ribbing
- Stitch markers to mark the four division points of the yoke
- Tapestry needle for weaving in ends and seaming the ribbing
- Measuring tape for checking yoke depth, body length, and sleeve length
- Scissors
Difficulty and Time
- Skill level: confident beginner to intermediate
- Skills you need: chaining, slip stitch, single crochet, working in the back loop only, joining rounds neatly, and a simple decrease
- Time: plan on roughly 20 to 30 hours of hook time for an L/XL, depending on your speed and how often you stop to test the fit
- What makes it approachable: the stitch pattern repeats the same motion throughout, and the top down build lets you check fit at every stage instead of guessing at the end
Beginner Technique Notes
The Special Stitch
- This sweater uses one textured stitch for the whole yoke, body, and sleeves.
- Insert your hook into the stitch or space, pull up a loop, chain 2, then yarn over and pull through all loops on the hook.
- The chain 2 worked mid stitch leaves a small loop sitting on the side of each stitch, and that little loop is what creates the knit like texture across the fabric.
- The finished height sits somewhere between a single crochet and a half double crochet, so the fabric stays dense and warm without stiffening.
- Practice a small swatch of a few rows first so the motion feels automatic before you start the yoke.
Corner Fans
- Each raglan corner is a fan made of 2 stitches, 1 chain, and 2 stitches, all worked into the same space.
- On every following round, work your next fan into the chain space at the centre of the fan below.
- Keeping one stitch marker in each corner chain space saves you from counting every round.
The Inverted Slip Stitch Join
- A standard slip stitch join tends to drift sideways round after round, which pushes the seam into a slant across the body.
- For a straighter seam, drop the loop from your hook at the end of the round, insert the hook from back to front into the top of the starting chain, pick up the dropped loop, and pull it through.
- Join at the same point every round and the seam will run in a straight vertical line down the side of the sweater.
Back Loop Only Ribbing
- The hem, collar, and cuffs are worked sideways in short rows of single crochet.
- Working into the back loop only on each row lifts the front loop into a ridge, and those ridges stack into a stretchy ribbed band.
- Each row attaches itself to the sweater edge with slip stitches as you go, so the ribbing grows around the opening without separate seaming along its length.
The Pattern
Neckline Foundation
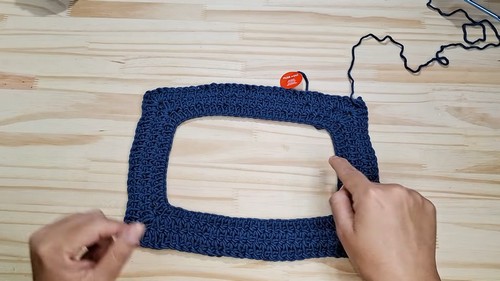
- Leave a yarn tail and make a slip knot on your 5.0 mm hook.
- Chain 80 loosely, keeping the chains relaxed so you can work into them easily on the next round [80 chains].
- Lay the chain flat and check carefully that it is not twisted anywhere along its length.
- Join to the first chain with a slip stitch to form a circle, and work in rounds from here on (the ring should lie flat with no twist).
Stitch Distribution
- Divide the 80 chains into four sections and mark each division point with a stitch marker.
- Front section [24 stitches].
- Back section [24 stitches].
- Left sleeve section [14 stitches].
- Right sleeve section [14 stitches].
Foundation Round
- Chain 3 to bring your work up to height.
- Work the special stitch into the base: insert the hook, pull up a loop, chain 2, then yarn over and pull through all loops on the hook, leaving the small side loop on the stitch.
- Continue the special stitch all the way around the circle [80 stitches].
- Close the round with a slip stitch or the inverted slip stitch join for seamless alignment (the stitches should sit evenly around the neckline with the markers still in place).
Yoke Increases
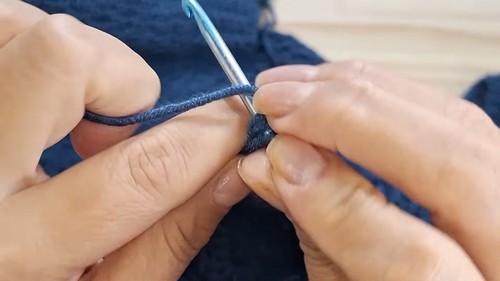
First Increase Round
- Begin with a corner fan of 2 stitches, 1 chain, and 2 stitches, all in the same space.
- Work the special stitch across the straight sleeve section [14 stitches].
- Make a corner fan of 2 stitches, 1 chain, and 2 stitches in the same space.
- Work the special stitch across the straight front or back section [24 stitches].
- Continue around in the same way, making a corner fan at each division point and working the straight sections between them.
- Join the round as before, noting that each increase round adds 4 stitches in total, one per fan.
Building the Yoke
- Keep working round by round, placing each fan into the chain space of the fan below and each stitch over a stitch.
- Join every round at the same point using your chosen join.
- Continue for about 10 to 11 rounds in total, depending on your tension, until the yoke measures approximately 23 cm from the top of the collar down along the diagonal corner (fold the corners together under the arms and the yoke should wrap the chest comfortably without pulling).
Dividing the Body and Sleeves
- Fold the work at the marker points so the front and back sections line up with each other.
- Leave the sleeve sections resting on hold as open loops.
- Join the front and back directly beneath each armpit by working through the centre of the underarm fan spaces.
- Connect both sides this way to turn the front and back into one continuous body circle (the sleeves should hang as two open rings on either side).

Body
- Work around the body in continuous rounds of the special stitch.
- Close each round with the inverted slip stitch join to keep the vertical seam straight and stop it from spiralling.
- Continue downward for about 25 rows for an L/XL, until the body measures approximately 40 cm from the underarm or reaches your preferred length (the lower edge should sit where you want the ribbing to begin).
Bottom Ribbing
- Switch to the 4.0 mm hook for a tighter, cleaner band.
- Chain 10 straight out from the bottom edge of the sweater body.
- Skip 2 chains and work single crochet back down toward the sweater base [8 single crochet].
- Slip stitch into the next available space on the sweater body.
- Slip stitch into the adjacent space to move up along the edge.
- Turn your work.
- Work back up the ribbing in single crochet, working into the back loop only to build the ribbed texture.
- On the final stitch at the edge of each ribbing row, work through both loops to keep the outer edge neat.
- Keep repeating this sequence all around the bottom circumference, attaching each row to the body as you go.
- Join the two short ends of the ribbing from the inside with slip stitches or a seam (the band should lie flat and spring back when you stretch it).
Collar
- Using the 4.0 mm hook, attach the yarn at the neckline opening.
- Chain 10.
- Work back down the chain in single crochet, the same way you started the bottom ribbing.
- Anchor the ribbing to the neckline with slip stitches.
- Work back and forth in rows of back loop only single crochet, attaching to the neckline at the end of each row, all the way around the neck opening.
- Seam the two ends of the collar together (the collar should fold neatly against the neck without gaping).
Sleeves
- Reattach the yarn at the underarm opening of one sleeve using the 5.0 mm hook.
- Work around the sleeve in circular rounds of the special stitch.
- Decrease once per round by working two stitches together near the underarm seam, which tapers the sleeve from shoulder to wrist.
- Continue for about 31 rows with decreases, until the sleeve measures approximately 50 cm from the underarm (the sleeve should narrow gradually toward the wrist).
Sleeve Cuffs
- Switch to the 4.0 mm hook.
- Chain 8 out from the sleeve edge.
- Work the same ribbing technique as the hem, going back and forth in back loop only single crochet and anchoring each row to the sleeve edge.
- Continue all the way around the wrist opening.
- Seam the two ends of the cuff together (the cuff should hug the wrist snugly).
- Repeat the sleeve and cuff instructions exactly for the second sleeve.
- Weave in all ends with the tapestry needle.
Tips and Troubleshooting
- Chain the foundation loosely, or go up a hook size just for that chain. A tight neckline chain is the most common reason a top down sweater will not pass over the head.
- Move your stitch markers up into the fan chain spaces every round or two. It keeps the raglan lines straight and saves a lot of frogging.
- If the yoke starts ruffling, your fans are probably landing in the wrong place. Check that each new fan sits in the chain space of the fan below rather than beside it.
- Try the yoke on before you divide. Ask the wearer to lift his arms; if the fabric pulls across the upper back, add another round before joining the underarms.
- Measure the body on a flat surface rather than holding it up. Acrylic stretches a little under its own weight and can fool you into stopping short.
- Keep your ribbing tension steady from start to finish. If the hem begins to flare, you are likely skipping too few spaces along the body edge, and if it pulls in, you are skipping too many.
- Space the sleeve decreases evenly at the underarm line so the shaping hides beneath the arm instead of twisting around the sleeve.
- Make both sleeves before blocking or weaving in, and count your rows so the second sleeve matches the first exactly.
Yarn Substitution
- The original yarn is a smooth acrylic with a Tex of 625, which falls roughly in the worsted to aran weight range.
- Any smooth worsted weight yarn that meets gauge on a 5.0 mm hook will work well, so swatch the special stitch first and compare your swatch to the sample’s drape.
- Anti pilling acrylic or an acrylic and wool blend keeps the textured surface crisp and makes the sweater easy to machine wash, which most men will appreciate.
- A wool blend gives extra warmth and a softer drape, though it may need gentle washing.
- Avoid very fuzzy or highly textured yarns, because they hide the little side loop that gives this stitch its character.
- Buy an extra ball beyond the 7 used for the sample, especially if you plan to lengthen the body or sleeves.
Customization Ideas
- Contrast ribbing: work the hem, collar, and cuffs in a darker shade such as navy or charcoal for a classic varsity feel.
- Colour blocked yoke: switch colours at the underarm divide so the shoulders and body show two tones split cleanly along the raglan line.
- Simple stripes: add two or three narrow stripes across the chest or near the hem for a sporty touch.
- Mock neck collar: keep working the collar ribbing wider for a taller, folded neckline that adds warmth.
- Longer body: keep adding body rounds for a tunic length that pairs well with slim trousers.
- Elbow patches: crochet two small ovals in a contrast colour and stitch them onto the sleeves for a cosy, academic look.
- Heathered neutrals: oatmeal, grey, olive, and denim blue all suit this stitch and look right for everyday wear.
Frequently Asked Questions
Can I make this sweater for a woman?
Yes. The construction is completely unisex, so the only change is fit. Many women prefer a shorter body, slimmer sleeves, or a slightly cropped length, and the top down method makes those adjustments easy to make as you go.
How do I adjust the size?
Measure the wearer’s chest and try the yoke on before dividing. Working extra yoke rounds widens the chest and deepens the armholes, while fewer rounds suit a smaller frame. Body and sleeve lengths are simply worked until they reach the measurement you want.
Why does my seam lean to one side?
A regular slip stitch join shifts slightly with each round, and that shift adds up over the body. Switch to the inverted slip stitch join and always close the round at the same point to keep the seam running straight down the side.
How tight should the ribbing be?
The ribbing should feel snug but stretchy, gripping the hips and wrists lightly without pinching. The smaller 4.0 mm hook does most of the work here, so keep your tension relaxed and even rather than pulling each stitch tight.
How should I wash the finished sweater?
An anti pilling acrylic like the one used here handles a gentle machine wash in cool water. Lay the sweater flat to dry and ease the ribbing back into shape while it is damp, and avoid hanging it, as the weight can stretch the shoulders over time.