Beginners new to garments build this crochet balloon sleeve cardigan from seven plain rectangles, with no shaping anywhere. Easing four sleeve stitches into each stitch of the ribbed cuffs creates the puff, and a picot edge trims the open front.
Color gradients and balloon sleeves are a combination that rarely disappoints, and this crochet cardigan works both into a single open front piece that goes from black at the shoulders down through purple and into burnt orange at the cuffs. The body is intentionally plain so the color transition does all the visual work, and the orange picot edging pulls the whole palette together at the front opening. If the sleeve shape appeals to you, the puff sleeve sweater takes a similar volume in a single solid color.
Balloon Sleeve Sweater Crochet
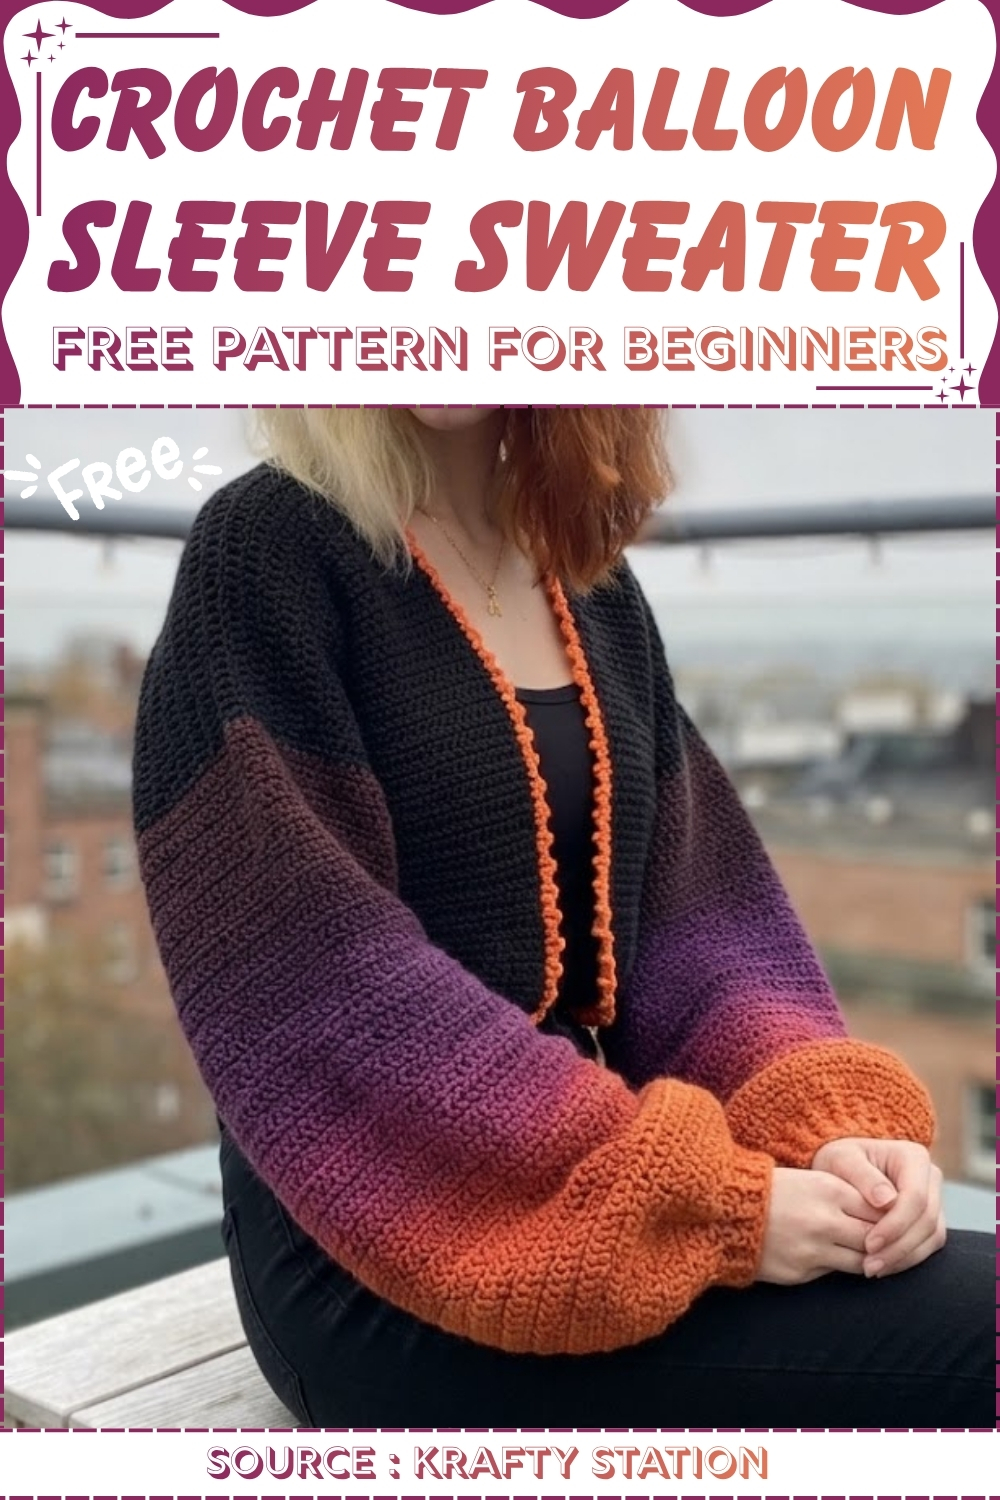
Working the sleeves and body as separate flat panels keeps this project manageable even with the color changes involved. The gradient effect comes from a single variegated or hand-dyed skein rather than multiple yarn joins, so the transition is smooth rather than striped.
Materials & Tools
- Solid-color yarn for the two front panels (a thin yarn can be held double for body)
- Ombre or variegated yarn for the back panel, sleeves, and border edges
- Accent color yarn for the second border row (optional)
- 4.5 mm crochet hook
- Tapestry needle
- Scissors
- Stitch markers (optional but helpful)
Abbreviations used in this pattern: ch = chain · hdc = half double crochet · sc = single crochet · sl st = slip stitch · BLO = back loops only · dec = decrease · st(s) = stitch(es) · rep = repeat
Basic Stitch to Know
Difficulty & Time
Beginner. If you can chain and work half double crochet rows, you can make this cardigan. The only slightly new techniques are the gathered cuff attachment and the picot edge — both are explained in detail below. Expect several sessions spread over a week or so, depending on your pace.
Beginner Technique Notes
- Half double crochet (hdc): Insert your hook into the stitch, yarn over, pull up a loop — you’ll have 3 loops on the hook. Yarn over once more and pull through all 3 loops at once. That’s one hdc. It’s a little taller than single crochet and gives a dense, stretchy fabric.
- Back loops only (BLO): Every stitch has two loops at the top — the front loop and the back loop. When a row says “back loops only,” insert your hook under just the back loop. This creates a ridge on the fabric that looks like ribbing, which is exactly what we want for the cuffs.
- Turning chain: At the end of every row, chain 1 before you turn. This ch-1 brings your hook up to the right height for the next row. It does not count as a stitch — start your first hdc in the very first stitch of the row.
- The picot stitch: This is just a small decorative loop. Work 3 sc, then ch 3 and slip stitch back into the base of that ch-3. That creates the little knot. Repeat across the edge. It sounds fiddly but once you’ve made your first one, the rhythm clicks quickly.
- Gathering the cuff onto the sleeve: The sleeve is wider than the cuff, so you’ll be easing 4 sleeve stitches into every 1 cuff stitch as you sew. Pull gently but firmly as you go — this is what creates the balloon puff at the wrist.
The Pattern
Step 1: Crocheting the Panels
Front Panels (Make 2 — Solid Yarn):
- Make a slip knot and chain your desired panel width. (The pattern uses a foundation chain of 40.)
- Row 1: Work hdc starting from the 2nd ch from the hook, across to the end.
- Ch 1, turn. Continue working hdc rows until the panel reaches your desired length. (The pattern uses 50 rows.)
- Fasten off by cutting the yarn and pulling the tail through the last loop securely.
- Make a second identical panel.

Back Panel (Make 1 — Ombre Yarn):
- Chain a foundation that is as wide as both front panels combined, plus extra for the back neck area. (The pattern uses a foundation chain of 100.)
- Work in hdc rows for the same length as the front panels.
- Fasten off.
Reading crochet patterns can be tricky when you’re just starting out, feel free to follow the video tutorial below instead!
Sleeves (Make 2 — Ombre Yarn):
- Chain your desired sleeve width. (The pattern chains 75 for a wide balloon effect.)
- Ombre blending tip: To blend colors evenly across the sleeve, alternate every 2 rows between two different colored yarns, cutting and reattaching as needed.
- Work hdc rows for your desired sleeve length. (The pattern uses 60 rows.) The sleeve stays a simple rectangle — no shaping needed.
- Fasten off. Make a second identical sleeve.
Cuffs (Make 2 — Ombre Yarn):
- Make a slip knot and chain 9.
- Row 1: Hdc down the chain.
- Following rows: Ch 1, turn. Work hdc in the BLO only across the row.
- Repeat the BLO row until the cuff band, when slightly stretched, wraps around your wrist comfortably.
- Fasten off. Make a second identical cuff.

Step 2: Sewing and Assembly
Shoulder seams:
- Lay the back panel flat. Place both front panels on top of it, face down.
- Sew the front and back panels together along the top shoulder edges on each side.
Attaching cuffs to sleeves:
- Align the bottom edge of a sleeve to one long edge of a cuff.
- Because the sleeve is much wider than the cuff, sew approximately 4 sleeve stitches into every 1 cuff stitch, pulling gently as you go to gather the sleeve fabric. This creates the balloon puff at the wrist.
- Repeat for the second sleeve and cuff.
Attaching sleeves to the cardigan body:
- Fold one sleeve in half to find its exact center point. Place a stitch marker there.
- Align that center point with the shoulder seam of the cardigan.
- Sew the top section of the sleeve to the cardigan body along the shoulder seam.
- Repeat for the second sleeve.

Closing the sides:
- Starting at the wrist, sew from the cuff up to the armpit.
- Then sew from the armpit down to the bottom hem of the cardigan on each side.
Step 3: Edgings and Borders
First border row:
- Attach yarn and work sc evenly all the way around the outer front edges and neckline of the cardigan.
- When you reach the bottom hem/waist area, alternate 1 sc followed by 1 decrease to gently cinch the waist.

Second border row:
- Work a plain, even row of sc all the way around — no decreases this time. (This is a great place to switch to an accent color if you’d like a pop of contrast.)
Picot edge:
- Work 3 sc, then ch 3, and sl st back into the base of that chain to form one picot knot.
- Repeat [3 sc, 1 picot] all the way around the entire edge.
- Sl st to close and weave in all remaining yarn ends.

Tips & Troubleshooting
- Keep your tension even on the front panels. Because they’re worked in a solid color, any uneven tension shows more clearly than it would in a variegated yarn. If you notice your rows pulling, try relaxing your grip on the hook slightly.
- Check the width of the back panel before you start sewing. Lay both front panels side by side and hold them against the back panel — the back should be about the same width as both fronts together. If it’s slightly off, it’s easier to adjust before assembly than after.
- Don’t skip the stitch marker when attaching the sleeves. Folding the sleeve in half and marking the center before you sew is the step that keeps the sleeve sitting squarely on the shoulder. Without it, sleeves often end up skewing forward or back.
- The picot edge is easier than it looks. Make your first picot slowly and check that you’re slip stitching back into the correct stitch (the base of the ch-3, not the chain above it). After 4 or 5 repeats the rhythm becomes automatic.
FAQ
1. I’ve never made a garment before — is this really beginner-friendly? Yes. Every piece is a rectangle of the same stitch (hdc), which means you’re not dealing with increases, decreases, or shaping at any point in the main construction. The only slightly new skills are the gathered cuff sewing and the picot edge, and both are explained step by step above.
2. What does “held double” mean for the front panels? It means taking two strands of yarn and treating them as one as you crochet. If your solid yarn feels thin or lightweight on its own, pull from two balls at once (or wind one ball into two smaller ones). The resulting fabric will be thicker and more structured.
3. How do I know if my panels are the right size before I start sewing? Lay them out on a flat surface and hold them against yourself or a garment that fits you well. The two front panels side by side should cover the full width of your chest. The back panel should match that total width. Adjust your row count or chain length before assembly, not after.
4. My cuff doesn’t look like a ribbed band — what went wrong? The ribbed look only appears when you work in back loops only on every row. If your cuff looks smooth and flat, check that you’re inserting your hook under just the back loop on every stitch. If you worked into both loops, you can simply undo those rows and redo them — BLO crochet is easy to spot once you know what to look for.
5. Can I skip the picot edge and use a simpler finish? Absolutely. Two or three rounds of plain sc around the edges makes a clean, tidy finish without any picot at all. The second border round is already part of the pattern — you can simply stop there if you prefer.