Little boys aged 3 to 4 can wear this crochet raglan baby sweater in soft pink with navy trim at the collar and cuffs. Twisted cable columns climb the front and back, and the raglan yoke grows straight from the neckline, so you sew no shoulder seams.
A soft pink pullover with navy edging reads as classic without trying very hard, and the contrast trim does most of that work at the collar and both cuffs. This one is built as a raglan, so the yoke shapes outward from the neckline and the sleeves grow straight off the body with no seaming at the shoulder. If you already made the baby sweater in the 0 to 12 month range, the shaping logic here will feel familiar right away.
Raglan Crochet Sweater Baby

What lifts this above a plain pullover is the surface detail. Twisted columns run vertically down the front and back, framed by a textured yoke that catches light differently than the flat sleeve fabric. The contrast rows at the collar and cuffs are worked last, which means you can swap that navy for any color you have on hand without touching the rest of the pattern.
Materials & Tools
- Yarn suitable for a child’s sweater (a soft DK or light worsted in acrylic or acrylic blend washes well and holds the cable detail clearly)
- Crochet hook sized to your yarn
- Stitch markers (at least 4 — one for each raglan corner)
- Tapestry needle
- Scissors
Sizing note: The pattern uses a foundation chain of 80 for ages 3–4. For a 5–6-year-old, use 96 chains.
Abbreviations used in this pattern: ch = chain · sc = single crochet · hdc = half double crochet · dc = double crochet · tr = triple crochet · FPtr = front post triple crochet · sl st = slip stitch · sp = space · st(s) = stitch(es) · rep = repeat
Master Before You Start
Difficulty & Time
Intermediate. The raglan yoke construction is logical and forgiving, but the cable cross technique — skipping and working front-post triple crochets out of order — requires confident stitch placement. The back stays in plain dc throughout, so if the cable feels uncertain in early rows, you can practice the cross on a small swatch before committing it to the front panel. Budget several sessions for the yoke alone; the body tube works up quickly once the armholes are closed.
The Pattern
Step 1: Base Row
- Make a foundation chain of 80. Join into a ring.
- Ch 2, then work hdc stitches into each chain around, pulling through 3 loops at once on each stitch.
- Complete the full round and join. (Keep your tension even on this round — it sets the neckline width for the entire sweater.)
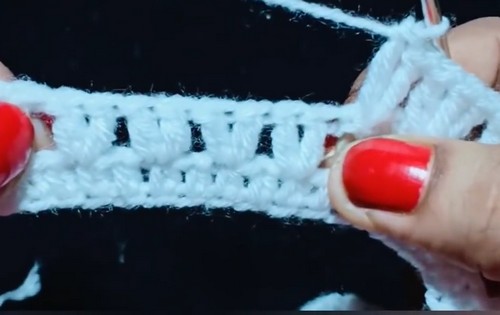
Step 2: Setting Up the Pattern and Corners
- Ch 3.
- Body section: Work 2 dc into the same sp, skip 1 ch, work 2 dc in the next ch. Repeat this sequence to complete 8 sets of dc pairs for the section.
- Corner formation:
- Ch 2, skip 2 ch, sc into the 3rd ch.
- Ch 2, sc into the same sp.
- Ch 2, skip 2 ch, and begin the next set of 8 dc pairs.
- Repeat around to establish 4 total corners, dividing the sweater into back, front, and two sleeves. (Place a stitch marker at each of the 4 corner spaces — these are your raglan increase points and you’ll need to find them on every row.)
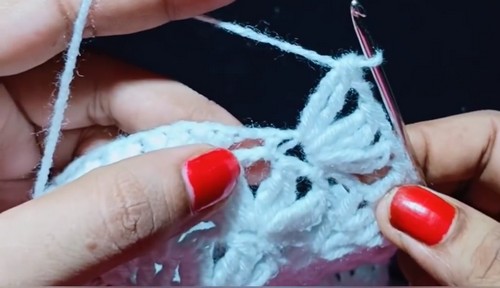
Step 3: Yoke Construction — Increasing and Cable Rows
Increases at corners:
- At the beginning and end of each section near the corner spaces, expand the piece by working 3 dc instead of 2. (This is the raglan increase — it happens at all 4 corners on every increase row, adding stitches to both the body and sleeve sections simultaneously.)
- In each corner sp itself, work specialized triple-crochet clusters separated by ch 2.
If you’re still learning how to read crochet patterns, no stress! Follow the video tutorial below and use the written pattern below as you get more comfortable!
Cable cross design on the front and sleeves:
- Every few rows, work the cable cross: skip specific pairs of stitches and work FPtr out of order to twist the columns and create the crossed cable effect.
- (The FPtr is worked from the front of the fabric — insert your hook from front to back around the post of the stitch two or more rows below, yarn over, and pull up a tall loop. This crosses over or under the adjacent stitch depending on the order you work them. Skipping a stitch before working back into it is what creates the visible twist.)
- Keep the back section in plain dc throughout — no cables on the back.
 Repeating the yoke rows:
- Continue repeating the increase rows and cable rows, working the crosses every couple of rows on the front and sleeve sections as established.
- Repeat the full yoke sequence approximately 5 times, or until the yoke reaches your desired depth for the armhole.
Step 4: Joining the Armholes
- Work across the back section normally in the established pattern.
- At the first corner/armhole junction, skip the sleeve stitches entirely and work the dc directly into the connecting corner spaces on the other side — this bridges the gap and closes the armhole.
- Repeat on the second armhole to lock in both sides.
- (Check that the armhole opening looks proportional before moving on — if the sleeve section feels too narrow or wide, this is the last point to adjust before continuing down the body.)
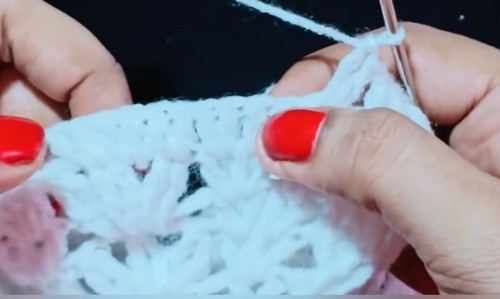
Step 5: Body Length
- Once both armholes are joined, stop all increases.
- Work even rows of dc around the body tube, continuing the front cable pattern on the front section and keeping the back in plain dc.
- Continue working down to your desired body length. Fasten off.
Note: Borders, sleeve construction, and neckline finishing are covered in the creator’s Part 2 video and are not included in this pattern.
Technique Notes
- Raglan corner tracking is the part that trips most makers up. With 4 increase points all working simultaneously, it’s easy to miss one on a long round. Count your corner markers at the start of every row and move them up as you pass each one — don’t rely on finding them by eye mid-round.
- The cable cross works differently from standard cable knitting. In crochet, you skip a stitch, work into the stitch beyond it, then go back and work the skipped stitch from the front — or you work FPtr around the post of a stitch from two rows down, which pulls it forward and crosses it over its neighbor. Either way, the crossed effect only reads clearly if your tension is firm enough to hold the twist in place.
- Working 3 dc instead of 2 at each corner adds 4 stitches per increase round (one extra at each of the 4 corners). Tracking how many increase rounds you’ve worked tells you exactly how much the yoke has grown and helps you compare the depth against a reference garment.
- Skipping sleeve stitches at the armhole join is simpler than it sounds. When you reach the corner before the sleeve, work the corner cluster, skip across all the sleeve stitches without working into any of them, and pick up the next corner cluster on the far side. The sleeve stitches sit unworked and will be picked up later (in Part 2) to build the sleeve downward.

FAQ
1. How do I know when the yoke is deep enough to close the armholes? Hold the piece up to the child’s shoulder (or a similar-sized garment) and check that the raglan line runs diagonally from the neck to the underarm at the right angle. The yoke repeats approximately 5 times for the 3–4-year size, but fit is a better guide than row count.
2. Can I skip the cable design and make the whole sweater in plain dc? Yes — just work the front and sleeve sections in the same plain dc pattern as the back. The construction doesn’t change at all; you’re simply replacing the cable rows with standard dc rows. The sweater will still have the same shape and fit.
3. The sweater is worked from the neck down — what if the neckline ends up too tight or too loose? The foundation chain is your only chance to adjust the neckline. If it’s too tight, add a few extra chains (in a multiple that works with your corner distribution). If it’s too loose, remove some. Check that the chain fits comfortably around the child’s head before joining into a ring — it’s much easier to adjust now than after several yoke rounds.