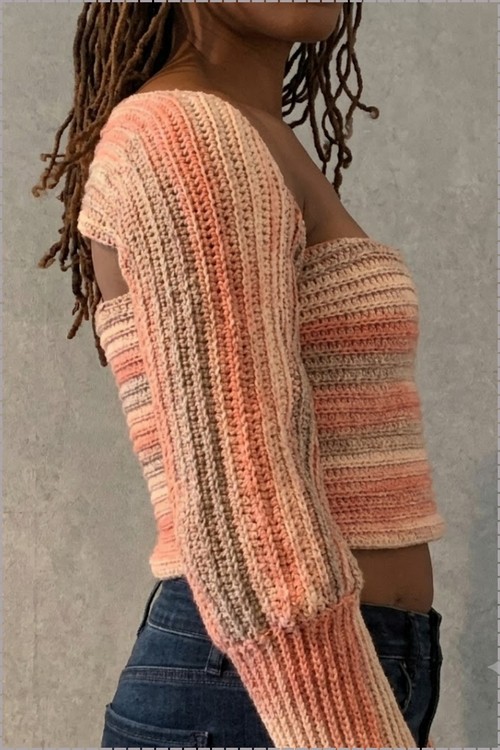
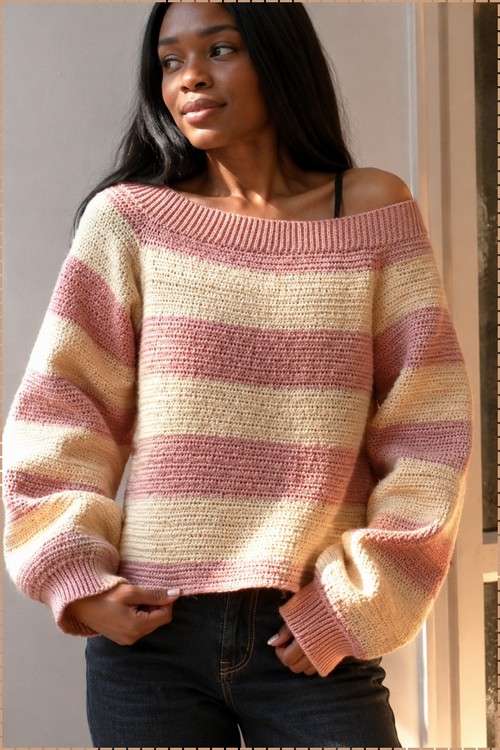
Pink and cream stripes give this off-shoulder crochet pullover a bold look, while alternating half double crochet loops add subtle ridges. A wide neckline and ribbed cuffs frame the relaxed, made-to-measure sweater, worked in panels with sleeves added afterward.
Wide horizontal stripes in pink and cream run the full length of this sweater, with the color changes spaced evenly enough that each band reads as a distinct block rather than a gradient. The neckline is wide and sits just below the shoulder on one side, held in place by a short ribbed collar rather than any elastic or drawstring. A solid HDC tutorial covers the core stitch used through every stripe row here.
Crochet Off The Shoulder Sweater

Body is worked in one piece from the bottom up before the sleeves are added, and the stripe sequence stays consistent across both the body and the arms so the colorwork lines up at the seams. Ribbed cuffs at the wrist match the neckline trim and keep the silhouette clean at both ends. The fabric is dense enough to hold its shape without blocking every time it is worn.
Quick Facts
- Skill level: Easy / advanced beginner
- Construction: Two flat body panels, sleeves built from a chain bridge at each side seam, ribbing added separately at the neckline and cuffs
- Main stitch: Half double crochet in alternating back and front loops, creating a textured striped fabric
- Hook: 4.0 mm (or any hook — all stitch counts adjust to your gauge and measurements)
- Sizing: Fully custom — no fixed size, all counts are examples you replace with your own measurements
- Estimated time: A relaxed multi-session project; the alternating loop pattern and stripe changes add rhythm without complexity
Customization Ideas (Before You Begin)
Since every stitch count is yours to set:
- Adjust the stripe width. The pattern uses 10-row stripes. Narrower 5-row stripes give a more graphic effect; wider 15-row stripes give a bolder, chunkier look.
- Change the color combination. Pink and cream is the original — any two contrasting or complementary colors work with the same method.
- Go longer or shorter. The body is worked until 1 inch below your neckline. Adding more rows before that point makes a longer, tunic-style pullover.
- Adjust the off-shoulder effect. The top edges are left fully open for the neckline. A deeper off-shoulder look comes from building the body slightly taller and using wider ribbing; a more covered version uses narrower ribbing.
- Widen or narrow the cuffs. The ribbing chain (example: 16 chains) sets the cuff and neckline depth. More chains give wider ribbing; fewer chains give a simpler edging.
Materials and Tools
- Pink yarn (amount based on your sweater size)
- Cream yarn (amount based on your sweater size)
- A 4.0 mm hook (any hook size works — your gauge will determine your stitch counts)
- Stitch markers
- Sewing needle
- Scissors
- An oversized sweater for reference measurements (optional but helpful)
Must-Know Stitch
The Pattern
- All stitch counts given are examples only. Replace every count with your own based on your measurements and a tension swatch.
- Stripe sequence: Work 10 rows in pink, then 10 rows in cream. Repeat throughout the full sweater — approximately 6 stripes total for the body.
- Color change method: On the last stitch of the final row of each color: yarn over, pull up a loop from the last stitch (3 loops on hook). Using the new color, pull through all 3 loops to complete the half double crochet. Chain 1 and continue in the new color.
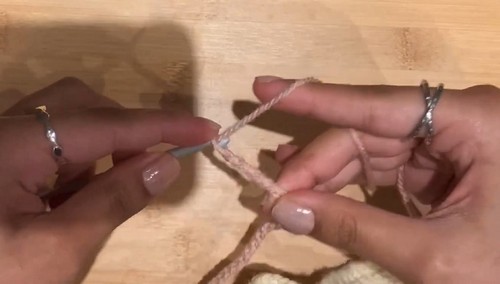
Front and Back Panels (Make 2)
- Foundation row: Using pink yarn, make a foundation half double crochet chain equal to half your desired sweater width. (Example: 75 chains.)
- Row 1: Chain 1 to turn. Half double crochet in the back loops only into every stitch across.
- Row 2: Chain 1 to turn. Half double crochet in the front loops only into every stitch across.
- Rows 3–4: Repeat Rows 1–2.
- Continue: Repeat Rows 1–2, alternating back-loop-only and front-loop-only rows, changing color every 10 rows following the stripe sequence, until the panel measures approximately 1 inch below your desired neckline depth. Aim for 6 stripes total.
- Fasten off. Make a second identical panel for the back.

Assembly
- Place the front and back panels together with right sides facing out.
- On each side seam, use stitch markers to mark the sleeve openings. The number of marked stitches should equal half the desired sleeve circumference, placed equally on either side of the seam. (Example: for a 50-stitch sleeve opening, mark 25 stitches on each side of the seam.)
- Using a sewing needle and matching yarn, sew both side seams together on both sides, leaving the stitch-marked sleeve openings unsewn.
- The top edges of both panels remain fully open to form the wide off-shoulder neckline.
Reading crochet patterns can be tricky when you’re just starting out, feel free to follow the video tutorial below instead!
Sleeves (Make 2)
Setting up the sleeve opening
- Using color-change yarn, reattach to the sleeve opening 1 stitch before the stitch marker. Chain the number of stitches equal to the full sleeve opening count. (Example: 50 chains.) Reattach the end of the chain to where the second stitch marker is placed.
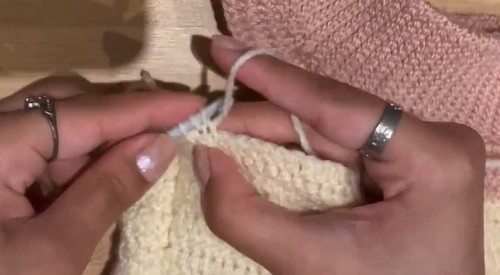
Building the sleeve body
- Reattach yarn to the first half double crochet stitch next to the side seam.
- Row 1: Chain 1. Half double crochet in the front loops only into every stitch up to the neckline. Then half double crochet into the other side of all chain stitches until the end of the chain. Continue half double crochet in the front loops only until you reach the seam on the other side.
- Row 2: Turn your work. Chain 1. Half double crochet in the back loops only into every stitch to the end of the row.
- Continue: Repeat Rows 1–2, alternating front-loop-only and back-loop-only rows exactly as on the front and back panels. Continue color changes every 10 rows following the stripe sequence until the sleeve reaches your required length.
- To complete each row: slip stitch into the first stitch of the row, chain 1 to turn.

Sleeve Cuffs
Work the sleeve cuff ribbing at the open lower end of each completed sleeve using the same ribbing method described in Part 5. The finished cuff should show clean vertical ribbing in pink sitting neatly above the striped sleeve body.
Neckline Ribbing and Sleeve Cuff Ribbing
The same method is used for both the neckline and the sleeve cuffs.
- Setup: Join pink yarn to the neckline or cuff edge. Chain 16. Skip 1 chain from the hook, then slip stitch into the 2nd chain. Slip stitch into every chain to the end.
- Row 1: Slip stitch into the first stitch. Slip stitch in the back loops only into every stitch to the end of the row.
- Row 2: Chain 1 to turn. Slip stitch into the front loops of the next 2 stitches in the horizontal row of half double crochet stitches. Continue half double crochet in the front loops only to the end of the row.
- To start each new row: slip stitch into the first stitch of the row, chain 1 to turn.
- Repeat Rows 1–2 around the entire neckline or cuff opening until the ribbing band is complete.
- To finish: sew the first and last rows of the ribbing band together using a sewing needle to close the circle. Fasten off and weave in all ends.
- Repeat the full ribbing process for both sleeve cuffs.
Finishing
- Weave in all remaining yarn ends securely.
- Block lightly if desired to even out the texture.
Tips and Troubleshooting
- Swatch before you start. Every stitch count in this pattern adjusts to your gauge and measurements — but you can only set those counts correctly if you know how many stitches per inch your yarn and hook produce. A 4-inch swatch in the alternating BLO/FLO pattern is all you need.
- Mark your 10-row color boundaries. It’s easy to lose count mid-stripe. Drop a stitch marker at row 1 of each new stripe and count forward to 10 — switching at the right row is what keeps the stripes even.
- Sew your side seams before building the sleeves. The sleeve openings are defined by the stitch markers on the seam — the sleeve chain is then built across that gap. Assembly must come before sleeve construction.
Frequently Asked Questions
1. What does “all stitch counts are examples” actually mean for making this? You substitute every number in the pattern with your own, derived from your body measurements and your tension swatch. The example of 75 body chains is for illustration only — your number comes from dividing half your hip measurement by your stitches-per-inch count. Every other number follows the same logic.
2. How does the sleeve get created from a chain bridge? After the body is seamed with the sleeve opening left unsewn, you chain the full sleeve opening width across the gap as a bridge. The sleeve body is then built outward from that chain by working into both the chain stitches and the surrounding body stitches, creating a seamless sleeve attached at the armhole without any additional seaming.
3. Why does the ribbing use slip stitches and half double crochet in the same rows? The ribbing method combines slip stitches (very short, dense) with half double crochets in a specific way to create a tall, stretchy vertical rib texture — different from the body fabric’s textured stripe. It attaches row by row to the neckline or cuff edge as it’s worked, so no sewing is needed until the very end to close the band into a loop.
4. How wide should I make the off-shoulder neckline? The neckline is the full open top of both panels — you’re not shaping it; you’re simply leaving both panel top edges unsewn. The neckline width is the full width of your sweater. The ribbing band you add around it determines how much it sits on or off the shoulder. Wider ribbing pulls the neckline slightly tighter; narrower ribbing lets it drape more freely.