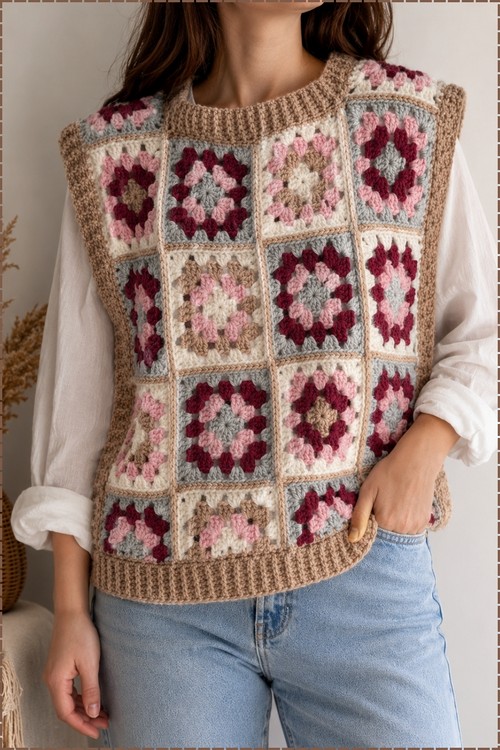
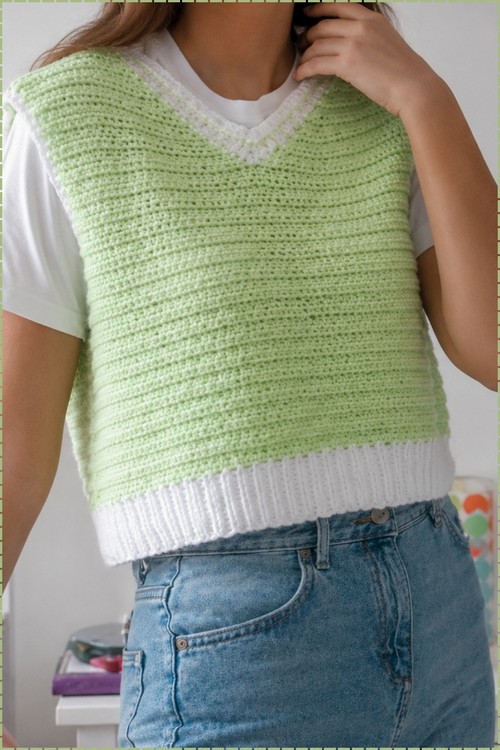
Autumn mornings call for a crochet sweater vest over a plain white tee. Sleeveless means half the yarn and half the time of a full sweater, and the white ribbing is the only part worked in a second colour.
Horizontal stitch rows run across the body of this crochet sweater vest, worked in pale green with no sleeves at all. White ribbing edges the V neckline and forms a deep band at the cropped hem, and the armholes finish with a plain green edge. Make the ribbed hem slightly tighter than the body, because a loose band lets the vest ride up over whatever you layer underneath.
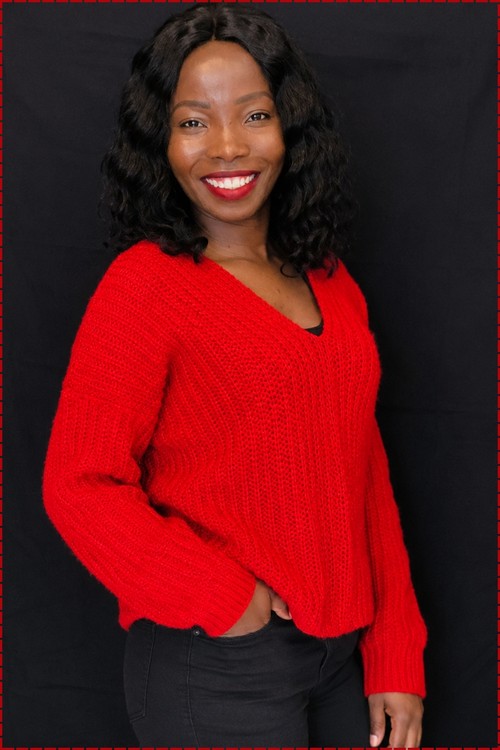
V Neck Crochet Sweater

Mint green over a white t shirt is a combination that keeps showing up for good reason, and this sweater vest is built exactly for that layered look. The body works up in a dense, even stitch while white ribbing at the hem and v neckline gives the whole piece a clean two tone finish. It sits in similar territory to a crochet sweater vest but with a cropped length and a lighter overall feel.
Front and back panels are worked flat and seamed at the shoulders and sides, keeping the construction beginner friendly from start to finish. The v neck shaping is gradual and the ribbed trim goes on last, so you have full control over how wide or narrow the neckline sits. Swapping the two colors or working the whole piece in one shade both hold up equally well.
Materials and Tools
- Two contrasting colors of acrylic yarn (the original uses green and white)
- A 4 mm crochet hook
- Tapestry needle
- Scissors
- Tape measure
- Stitch markers
Essential Stitch to Know
Stitches and Techniques (with tips throughout)
- Front loop only (FLO) single crochet: Work into just the front loop of each stitch instead of both loops. This creates the stretchy, ridged texture of the ribbed band. Tip: the FLO rows feel a little looser than standard single crochet — keep your tension consistent and count your stitches at the end of each row.
- Half double crochet (HDC): The main body stitch. Yarn over, insert hook, pull up a loop (3 loops on hook), yarn over and pull through all 3. Chain 2 to turn at the end of each row — not chain 1. Tip: chain-2 turns can sometimes show as a gap at the edge; work the first HDC of each row into the same stitch as the chain-2 rather than skipping it.
- Slip stitch shaping for armholes: Instead of binding off and reattaching, you slip stitch across the first 3 inches of stitches to move your starting position inward before working the armhole section. Tip: keep the slip stitches loose — tight slip stitches will pull the armhole edge in and make it look puckered.
- V-neck split and decrease: Find the center stitch, work each side separately, and decrease at the neck edge when two stitches remain at the end of the row. This creates the diagonal slope. Tip: both sides of the V must match in row count — count carefully on the second side rather than eyeballing.
- Three-round neckline edging: White HDC, green single crochet, white HDC — alternating for a clean two-color finish. The V-dip gets a slight decrease on the first round to keep the point sharp rather than rounded.
The Pattern
The vest is made from two panels — front and back — each built on a ribbed band, then seamed together and finished with neckline and armhole edging.
Step 1: The Bottom Ribbed Bands (Make 2)
- Foundation chain: Make a slip knot and chain 11 (10 plus 1 turning chain).
- Row 1: Skip the first chain, then single crochet into the second chain from the hook and all the way down. Chain 1 and turn.
- Row 2: Work a front loop only single crochet across the row. Chain 1 and turn.
- Body length: Continue working front-loop-only single crochet rows until the band measures approximately 19.5 inches long. Fasten off.
- Repeat the exact same process to create a second identical band.

Step 2: Front Panel Body
- Double-knot the green yarn to the corner of the white ribbed band, pull up a loop, and chain 2.
- First round: Work half double crochet evenly across the top edge of the ribbed band. Chain 2 and turn.
- Height: Continue working rows of half double crochet until the green section measures 7.5 inches long.
- Armhole setup: Measure 3 inches in from both outer edges and place stitch markers. Slip stitch up to the first marker, chain 2, and half double crochet across until you reach the second marker.
- Armhole height: Chain 2, turn, and continue working rows of half double crochet until the armhole section is 2.5 inches tall.
Step 3: Creating the V-Neck (Front Panel)
- Fold the front panel in half to find the center and mark the middle stitch with a stitch marker.
First side of the V
- Half double crochet up to the stitch marker, half double crochet into the marked stitch, chain 2, and turn.
- Skip the first stitch, half double crochet down the row, chain 2, and turn.
- Continue rows, decreasing when you have 2 stitches remaining at the neck edge to form the slope.
- Stop when this V-section is 2.5 inches wide and tall, then fasten off.
Just starting out with crochet? The video tutorial below is a great place to begin, or challenge yourself with the written pattern below!
Second side of the V
- Attach the green yarn on the opposite side of the neck center, chain 2, and half double crochet across.
- Work rows identically, decreasing at the neck edge, until this side matches the first (2.5 inches). Fasten off.

Step 4: Back Panel
- Repeat Step 1 (create a white ribbed band), then attach green yarn and work 7.5 inches of half double crochet rows just as you did for the front.
- Measure and place stitch markers matching the width of the front panel shoulder lines.
- Work rows of half double crochet between the stitch markers for approximately 3 rows (roughly 1 inch) to form the upper back shoulders. Repeat for both shoulders and fasten off.
Step 5: Seaming the Panels
- Lay the front and back panels flat with right sides facing inward.
- Double-knot your yarn at the seams and slip stitch the shoulders and sides together.
- Turn the vest right-side out.
Step 6: Edging and Neckline Trim
- Neckline Round 1 (white): Attach white yarn at the neckline, chain 2, and work one round of half double crochet all around the collar, decreasing slightly right at the bottom V-dip to keep the point sharp. Slip stitch to close and fasten off.
- Neckline Round 2 (green): Attach green yarn and work one round of single crochet around the collar for a textured border.
- Neckline Round 3 (white): Finish with one final round of white half double crochet, then fasten off.
- Armholes: Attach yarn at each armhole opening, work one round of half double crochet all the way around, slip stitch, and fasten off. Repeat for the other armhole.

Step 7: Finishing
- Use your tapestry needle to weave in all remaining loose yarn ends.
Yarn Substitution
Any smooth worsted or DK weight acrylic works on the 4 mm hook. The color contrast is what drives the design, so choosing two shades with good visual separation — dark and light, or complementary colors — matters more than the specific fiber. Avoid textured or fuzzy yarns, which blur the clean FLO ribbing detail and obscure the color boundary between the ribbing and body sections.
Customization Ideas
- Change the color combination. Any two contrasting colors work — try cream and navy, rust and off-white, or black and mustard.
- Adjust the body length. More or fewer half double crochet rows between the ribbing and the armhole changes the torso length.
- Widen or narrow the armhole. Moving the stitch markers further in or out (more or less than 3 inches) adjusts the shoulder width and armhole opening.
- Deepen the V. Working more rows on each V-neck section before fastening off creates a longer, lower V.
- Make it a sweater. The same construction translates directly to a sleeved version — work the sleeves separately from the armhole openings and seam them in.
Frequently Asked Questions
1. What’s the difference between front loop only and back loop only ribbing? Both create ribbed texture, but they look slightly different. Front loop only (used here) leaves a raised horizontal ridge on the side you can see; back loop only leaves it on the reverse. Both are stretchy and work well for hems and cuffs — this pattern uses FLO, so stick with it for consistency.
2. Why does the neckline use three separate color rounds rather than one? The three-round trim (white, green, white) creates a layered, intentional border rather than a plain single color edging. It uses the same color scheme as the body and feels like a design choice rather than an afterthought. You can simplify to a single round if you prefer.
3. My V-neck point looks rounded instead of sharp — how do I fix it? The key is the decrease at the bottom of the V on Round 1 of the neckline edging. If the point still rounds, work a single crochet decrease at the very lowest V stitch on each neckline round to pull the fabric in more decisively at that point.