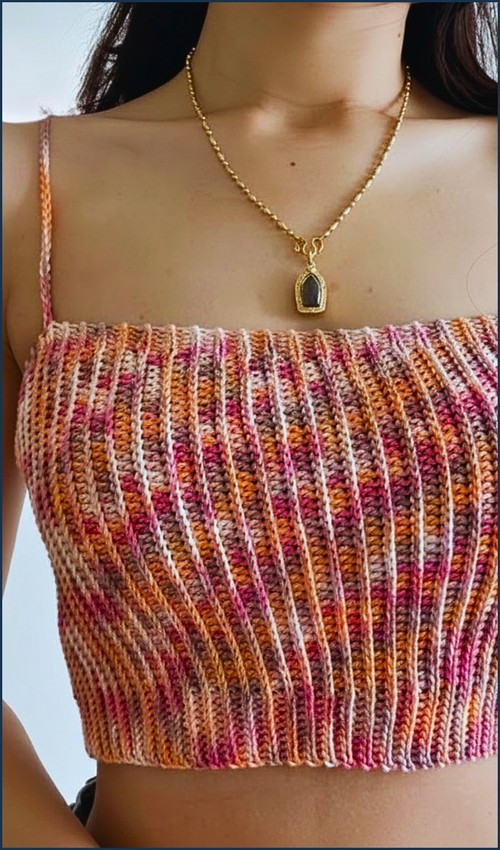
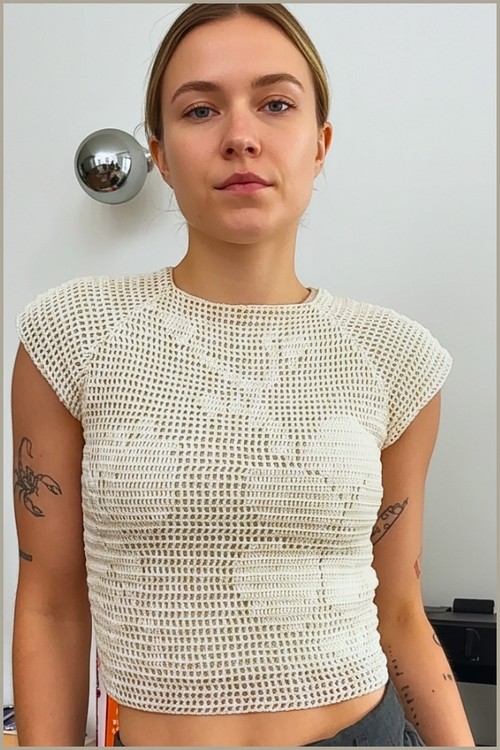
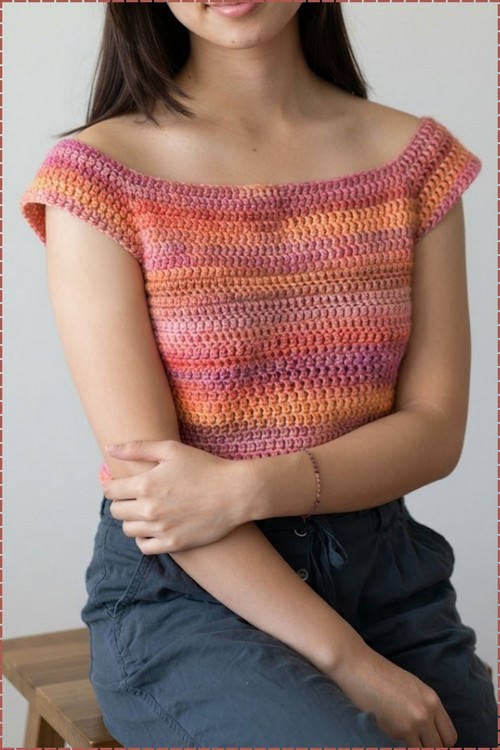
Worked seamlessly from the neckline down in worsted weight yarn, the crochet boat neck tank top takes its shape from yoke increases and sectioned sleeves. A granny square joins the two front panels at the bust, and optional waist shaping refines the fit.
A variegated yarn does a lot of quiet work on a pattern like this. The color shifts move row by row across the body so the fabric never looks flat, and the wide boat neck opening lets the full gradient read across both shoulders at once. If you prefer the same silhouette in solid yarn, this mohair top shows how much the fabric character changes with the yarn choice.
Boat Neck Tank Top Crochet

The construction centers on a single granny square that holds the two front panels together at the bust. That one motif acts as a seam and a focal point at the same time, so there is no complicated shaping to manage and no separate appliqué step at the end.
Quick Facts
- Difficulty: Advanced beginner — confident with double crochet and comfortable following increase placement
- Time: A few relaxed evenings, longer if you add the granny square and waist shaping
- Construction: Worked seamlessly from the top down, starting at the neckline
- Hook: 5.0 mm
- Yarn: Worsted weight
Materials & Tools
- Worsted weight yarn (the sample used a worsted cotton plus a Caron Blossom Cake yarn)
- 5.0 mm crochet hook
- Stitch markers
- Tapestry needle
- Scissors
- One granny square of your choice (optional, for the front panel)
Handy Stitch to Know
Customization Ideas (for inspiration before you start)
- Plain or embellished: Skip the granny square entirely for a clean tube-top look, or set in a bold, colorful square for a statement front.
- Waist shaping: Add optional decrease rows for a more fitted silhouette, or leave it straight for a loose, breezy drape.
- Length: Crop it short for a summer top or keep working rounds for a tunic or mini-dress length.
- Yarn effects: A self-striping or cake yarn (like the Blossom Cake used here) gives beautiful color movement with zero extra effort.
The Pattern
Sizing note: this is worked to fit your own measurements. The sample used 120 chains for the neckline; your count should be a multiple of 6 sized to your shoulders.
1. The Neckline Chain
- Start with a slip knot.
- Chain a length that fits comfortably around your shoulders and neckline. Your total chain count must be a multiple of 6 (the sample used 120 chains).
- Test the fit: fold the chain in half — it should comfortably span the width of your shoulders.
- Join into a loop by slip stitching into the first chain, then pull the yarn through the loop on your hook.

2. Sectioning the Neckline for Increases
- Divide your neckline into sections for the front, back, and two sleeves using stitch markers.
- Divide your total chain count by 6 (for example, 120 ÷ 6 = 20).
- Count that number of stitches (20) and place a stitch marker.
- Count the next section (another 20 stitches) and place a marker on the 21st stitch.
- Count 40 stitches for the front/back span and place a marker on the 40th stitch.
- Continue placing markers for the remaining sleeve and body sections in the same way, following your proportions.
Just starting out with crochet? The video tutorial below is a great place to begin, or challenge yourself with the written pattern below!
3. Top-Down Yoke & Increases (First 6 Rows)
- Row start: Chain 2, then work 1 double crochet into the exact same stitch where you joined.
- Double crochet in each stitch until you reach a stitch marker.
- Making an increase: Remove the stitch marker and work an increase into that same stitch or space — 1 double crochet, chain 1, 1 double crochet.
- Continue double crocheting and making increases at all marked locations around the row.
- Row end: Slip stitch into the top of the first double crochet to close the round.
- Repeat this for a total of 6 rows, chaining 2 at the start and slip stitching at the end of each row.
4. Sectioning Off the Sleeves
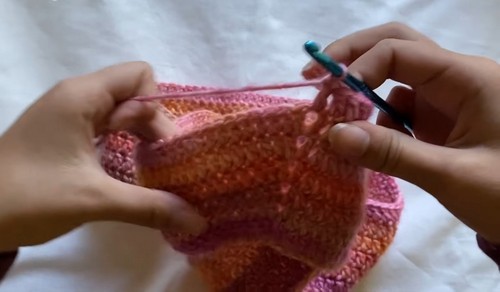
- Start a new row by chaining 2 and double crocheting until you reach the first increase space.
- Make 1 double crochet into the chain space of that increase.
- Create the armhole bridge: chain enough stitches to comfortably span across your arm to the next increase space (the sample used 8–10 chains).
- Skip the entire sleeve section and make a double crochet directly into the chain space of the next increase on the other side.
- Repeat the bridge chain for the other sleeve.
- Double crochet to the beginning of the round and slip stitch to close.
5. Preparing for the Granny Square (Front Panel)
If you prefer a plain tube top, skip this step and simply continue working plain double crochet rounds down the body.
- Chain 1 and cut your yarn to finish the upper yoke section.
- Count the number of stitches across the top edge of your chosen granny square (for example, 19 stitches).
- Count the stitches across the front of your top, subtract the granny square width, and divide by 2 to find how many stitches to leave open in the center.
- Place stitch markers at these symmetric points.
- Attach your yarn at the left stitch marker, chain 2 (this does not count as a stitch), and double crochet around the back and sides of the top, skipping the front center gap where the granny square will go.
- Turn your work and continue in rows back and forth (leaving the front gap open) until the height of these side rows matches the height of your granny square.
6. Shaping the Waist (Optional)
For a more fitted look toward the waist:
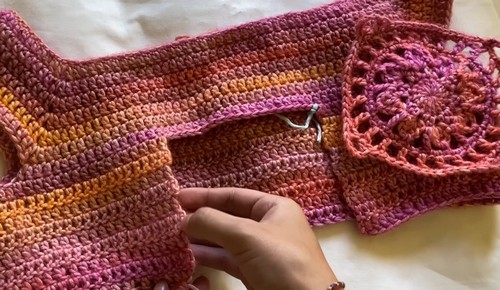
- Work a decrease row, placing a decrease every 6th stitch: yarn over, pull up a loop in the 6th stitch, pull up a loop in the 7th stitch, and work them off together.
- Work a plain row of double crochets.
- Repeat the decrease row if you want further narrowing, stopping once you reach your preferred width.
7. Sewing in the Granny Square
- Thread a long piece of yarn onto your tapestry needle.
- Align the granny square into the front opening with the right sides facing inward.
- Carefully sew the square into the gap, aiming for roughly 2 stitches along the granny square edge for every 1 row of double crochet. Take your time to keep the seams neat.

8. Finishing the Body Length
- Reattach your working yarn (or continue from your active loop) at the top of the granny square.
- Double crochet evenly across the top edge of the square (matching your square’s stitch count, for example 19 stitches) and continue working in rounds around the rest of the body.
- Keep working plain double crochet rounds downward until the top reaches your desired length, or until you run out of yarn.
- Slip stitch to finish, chain 2, cut your yarn, and weave in all loose ends.
Tips & Troubleshooting
- Test the neckline before you commit. Fold the joined chain in half and check it spans your shoulders comfortably — this is your one chance to fix the fit before the whole top grows from it. Keep the count a multiple of 6 so your sections divide evenly.
- Keep your increases stacked. The (double crochet, chain 1, double crochet) increases should sit directly above each other row to row. Parking a marker in each chain-1 space helps you find them instantly on the next round.
- Match the granny square seam ratio. Roughly 2 square-edge stitches to every 1 double crochet row keeps the panel flat and pucker-free — ease gently rather than pulling the seam tight.
FAQ
Can I make this without the granny square? Absolutely. Skip step 5 and the sewing step, and just keep working plain double crochet rounds down the body after sectioning off the sleeves. You’ll get a clean off-the-shoulder tube top.
How do I get the sizing right? Everything grows from the neckline chain, so fit that first — a multiple of 6 that folds in half to span your shoulders. From there, the yoke rows and body length are worked to your own measurements, and the optional waist decreases let you fine-tune the shape.
Why does my top flare out too much at the yoke? That usually means too many increase rows or increases that drifted out of alignment. Stick to the 6 increase rows before sectioning the sleeves, and keep each increase stacked over the one below it.
What kind of granny square works best? Any square you like, as long as you measure its top-edge stitch count and width first. Those two numbers drive where you place your front markers and how you seam it in, so a square with a tidy, countable edge makes the whole process easier.