
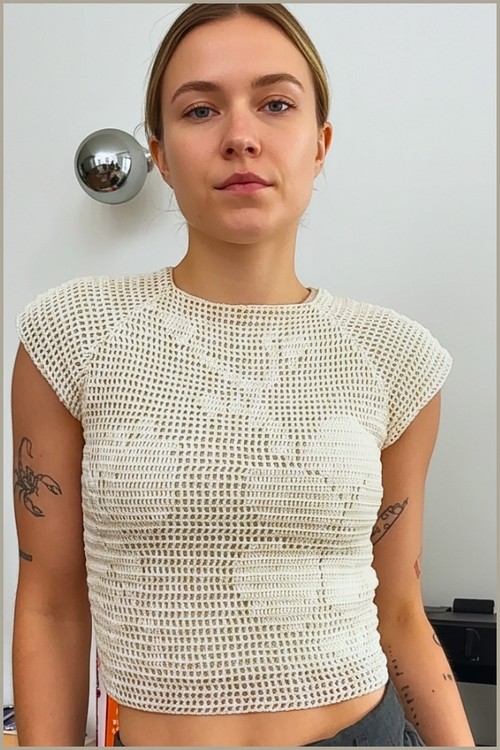
An open filet grid in cream cotton is one of the most versatile textures in crochet structured enough to hold its shape, light enough for summer, and clean enough to wear over almost anything. This cap-sleeve crop top keeps the construction simple: two flat panels worked in a consistent dc-and-chain grid, then seamed at the shoulders and sides. No motif chart, no shaping rows, just the grid, which makes it the most straightforward filet top to follow. If you want to see the same filet grid logic applied to a different silhouette, the crochet filet halter top handles the open-square construction with a high neck and no sleeves.
Filet Crochet Summer Blouse

The panel construction means front and back work up separately before being joined — each piece is a simple rectangle of filet rows, which keeps the stitch count predictable throughout. The subtle horizontal banding visible across the midriff adds a little visual texture without breaking the grid rhythm. For another cream cotton top with a different open construction, the lightweight crochet summer top with mesh grid shows how the same palette and openwork logic works in a top-down seamless format.
Materials
To achieve the delicate drape required for this blouse, high-quality lace weight yarn is essential.
Yarn: Lace weight (Weight 0) cotton yarn.
Hook: 2 mm crochet hook.
Notions: 4 stitch markers, 12 dome-shaped buttons, sewing thread, and a sewing needle.
Tools: Measuring tape, scissors, and a tapestry needle for weaving in ends.
Stitching Essentials
Sizing & Measurements
This pattern uses a “measure-as-you-go” approach to ensure a perfect fit for any body type.
Collar: Measure around the base of your neck. The starting chain should be this length (multiple of $2 + 1$).
Body Length: Customizable. Continue the body rows until the blouse reaches your waist or hips.
Gauge: Work a $4″ \times 4″$ swatch in filet mesh (dc 1, ch 1, sk 1).
The Pattern: Filet Crochet Summer Blouse
1. Planning and Setup
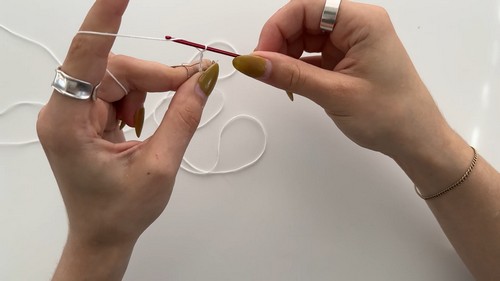
Before starting, divide your total number of mesh squares into thirds:
Front: 1/3 of total squares.
Back: 1/3 of total squares (divided into two halves for the opening).
Sleeves: 1/3 of total squares (shared between both sleeves).
- Just starting out with crochet? The video tutorial below is a great place to begin, or challenge yourself with the written pattern below!
2. Foundation Row & Collar
Foundation: Chain your calculated number plus 2 (turning chain).
Row 1: Skip 2 chains (counts as first dc). Dc in the 3rd ch.
Mesh Section: Ch 1, sk 1, dc in next ch across the first back half.
Corner Increase: In the next stitch, work (dc, ch 1, dc, ch 1, dc). Place a stitch marker in the middle dc of this group.
Repeat: Continue mesh across the sleeve, front, and second sleeve, placing a corner increase at each of the 4 raglan points.
Ending: Finish the second back half with the mesh pattern. Work 1 dc in each of the last two chains to create a solid “button band” edge.
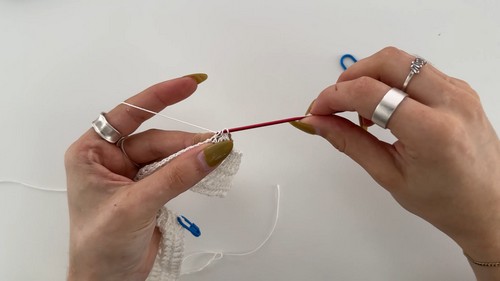
Pro-Tip: The Solid Edge
Working two double crochets side-by-side at the beginning and end of your rows (the center back) provides stability. This makes it much easier to sew on buttons later without the fabric stretching out.
3. Raglan Increase Rows
Row 2: Ch 2 (counts as dc), turn. Work dc into dc and ch 1 over ch 1 spaces.
Increases: When you reach a stitch marker, work (dc, ch 1, dc, ch 1, dc) into the marked stitch. Move the marker up to the new middle dc.
Repeat: Continue these rows until the raglan diagonal is long enough to meet comfortably under the arm.
4. Optional Filet Design

To add a floral or geometric motif to your blouse:
Empty Mesh Square: (Dc, ch 1, sk 1).
Filled Mesh Square: (2 dc). Work the dc directly into the ch-1 space of the row below instead of chaining.
5. Separating the Sleeves
Work across the back section to the first corner marker.
Underarm Bridge: Ch 7 (or any odd number). Skip the entire sleeve section.
Join: Work a dc into the middle stitch of the next corner.
Front: Work across the front section to the next marker.
Second Bridge: Ch 7, skip the second sleeve, and finish the back section.
Next Row: Work the mesh pattern across the body, treating the underarm chains as foundation chains (dc 1, ch 1, sk 1) to keep the grid aligned.
6. Finishing the Body and Buttons
Continue the mesh pattern until the blouse reaches your desired length. Fasten off.
Button Placement: Sew 12 dome buttons evenly along the “solid” edge of one back panel.
Button Loops: Attach yarn to the top of the opposite back panel. Sc evenly down the edge. When you reach a button position, Ch 3 (or enough to fit your button) and continue sc.
Technique Explainer: The Stacked Single Crochet
If you find that a Ch 2 at the start of a row looks too thin or leaves a gap, try a Stacked Single Crochet instead:
Sc in the first stitch.
Insert your hook into the left-hand vertical bar of the sc you just made.
Yarn over and pull up a loop, yarn over and pull through both loops.
This creates a thicker “fake” double crochet that blends perfectly with your mesh!
Blocking Guide
Because this blouse uses lace weight cotton and a mesh stitch, blocking is mandatory to open up the design.
Soak: Submerge the finished blouse in lukewarm water with a bit of wool wash for 15 minutes.
Remove Excess Water: Roll the blouse in a clean towel and press firmly. Do not wring or twist.
Shape: Lay the blouse flat on blocking mats. Use rust-proof pins to pull the mesh into straight, square lines.
Dry: Allow to air dry completely before removing pins. This “sets” the stitches and gives the blouse a professional, boutique-quality drape.


