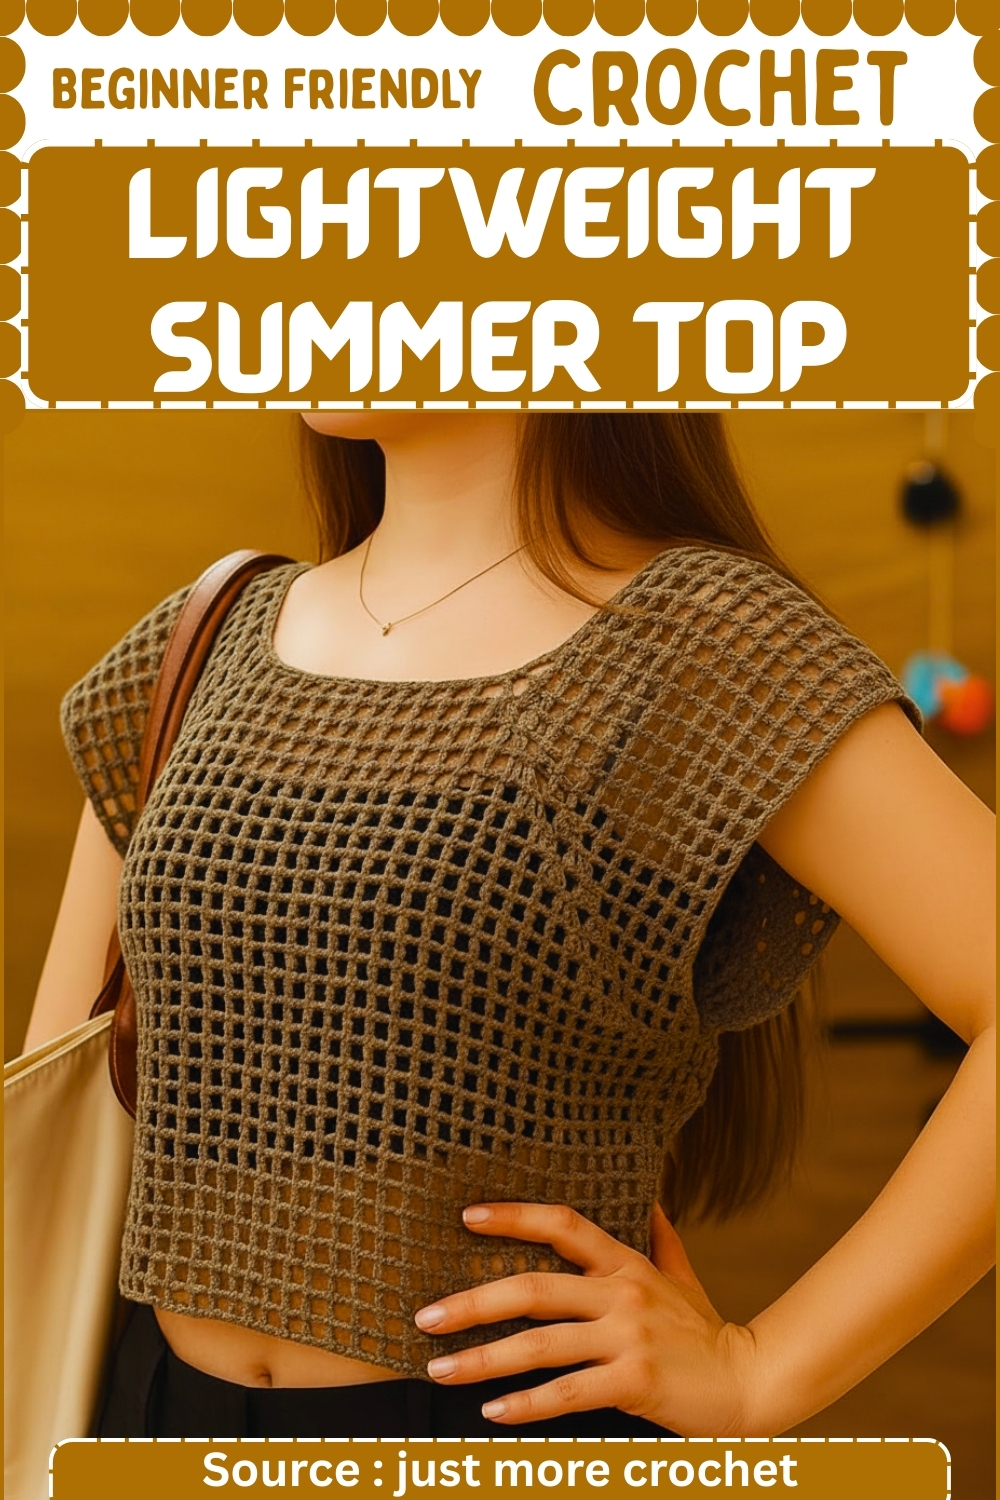
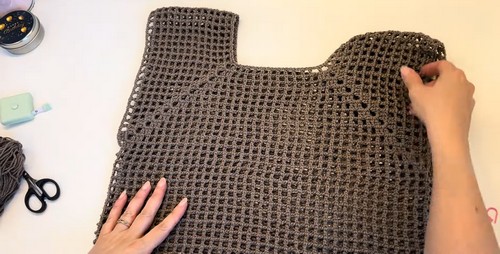
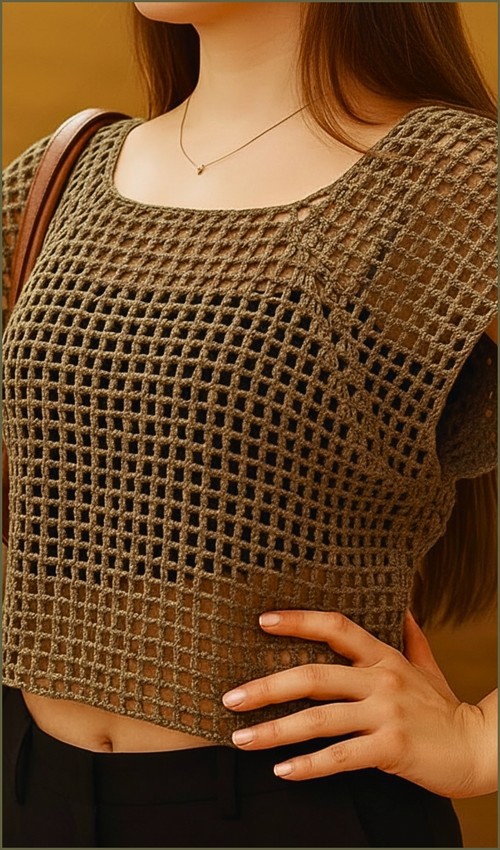
A uniform square mesh grid worked top-down gives this cap-sleeve crop top a clean, modern look no motifs, no texture shifts, just consistent open cells from the neckline to the hem. The taupe cotton (Nako Pırlanta) reads neutral enough to layer over almost anything, and the top-down seamless construction means there’s no assembly once the final row is finished. For a similar open-grid top with a different neckline and silhouette, the crochet mesh top for beginners handles the same grid logic in a slightly different format.
Lightweight Crochet Summer Top
The construction starts at the neckline and works down, with armhole shaping built in as the yoke expands one continuous piece with no seaming. The square mesh cells stay consistent throughout, which makes row-counting straightforward and the finished fabric very even. If you want to see the same top-down approach applied to a longer, more draped silhouette, the crochet mesh top with long sleeves extends the same logic into a raglan format.
Materials
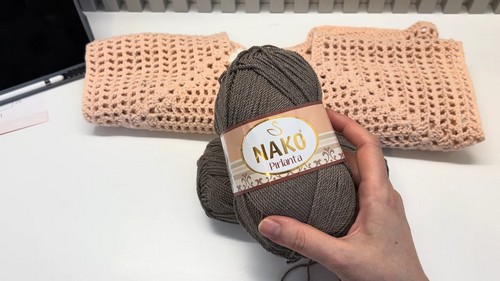
- Yarn: Nako Pırlanta Mercerized cotton yarn, approximately 2 skeins for size Small to Medium
- Hook size: 3.5 mm
Skill level: Easy
Before You Start
How this blouse is constructed
- Top down neckline start: You begin at the neck and work in rounds.
- Mesh yoke with four increase points: The yoke expands at shoulder and side points using “increase fans.”
- Join body by skipping shoulder sections: This creates armholes without sewing.
- Straight mesh body: You keep the same stitch pattern and stop at your preferred length.
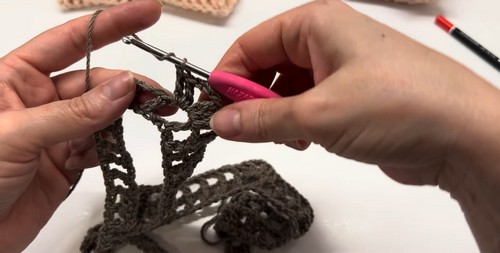
Why the pattern uses triple crochet mesh
Triple crochet gives height quickly and keeps the fabric airy. With mercerized cotton, it creates a crisp, open structure that shows the mesh clearly and drapes neatly without collapsing.
Notes on fit
- This design has an easy, floaty fit because the mesh is open and the yoke expands gradually.
- The neckline fit depends heavily on your starting chain tension, so that first step matters more than it looks.
Stitch and Pattern Clarity
What a “mesh cage” means here
In your pattern, one mesh cage is the repeated unit made by:
- a tall stitch (triple crochet)
- and chain spaces that create the open “window”
You count cages to keep the yoke evenly divided and to place increases in the same spots every round.
Increase fan placement
- The “increase fan” is your marker point.
- It creates the four growth lines (two shoulder areas and the front and back growth points), similar to a raglan style.
- If these fans stack above each other round after round, the yoke stays balanced.
Fit and Sizing Guidance
Neckline sizing
- The neckline is a fixed starting size in this draft (119 chains).
- The instruction to chain loosely is key, because tight chains reduce the effective size and can make the neckline hard to pull over the head.
- If you’re still learning how to read crochet patterns, no stress! Follow the video tutorial below and use the written pattern below as you get more comfortable!
Practical tip: If you know you chain tightly, use a slightly larger hook just for the neckline chain, then switch back to 3.5 mm for the rest.
This keeps the pattern intact while improving comfort.
Yoke depth check
- The yoke should reach under the arms before you join the body.
- Your pattern gives 13 rounds as the target, but the best confirmation is that the fabric reaches the underarm area when folded and tried against the body.
Body size and length
Your sample measurements are:
- approximately 43 cm in width
- 43 cm in length
Because mesh fabric stretches and relaxes, width can change slightly after blocking and wear. Length is the easiest thing to customize since you simply keep repeating rounds until it feels right.
The Pattern

Foundation Neckline
- Make 119 chains loosely to ensure the neckline can pass comfortably over the head
- Join with a slip stitch to the first chain to form a circle, being careful not to twist the chain
Clarity notes:
- Take a moment before joining to lay the chain flat on a table.
- If it twists, the neckline will spiral and the mesh will never sit evenly.
- A loose chain keeps the neckline comfortable and prevents the top edge from pulling inward.
Foundation Mesh Round
- Chain 5 to begin the round
- Skip 1 chain and work 1 triple crochet into the next chain
- Chain 2, skip 1 chain, and work 1 triple crochet into the next chain
- Repeat this pattern around the entire neckline
- You should have a total of 60 mesh cages at the end of the round
Clarity notes:
- The chain 5 at the start functions as height plus spacing so the first mesh matches the rest.
- Counting your cages at the end is worth doing. If you do not land on 60, your section division will not line up cleanly.
If your cage count is off:
- Being off by 1 cage usually means you accidentally skipped the wrong chain once or worked the triple into the wrong chain. It is easiest to fix this in the first mesh round rather than later when the increases start stacking.
Division for Shoulders and Body
- Divide the 60 mesh cages into sections
- Allocate 12 cages for each shoulder section
- Allocate 18 cages for the front section and 18 cages for the back section
- Work 11 mesh cages
- In the 12th cage, work an increase fan made of 2 triple crochets, 3 chains, and 2 triple crochets in the same space
- Continue working 11 cages for the shoulder, then an increase fan
- Work 17 cages for the front or back, then an increase fan
- Repeat this sequence until all four sections are complete
Clarity notes:
- This is where the garment shape is decided. The shoulder sections are smaller (12 cages each) so the neck does not become overly wide, while the front and back get more space (18 cages each) for body coverage.
- The increase fan marks the corner. From this point forward, every round will place new fans in the same four spots.
Helpful way to stay organized (without changing the pattern): Place a stitch marker in the center chain space of each increase fan as soon as you make it. That gives you four clear markers to return to every round.
Yoke Construction
- Continue crocheting in rounds using the mesh pattern
- Work one mesh cage into each existing mesh cage
- At each increase fan, work one mesh cage into the first triple crochet space
- Work a new increase fan of 2 triple crochets, 3 chains, and 2 triple crochets into the center chain space
- Work one mesh cage into the second triple crochet space
- Repeat this process for every round
- Continue for a total of 13 rounds or until the yoke reaches under the arms
Clarity notes:
- The instruction “one mesh cage into each existing mesh cage” is what keeps the fabric consistent and open.
- The fan treatment is the only place where extra width is added.
- That is why the fans must stack neatly.
- If they drift, the yoke can twist.
Check your yoke as you go:
- Every few rounds, fold the yoke so two fans sit at the shoulder line and the other two align down the sides.
- This quick check confirms your increase points are staying symmetrical.
Joining the Body
- Fold the piece so the increase lines sit neatly on top of the shoulders
- Work across the front section in mesh pattern
- When reaching the underarm, skip the shoulder section entirely
- Chain 2 and join directly to the back section to create the armhole
- Continue working across the back
- Repeat the same steps on the opposite side to complete both armholes
Clarity notes:
- Folding first helps you confirm you are joining at the correct points.
- The shoulder sections are skipped because they become the sleeve/armhole opening area rather than part of the torso circumference.
- The chain 2 connection creates the small bridge at the underarm.
- This prevents the armhole from pinching while keeping the mesh continuous.
Troubleshooting the join:
- If the armhole feels too tight, it is usually because the join chain is too short or because the yoke depth is not long enough before joining.
- If the armhole looks loose and floppy, it is often a sign the yoke is very deep or the join bridge is longer than needed. (In this draft, you keep the chain 2 as written, so focus on yoke depth and even tension.)
Body Length
- Continue working the mesh stitch in continuous rounds
- Crochet until the blouse reaches your desired length
- The sample blouse measures approximately 43 cm in width and 43 cm in length
- Fasten off and weave in all loose ends
Clarity notes:
- Once the body is joined, the shaping is done.
- The rest is simple repeat rounds, which makes it relaxing to finish.
- Mercerized cotton can look slightly stiff right off the hook but softens after washing and blocking.
Beginner Notes That Prevent Common Mistakes
1) Keep your neckline chain loose
A tight neckline chain is the number one reason a top like this becomes uncomfortable. Take your time with the first 119 chains and keep them relaxed.
2) Count cages early
If the first mesh round does not end with 60 cages, the section division will fight you later. Fixing it right away saves time.
3) Use markers at the increase fans
Even experienced crocheters lose track in mesh rounds because the fabric is airy and repetitive. Marking the four fan centers makes the yoke nearly foolproof.
Troubleshooting
My work is twisting
- Most often caused by the foundation chain being twisted when joined.
- Less commonly caused by increases drifting because fans were not placed in the same chain space each round.
My yoke looks too wide too fast
- Check that you are making only one new increase fan at each existing fan per round.
- Also check that you are not accidentally adding extra cages between fans.
My neckline feels tight
- This is usually chain tension. If it will not pass over the head comfortably, it is best corrected at the neckline stage.
The armhole join looks gappy
- Open mesh can make the underarm bridge look more visible. This often improves after weaving ends neatly and lightly blocking to settle stitches.
Finishing Notes
- Weave in ends along the solid parts of the stitches (around triple crochet posts) rather than through only chain spaces, so the ends hold securely in an open mesh fabric.
- A light block helps the mesh open evenly and makes the yoke increase lines look clean and intentional.