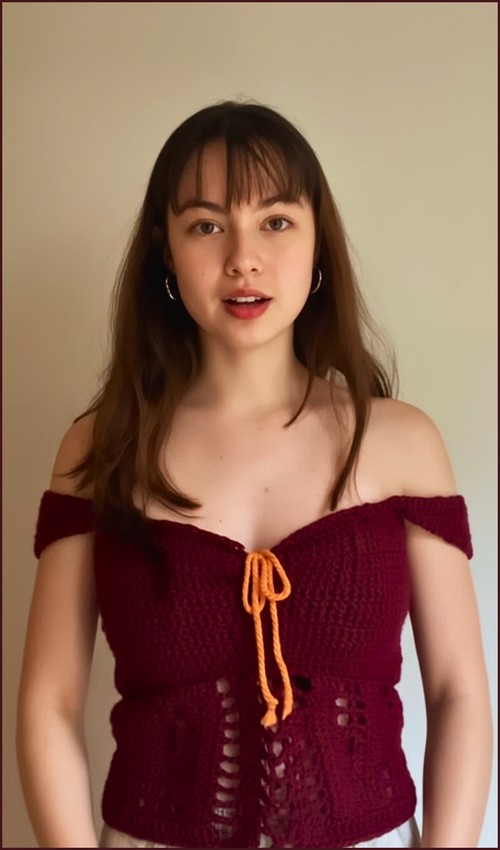
Off-shoulder sleeves, a drawstring front, and a lace lower panel that opens up below the waist، this top earns the milkmaid label through the silhouette rather than any single construction detail. The contrast yarn tie in orange is a small styling choice that punches well above its weight against the deep burgundy body. For another top from the same source with a different take on the bodice-to-lace transition, the sheer babydoll halter top uses a similar two-zone construction.
Sheer Crochet Top

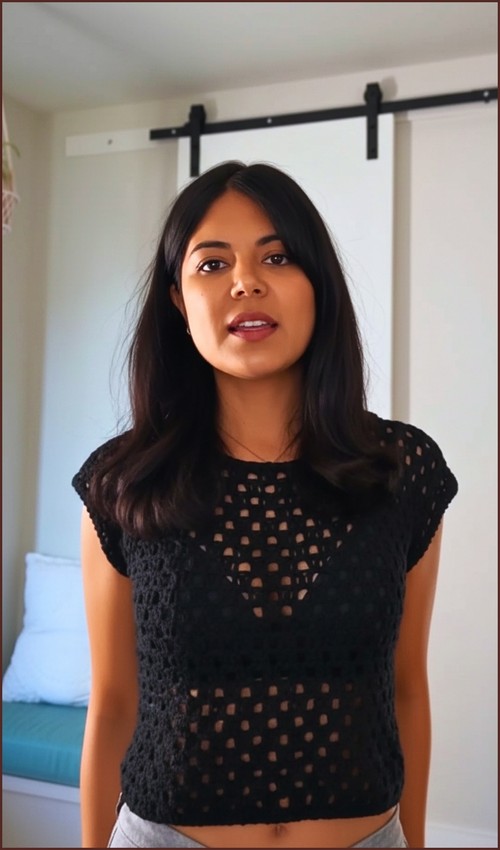
The off-shoulder edge is structured enough to stay in place, which makes this more wearable than most off-shoulder crochet tops that rely purely on tension to hold position. For a different off-shoulder style in an open stitch all the way through, the off-shoulder mesh top is a useful contrast.
Materials
- 4mm crochet hook
- Acrylic yarn in base color
- Accent yarn for drawstring bow
- Sewing needle

Skill Level: Advanced
Stitches Used
- Single crochet
- Double crochet
- Chain
- Slip stitch
- Lace stitch combinations]
Before you start: what you are building
This top is made in clear phases:
- Main body fabric: a simple double crochet back panel plus two single crochet front panels.
- Milkmaid cinch: loops + a drawstring that creates ruching and a gathered neckline.
- Lace hem panel: a separate lace piece that gets sewn to the bottom edge.
- Straps: shaped straps that angle under the arm for a cleaner fit.
Knowing this structure helps you catch fit issues early (while it is still easy to adjust).
Fit and sizing guidance
1) Rib cage measurement matters more than bust measurement here
You are measuring around the rib cage just under the bust and dividing by two. That half-measurement is the width used for the back panel and also guides the lace panel width.
The bust is shaped mostly by:
- the height of the back panel (bust height measurement)
- the cinching/drawstring ruching
- strap placement
2) “Slightly stretched” is intentional
Your foundation chain is worked to match the rib cage measurement when slightly stretched. This creates a top that hugs without relying on tight stitches. With acrylic yarn, stretch is real, so “slightly stretched” helps prevent the band from feeling loose after wear.
A practical way to interpret it:
- Stretch the chain gently until the stitches open a little.
- It should reach the half rib cage measurement without forcing it.
3) Bust height controls coverage
The back panel is repeated until it reaches the bust height from armpit down to rib cage. If you want more coverage, add height here. If you want a lower neckline or more open feeling, keep it shorter. This measurement is where you control the overall “milkmaid” look.
Stitch and shaping clarity
Double crochet fabric in the back panel
Double crochet makes a flexible fabric that is quick to build and sits smoothly under the lace and straps.
Single crochet for the front panels
Single crochet is denser and holds shape well.
That is useful here because the front panels will:
- be pulled into gathers
- hold long loops
- support the drawstring cinch
Strap shaping with one-sided increases/decreases
Increasing on one side only creates an angle, not a wider strap. This matters because the strap needs to travel along the underarm line instead of rising straight up.
Pattern Instructions
Phase 1 Measurements And Calculations
- Measure around the rib cage just under the bust and divide by two
- Measure bust height from armpit level down to the rib cage

Extra clarity (how to measure):
- Rib cage: keep the tape snug but not tight. Take the measurement while breathing normally.
- Bust height: measure vertically from where your underarm naturally creases down to the rib cage line. This prevents straps from pulling the top upward later.
Phase 2 Main Body
Back Panel
- Chain a length equal to half of the rib cage measurement, slightly stretched
- Double crochet in the third chain from the hook and across the row
- Repeat double crochet rows until the panel reaches the bust height measurement
What to watch here:
- Starting in the third chain: this creates the height for a double crochet turning chain.
- Row count vs. measurement: measure your panel flat, not stretched. Acrylic can lengthen when pulled, so use the “resting” fabric for the bust height check.
Common confusion: If your panel width looks correct but feels loose when held to the body, it usually means the foundation chain was not stretched when measured. You can fix that early by reducing chain length slightly rather than tightening stitch tension.
Front Bust Panels Make 2
- Attach yarn to one side of the back panel
- Work single crochet evenly along the side edge using two single crochets per double crochet row
- Continue single crochet rows until the panel reaches half the length of the back panel
- Repeat on the opposite side

Why “two single crochets per double crochet row” works: The side edge of double crochet rows is taller than a single crochet stitch. Working two single crochets into each row-end helps the edge sit flat and prevents puckering.
- Still getting the hang of reading crochet patterns? That’s completely okay, the video tutorial below breaks everything down in a simple, beginner-friendly way!
How to keep it even:
- Place the first few stitches slowly and check that the edge stays straight.
- If you see rippling, you likely added too many single crochets in a section.
- If the edge pulls inward, you likely missed row-ends.
About “half the length of the back panel”: Here “length” means the side edge height you are building upward on each front panel. Each front panel grows until it reaches about half the back panel’s height, so the top has an open neckline area that will later be gathered by the drawstring.
Phase 3 Cinching And Neckline
- Create a two strand chain or braid using the accent yarn approximately 28 inches long
- Slip stitch the two front bust panels together about one third of the way up
- Pull up long loops along the open edge of each bust panel
- Thread the drawstring through the loops to create the ruched milkmaid effect
- Repeat for the second bust panel

What “one third of the way up” means in practice
You are joining the two front panels only at the lower portion, leaving the upper portion open so it can gather.
One third up gives you:
- stability at the lower bust
- room for ruching above
- If you join too high, you lose the milkmaid gather.
- If you join too low, the center can gap and feel unsupported.
Pulling up long loops without stretching the fabric
Long loops form the channels the drawstring will pass through. The key is to keep loops consistent.
Tips:
- Pull each loop to roughly the same height.
- Do not yank the working yarn so hard that the top edge tightens.
- If loops vary a lot, the drawstring will gather unevenly.
Threading the drawstring
When you thread through the loops, think of it like lacing:
- go in and out evenly
- keep the drawstring flat (not twisted)
- gather gradually so you can control the final neckline shape
Phase 4 Lace Panel Bottom
- Chain a foundation based on a multiple of 29 plus 1 to match the rib cage measurement
- Define puff stitch as two double crochets, chain two, two double crochets worked in the same space
- Work the first lace row following the established stitch sequence using puffs, chains, and double crochets
- Continue working the lace pattern through the full 13 row repeat, shaping the diamond and floral motifs as established
- Sew the completed lace panel to the bottom edge of the top, leaving a small opening at the back for comfort and fit
Getting the foundation count right
This lace panel is built from a repeat, so the stitch count matters.
- Multiple of 29 + 1 means your total chain count should be: (29 × number of repeats) + 1
The goal is to match the rib cage measurement so the lace doesn’t flare too wide or pull too tight.
Puff definition in this pattern
Your “puff stitch” here is a lace puff made from two double crochets, chain two, two double crochets in the same space. It is more like a cluster/puff combination, and it creates the raised points that help form the diamond and floral shapes.
Sewing the lace panel on cleanly
Sewing is where the finished top starts to look professional.
Helpful approach:
- Lay the top flat and match the lace panel edges to the bottom edge.
- Pin or clip in a few places first: center front, sides, and center back area.
- Sew with small, even stitches so the seam flexes with the fabric.
Leaving a small opening at the back: This is a comfort detail. It prevents the hem from feeling restrictive and helps the lace sit smoothly, especially if the back panel fits snug.
Phase 5 Shoulder Straps
- Put the top on and mark natural strap placement
- Attach yarn and work a strap four double crochets wide
- Increase on one side only to angle the strap along the underarm
- Work one row even at the shoulder peak
- Decrease on the same side to mirror the angle as the strap moves down the back
- Slip stitch the strap securely to the back panel
Why you mark strap placement while wearing it
Straps control both comfort and neckline shape.
Marking while worn helps you:
- avoid straps that rub the underarm
- prevent the bust from pulling outward
- set the neckline gather where you want it
Four double crochets wide
This width is supportive without being bulky. Try to keep your turning consistent so the strap edges stay straight.
One-sided increase and decrease
Think of the strap as having an inside edge (near the underarm) and an outside edge.
- Increasing on one side changes the strap’s direction gradually.
- Decreasing on the same side creates a mirrored angle so it lays flat at the back.
Secure slip stitch join
Slip stitching the strap to the back panel should feel firm. This join point carries weight, so it is worth reinforcing with the sewing needle afterward if you like extra security.
Finishing
Weave in all yarn ends neatly
Tie the front drawstring into a bow to complete the Fiona Top
Finishing notes that make it last
- Weave ends in multiple directions, especially at seams and strap joins.
- Acrylic can loosen with wear, so take extra care to anchor ends through dense areas like single crochet sections and strap rows.
- After tying your bow, adjust the gathers evenly on both sides so the neckline sits balanced.
Beginner notes (even though this is labeled Advanced)
If you are newer to garment crochet, the techniques that tend to feel “advanced” here are:
- measuring and matching panel sizes
- even single crochet placement along row ends
- controlling long loops and drawstring gathering
- sewing lace to a stretch fabric without distortion
Take it one phase at a time. You do not need perfection in every stitch. You need even shaping and careful assembly, and that comes from checking your work as you go.
Troubleshooting
The back panel is the right size, but it rides up
- Straps may be placed too close to the neck or too tight.
- Re-check your bust height measurement; the back panel may need more rows.
The front ruching gathers unevenly
- Loops may be different heights or spaced unevenly.
- Re-thread the drawstring more evenly and adjust gathers gradually.
The lace panel ripples when sewn on
- Lace panel may be wider than the body edge.
- Sew while both pieces are fully relaxed and pinned/clipped evenly. Do not stretch either piece while sewing.
The underarm feels tight
- Strap angle may be too steep.
- Add more one-sided increase rows so the strap travels outward more gently.
Finishing check
Before you consider it done:
- Try it on and adjust the drawstring gather.
- Check strap comfort at the underarm.
- Make sure the lace hem hangs evenly and the back opening feels comfortable.