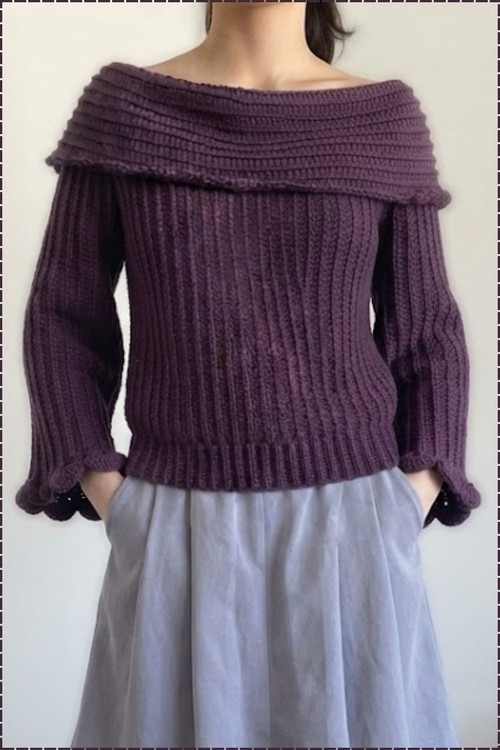
Crochet this free loose off shoulder sweater pattern in front and back post ribbing, then fold the wide collar over so the neckline settles into an off shoulder drape. You seam two body panels and two sleeves and finish the cuffs with scallops.
Every row of this sweater is built on front and back post stitches that pull the fabric into tight vertical columns, giving it the look of a chunky knit ribbing without a single knitting needle in sight. The collar is worked as a wide rectangle in the same rib and then folded over, which is what creates the layered off shoulder drape. Anyone who has tried the slouchy sweater vest will find the post stitch logic immediately familiar.
Loose Off Shoulder Crochet Sweater
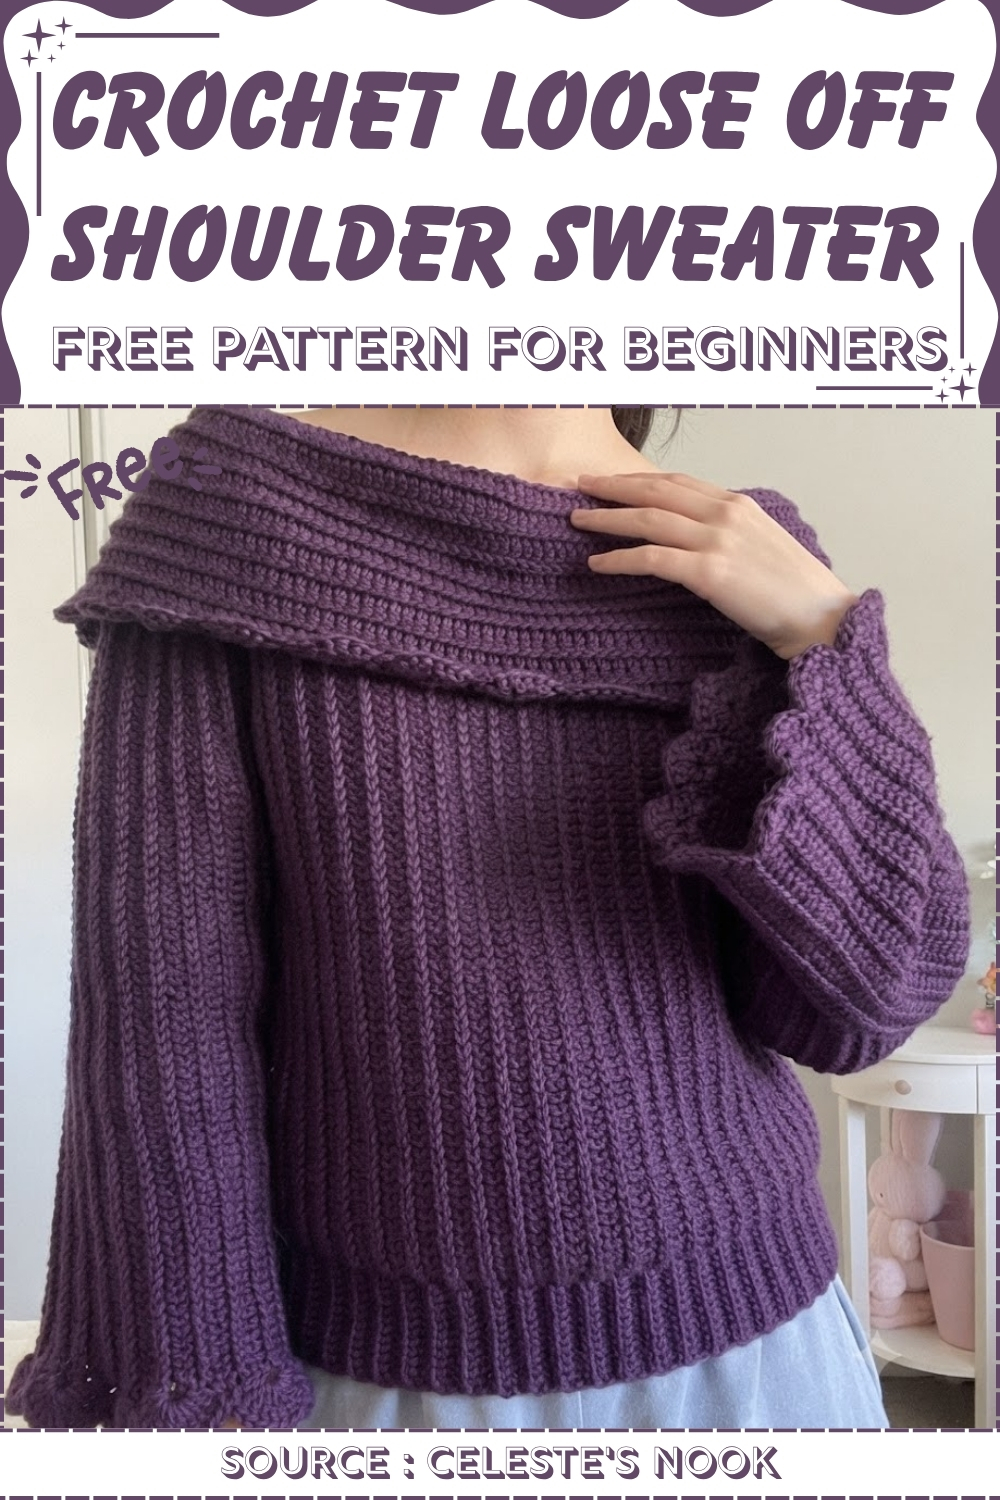
Body and sleeves are sized to sit loose through the torso and taper only slightly at the wrist before the scalloped cuff edging. Purple is the colorway in the tutorial but the rib texture reads cleanly in any solid weight yarn. It is rated for beginners because each row is a single repeating stitch once the foundation chain is done.
Materials and Tools
- Weight 4 yarn (yardage depends on your measurements)
- A 5.5 mm hook
- Scissors
- Tapestry needle for weaving in ends
- Stitch markers
Essential Crochet Stitch
Difficulty and Time
This is a solid intermediate project. The stitch pattern is a two-row repeat of double crochet and slip stitches — easy to memorize — and the scalloped edging is satisfying to work once you’ve tried one fan. The fold-over neckline requires five rounds of increasing attention before settling into a repeat. Budget several sessions, especially for the neckline section, and keep your slip stitch tension loose throughout.
Beginner Technique Notes
Before you start, here’s a closer look at the techniques that run through this pattern:
- Double crochet in the back bump (Row 1): The very first row of each panel is worked into the bumps on the underside of the starting chain, not the front loops. This gives both edges of the panel the same tidy look. Flip the chain over and look for the row of bumps along the back.
- Back loop only (BLO) stitches: From Row 2 onward, every stitch in the main fabric goes into just the back loop of the stitch below. This creates the ridged, textured surface and is what makes the fabric slightly stretchy.
- The alternating row repeat: The body fabric alternates two row types — a double crochet row and a slip stitch row — both in the back loops only. The slip stitch rows are the ones that need the most attention to tension: they want to pull tight. Keep them genuinely loose so the fabric lies flat and maintains stretch.
- Scallop stitch: Each scallop is 7 double crochets all worked into the same single stitch, creating a fan shape. A single crochet after each fan anchors it to the fabric and creates the anchor point for the next fan.
- Fold-over neckline: The neckline is built outward from the neck edge in graduated increase rounds that gently flare the fabric. A stitch-count check on Row 5 ensures the final count is a multiple of 5 — that’s what makes the scalloped edging work out evenly all the way around.
The Pattern
This sweater uses four panels: a front, a back, and two sleeves. The body panels are sewn together at the shoulders, sleeves are centered on the shoulder seam and seamed to the body, then the fold-over neckline and scalloped edging are added.
Front and Back Panels (Make 2 — Identical)
- Measurements: Take measurements for your desired length (from top of shoulder to hips) and width (shoulder-to-shoulder).
- Foundation chain: Make a slip knot and chain your length measurement (example: 65 chains). Add 1 extra for a turning chain.
- Row 1: Skip the turning chain. Working into the back bump of each chain, work double crochets all the way across.
- Row 2: Chain 1 (turning chain), turn, skip the turning chain, and work slip stitches in the back loop only across the entire row. Check your tension — the piece should lie flat, not pull in.
- Row 3: Chain 1, turn, and work double crochets in the back loop only across.
- Pattern repeat: Continue alternating Row 2 (slip stitch in BLO) and Row 3 (double crochet in BLO) with a chain-1 turning chain until the panel reaches your desired shoulder width. End on a double crochet row. Fasten off the front panel, but leave the working yarn attached on the back panel for seaming.

Seaming the Shoulders
- Lay the front and back panels with right sides facing outward.
- Use stitch markers to mark off the neckline — leaving the center open for the off-shoulder fit.
- Seam the shoulders together from the outer edge to each stitch marker using slip stitches, treating each row end (which includes both a double crochet and a slip stitch) as one stitch.
Don’t let crochet patterns intimidate you! If you’re a beginner, the video tutorial below makes it super easy to follow along!
Sleeve Panels (Make 2)
- Foundation chain: Make a slip knot and chain your desired arm length (example: 75 chains), plus 1 extra turning chain.
- Row 1: Double crochet in the back bump across the entire row.
- Pattern repeat: Follow the same alternating row pattern used for the body panels:
- Chain 1, slip stitch in the back loop only.
- Chain 1, double crochet in the back loop only.
- Continue alternating until the sleeve panel is wide enough to wrap comfortably around your arm. End on a double crochet row and do not fasten off.
Attaching the Sleeves and Seaming the Body
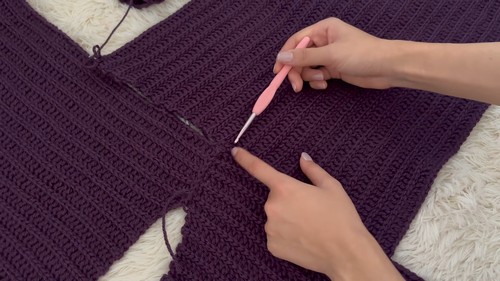
- Attaching sleeves: Find the exact center of each sleeve panel and align it with the shoulder seam of the front and back panels. Slip stitch the sleeve to the body panels across the edge. Repeat for the second sleeve.
- Closing the seams: Fold the sleeve in half, match the edges, and slip stitch down the underside of the sleeve (working through the front loop of the bottom and the back loop of the top). Continue slip stitching straight down the side of the body panels to close the torso.
Fold-Over Neckline
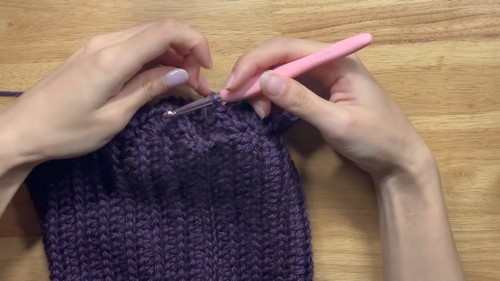
- Base row: Attach yarn to any stitch along the back neckline, chain 1, and work single crochets evenly all the way around the neckline. Slip stitch into the first single crochet and chain 1.
- Row 2 (first flare): Skip the chain-1, and work double crochets in the back loop only, alternating 1 double crochet in the first stitch and 2 double crochet (an increase) in the next stitch, all the way around. Slip stitch to join.
- Row 3: Chain 1, slip stitch in the back loop only all the way around.
- Row 4 (second flare): Chain 1, work an increase pattern of 1 double crochet, 1 double crochet, then 2 double crochet (an increase) repeating around.
- Row 5 (stitch count check): Slip stitch in the back loop only across, but count your total stitches to ensure the final count is a multiple of 5. Add subtle increases if needed during this round to reach the correct multiple.
- Body of fold-over: Continue alternating double crochet rows and slip stitch rows in the back loop only until the fold-over reaches your desired length. End on a slip stitch row.
Scalloped Edging
Neckline edging
- From your final slip stitch row on the fold-over, chain 1.
- Skip the next 2 stitches and work 7 double crochets into the 3rd stitch to form one scallop.
- Skip the next 2 stitches and work a single crochet into the 3rd stitch.
- Repeat this scallop-and-anchor pattern all the way around the neckline. Fasten off and weave in ends.
Sleeve cuff edging
- Attach yarn to a slip stitch edge on the sleeve cuff and chain 1.
- Distribute 7 double crochets across the slip stitch gaps to form a scallop.
- Work a single crochet into the next ridge.
- Repeat the sequence around the cuff. Slip stitch to join, fasten off, and weave in all remaining ends.

Tips and Troubleshooting
- Keep your slip stitch rows genuinely loose. The alternating pattern relies on the slip stitch rows staying stretchy — tight slip stitches will pull the panel in and make the finished fabric stiff. Deliberate, relaxed tension on every slip stitch is the most important habit in this pattern.
- End every panel on a double crochet row. The seaming method and the scallop edging are both designed to attach at the double crochet surface. Ending on a slip stitch row leaves the wrong edge exposed.
- Center the sleeve precisely on the shoulder seam. Measure the center of the sleeve panel and pin it to the shoulder seam before slip stitching — an off-center sleeve will cause the finished sweater to sit crookedly on the body.
- Check the multiple-of-5 count on Row 5 of the neckline. The scalloped edging uses a 5-stitch repeat (skip 2, 7 DC, skip 2, 1 SC). If the total stitch count doesn’t divide cleanly by 5, the last scallop will be cut short. A few subtle increases on Row 5 prevents this.
- Work the scallop edging loosely. Seven double crochets all in one stitch can pull that anchor stitch tight. Give each double crochet a gentle tug to open the fan before moving to the anchor single crochet — this keeps the scallops full and even.
Yarn Substitution
Any smooth weight 4 yarn works well on the 5.5 mm hook for this pattern. The alternating DC and BLO slip stitch fabric benefits from a yarn with a little drape — a cotton, cotton-blend, or soft acrylic will give the sweater a floaty, relaxed quality. Avoid textured or fluffy yarns, which will obscure the ridged texture that makes this fabric distinctive. Yardage depends entirely on your measurements, so if you’re swapping yarns, swatch the alternating pattern first to get an accurate yardage estimate per square inch.
Customization Ideas
- Adjust the neckline openness. Marking the stitch markers further inward (closer to the center) gives a wider, more deeply off-shoulder opening; marking them further out brings the neckline higher.
- Change the fold-over neckline height. More alternating rows before the scalloped edging gives a taller, more dramatic fold; fewer rows give a short turtleneck effect.
- Lengthen or shorten the body. The foundation chain sets the sweater length — your measurements drive every dimension.
- Widen or narrow the scallops. Seven double crochets per fan is the original — five gives a smaller, daintier scallop; nine gives a more exaggerated fan.
- Change the cuff width. Continuing the sleeve panel alternating pattern for more or fewer rows before the scallop edging adjusts the sleeve width.
Frequently Asked Questions
1. Why does Row 1 use the back bumps of the chain instead of the regular loops? Working into the back bumps creates a foundation edge that looks identical to all the other rows of the panel, rather than having a visible chain edge on one side. This matters especially here because both edges of the body panels will be visible — one at the hem and one at the shoulder seam.
2. Why is it important to end on a double crochet row? The seaming method joins matching double crochet edges, and the scallop edging needs a double crochet surface to distribute the fans correctly. A slip stitch edge doesn’t give the right structure for either.
3. How does the fold-over neckline stay open off the shoulder? The neckline is left intentionally wide during the shoulder seaming step — the stitch markers create a large open center gap rather than seaming all the way across. The fold-over neckline is then worked around the full opening, building outward with gradual increases that make it flare. When it folds down, the weight of the fabric and the flare holds it at the off-shoulder position.
4. What does “multiple of 5” mean for the neckline edging count? The scalloped edging uses a 5-stitch repeat: skip 2, seven double crochets in 1 stitch, skip 2, single crochet. For the scallops to work out evenly all the way around without a partial fan at the end, the total stitch count needs to divide cleanly by 5. Row 5’s job is to adjust the count to that multiple before the edging begins.
5. How wide should I make each sleeve panel? Hold the growing sleeve panel against your arm and check that it can wrap around the widest part (usually the bicep) with a little ease — not tight, but not dramatically oversized unless that’s the look you want. The sweater is described as loose and off-shoulder, so a generous fit generally suits the silhouette.