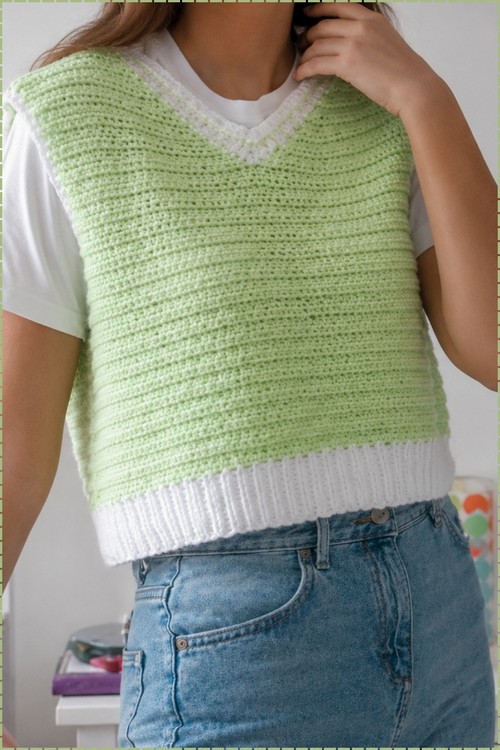
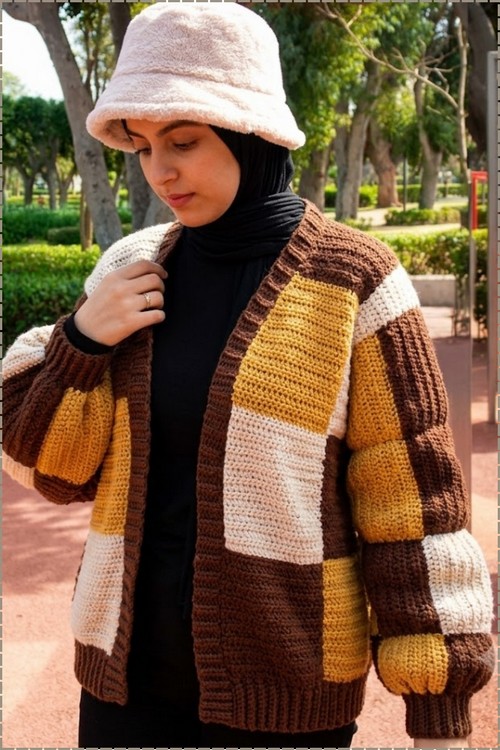
Autumn walks call for an oversized crochet sweater roomy enough to pull over a turtleneck and a scarf. Three colours cover the whole patchwork cardigan, so leftover balls from past projects finish it without buying a full set of yarn.
Color block construction breaks the body into distinct panels worked separately and joined, which means you never have to carry yarn across the full width of a sweater or manage long floats mid row. Brown, gold, and cream sit in large rectangular sections that shift across the body and sleeves, giving the finished piece a retro patchwork quality that reads as very deliberate. Anyone drawn to the patchwork long sleeve top will recognize the same panel by panel logic here, scaled up to a full open front garment.
Crochet Oversized Turtleneck Sweater

The ribbed cuffs and hem band anchor the looser body fabric and keep everything from pooling at the wrists and waist. No sew construction means the panels are joined with slip stitches or surface joins rather than a tapestry needle, which removes the most tedious finishing step from an otherwise straightforward make. Balloon sleeves taper back into the ribbed cuff for a sleeve silhouette that suits the oversized body without overwhelming it.
Materials and Tools
- Size 4, 5, or 6 yarn (approximately 1,000 to 1,500 yards — the tutorial uses Red Heart Super Saver Ombre)
- A 5.5 mm hook for the body, neckline, and sleeves
- A 4.5 mm hook for the cuffs and bottom hem
- Stitch markers
- Measuring tape
- Scissors
- Darning needle
Stitch to Master
Difficulty and Time
This is a well-suited intermediate project. The stitches are simple — slip stitch, half double crochet, and single crochet — but the construction has multiple stages and some technique variety: the BLO slip-stitch collar, the yoke corner increase system, the sleeve separation, and the BLO cuff band all take careful attention. The “no-sew” label is accurate; the only needle work is weaving in ends. Budget several sessions and try the sweater on as you go, which is one of the great pleasures of top-down construction.
Beginner Technique Notes
A few techniques carry this sweater and are worth a moment before you start:
- Back loop only (BLO) slip stitches for the collar: The slip stitch collar uses only the back loop, which creates a dense, stretchy, knit-like ribbing. It looks impressive and feels almost like a purchased sweater; the key is keeping your tension relaxed enough to maintain the stretch.
- Joining the collar into a tube: After the collar band is long enough to wrap around your neck, you join the two ends by slip stitching through the chain edge and the front loop of the opposite side simultaneously. This creates an invisible seam where the collar closes.
- Yoke corner increases: Four stitch markers define the four “raglan-style” increase points of the yoke. At each marked stitch, you work 1 HDC, chain 1, 1 HDC — which adds 2 stitches per corner per round and keeps the yoke growing evenly in all directions.
- The loose fasten-off trick: When you’ve finished the yoke and are about to work the sleeves, you fasten off the working yarn loosely — meaning you leave a long, loose tail rather than pulling the knot tight. This is critical because you’ll reopen the same spot later to resume the body. Pull it too tight and you’ll need to cut it.
- Sleeve chains bridging the armhole: When you return to work a sleeve, you chain across the armhole gap to create the underarm. This chain becomes part of the sleeve fabric.
- BLO cuff band: The cuff is a separate strip of BLO slip stitches worked back and forth and attached row-by-row to the sleeve edge — similar to the collar construction. The smaller hook and decrease row on the sleeve opening first ensures the cuff sits snugly at the wrist.
The Pattern
The sweater is worked top-down in one continuous piece: turtleneck collar, yoke with increase rounds, sleeves with cuffs, and then the body with an optional ribbed hem.
Step 1: The Neckline (Turtleneck Collar)
- Foundation: Start with a slip knot and chain 17 — or chain enough that the band matches your desired turtleneck height when folded over.
- Row 1: Chain 1 extra. Work a slip stitch into the second chain from the hook and continue slip stitching across to the end of the row.
- Subsequent rows: Chain 1, turn, and work back loop only slip stitches all the way across to create a stretchy knit-like look.
- Repeat: Continue these rows until the band fits snugly and comfortably around your neck, remembering it will need to stretch over your head.
- Joining: Hold both ends of the collar together, chain 1, and join them by slip stitching through the chain and the front loop of the opposite side all the way down to form a tube.
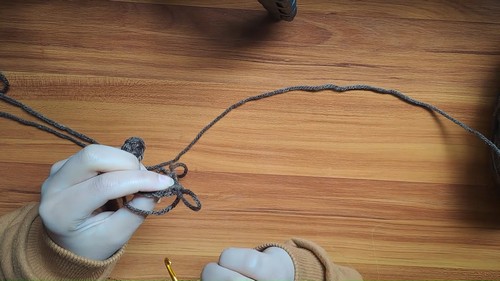
Step 2: The Yoke
- Transition to body: Chain 1 and work a row of half double crochet evenly all the way around the neckline. Slip stitch into the first half double crochet to join, then chain 1.
- Increase row: Half double crochet in the first 4 stitches, then work 2 half double crochet into the 5th stitch. Repeat this sequence — 4 half double crochet, then 2 in the next — all the way around. Join with a slip stitch.
- Marking the sleeve sections: Measure approximately 2 to 2.5 inches from the corner seam and place stitch markers on the 9th stitch. Repeat this at all four corners to section off the sleeve positions.
Still getting the hang of reading crochet patterns? That’s completely okay, the video tutorial below breaks everything down in a simple, beginner-friendly way!
- Yoke expansion: Continue working rounds of half double crochet. At each stitch marker, work 1 half double crochet, chain 1, 1 half double crochet into the marked stitch. Remove and reposition the marker into the chain-1 space. Repeat this corner increase at all four points every round.
- Length check: Try on the sweater periodically. Continue the increase rounds until the yoke extends comfortably past your armpits and over your shoulders.
- Separating sleeves: Fasten off your yarn loosely — leave a long, loose tail rather than pulling the knot tight, since you will reopen this spot later to resume the body.
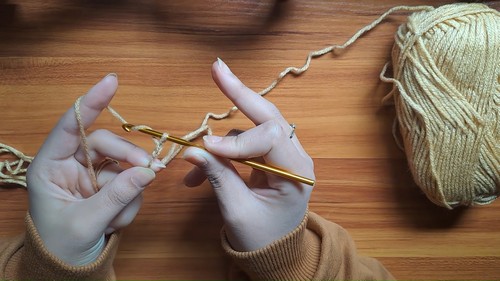
Step 3: The Sleeves
- Connecting the sleeve: Reattach your yarn at the corner space (the half double crochet, chain 1, half double crochet space) of one arm opening. Chain your desired sleeve width across to the opposite corner space and slip stitch to connect. (The tutorial uses 13 chains.)
- Sleeve rounds: Chain 1, work half double crochet around the armhole opening and across the new chains. Slip stitch to join, then continue working continuous rounds of half double crochet until the sleeve reaches your wrist.
- Optional cuff: Switch to the smaller 4.5 mm hook. Chain 1, then work a decrease row: 1 single crochet, then single crochet 2 together, repeating this sequence all the way around. Next, chain the length of your cuff (the tutorial uses 7 chains). Work slip stitches back down the chain, connecting to the sleeve edge on the final stitch, and turn. Work back loop only slip stitches back and forth for the cuff band, joining it to the sleeve edge at the end of each row. Slip stitch the final seam closed and fasten off.
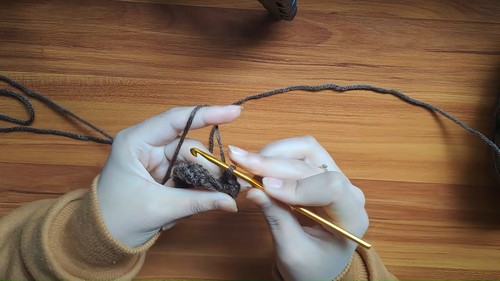
- Repeat the entire sleeve process for the second arm.
Step 4: The Body
- Resume body: Switch back to the 5.5 mm hook, open the loose fastening knot left earlier at the underarm, and reattach your yarn.
- Armhole decreases: Chain 1 and work half double crochet around. When you reach the armpit connection points, work half double crochet 2 together to cinch and clean up the fit around the armpits. Repeat this decrease row for 1 to 2 more rounds if desired.
- Body length: Continue working plain rounds of half double crochet until the sweater body reaches your desired length.
- Optional bottom hem: Switch to the 4.5 mm hook. Work one row of plain single crochet around. Chain your desired hem cuff length (the tutorial uses 7 chains) and repeat the BLO slip stitch band method used for the sleeve cuffs all the way around the bottom hem. Slip stitch the final hem seam closed.
- Finishing: Fasten off, then use your darning needle to weave in all loose ends.

Tips and Troubleshooting
- Keep your collar tension loose. The slip stitch collar needs to stretch over your head — tight tension makes it rigid and uncomfortable. Aim for a relaxed, springy fabric that feels more like stretchy knit than stiff crochet.
- Leave the loose fasten-off genuinely loose. The entire body of the sweater depends on being able to reopen the spot under the arm where you fasten off after the yoke. A tail pulled too tightly can lock the knot — leave a 4 to 5 inch tail and barely secure it.
- Move your stitch markers every round. The corner markers need to live in the chain-1 space of the increase each round, not in a fixed location. If you forget to move them, you lose the corner alignment and the yoke will start to pull unevenly.
- Try it on at every major stage. Top-down is the most forgiving construction for fit precisely because you can put it on before you commit to the next stage. Check the yoke at the shoulders, the sleeve at the wrist, and the body at the hem before finishing each section.
- Match both sleeves before the cuff. Write down how many rounds you worked on the first sleeve and match that count exactly on the second — including the decrease row before the cuff — so both wrists sit at the same length.
- Do the armpit decreases — don’t skip them. The 1 to 2 rounds of underarm decreases when you restart the body aren’t optional for fit. Skipping them leaves a slight gap or looseness under the arm that shows when worn.
Yarn Substitution
The pattern uses approximately 1,000 to 1,500 yards of size 4, 5, or 6 yarn. Any smooth yarn in that range works on the two given hooks — a heavier weight gives a warmer, denser fabric while a lighter weight gives more drape. The ombre option in the tutorial is purely a style choice; a solid color works equally well. Whatever you choose, make sure the yarn has enough stretch to allow the slip-stitch collar to pull over your head — very stiff or inelastic fibers will make the collar uncomfortable to wear.
Customization Ideas
- Adjust the turtleneck height. More or fewer rows on the collar band changes the fold height — taller for a dramatic roll, shorter for a mock neck.
- Change the sleeve length. Stop the sleeve rounds at any point — three-quarter, elbow, or cap length are all just a matter of when you start the cuff.
- Add or skip the cuffs. The pattern makes both the sleeve cuff and bottom hem optional — a plain single crochet edge works if you prefer a simpler finish.
- Widen or narrow the underarm chain. More chains at the armhole gap give a roomier, dropped-shoulder sleeve; fewer create a more set-in look.
- Adjust the body length. The body grows in plain rounds — add or remove length freely before the hem.
Frequently Asked Questions
1. Is this really no-sew? Yes. The entire construction — including the collar seam, the sleeve joins, and the cuff seams — is done with your hook rather than a needle. The only needle work is weaving in loose ends at the very end.
2. Why does the turtleneck use slip stitches instead of something taller? Slip stitches are the shortest, densest crochet stitch, and in back loops only they create a tight, stable ribbing that looks very similar to knitted ribbing. For a turtleneck that needs to hold its fold and return to shape after being stretched over your head, that density is exactly what you need.
3. What does “leave the fasten-off loose” mean? When you finish the yoke and separate the sleeves, you fasten off without pulling the knot tight — just a gentle half-knot that holds the yarn in place but can be pulled open again. Later, when you reattach for the body, you pull the knot free and pick up from the same spot. Tight knots make this impossible without cutting.
4. How do I know when my yoke is long enough to start the sleeves? Put the sweater on. The yoke should extend past the point of your shoulder and down far enough that the armhole opening reaches the natural crease of your underarm. If you can feel it pulling over the shoulder, keep going. Checking at the hook rather than measuring in inches is the most reliable test.
5. My collar doesn’t stretch over my head — what went wrong? Tight tension on the BLO slip stitches is the usual culprit. Try loosening your tension significantly — use the hook size and approach the stitches with a deliberate, relaxed motion. You can also add a few extra rows to the collar length, since a taller collar has more stretch available when pulling it over your head.