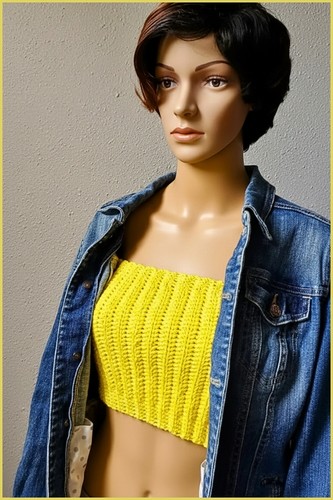
Finding a crochet top that’s actually graded for a fuller bust — not just a straight-size pattern with “add more stitches” scribbled in the notes، is rarer than it should be. This green summer top is built for it: supportive openwork cups, a wide underband that sits where you want it, and a pretty scalloped hem that skims the waistband of your jeans. It’s beginner-paced but genuinely flattering, and if dialing in the fit is your main concern, start with the crochet bralette size chart.
Crochet Summer Top Plus Size
 The top works up in two textures that do a lot with a little: airy mesh panels across the cups for breathability and a touch of peek-through, then a scalloped shell border that finishes the hem so it never looks unhemmed or plain. The body between stays in simple rows, so the only “fancy” bits are concentrated where they count. It’s an easy one to size up or down by adjusting the band and cup depth، the same adjust-as-you-go logic behind this sheer lace-up crop top.

Materials
- Light worsted weight yarn weight 3 or 4
- 4.0mm or 5.0mm crochet hook depending on desired drape
- Tapestry needle
- Scissors
- Measuring tape
Crochet Techniques Used in This Pattern
Pattern Instructions
Foundation and Ribbing
- Measure your waist or the widest part of your torso for sizing
- Create a foundation chain that fits comfortably around your body using an even number of chains
- Work half double crochet stitches in the back loop only to form a stretchy ribbing band
- Continue until the ribbing reaches the full circumference of your body
- Join the short ends together with slip stitches to form a circle

Body of the Top
- Work a round of single crochet evenly along the top edge of the ribbing to create a clean base
- Begin the mesh pattern using a repeat of double crochet stitches separated by chain one spaces
- Continue working the mesh pattern in rounds
- Stop when the body reaches from the waist to just under the armpits
- If you’re still learning how to read crochet patterns, no stress! Follow the video tutorial below and use the written pattern below as you get more comfortable!
Separating for Front and Back
- Mark two opposite sides to divide the piece into equal front and back sections
- Work the front panel back and forth in rows instead of rounds
- Build height for the chest area using the same mesh pattern
- Shape the neckline by gradually decreasing stitches at the center to form a V neck or rounded opening

Back Panel
- Attach yarn to the back section
- Work rows in the mesh pattern until the back matches the height of the front at the shoulders
- Keep the back neckline higher than the front for improved fit and coverage
Shoulder Seams and Sleeves
- Turn the top inside out
- Join the front and back panels at the shoulders using slip stitches or a tapestry needle
- Attach yarn at the armhole
- Work the mesh pattern in rounds to create sleeves
- Adjust sleeve length for short sleeves three quarter sleeves or full length

Finishing Touches
- Work a round of single crochet around the neckline for a neat finish
- Add a single crochet round to sleeve cuffs if desired
- Weave in all loose ends securely
Understanding the Construction
This top is built from the bottom up.
You begin with a horizontal ribbing band that wraps around the body. Because the half double crochet stitches are worked in the back loop only, the ribbing stretches and recovers well. This is what allows the top to stay secure at the waist without feeling tight.
Once joined into a circle, you work upward in rounds using a mesh stitch pattern. The mesh creates drape and breathability while keeping the fabric lightweight. When you reach the underarm, the piece separates into front and back panels so you can shape the neckline and shoulders properly.
This method gives you more control over fit than working entirely in the round.
Fit and Sizing Guidance

Measuring Correctly
Measure at the waist or widest torso area, depending on how you want the top to sit. If you prefer a snug fit, make your foundation chain close to your actual measurement. For a relaxed fit, add 1 to 2 inches of ease.
Because ribbing stretches, avoid pulling the chain too tight when measuring. Lay it flat and let it relax naturally before checking length.
Choosing Hook Size
4.0mm hook
Creates a slightly firmer fabric with less drape. Good for structured fit.
5.0mm hook
Creates more drape and openness in the mesh. Better for a soft, flowy look.
If you are between sizes, consider making a small ribbing swatch first to test stretch.
Stitch and Shaping Clarity
Why Work a Round of Single Crochet After the Ribbing
This step stabilizes the ribbing and gives you a clean foundation edge. Ribbing rows can have slight height differences, and the single crochet round evens everything out before beginning mesh.
Mesh Pattern Placement
When working double crochet separated by chain one spaces, consistency matters. Keep your tension steady so the mesh openings remain uniform. Uneven tension will show more clearly in an open stitch pattern.
Separating for Front and Back
When marking opposite sides, count stitches carefully to ensure both panels are equal. If the stitch count is uneven, the neckline will shift off center.
Neckline Shaping
Gradual decreases at the center create a smoother neckline. Avoid decreasing too quickly. A sharp decrease will create pulling at the chest.
- For a V neck: Decrease evenly on both sides of the center point.
- For a rounded neckline: Decrease fewer stitches per row for a softer curve.

Beginner Notes That Matter
Even experienced crocheters sometimes rush ribbing. Take your time with back loop only stitches. If you accidentally catch both loops, the ribbing will lose elasticity in that section.
When switching from rounds to rows, remember that turning changes stitch orientation. Pay attention to where your first stitch goes so the mesh alignment remains consistent.
Troubleshooting
Ribbing Feels Too Tight
- You may have chained too tightly or used a smaller hook than needed. Ribbing should stretch comfortably without strain.
Mesh Looks Uneven
- Check tension. Also confirm that each double crochet is placed correctly and chain spaces are not skipped accidentally.
Armholes Feel Too Small
- Make sure you stopped the body section high enough under the arm before separating. Adding a few extra rounds before dividing can improve comfort.
Neckline Gaping
- This can happen if decreases are too spaced out. Add one additional decrease row to gently pull the neckline inward.
Sleeve Adjustment Guidance
- Because sleeves are worked in the round directly from the armhole, you can customize easily.
For short sleeves
- Work only a few mesh rounds and finish.
For three quarter sleeves
- Measure from shoulder to mid forearm.
For full length
- Continue until desired length, checking fit as you go.
- If sleeves feel too wide, you can gradually decrease one mesh repeat every few rounds for shaping.
Finishing Notes
- The single crochet edging around the neckline provides structure and prevents stretching. Work it evenly and avoid tightening your stitches. Too tight and the neckline will pull inward.
- When weaving in ends, follow the path of existing stitches instead of crossing the mesh openings. This keeps the inside clean and prevents visible bulk.
- Blocking lightly can help even out the mesh and relax the ribbing. Use steam or gentle wet blocking depending on your yarn fiber.
This construction gives you a breathable mesh summer top with a secure ribbed waist and a shaped neckline that flatters the body. When worked with steady tension and careful measuring, it creates a garment that feels intentional rather than improvised.