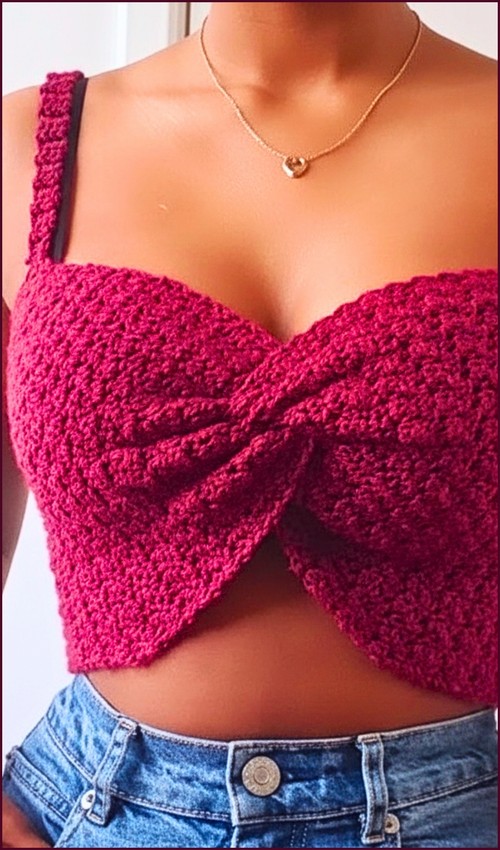
The front works up in a textured repeat that gives gentle vertical structure, then the back switches to an airy net — that combo keeps it breathable for warm days and easy to size by just adding repeats. Those little back ties let it grow with them a bit, too. For another fuss-free childrens’ make, the beginner kids’ summer top keeps things just as simple. Reach for a soft, skin-friendly cotton blend so it sits gently against little shoulders.
Materials
- Yarn cotton or acrylic yarn suitable for kids clothing
- Crochet hook size 3.5mm or appropriate for your yarn
- Scissors
- Measuring tape

Stitches to Know Before You Begin
Foundations and Sizing
- Make a slip knot and crochet a foundation chain
- Measure the chain to fit around the child’s chest with 1–2 inches of ease
- Keep the total number of chains even
Sizing and fit guidance
- The foundation chain determines the entire fit of the top, so this step is worth slowing down for.
- Measuring directly around the child’s chest ensures the top is comfortable rather than guessing by age.
- The extra 1–2 inches of ease allows the ribbed texture to sit naturally without pulling tight.
- Keeping the chain count even is important because the ribbed stitch pattern relies on alternating stitches.
- An odd number can throw off the texture and make the ribbing look uneven later.
- If your chain feels tight when you measure it, consider going up a hook size just for the foundation chain.
- A tight base can restrict stretch even if the rest of the fabric is flexible.
Body Section Ribbed Texture
- Work double crochet stitches across the foundation chain for the first row
- Alternate front post double crochet and back post double crochet across the next row
- Repeat the ribbed pattern rows until the lower body reaches the desired height

Stitch and texture clarity
- The first row of regular double crochet creates a stable base that makes the ribbing easier to see and control.
- From the second row onward, the alternating front post and back post double crochet stitches create vertical ribs that stretch gently and help the top move with the body.
- When working post stitches, focus on placing your hook around the post of the stitch rather than into the top loops.
- This is what pushes the stitches forward and backward to create texture.
- Keeping even tension here is more important than speed.
- You can adjust the length of the body section depending on whether you want the top cropped or slightly longer.
- Stop once the lower body visually looks balanced for the child’s size.
- Don’t let crochet patterns intimidate you! If you’re a beginner, the video tutorial below makes it super easy to follow along!
Top Section Shaping
- Find the center of the crocheted panel
- Decrease stitches evenly at the beginning and end of each row
- Continue decreasing to form a triangular or V shaped front
- Stop when a small top point is formed

Shaping explanation
- Finding the center helps keep the front symmetrical.
- The decreases at both ends gradually narrow the fabric without creating sharp angles, which keeps the shape smooth and wearable.
- Even decreases are key here.
- Reducing too many stitches at once can cause puckering, while inconsistent decreases can twist the shape.
- The goal is a clean, gentle slope that naturally forms a triangle or V shape.
- Stopping at a small top point prevents the neckline from becoming too narrow or uncomfortable.
- The straps will extend from this point, so it should be sturdy but not bulky.
Straps
- Attach yarn to the top point of each front section
- Crochet a chain long enough to comfortably fit over the shoulder
- Join each strap securely to the back of the top

Strap fit notes
- Strap length is best checked directly on the child if possible.
- The chain should sit comfortably on the shoulder without pulling the front upward or sliding off.
- When attaching the straps to the back, make sure both sides are even.
- A quick visual check before fastening permanently can save time later.
- Secure joins are important since straps take most of the wear and movement.
Finishing
- Crochet single crochet stitches evenly around all edges for a clean finish.
- Weave in all loose yarn ends neatly

Finishing and polish
The single crochet edging helps the fabric lie flat and gives the top a neat, finished look. Try to keep your stitches evenly spaced, especially around corners and strap joins.
When weaving in ends, follow the direction of the stitches rather than cutting straight across. This keeps the fabric flexible and prevents ends from popping out during wear or washing.
Beginner Notes
- Practice front post and back post stitches on a small swatch if they feel unfamiliar
- Always measure the foundation chain before committing to the body rows
- Check shaping symmetry every few rows to catch mistakes early
Troubleshooting
- Top feels too tight: The foundation chain may be too small or too tight
- Ribbing looks uneven: Check that front and back post stitches are alternating correctly
- Straps pull the front up: Lengthen the chains slightly before reattaching
Final Thoughts
- This pattern is flexible, adjustable, and forgiving, which makes it ideal for kids’ clothing.
- Taking time during the foundation and shaping stages ensures a comfortable fit and a clean final look, while the ribbed texture adds stretch and structure without complicating the process.