
Fifty chains start the extra small size of this sweater vest with collar, and two matching panels carry it up to 2X. Eight rows of hdc, with an increase at each end, build the collar off the neck edge, while a smaller hook firms up the contrast ribbing.
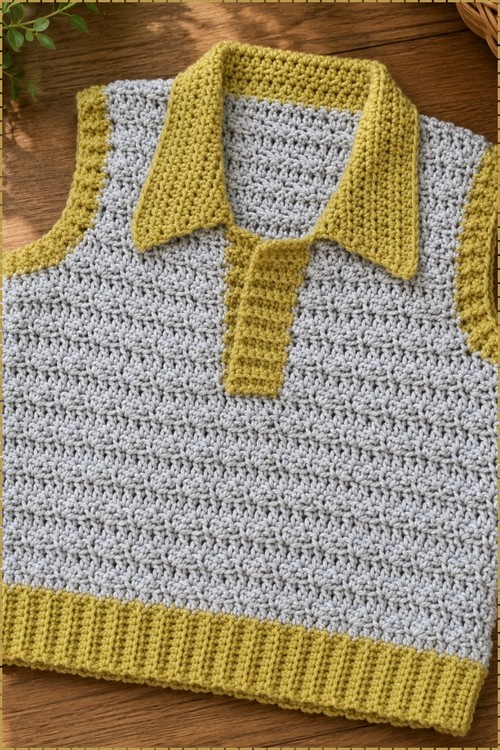
A polo collar on a sleeveless vest is an unexpected detail that keeps this piece from reading as a basic layer. The collar sits flat without any stiffening, the ribbed hem grounds the silhouette, and the mustard yellow accent runs from the hem band through the armhole trim and up into the collar so the colour feels intentional rather than added on. For a vest that goes heavier on texture in the body, the slouchy sweater vest shows what the same silhouette looks like with structured shoulders and a denser stitch.
Sweater Vest With Collar Crochet
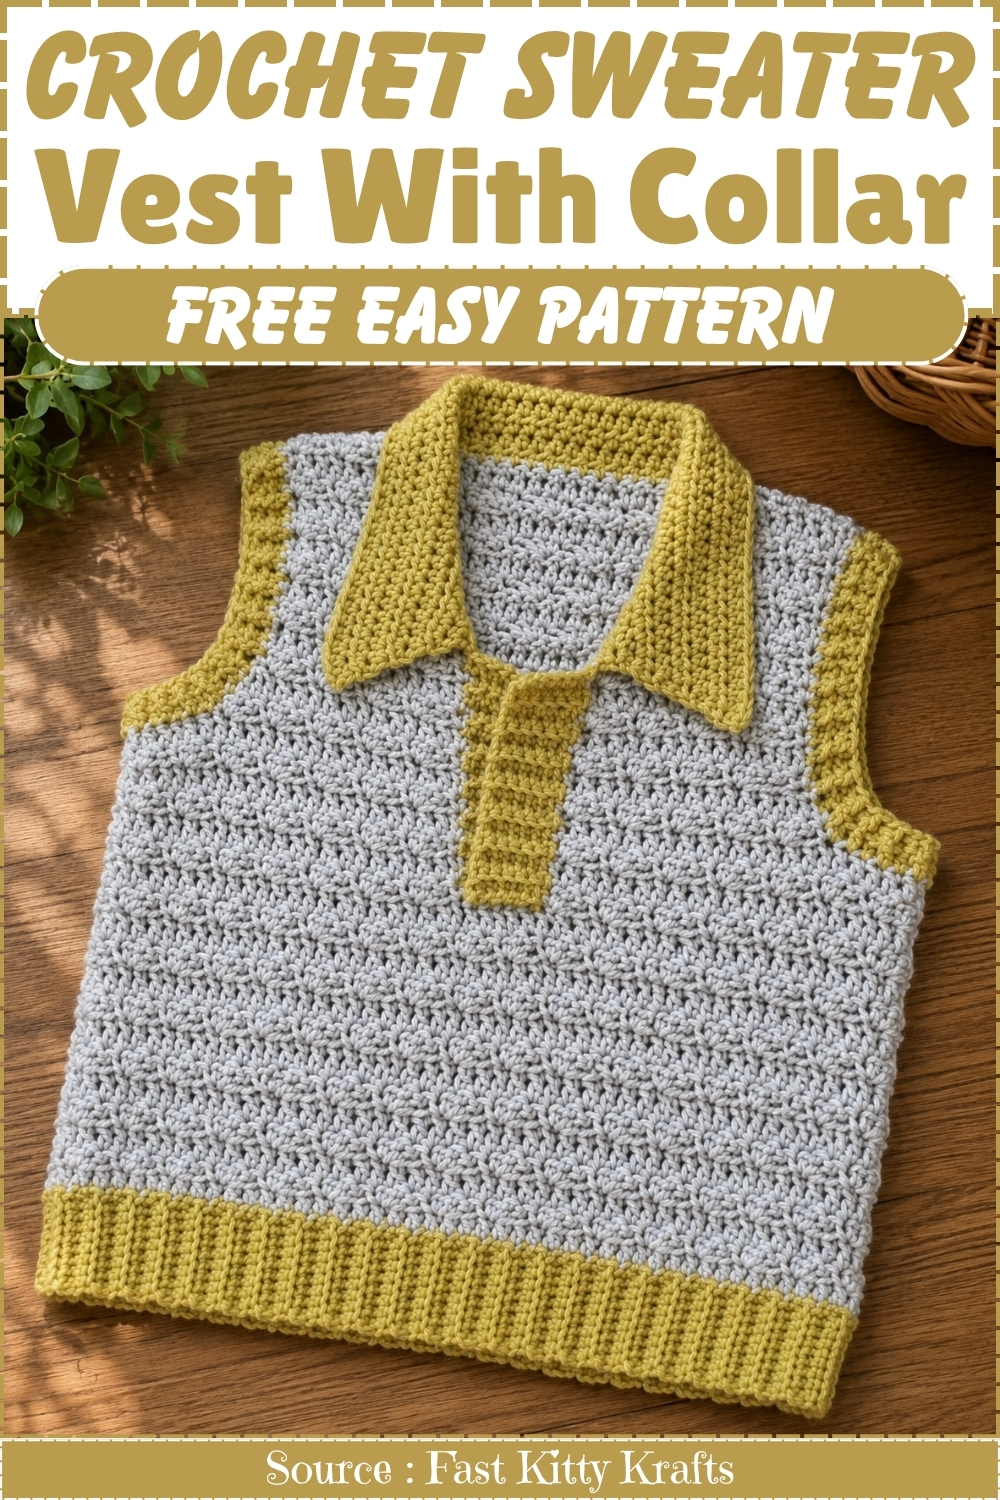
The body fabric reads as a linen or moss stitch texture from the stitch definition in image 2, which gives the grey section a subtle grid without any openwork. The armhole shaping is worked as a straight diagonal decrease rather than a stepped bind off, which keeps the edge clean for picking up the contrast trim afterward.
Materials & Tools
- Size 4 weight yarn in a main color (body)
- Size 4 weight yarn in a contrast color (ribbing and collar)
- Size J / 6 mm crochet hook (main body)
- Smaller crochet hook (for contrast ribbing)
- Stitch markers
- Yarn needle
Abbreviations used in this pattern: ch = chain · sc = single crochet · dc = double crochet · hdc = half double crochet · sl st = slip stitch · dc4tog = double crochet 4 together · dc3tog = double crochet 3 together · BLO = back loops only · FPhdc = front post half double crochet · BPhdc = back post half double crochet · rep = repeat · st(s) = stitch(es)
Common Stitch to Know
Sizing
Choose your chain length based on your size:
- Extra Small / Small: Chain 50
- Medium / Large: Chain your size count
- Extra-Large: Chain your size count
- 2X: Chain your size count
Note: The chain counts for Medium/Large, XL, and 2X aren’t specified in the source — measure your chain against a finished garment you like before beginning.
Difficulty & Time
Intermediate. This isn’t a first-garment project — the armhole shaping, V-neck decreases, and attached ribbing each need focused attention. That said, the stitch pattern itself is clear and satisfying once you’re in it. Expect two to four evenings depending on your pace.
The Pattern
Step 1: Main Body Panel (Work Two — Front and Back)
- Make a slip knot and chain the required number for your size.
- Row 1: Turn the chain over. In the 2nd chain from the hook, make a stacked single crochet (work a sc, then turn to the side and place another sc into the two side loops) — this acts as your first dc. Double crochet to the end of the chain.
- Row 2 (Silt Stitch Row): Ch 1. In the first st, place 1 sc and 2 dc all in the same st. Skip 2 sts. In the next st, place 1 sc and 2 dc all in the same st. Repeat this silt stitch to the end, finishing with 1 sc in the last st. (The silt stitch is a 3-stitch cluster — sc plus 2 dc — all worked into one stitch, with 2 stitches skipped between each cluster.)
- Row 3: Turn without a turning chain using a chainless dc (stacked sc) in the first st. Dc in each st across.
- Rows 4–15: Repeat Rows 2 and 3. The body should measure roughly 11 inches from the armhole down. Add extra rows ending with a dc row if you want more length.
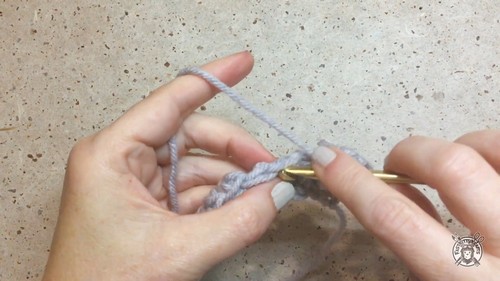
Step 2: Front Armhole Shaping and V-Neck
Setting up the sections:
- Place a stitch marker at the designated stitch for your size, skip 5 sts, and place a second marker. This divides the front into left front, armhole gap, and right front.
Left Front Section:
- Ch 1, turn, and work silt stitch to the first marker, ending with a sc.
- Continue the 2-row pattern (silt stitch row, then dc row) until you reach the armhole row count for your size.
New to crochet and not sure how to read a pattern yet? The video tutorial below will guide you through it step by step, you’ve got this!
Armhole Decreases:
- Row A: Ch 1, turn, sl st across the specified number of armhole sts. Ch 1 and silt stitch to the end. (Slip stitching into the armhole stitches pulls the edge in without leaving a gap.)
- Row B: Turn with a chainless dc. Dc across until the last 4 sts. Work dc4tog over those last 4 sts to curve the armhole edge.
- Row C: Ch 1, turn, complete a silt stitch row.
- Row D (V-Neck Decrease): Ch 3, turn. Work dc3tog over the next 3 sts, skipping the ch-3 space. Dc to the end. (This is where the V-neck begins to open — the dc3tog pulls stitches together at the neck edge.)
- Row E: Ch 1, turn, complete a silt stitch row.
- Row F: Ch 3, turn, work another dc3tog over the next 3 sts. Dc to the end.
- Continue the pattern for the remaining rows specified for your size (6 more rows for XS/S, 8 for XL/2X), ending with a dc row.
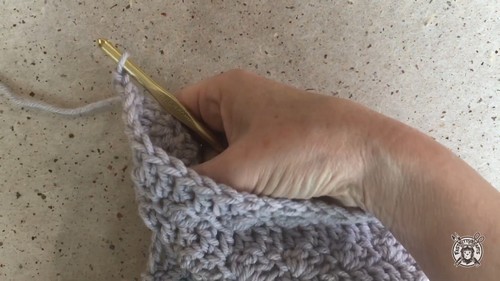
Right Front Section:
- Turn the piece to the wrong side and join yarn at the second marker.
- Mirror the left front exactly — silt stitch rows, armhole slip stitches, and V-neck decreases worked symmetrically.
Step 3: Back Panel
- Repeat all the main body and armhole shaping instructions from Steps 1 and 2.
- Skip the V-neck shaping entirely — keep the center of the neckline straight while still working the armhole decreases to match the front length.
Step 4: Seaming
- Lay the front piece on top of the back piece with wrong sides facing inward.
- Stitch up both shoulder seams and both side seams.
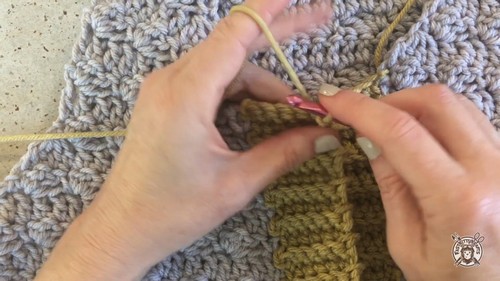
Step 5: Front Opening Ribbing (Contrast Color)
- Using the smaller hook and contrast yarn, join at the bottom corner of the front opening.
- Ch 7. In the 2nd ch from the hook, work 1 sc. Sc down the chain — 6 sc total.
- Sl st into the garment edge twice.
- Turn, skip the 2 sl sts, and sc in the BLO of the previous stitches back across.
- Turn without a turning chain and sc in the BLO back down the row.
- Repeat this ribbing process — attaching with 2 edge sl sts each time — all the way up the front opening to your stitch marker. (Working in back loops only gives the ribbing its stretchy, ridged texture.)
Step 6: Collar
- Join yarn at the neck edge. Ch 1 and place 1 hdc in the same st.
- Work hdc evenly around the entire neck opening.
- Row 2: Ch 1, turn. Work 2 hdc in the first st, hdc across, then 2 hdc in the last st.
- Repeat Row 2 for 7 more rows — 8 rows total for the collar. (The increases at each end on every row are what give the collar its gentle flare and drape.)
Step 7: Armhole Ribbing (Contrast Color, Two Options)
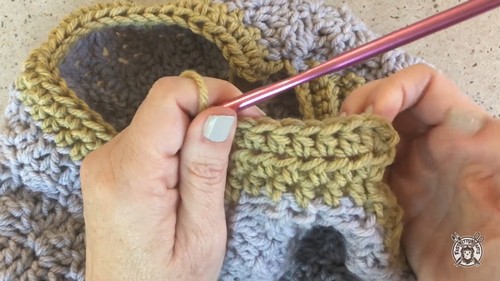
Option A — Attached Band:
- Join contrast yarn to the bottom of the armhole seam. Ch 10 and work a strip of BLO sc ribbing attached to the armhole edge with sl sts as you go, the same method as the front opening ribbing.
Option B — Worked-in-the-Round Ribbing:
- Round 1: Join contrast yarn and work hdc evenly around the entire armhole opening.
- Round 2: Ch 1, turn. Work alternating FPhdc and BPhdc around the armhole.
- Round 3: Continue the rib by matching front posts to front posts and back posts to back posts.
Finishing
- Stitch down the bottom tails of the ribbing strips neatly.
- Weave in all remaining yarn ends.
Technique Notes (with Tips Built In)
- The silt stitch is a 3-part cluster — one sc and two dc worked into the same stitch, with two stitches skipped between each cluster. The trick is keeping your skips consistent; mark every third stitch in the first few rows if you lose count. The cluster naturally wants to lean, so a firm, even tension helps the fabric lie flat.
- The stacked sc (chainless dc) is used at the start of dc rows instead of a turning chain. It mimics a double crochet without the gap that a ch-3 leaves at the edge. To make it: sc in the first st as normal, then pivot and place another sc into the two vertical side loops of that first sc. Done right it’s nearly invisible at the row edge.
- The dc4tog and dc3tog are decrease clusters that pull multiple stitches together into one. Work them slowly — insert your hook, pull up a loop, and yarn over as usual, but stop before the final pull-through until all legs are on the hook. The final yarn over closes them all at once.
- The attached ribbing requires 2 sl sts into the garment edge on each turn. These anchor stitches are what keep the ribbing moving evenly up the opening. If your ribbing is puckering, try easing the tension on those sl sts.
FAQ
1. Do I need to make two separate front panels or one? The front is worked as one panel up to the armhole row, then divided at the markers into a left front and right front. The back is one continuous panel throughout.
2. The silt stitch pattern looks uneven in my first few rows — is that normal? Yes. The silt stitch can look inconsistent until you’ve worked a few repeats and the fabric relaxes. Check that you’re skipping exactly 2 stitches between each cluster and that you’re ending with the correct stitch type at the row end.
3. Can I skip the collar and just do a simple neck edging instead? Absolutely. A round or two of hdc or sc around the neck opening makes a neat, clean finish if you prefer a sleeveless vest look over the folded collar version.




One Comment