
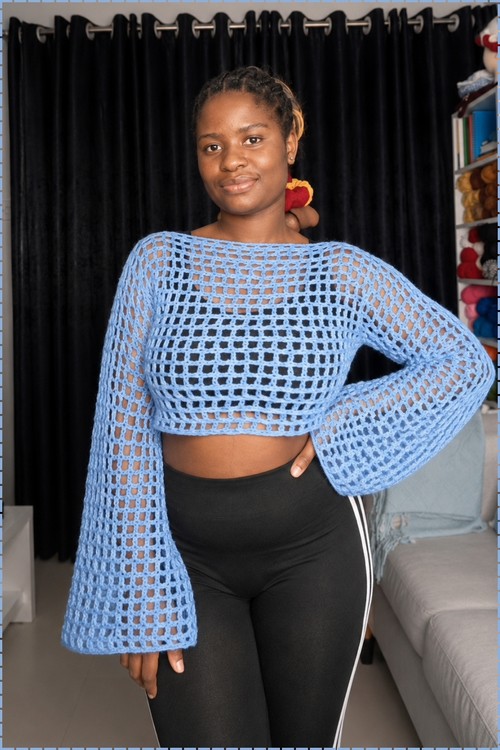
Layering over a camisole on warm days suits the open mesh, and the bell sleeves bring the drama. Sized for a medium off an 18 inch shoulder, the pattern uses Robin acrylic on a 4.5 mm hook and joins the panels 6 inches below the shoulder for roomy armholes.
Everything about this top is designed around the sleeves. The body is a simple rectangular mesh panel that sits loose across the chest, and all the drama happens from the elbow down where the bell flare widens into a full cuff that nearly reaches the knee. Working the whole piece in one consistent mesh repeat means the fabric weight and drape stay even from body to sleeve with no transition to manage. For the same open mesh silhouette with a more relaxed sleeve, the mohair off shoulder sweater offers a softer take on the open construction.
Bell Sleeve Crochet Sweater
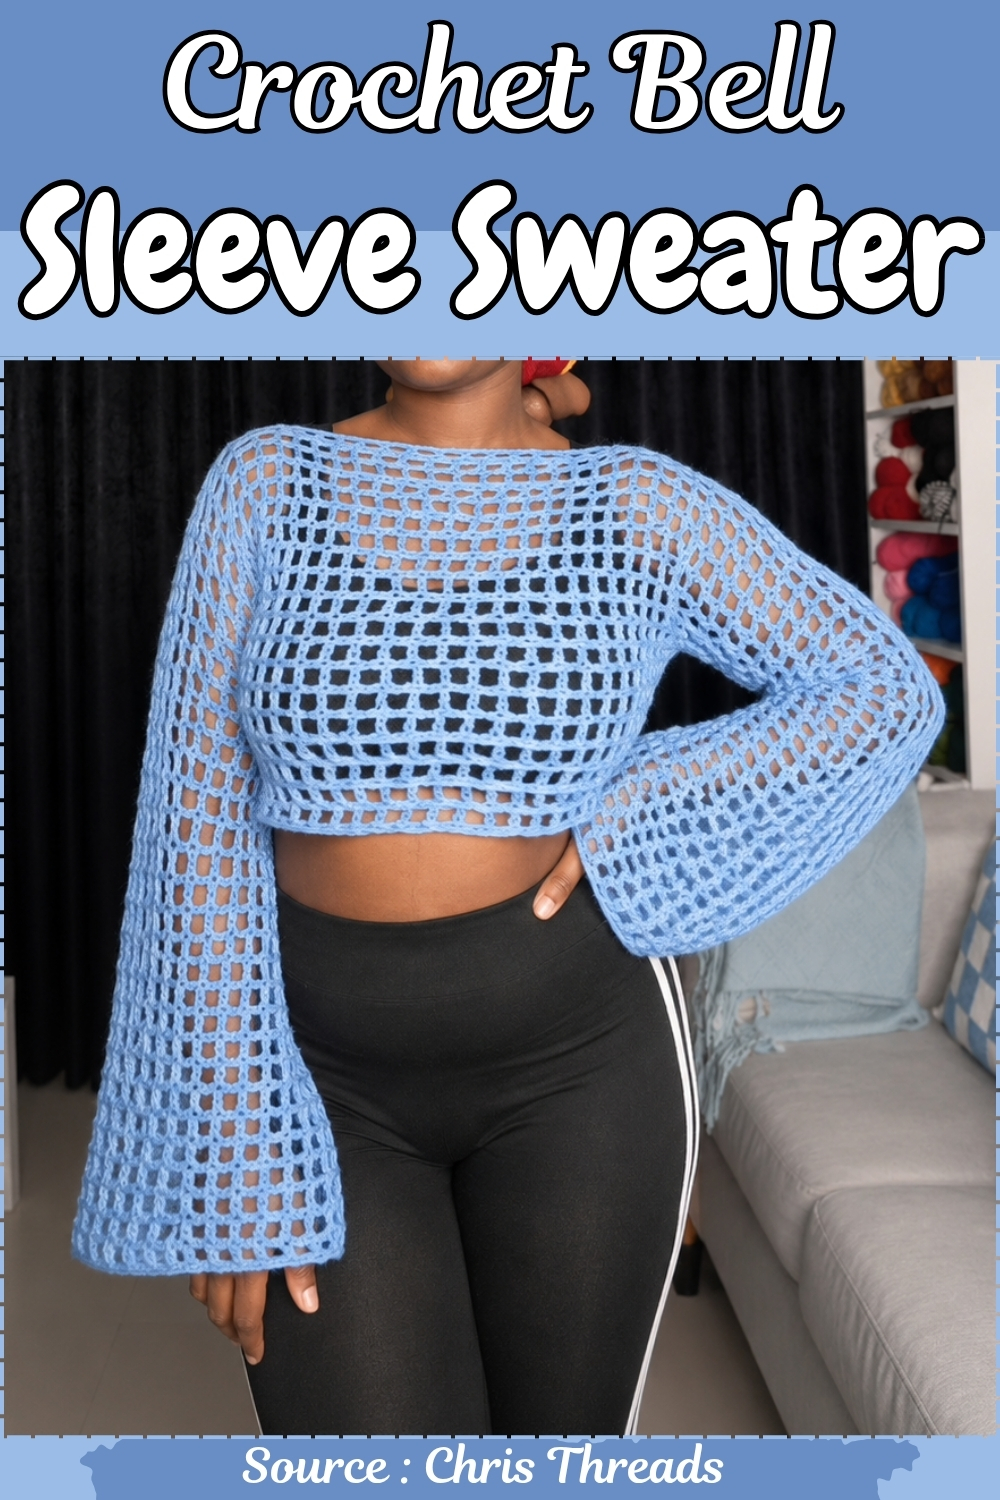
The body panel is sized as a rectangle and the sleeves are picked up directly from the armhole edge rather than seamed on separately, which keeps the shoulder line clean and removes the need for any shaping at the join. Two skeins of a medium weight cotton or acrylic in a solid color is all the yarn management this pattern asks for.
Why I love this one: the open mesh means it works up faster than it looks, and those bell sleeves make even a beginner-friendly project feel like couture.
Materials & Tools
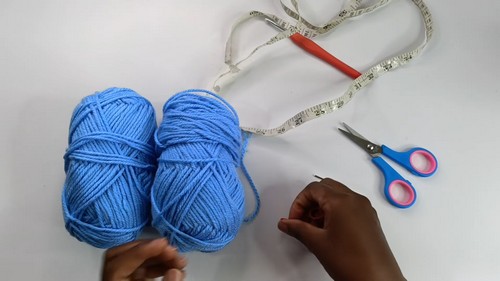
- Robin acrylic yarn (100% acrylic, 100g) — or any yarn of your choice
- 4.5 mm crochet hook
- Tape measure
- Scissors
- Tapestry needle
- 2 stitch markers
Helpful Crochet Technique
Difficulty & Time
This is an approachable intermediate project. The mesh stitch itself is simple and rhythmic, but the neckline calculation, panel joining, and sleeve increases ask for a little focus. Set aside a handful of relaxed sessions — the open fabric grows quickly once you find your rhythm.
The Pattern
Sizing note: the instructions below reference a medium (a standard 18-inch shoulder-to-shoulder measurement, chained slightly longer to allow for the mesh drawing in). Refer to the tutorial’s on-screen guide for other sizes.
1. Front Panel
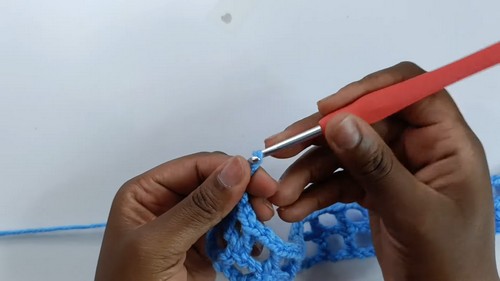
- Make a slip knot and keep your starting chain nice and loose.
- Chain a multiple of 3. For a medium, chain 72 (roughly 20 inches).
- Row 1: Count 6 chains from the hook and make a double crochet in the back loop. Then work the mesh: chain 2, skip 2 loops, and double crochet in the 3rd loop. Repeat across until the last 3 stitches. Chain 2 and make your final double crochet in the very last stitch. (This settles the panel back to your target of about 18 inches.)
- Row 2 onward: Chain 5 and turn — this chain-5 counts as one double crochet plus a chain-2 space. Make a double crochet on top of the next double crochet, chain 2, and repeat across. Chain 2 and make a double crochet in the 3rd chain of the turning chain.
- Continue repeating this row until you reach your desired length below the bust. For a medium, work a total of 20 rows (about 12.5 inches).
2. Neckline Shaping
- Place your stitch markers to mark the neckline opening. A standard medium neck is about 11.5 inches wide.
- Chain 5, turn, and work double crochets and chain-2 spaces up to the first stitch marker. Remove that marker.
- Calculate your neckline chain: count the skipped spaces between the markers, multiply by 3, and subtract 1. (For example, 15 spaces × 3 = 45, minus 1 = 44 chains.)
- Chain that calculated amount (44 in this example).
- Remove the second stitch marker and make a double crochet into that marked stitch, then finish the remaining stitches in the row.
Don’t let crochet patterns intimidate you! If you’re a beginner, the video tutorial below makes it super easy to follow along!
3. Back Panel
- Row 1: Chain 5 and turn. Work the double crochet mesh pattern across until you reach the chain space. Over that chain section, continue the mesh — chain 2, skip 2 loops, double crochet in the 3rd back loop — then finish the rest of the row normally.
- Remaining rows: Chain 5, turn, and continue the mesh rows.
- Work the same number of rows as your front panel (20 rows) so the front and back match.
4. Joining the Panels & Sleeves
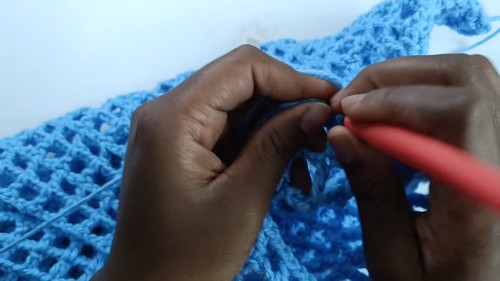
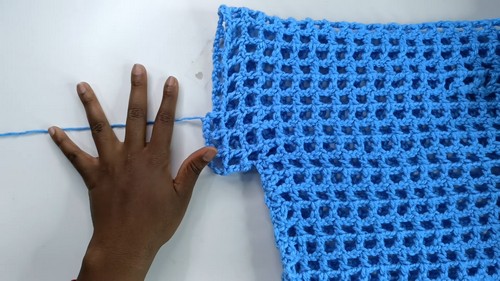
- Measure about 6 inches down from the shoulder edge on each side and place stitch markers to define the armholes.
- With the wrong side facing out, chain 1 at the edge.
- Join the front and back panels together using slip stitches and chain-2 spaces along the sides, working up to the stitch markers.
5. Working the Sleeves (Flowy Bell Style)
- Row 1: Attach yarn at the armhole join and chain 5. Work the mesh pattern (double crochet, chain 2) all the way around the armhole circle. Chain 2 and slip stitch into the 3rd chain of the starting chain-5.
- Rows 2–15 (straight section): Chain 5 and turn your work — from row 2 on, you turn every row. Continue the mesh around, ending each round with a slip stitch into the 3rd chain. Work straight until you reach the middle of your arm or elbow (about 10 inches, or 15 rows for a medium).
- Increases (creating the bell): The rhythm is 2 plain rows, then 1 increase row, where you work 2 double crochets into the same space to widen the sleeve.
- Increase Row 1: increase in every 3rd space, then work 2 regular rows.
- Increase Row 2: increase in every 5th space, then work 2 regular rows.
- Increase Row 3: increase in every 7th space, then work 2 regular rows.
- Final length: Add a few extra non-increase rows if needed until the sleeve reaches about 20 inches (roughly 29 total sleeve rows). Chain 1, cut the yarn, and pull tight.
6. Finishing
- Repeat the entire sleeve process on the second armhole.
- Weave in all loose ends with your tapestry needle.
- Turn the shrug right-side out, and it’s ready to wear.
Tips & Troubleshooting
- Keep that foundation chain loose. A tight starting chain fights the drape and makes Row 1 miserable. If yours tends to snug up, go up a hook size just for the chain.
- Double-check your neckline math before you chain. Count the skipped spaces twice — the multiply-by-3, subtract-1 formula only works if your space count is right, and a miscount here throws off the whole back panel.
- Match your row counts exactly. Front and back should have the same number of rows so the shoulders sit evenly when you seam.
- Space your increases patiently. The widening bell comes from the every-3rd, every-5th, every-7th rhythm — resist the urge to add more, or the sleeve will ripple instead of flare gracefully.
Yarn Substitution
The sample uses a 100% acrylic worsted, which is affordable and holds the mesh’s shape nicely. If you swap, aim for a similar weight so the 4.5 mm hook still gives you that open, airy fabric. A cotton or cotton blend drapes beautifully for hot weather and gives the sleeves a lovely swing, while a bamboo blend adds a cool, silky sheen. Whatever you pick, work a few mesh rows as a swatch to confirm you like the openness before committing.
Customization Ideas
- Adjust the length: add or remove panel rows to make the body cropped or longer.
- Tame or dramatize the bell: stop the increases early for a gentle flare, or add another increase row for a fuller, more theatrical cuff.
- Change the neckline width: widen it for a relaxed off-shoulder look or narrow it for more coverage.
- Play with color: work the sleeves in a contrasting shade for a color-blocked statement.
FAQ
- Is the mesh stitch hard to learn? Not at all — it’s a repeating double crochet and chain-2 rhythm that becomes second nature within a few rows. It’s actually one of the more relaxing stitch patterns once it clicks.
- Why does the pattern have me chain longer than my target measurement? The mesh draws in a little as you work, so chaining a couple of inches longer than your goal lets the finished panel settle to the right width.
- How do the bell sleeves stay flared instead of collapsing? The graduated increases — every 3rd space, then every 5th, then every 7th — add width gradually toward the cuff, which is what gives that clean, weighted bell shape rather than a bunched one.
- Can I make this in a different size? Yes. Start by adjusting your foundation chain (keeping it a multiple of 3) and match your row counts front to back. The tutorial’s on-screen guide offers chain counts for other sizes as a starting point.



One Comment