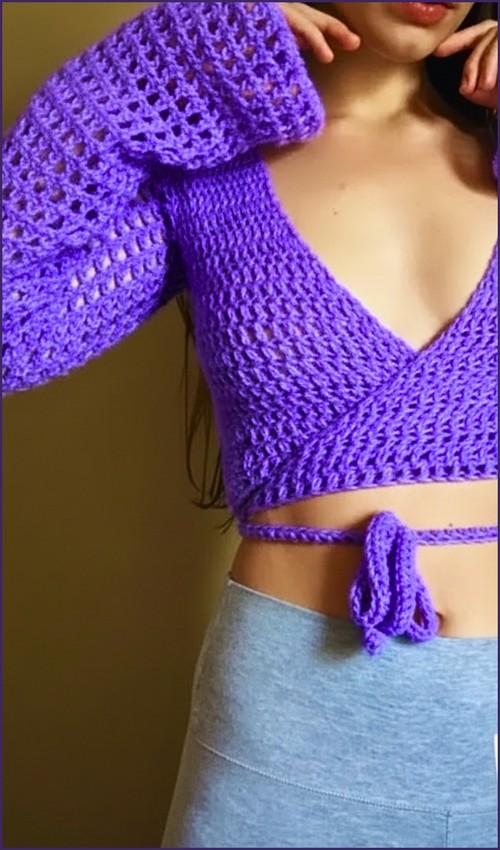
There’s something quietly striking about a gold filet crochet top — the open grid catches the light while the color does the rest. If you love this airy look, you’ll also want to try this filet crochet tie-back top, which uses the same open-square technique in a different silhouette.
Filet Crochet Top Outfit

Filet crochet looks intricate but is forgiving once you find the rhythm of filled and open squares. And if you’re building a full set, pair it with this crochet bralette cup pattern for a shaped, supportive finish. Below you’ll find the materials, sizing, and step-by-step instructions.
Project Overview
Skill level: Intermediate
Materials: Size 0 lace weight metallic gold thread and 1.5 mm crochet hook
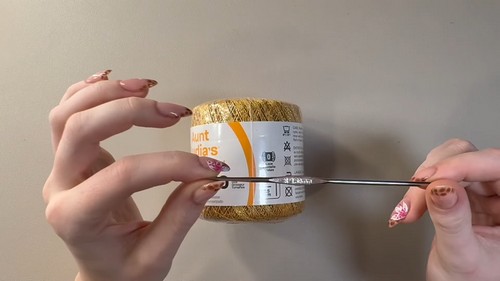
Technique: Filet crochet using double crochet and chain spaces
Open box: One double crochet, chain 1, skip 1 stitch
Filled box: Two consecutive double crochets
Understanding the Structure Before You Begin
This top is built in three clear stages:
- A rectangular filet crochet body worked from the bottom upward
- Two triangle cups shaped directly from the top edge
- Straps and edging to finish and reinforce the garment
The body establishes the width and visual pattern. The triangles are shaped by decreasing evenly on both sides. The straps are added last for strength and control over fit.
Because this is filet crochet, your accuracy in counting boxes is more important than counting individual stitches.
Stitches to help you for making this top:
Planning and Measurements
- Create a gauge square using filet crochet
- Measure 10 boxes horizontally and vertically
- Horizontal gauge: 10 boxes = 2 inches
- Vertical gauge: 10 boxes = 2.15 inches
- Decide final top width and height
- Calculate required boxes based on measurements
- Multiply horizontal boxes by 2 and add 2 for the starting chain
Why the Gauge Matters Here
Filet crochet gauge is measured in boxes, not stitches.
Each box represents either:
- One open space
- One filled space
Since 10 boxes measure 2 inches horizontally, each box equals 0.2 inches wide.
- If you’re a beginner and crochet patterns feel confusing, start with the video tutorial below, it’s the easiest way to learn as you go!
- Vertically, 10 boxes measure 2.15 inches, so each row is slightly taller than it is wide. That difference affects cup height and overall proportions.
- If you skip gauge with metallic thread, the fabric can easily end up too stiff or too loose. Metallic thread does not stretch much, so correct sizing at this stage prevents fit problems later.
Starting Chain Logic
- Multiply horizontal boxes by 2 and add 2 for the starting chain
Each box requires two stitches. The extra 2 stitches account for turning and structure. This formula ensures the first row aligns properly with your chart.
Filet Body
- Chain the calculated number of stitches
- Double crochet into the 4th loop from the hook
- Follow filet pattern using open and filled boxes
- Chain 3 at the start of each new row and turn
- Continue following your chart until desired height is reached

Row Structure Clarified
The first double crochet into the 4th loop creates the foundation for your first box.
An open box is worked as:
- 1 double crochet
- Chain 1
- Skip 1 stitch
A filled box is:
- 2 consecutive double crochets
The key is consistency. If your chain 1 spaces become tight, your open boxes shrink visually. If they are too loose, the fabric loses structure.
Common Confusion Point
- Many crocheters accidentally place the next double crochet into the chain space instead of the stitch after the skipped stitch.
- In standard filet construction, you skip the stitch entirely and work into the following stitch.
- Keeping this clean creates crisp square openings.
Triangle Cups
- Place a stitch marker at the center of the top edge
- Starting from one side, double crochet evenly to the center marker
- Chain 2 and turn
- Decrease over the first two stitches
- Double crochet across the row
- Decrease over the last two stitches
- Repeat decrease rows until three stitches remain
- Fasten off

Repeat the same steps on the opposite side to form the second triangle
Understanding the Shaping
- Each decrease row removes one stitch from both edges.
- That creates symmetrical shaping.
- Decrease over the first two stitches
Decrease over the last two stitches - This ensures the triangle narrows evenly toward the tip.
- The chain 2 at the beginning replaces the turning height but keeps the edge slightly tighter than a chain 3 would.
- That helps maintain a cleaner slanted edge.
Maintaining Symmetry
- When you repeat the second triangle, count your rows carefully.
- The number of decrease rows must match exactly.
- Even one extra row will make one cup taller.
- If your decreases look uneven, check whether you are fully completing the double crochet decrease rather than partially skipping stitches.

Straps and Finishing
- Attach yarn to the tip of a triangle
- Chain until strap reaches 20 inches
- Slip stitch back down the chain
- Single crochet down the side of the triangle
- Join the two triangles near the bottom using slip stitches
- At each outer corner of the body, chain 30 inches for back straps
- Slip stitch back along the chain for durability
- Single crochet around the entire top for edging
- At corners, work single crochet, chain 1, single crochet in the same space
Why the Strap Is Reinforced
Slip stitching back along the strap chain strengthens it. Metallic thread can stretch or split over time. The return slip stitches create a cord-like structure that holds shape better than a single chain alone.
The final single crochet edging stabilizes:
- The top edge
- The triangle shaping
- The strap joins

The corner detail of single crochet, chain 1, single crochet prevents puckering and allows the edge to sit flat.
Fit and Sizing Guidance
Width is determined entirely by your starting box count.
Height of the body determines how much coverage sits below the bust line.
Triangle depth determines cup coverage.
Because this fabric has limited stretch:
- Measure your bust circumference
- Decide how much negative or positive ease you want
- Convert that measurement into boxes using your horizontal gauge
If you prefer more coverage, increase body height before beginning triangle shaping.
If you prefer a narrower triangle, stop decreasing earlier. If you want a sharper tip, continue decreasing precisely until three stitches remain as written.
Beginner Notes for Intermediate Crocheters
Even though this is labeled intermediate, the difficulty comes from:
- Consistent tension
- Accurate counting
- Clean decreases
The stitches themselves are basic. The challenge is precision.
Metallic thread can be slippery. Keep your hands relaxed and avoid pulling too tightly.
Troubleshooting
- Fabric curling: Usually caused by tight foundation chain. Try loosening tension or using a slightly larger hook for the starting chain only.
- Uneven boxes: Check that open boxes always skip exactly one stitch.
- Triangles leaning: Confirm decreases are worked at both the beginning and end of every decrease row.
- Straps twisting: Ensure you slip stitch evenly and do not pull the chain too tightly on the return pass.
Finishing Notes
- Block gently if needed, but avoid excessive steam with metallic thread. Light shaping with pins is usually enough.
- Weave in ends carefully through filled boxes where they are less visible.
- Once complete, the structure is simple but elegant. Clean filet boxes form the body. Balanced decreases form the cups. Reinforced straps ensure durability.