
Twelve granny squares, twelve different colors, and a black border that ties the whole thing together this patchwork crop top is the kind of project that lets you use up every leftover skein in your stash without it looking accidental. The neon-meets-earth-tone palette shown here is bold enough to anchor a simple outfit on its own. If you want a version of the same assembled-square approach with a slightly more structured silhouette, the patchwork tank top with granny squares shows how adding a solid border changes the overall feel.
Crochet Patchwork Top
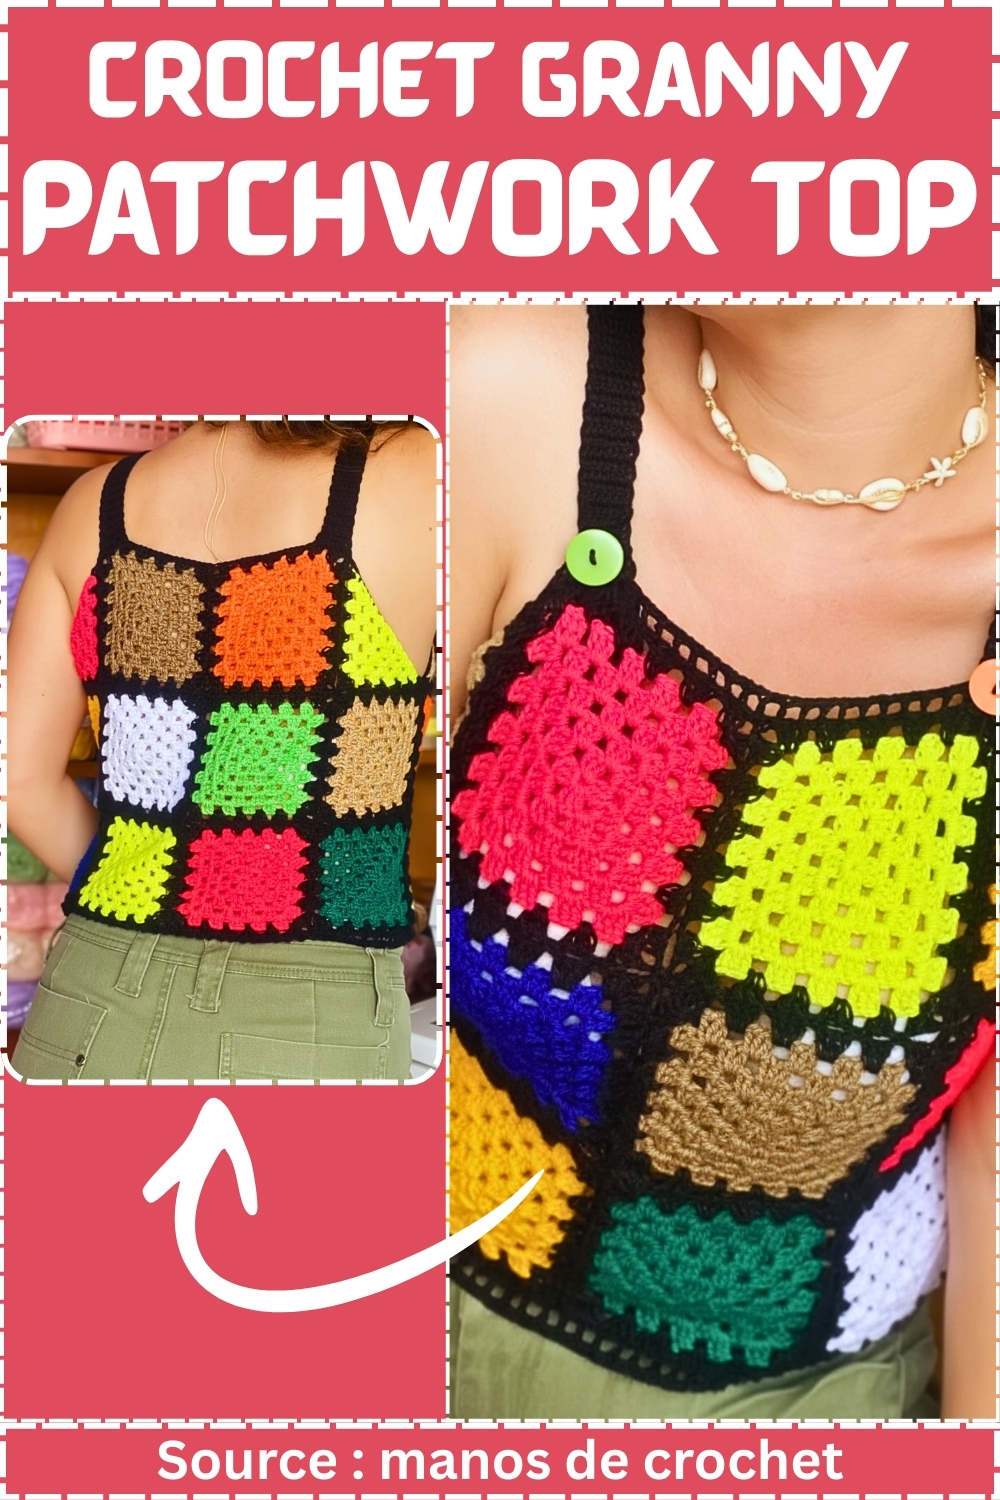
The button-closure straps are a practical detail that makes this adjustable across sizes without any math just move the buttons. Working each square separately also means you can spread the project across a week of short sessions rather than committing to long uninterrupted blocks. For the granny square construction itself, the granny stitch tutorial walks through the 3-dc cluster and corner chain structure that every square in this top uses.
Materials
- 20 basic granny squares with 5 rounds in the main color and 1 round in black
- 4 granny triangles matching the square size
- Yarn in main color and black
- Crochet hook suitable for your yarn
- Scissors
- Yarn needle
- Buttons
Measurements
- Finished size approximately 36 cm long and 45 cm wide
- Square size approximately 10 cm before border and 12 cm with black border]
Before You Start
Essential Stitch Reference
What the measurements really mean
- Square size matters most. Your finished width and length come from the final size of each square with the black border included. If your squares measure larger or smaller than 12 cm with border, the top will change size even if you follow the same square count.
- The finished width (about 45 cm) comes mainly from the circumference of the joined square “circle.” A small change in square size adds up fast when you have 8 squares going around the body.
- The finished length (about 36 cm) comes from stacking the two rows of squares plus the finishing border.
Quick size check before joining
Lay 8 bordered squares in a line and measure the total length. This gives you a preview of the body circumference once those 8 are joined into a circle. This is the easiest way to confirm whether the top will fit the way you want before you commit to joining.
Yarn and hook choice
Use whatever yarn weight you like, but keep in mind:
- Cotton holds shape well and gives crisp granny edges.
- Acrylic is lighter and drapier, but can stretch a bit with wear.
- Your hook should produce a square that lies flat without ruffling and still has soft drape. If your squares curl or feel stiff, consider going up a hook size.
Stitch and Construction Notes
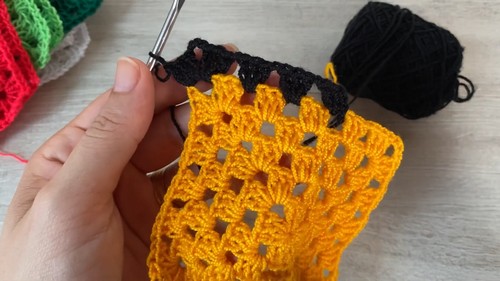
How the black border round works
Your black border is not just decoration. It also:
- standardizes the square size so joining is cleaner
- creates clear corner spaces and chain gaps to stitch into when joining
- adds firmness to the seams since it is the joining round
- Just starting out with crochet? The video tutorial below is a great place to begin, or challenge yourself with the written pattern below!
The wording “3 double crochet clusters separated by 1 chain” describes the classic granny rhythm: cluster, chain space, cluster, chain space.
Why triangles are added under the arms
When you build a top from squares, the underarm area often creates an empty diagonal gap.
If you leave it open, the fabric can:
- pull upward
- cause the side seam to sit awkwardly
- feel tight at the armhole
The triangles fill that space and create a smoother curve under the arm.
Pattern
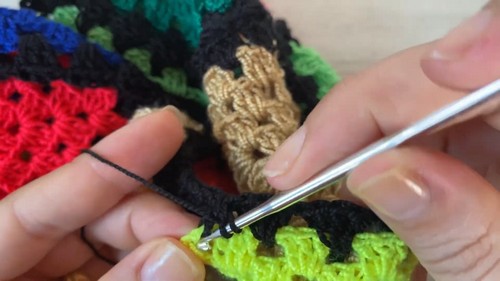
Granny Squares
- Crochet 20 basic granny squares using 5 rounds in your main color
- Add a black border as round 6 using 3 double crochet clusters separated by 1 chain
- Work corners as 3 double crochets, 3 chains, 3 double crochets]
Square consistency tips
- Count your rounds carefully. All squares should have the same number of clusters per side by the time you reach round 6.
- If one square is slightly larger, block it before joining. Uneven squares show up most at the neckline and button front.
Joining the Squares
- Join 8 squares into a large circle to form the body
- Use a join as you go method while working the final black round
- Join another row of 8 squares below the first row using the same method
- Attach 2 squares to the front and 2 to the back aligned at the center for the top section]
How to picture this layout
- Row 1: 8 squares joined into a tube (this forms the upper body section).
- Row 2: another 8 squares joined below it (this adds length).
- Top section: 2 squares added to the front center and 2 squares added to the back center to bring the piece higher on the chest and back.
Join-as-you-go clarity
If you are joining “while working the final black round,” that means:
- you crochet round 6 on a square,
- and when you reach a side/corner that touches another square, you connect into the matching chain spaces of the neighboring square instead of chaining freely.
This is a clean method because it builds the seam directly into the border round, which keeps the joins flexible but sturdy.
Common joining mistake: Make sure all squares are oriented the same way before joining. If one square is rotated differently, the corners and chain spaces may not line up visually, especially with the black border acting like a frame.
Creating the Triangles
- Make 4 triangles using a magic ring or chain loop start
- Work round 1 following a granny style triangle base
- Continue for rounds 2 to 5, turning each row and increasing at the edges
- Join the triangles into the underarm gaps using the black border round]
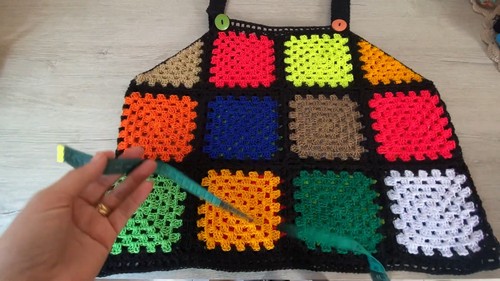
Keeping triangle size matched: Your goal is for the triangle edges to match the square edges so the underarm insert sits flat.
Two ways to check:
- Lay the triangle on top of a square and compare edge length.
- Check that the triangle reaches the same “border width” feeling as the square, especially if you are using the black round as the joining edge.
Turning each row and increasing: Turning each row helps the triangle stay symmetrical and prevents it from leaning. Increasing at the edges is what creates the triangle’s angled sides so it fits the diagonal underarm gap.
Straps and Edging
- Work a round of single crochet around the entire top opening
- Identify the top corners of the front squares and work 8 single crochets across
- Chain 1, turn, and continue working rows of single crochet until the strap reaches about 30 cm
- Repeat for the second strap
- Create a button tab on the front opening using double crochet and chain spaces
- Finish the tab with a stabilizing row of single crochet]
Why add a single crochet round first: That round creates a stable edge before you attach straps and button tabs. Granny clusters can leave the neckline a little stretchy or uneven. A single crochet edging:
- smooths the neckline
- gives you clear stitches to count from
- makes straps sit more securely
Strap placement tip: When you “identify the top corners of the front squares,” you are choosing strong anchor points. Corners have multiple stitches and chain space structure, which holds strap tension better than attaching into the middle of a side.
- Strap length note: 30 cm is a starting point. Strap comfort depends on bust height and how high you want the neckline. If you want a more adjustable fit, you can check strap length by pinning the end to the back while trying the top on before fastening off.
- Button tab structure: The tab uses double crochet and chain spaces so buttons can fit through without forcing. The final stabilizing single crochet row keeps the tab from stretching out over time.
Finishing
- Sew buttons onto the front button tab
- Add a bottom border using one row of single crochet, one row of double crochet and chain mesh, and a final row of single crochet
- Weave in all ends and block lightly if needed]

Button placement tip: Before sewing, close the front and place stitch markers where you want each button to sit. This helps the front opening lie flat rather than gaping.
Bottom border purpose
That three-step border does two useful things:
- adds a clean, finished edge that visually matches the neckline edging
- provides a little structure at the hem so the top doesn’t flare or roll
Weaving in ends: With granny motifs, you will have many ends. Weave them in along the black border where the color change and seams hide them best. Aim to run the yarn through multiple direction changes so it stays secure even with wear and washing.
Blocking
Light blocking is especially helpful here because it:
- evens out square edges
- relaxes any tight joins
- helps the button front sit straight
Fit and Sizing Guidance
- Wider fit: If your squares are slightly larger than 12 cm with border, the circumference increases quickly. This will feel looser through the body.
- More fitted: Slightly smaller squares tighten the fit. If it becomes too snug, the underarm area is usually where you feel it first.
- Length adjustments: The easiest length change is in the finishing stage. The bottom border can be repeated or extended if you want more coverage without changing the square layout.
Beginner Notes
- If join-as-you-go feels stressful, practice on two test squares first. Once you understand where to connect into chain spaces, it becomes repetitive and calm.
- Count your stitches on the strap rows so both straps match. Even a small difference becomes noticeable when worn.
Finishing Notes
- Once the buttons are on and the ends are woven in, give it a final try-on.
- If the neckline feels a bit wide, you can tighten it slightly by adjusting the strap attachment point inward by a stitch or two on each side during the strap setup.
- A small change there can make the whole top feel more secure without changing the body construction.


