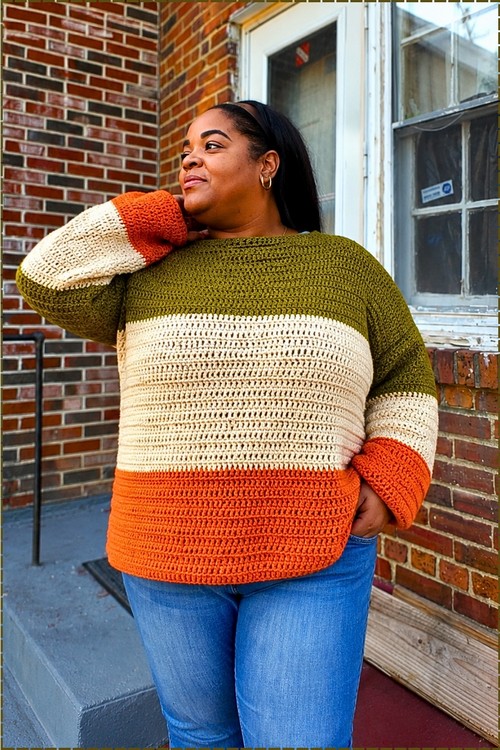
Pair a chunky oversized crochet sweater with blue jeans on crisp fall weekends for a crew neck pullover that keeps you warm from errands to the porch. Beginners can make the free crochet sweater pattern in sizes S to 3X and wear it as a cozy layer all through pumpkin season.
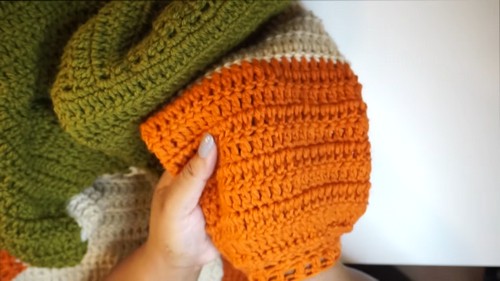
Three colors, one stitch, and enough room through the body to layer whatever you want underneath. Olive at the shoulders, cream through the middle and burnt orange across the hem and cuffs give this chunky sweater its shape without a single shaping row. It wears the way an oversized sweater should, with the fit coming from panel width rather than any complicated sizing math.
Chunky Oversized Sweater Crochet
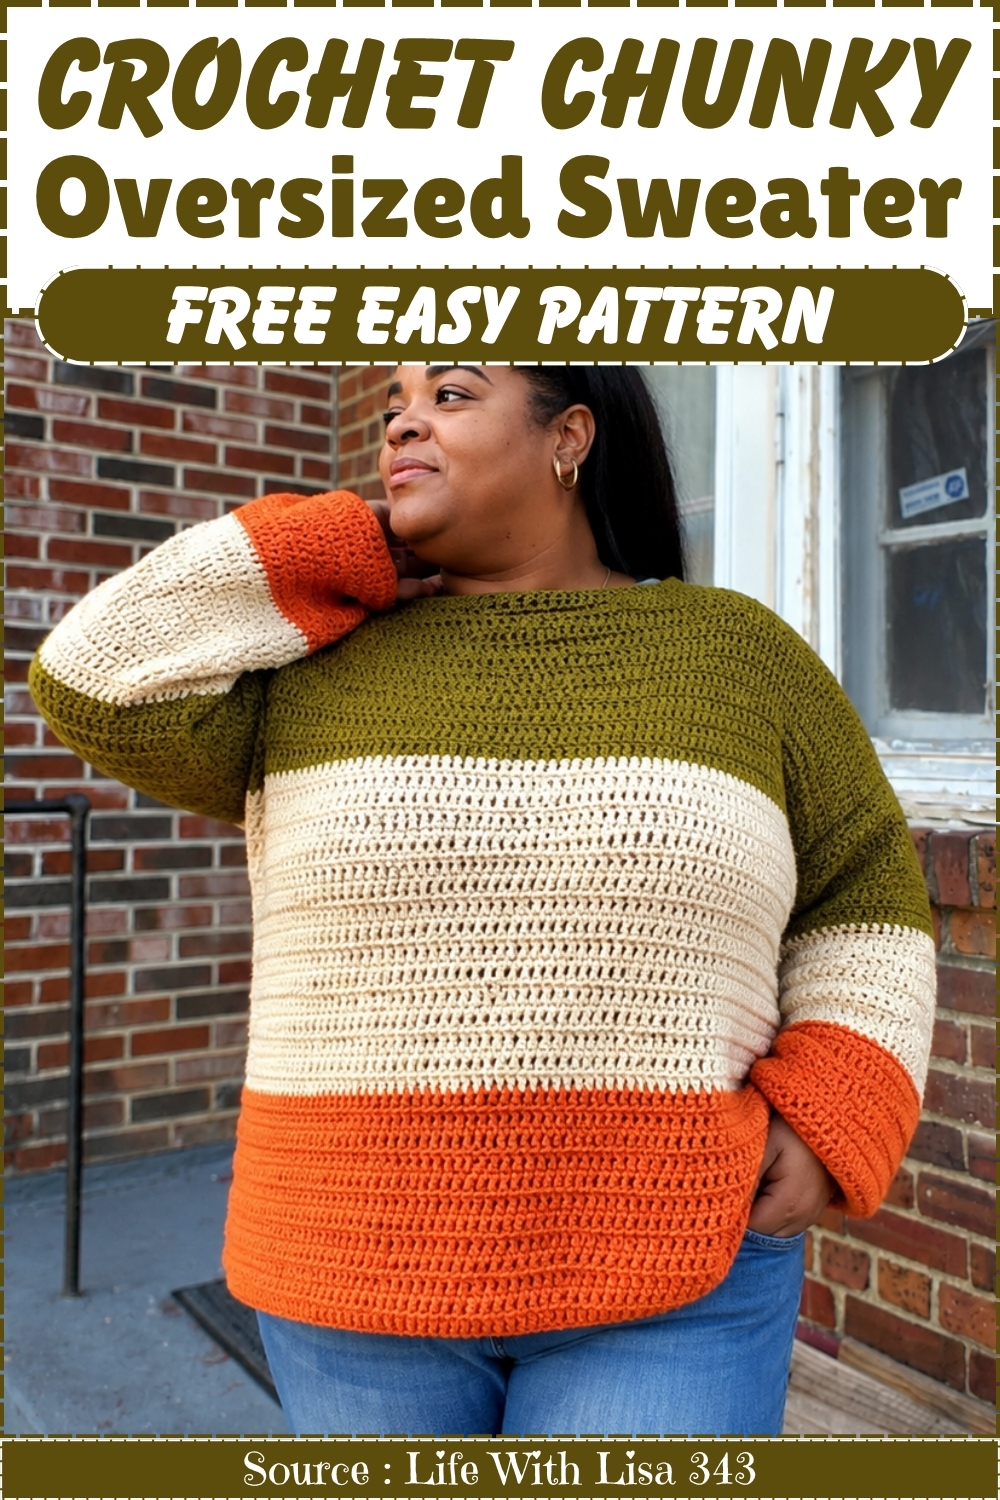
Every row is double crochet, start to finish. Color changes happen at set row counts and nothing else about the stitch changes, so the bands do all the visual work while the fabric stays consistent from hem to neckline. Panels are worked flat and seamed at the shoulders and sides, and the sleeve cuffs are added last in the round and folded back, which is what gives the orange edge its double thickness.
Quick Facts
- Skill level: true beginner — only single crochet and double crochet required
- Construction: four flat panels seamed together, sleeves worked in the round from the armhole
- Sizing: S through 3X, sized by row count on the ribbing band
- Hook: size H, 5.0 mm
- Yarn: worsted weight, number 4 acrylic
- Time estimate: two to four sessions depending on size and sleeve length preference
Customization Ideas
- Before you cast on, it helps to picture what this sweater can be. The pattern is a blank canvas in the best way: the body is solid double crochet rows, which means color changes drop in with almost no disruption. The original is worked in three colors divided evenly across the body rows, but a single solid color reads just as well and lets the ribbing texture do all the visual work. You can also leave the sleeves out entirely for a vest silhouette, which cuts the make time significantly and turns this into a genuinely quick project.
- The neckline opening is another place to make the sweater your own. The pattern gives a 12-inch opening sized for a slightly off-the-shoulder fit, but bringing that in by a few inches creates a more traditional crew neck. Moving it out gives a wider, more dramatic drop. Both versions work within the same stitch count logic, so pick your preference before you seam the shoulders and count from there. The armhole depth is equally adjustable: the original uses 9.5 inches, but going slightly deeper suits longer arms and fuller shoulders without changing anything else in the construction.
Materials and Tools
- Worsted weight yarn, number 4, in your chosen colors (the original uses three colors in olive green, cream, and burnt orange divided evenly across the body rows, but any combination or a single color works)
- A size H, 5.0 mm crochet hook
- Stitch markers, at least four
- A tapestry needle for seaming and weaving in ends
- Scissors and a measuring tape
Understand It Before Starting
The Pattern
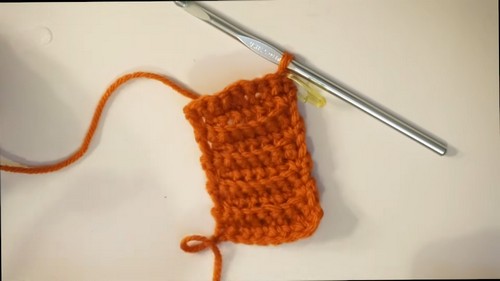
Step 1: Bottom Ribbing (Make Two Identical Panels)
- Make a slip knot and chain 9 [9 ch]
- Row 1: sc into the second chain from the hook and into every chain across [8 sc]
- Row 2 (ribbing pattern): ch 1 and turn; sc under both loops of the very first stitch; sc in the back loop only for the next 6 stitches; sc under both loops of the very last stitch [8 sts]
- Repeat Row 2 until the ribbing band reaches your target width for your size (the example uses 94 rows for a size 3X)
- Place a stitch marker every 10 rows to keep count without having to recount from the beginning
- Make a second identical ribbing band to match the first; this becomes the back panel
Step 2: Main Body Panels (Double Crochet)
- With the ribbing band complete, ch 1 and turn so you are working along the long edge
- Work one sc into the end of every row across the full length of the ribbing band to create the base edge row
- Ch 2 and turn (this chain 2 does not count as a stitch; it only brings you up to working height)
- Work dc under the V of every stitch across the row
- Ch 2, turn, and repeat the dc row across for your desired sweater length
- If changing colors, wrap the new yarn around your hook as a faux slip knot, pull it through the last loop on the hook, pull the old yarn taut, and tie off the tails securely before continuing
- At the final row of your desired body length, ch 1, turn, and work one final row of sc under both loops evenly across the top edge
- Repeat this entire process to make the second matching panel
Step 3: Seaming the Shoulders
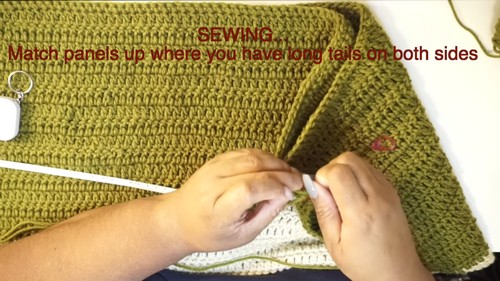
- Lay the front and back panels flat with yarn tails positioned on opposite sides
- Place a stitch marker at both top outer corners to hold the panels in position
- Decide on your neckline width (the original uses 12 inches for a slightly off-the-shoulder fit) and center it evenly across the top edge
- Count the stitches on both outer sides of the neckline marker to confirm the opening is centered and even on both sides
- Thread a tapestry needle with a leftover yarn tail and whip stitch from each outer edge inward toward the neckline marker
- Weave in and trim the ends on both shoulder seams.
Step 4: Side Seams and Armhole Setup
- Decide on your armhole opening depth (the original uses 9.5 inches) and place a stitch marker at that point on both side edges
- Sew the side seams from the bottom hem upward to the armhole marker on each side, leaving the armhole open above the marker
- Turn the sweater inside out before beginning the sleeves
Never read a crochet pattern before? No problem! The video tutorial below is perfect for beginners, or give the written pattern below a try!
Step 5: Sleeves (Worked in the Round)
- Attach yarn with a slip knot at the lowest underarm point of the armhole opening
- Ch 1, then work 2 sc into the end of each row or stitch all the way around the full armhole opening
- Sl st to join the round, then ch 2
- Work dc around every stitch of the round
- Sl st to join at the end of the round, ch 2, turn, and repeat for your desired sleeve length (the original works 9 rows per color block)
- Repeat the full sleeve process for the second armhole
Step 6: Sleeve Cuffs (Optional Tapering)
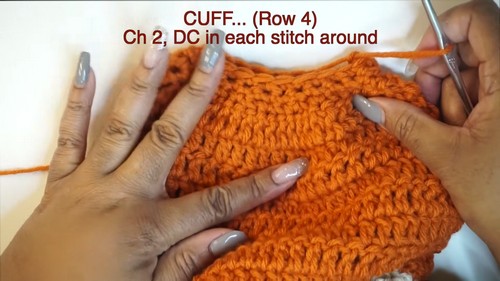
- Ch 1 to begin the cuff section
- Cuff Row 1: sc into the first stitch, then work a sc decrease by inserting the hook into the next stitch and pulling up a loop, inserting into the following stitch and pulling up a loop, then yarn over and pulling through all 3 loops; alternate 1 sc and 1 sc decrease all the way around; sl st to join, ch 1, turn
- Cuff Row 2: repeat the same 1 sc and 1 sc decrease alternating pattern around; sl st to join
- Cuff Row 3: work a pattern of 2 sc followed by 1 sc decrease repeatedly around for a more gradual taper
- Final Cuff Row: ch 2 and work one full round of dc around; sl st to join, cut yarn, and fasten off
- Repeat the cuff process on the second sleeve
Tips
- The ribbing band is the part that controls your size, so this is where your measuring tape earns its place. Lay the band flat without stretching and measure the width every ten rows or so. The double crochet body stretches more than the ribbing, so keep that difference in mind when you are deciding whether to add more rows.
- When you seam the shoulders, resist the urge to pull the whip stitch tight. A seam that is pulled snug on a stretchy fabric will dig into the shoulder when worn. Work it just firmly enough to hold, with a little give, and the shoulder line will sit flat and comfortable rather than pinching.
- The inside out step before working the sleeves is easy to forget and worth pausing to do properly. If you work the sleeve rounds from the outside, the seam ridge will sit on the visible surface of the sleeve. Turning the sweater inside out first puts that ridge on the inside where it belongs.
Yarn Substitution
Worsted weight acrylic is the right call here for practical reasons: it is consistent, affordable, widely available in every color, and washable, which matters for a sweater you will actually wear regularly. The double crochet body and ribbing both depend on a yarn that does not split easily on the hook, so a smooth, plied acrylic or a wool-acrylic blend is the better choice over a loosely spun single or a heavily textured yarn. If you want a softer hand, a superwash merino in the same weight works well and still holds the stitch definition the ribbing needs. Avoid cotton for this one — it lacks the stretch that makes the ribbing snap back cleanly.
Frequently Asked Questions
- How do I figure out how many ribbing rows to work for my size? The ribbing band is worked perpendicular to the body, so width grows with rows rather than stitch count. Measure the band as you go without stretching it. The original example gives 94 rows for a 3X; for smaller sizes, work fewer rows until the band reaches the chest width you want. A measuring tape and a stitch marker every 10 rows is all you need.
- Can I make this as a vest by skipping the sleeves? Yes, and it works very well. After seaming the shoulders and side seams, simply work one round of single crochet around each armhole opening to finish the raw edge neatly instead of adding sleeve rounds. The rest of the construction stays the same.
- The neckline feels too wide or too narrow after seaming. Can I fix it? If it is too wide, undo the whip stitch back to the shoulder edge and re-seam with more stitches closed on each side, moving the neckline markers inward. If it is too narrow and you have not yet fastened off, open the seam back to the marker and release a few stitches on each side. Do this before you weave in the ends and the fix takes a few minutes.
- My sleeve rounds are twisting. What is happening? This almost always happens when the sweater is not turned inside out before you start. The round should be worked from the inside of the garment so the seam ridge ends up on the inner surface. If you are already a few rounds in and you notice a twist, the fastest fix is to frog back to the foundation round and restart with the sweater flipped correctly.